Send Template Messages with Variables via WhatChimp API
How to personalize template messages with dynamic data like customer names, order numbers, and dates using template variables.
Updated 5 February 2026
Template variables let you personalize template messages with dynamic data — customer names, order numbers, dates, amounts — that changes with every message you send.
Before you begin: Make sure you've read Send Template Messages via WhatChimp API for the basics of sending template messages.
Using custom fields instead? If your template uses subscriber data like company name, country, or email (data that doesn't change per message), see Send Template Messages with Custom Variables via WhatChimp API — the setup is different.
Video: https://www.youtube.com/watch?v=R5jz8SkAM9I
How It Works
You add placeholders like {{1}}, {{2}}, {{3}} in your template body. When you send the template via API, you pass the actual values as variable1, variable2, variable3 parameters. The recipient sees the final personalized message.
Example template:
Hi {{1}}, your order {{2}} has been shipped and will arrive by {{3}}.
API call with values:
https://app.whatchimp.com/api/v1/whatsapp/send?apiToken=API-KEY&phone_number_id=PHONE-NUMBER-ID&phone_number=919999999999&template_name=order_update&language_code=en_US&variable1=John&variable2=ORD-12345&variable3=Feb 10Recipient sees:
Hi John, your order ORD-12345 has been shipped and will arrive by Feb 10.
Step 1: Create Template Variables
Step A. Go to Bot Manager > Message Template

Step B. Scroll down to Template Variables and click Create
Step C. Enter a name (e.g., order_number) and click Save. Repeat for each variable you need.

Step 2: Create Your Template
Step A. Scroll up to Message Template Settings and click Create
Step B. Write your message body using {{1}}, {{2}}, {{3}} where you want dynamic values:
Hi {{1}}, thank you for your order!

Your order {{2}} has been confirmed and will be delivered by {{3}}.

Total amount: {{4}}
Step C. Click Save. Wait for Meta to approve the template.

Step 3: Send via API
Step A. Go to Settings > API Developer Console
Step B. Under Send Template Message, select your account and template. The console generates the API URL with variable placeholders included.
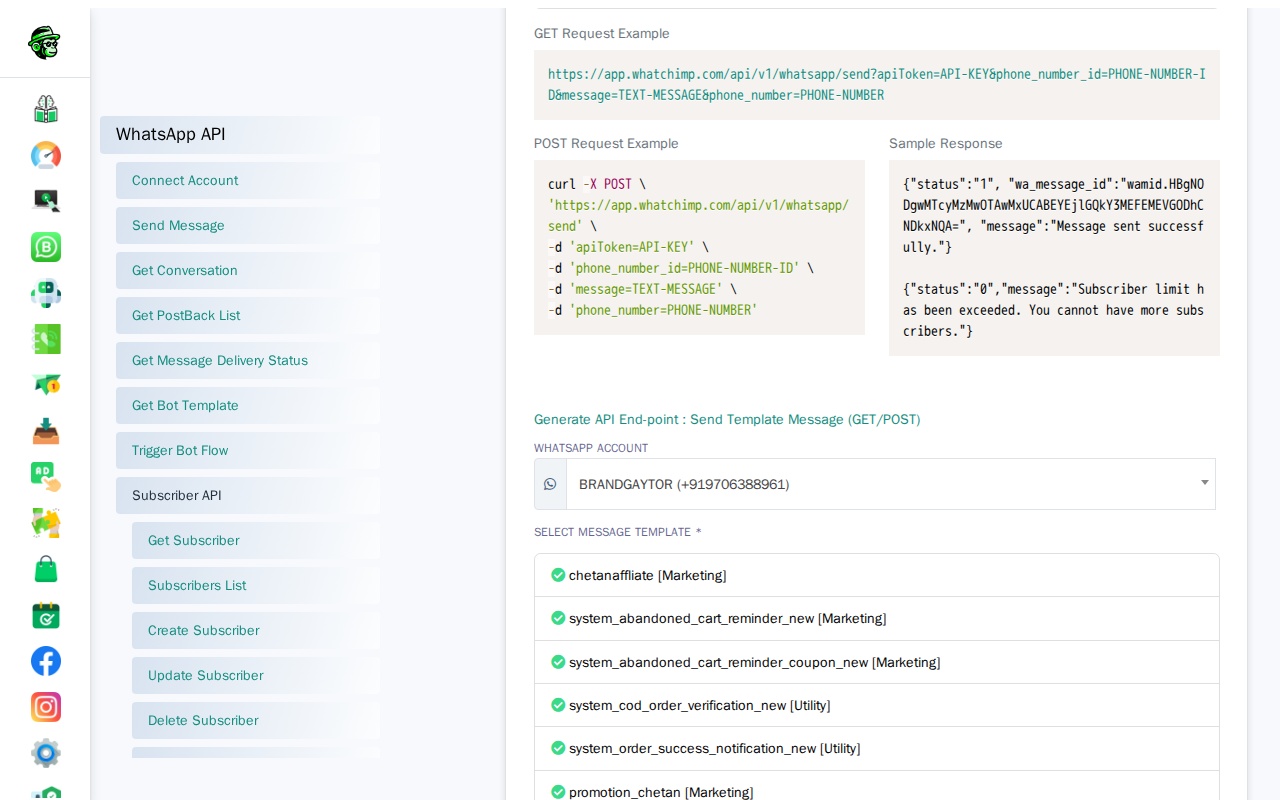
Step C. Replace the placeholders with your actual data and send:
Endpoint: GET/POST /api/v1/whatsapp/send
https://app.whatchimp.com/api/v1/whatsapp/send?apiToken=API-KEY&phone_number_id=PHONE-NUMBER-ID&phone_number=919999999999&template_name=order_confirmation&language_code=en_US&variable1=John&variable2=ORD-12345&variable3=Feb 10&variable4=$43.00Each variable1, variable2, etc. maps to {{1}}, {{2}} in the same order they appear in the template.
Success Response:
{
  "status": "1",
  "wa_message_id": "wamid.HBgNODgwMTcyMzMwOTAwMxUCABEYEjlGQkY3MEFEMEVGODhCNDkxNQA=",
  "message": "Message sent successfully."
}
Variable Mapping
| Template Placeholder | API Parameter | Example |
|---|---|---|
{{1}} | variable1 | John |
{{2}} | variable2 | ORD-12345 |
{{3}} | variable3 | Feb 10 |
{{4}} | variable4 | $43.00 |
Troubleshooting
| Problem | Fix |
|---|---|
Variables show as {{1}} in message | You didn't pass variable1=VALUE in the API call. Use the API Console generator to get the correct format. |
| Wrong data in wrong placeholder | variable1 maps to {{1}}, variable2 to {{2}}. Check the order in your template. |
| Template rejected by Meta | Variables don't cause rejections — review Meta's reason, fix the content, resubmit. |
Related Articles
- Template Variables vs Custom Variables — What's the Difference? — Understand which type to use
- Send Template Messages with Custom Variables via WhatChimp API — Use subscriber data in templates (no API parameters needed)
- Send Template Messages via WhatChimp API — Basic template sending
- Getting Started with WhatChimp Developer API — API setup