How to Migrate to WhatChimp from Another BSP
Step-by-step guide to migrate your WhatsApp Business account to WhatChimp without losing your phone number, messaging quota, or quality rating
Updated 16 June 2026
Already using WhatsApp Business API with another provider? You can move to WhatChimp in about 5 minutes. All you're doing is disconnecting your WhatsApp Business Account from your current Meta partner and reconnecting it to WhatChimp — that's it. We've done this for hundreds of businesses without a single issue.
Nothing Gets Lost
Will I lose my phone number? No. Your number stays exactly the same. Customers won't even know you switched.
Will my messaging limits reset? No. Whether you're at 1K, 10K, 100K, or unlimited — your tier carries over.
Will my quality rating drop? No. Your quality rating is tied to your WhatsApp Business Account, not your BSP. It stays the same.
Will there be downtime? No. The switch is instant. You can start sending messages from WhatChimp right after connecting.
Will my customers notice anything? No. From their side, nothing changes. Same number, same conversation history on their phone.
Will I lose my blue tick? No. Your verified business badge (blue tick) is tied to your WhatsApp Business Account, not your BSP. It stays.
What About My Subscribers?
Subscribers are the one thing that doesn't migrate automatically. You'll need to export your subscriber list from your old platform and import it into WhatChimp. This is a simple CSV upload — see the Subscriber Manager guide for step-by-step instructions.
What Gets Preserved
Your phone number, messaging limits, quality rating, display name, business profile, blue tick verification, and green tick verification (if you have them) — all carry over automatically. Migration is a standard Meta process built into the WhatsApp Business platform.
What You'll Need
Facebook Business Manager access with admin permissions, your current BSP account credentials, and the phone number you want to migrate.
Here's What You'll Do
- Step 1 — Disable two-step verification on your current number
- Step 2 — Connect your number to WhatChimp via Embedded Signup
- Step 3 — Register your phone number
- Step 4 — Verify everything carried over
That's it — ~5 minutes and you're done.
Step 1: Disable Two-Step Verification
Before migrating, you need to turn off two-step verification on your current phone number. Here's how to get there:
Go to whatchimp.com/phone-numbers — this is just a shortcut link that takes you directly to the phone numbers page in Meta's WhatsApp Manager. It has nothing to do with WhatChimp, it just saves you from navigating through Meta's menus. Log in with the Facebook account that has admin access to your Business Portfolio.
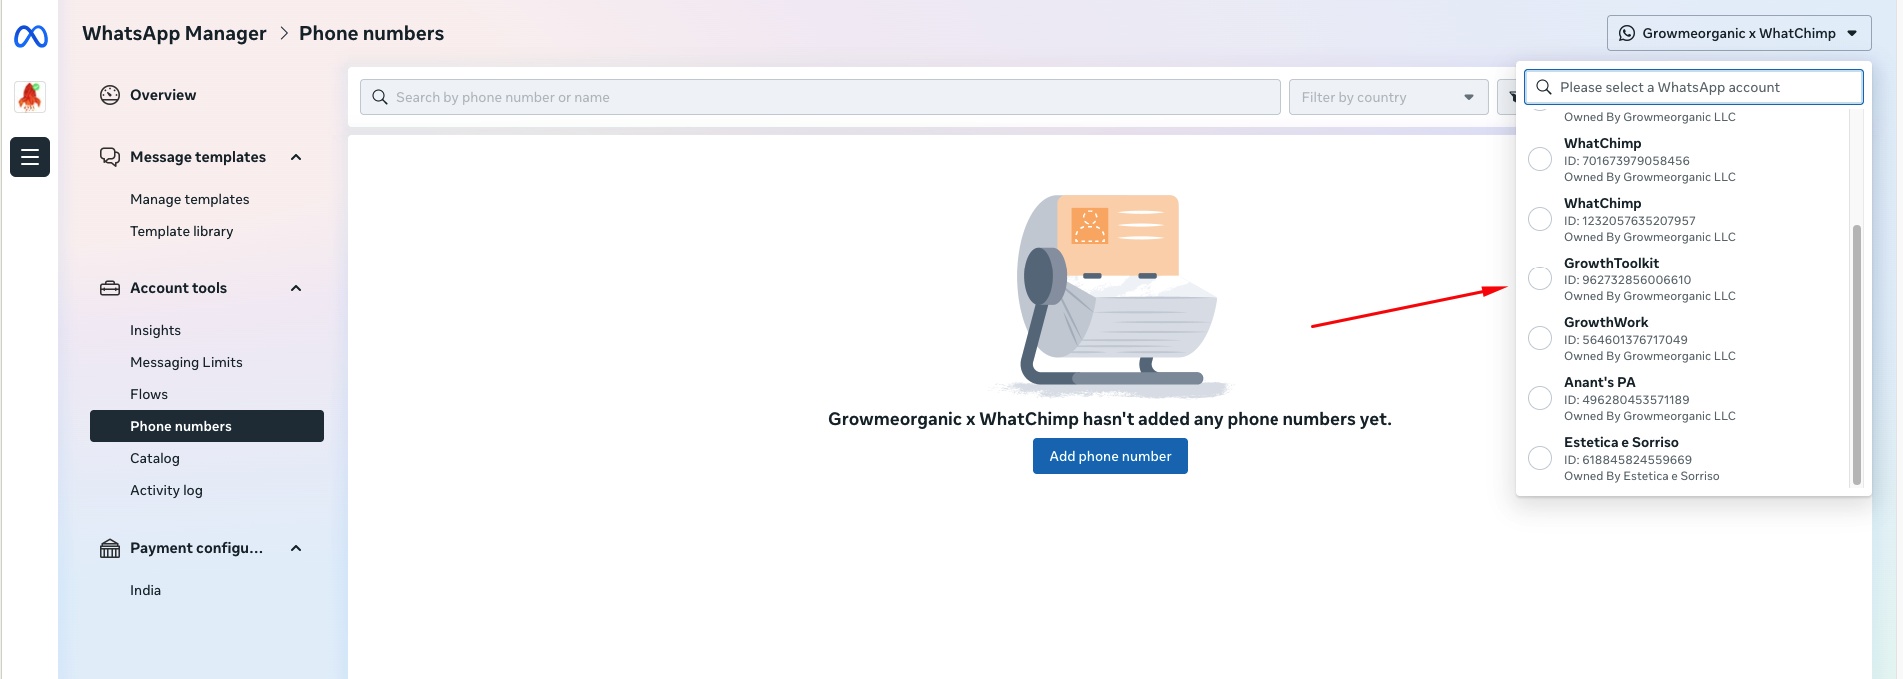
Once logged in, you'll land on the WhatsApp Manager. If you have multiple phone numbers, click the dropdown in the top-right corner and select the correct one — the phone number you want to migrate.
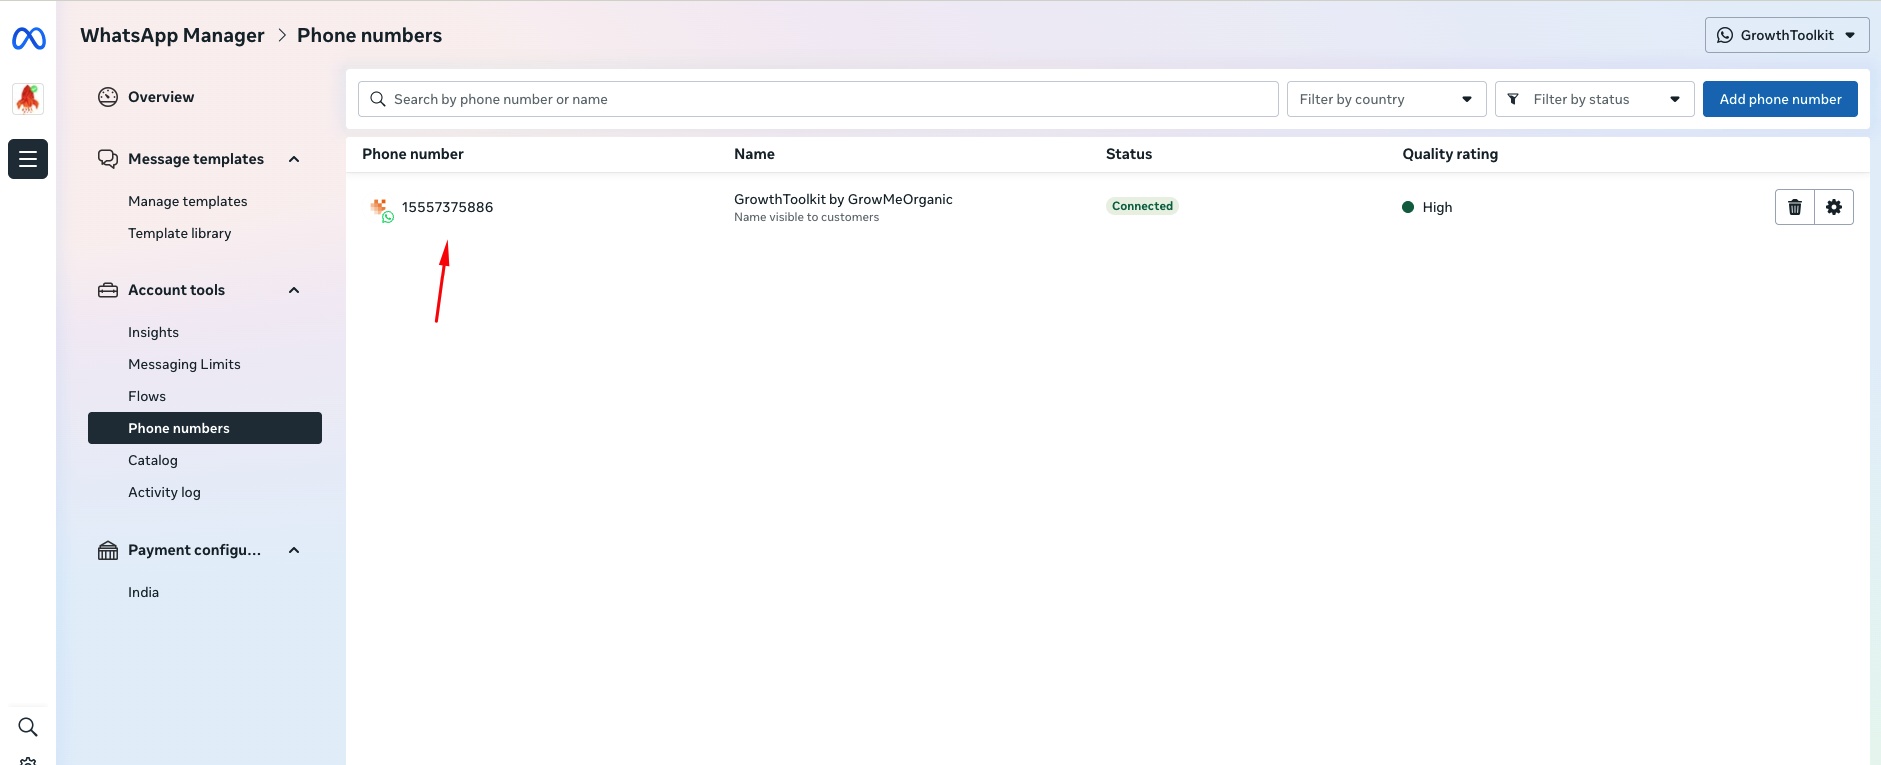
You'll see your phone number listed on the Phone numbers page along with its name, status, and quality rating. Click on your phone number to open its settings.
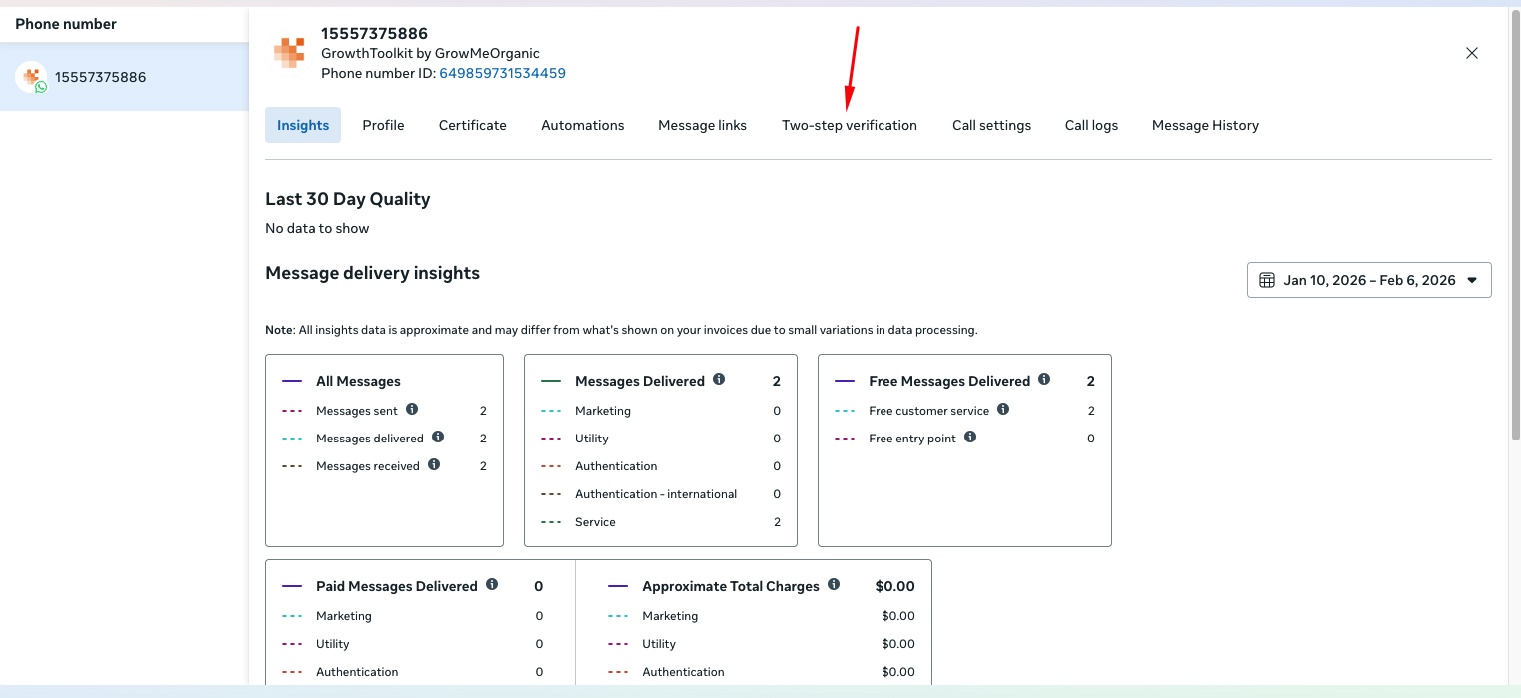
A settings panel opens on the right with multiple tabs. You'll see tabs like Insights, Profile, Certificate, Automations, Message links, Two-step verification, Call settings, Call logs, and Message History. Click the Two-step verification tab.
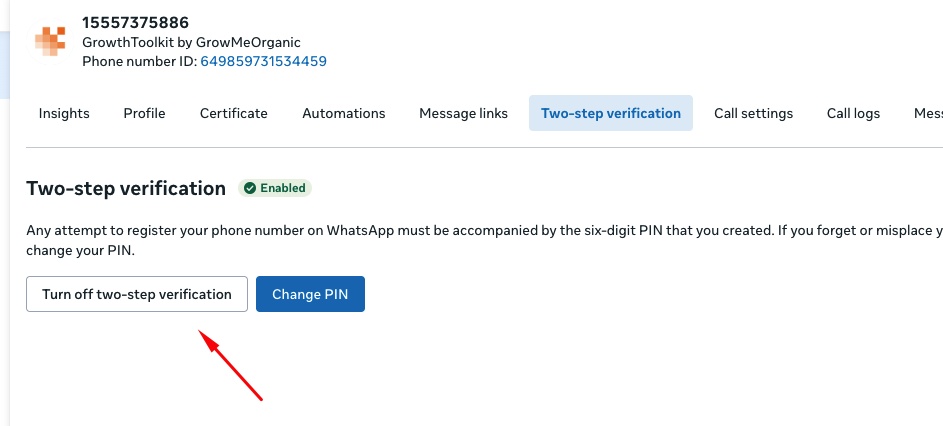
If it shows Enabled (green badge), click Turn off two-step verification.
You'll see a confirmation dialog — Meta will send an email with instructions to complete the process. Check your inbox (and spam folder) for the email and follow the instructions.
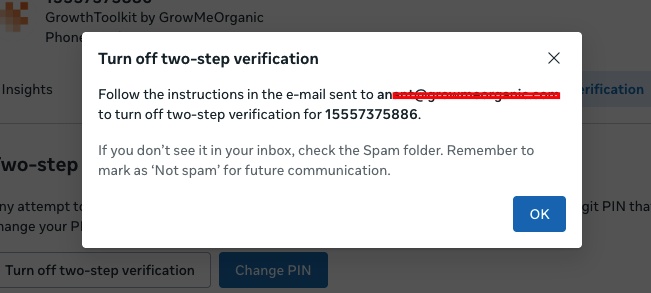
- This is temporary — you'll re-enable it after migration for security
- Important: The migration will fail if two-step verification is still on
- If it already shows as disabled, you're good — move to Step 2
Step 2: Connect Your Number to WhatChimp
Log into your WhatChimp account and go to Connect Account.
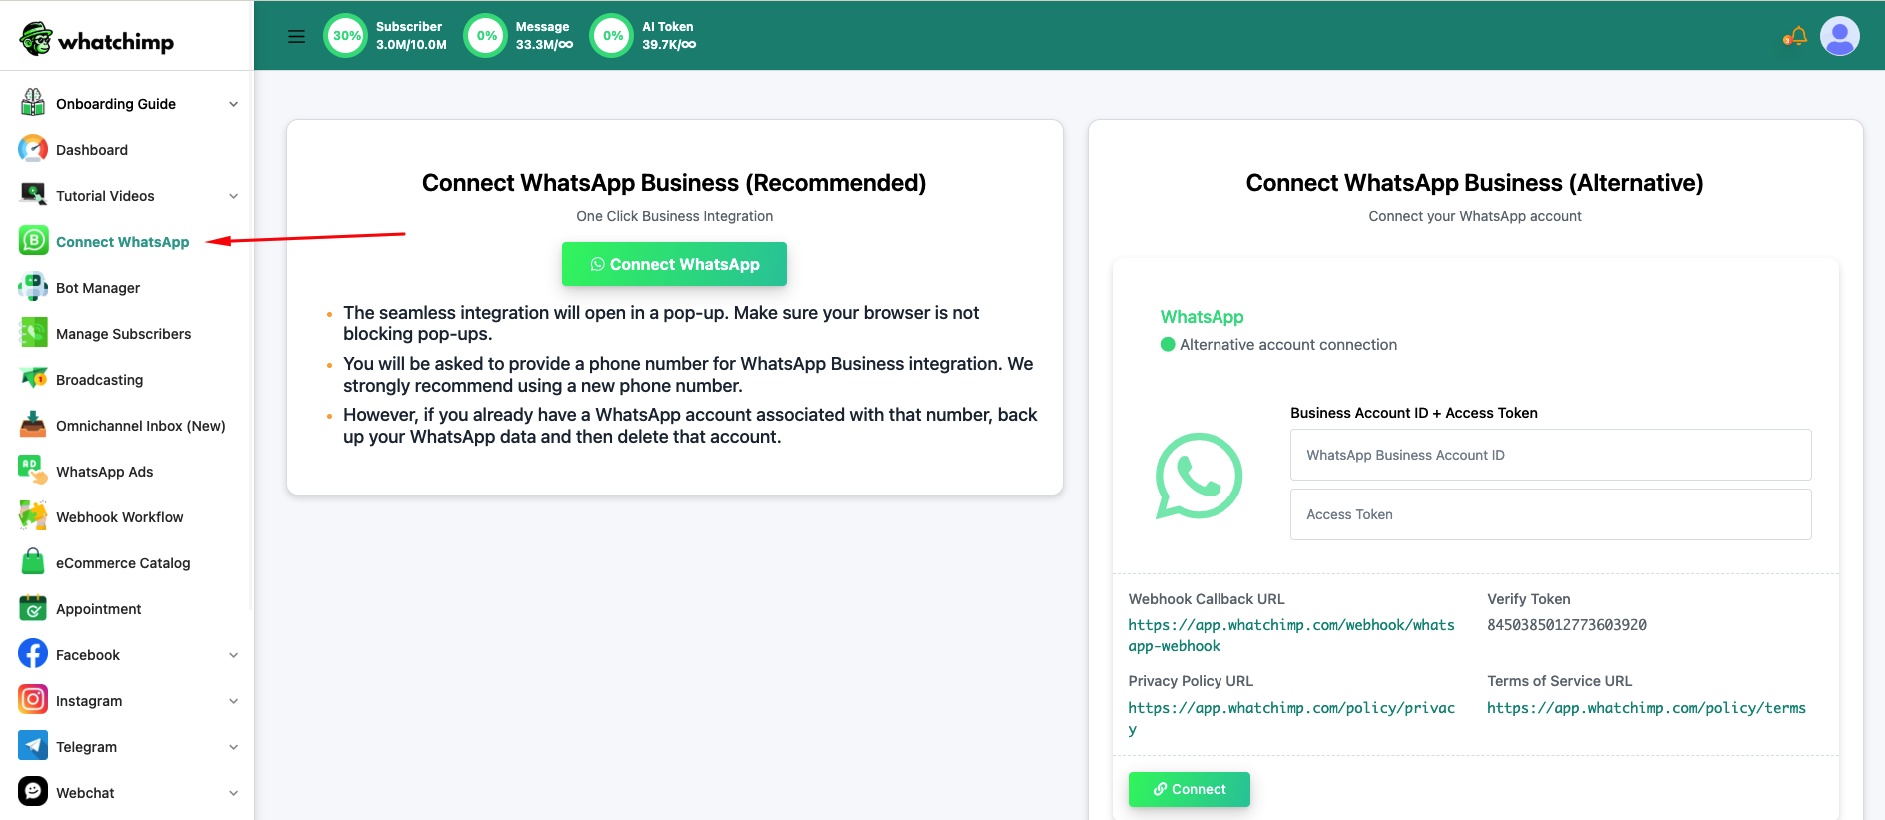
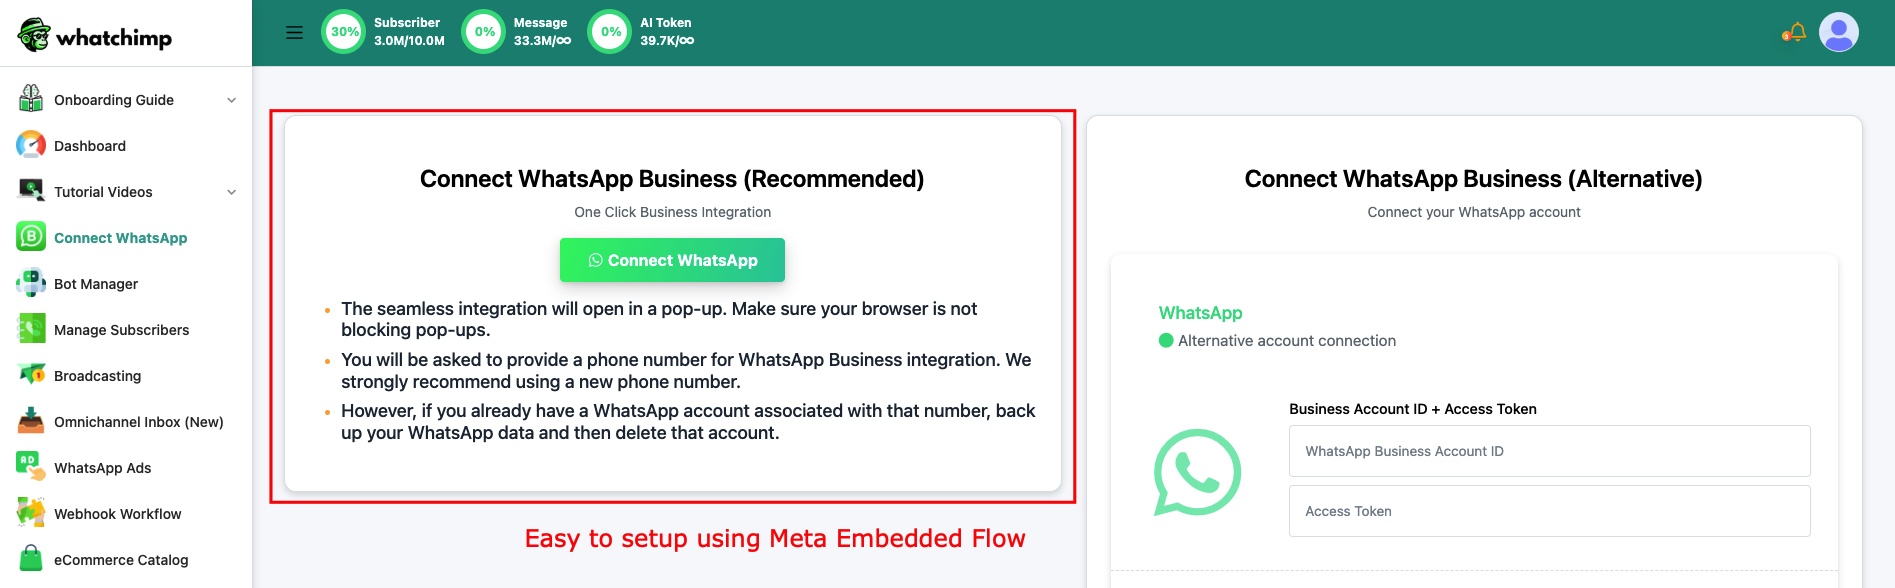
Click Connect WhatsApp to start the Embedded Signup flow.
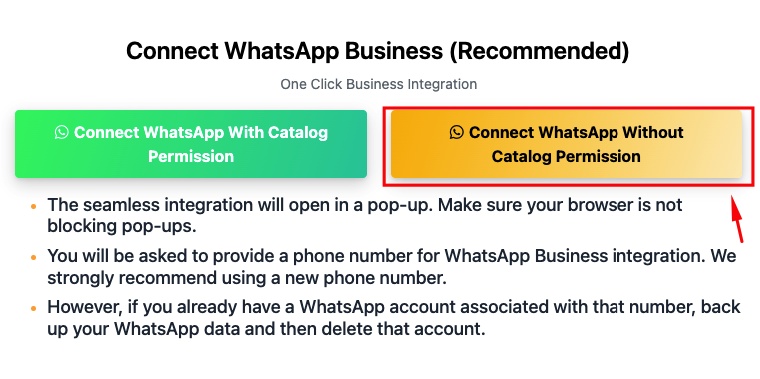
Select Connect WhatsApp Without Catalog Permission to move faster — you can connect your catalog later.
Log in with the same Facebook account that has access to your Business Portfolio.

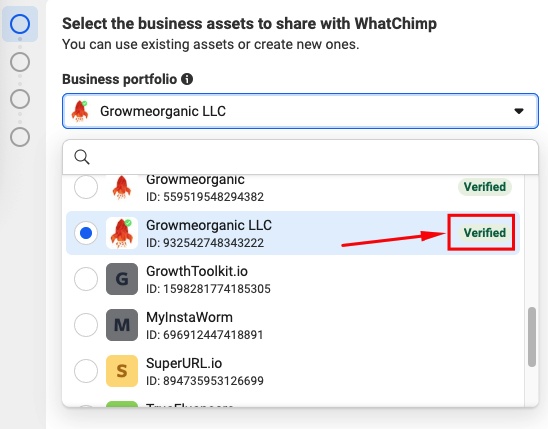
Since you were connected to another BSP before, you'll already have a verified Business Portfolio. Select it from the dropdown — you should see the green "Verified" badge next to your business name.
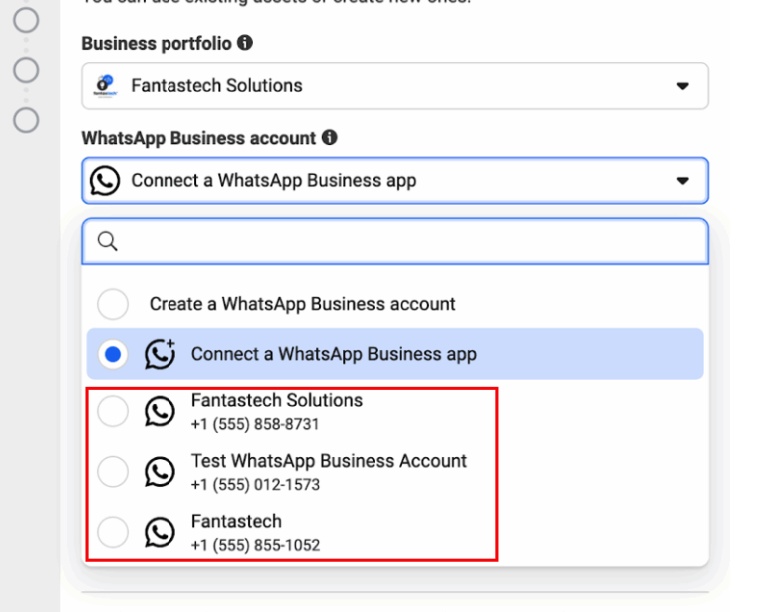
Select your existing WABA (WhatsApp Business Account) — it will show the account you were using with your previous BSP.
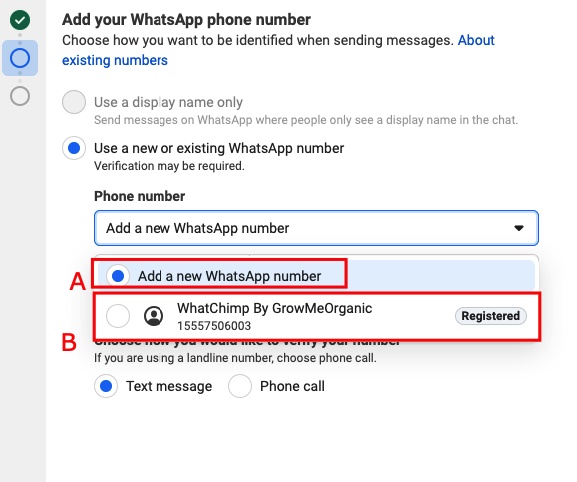
Select your existing phone number — choose the registered number you're migrating, not "Add a new WhatsApp number".
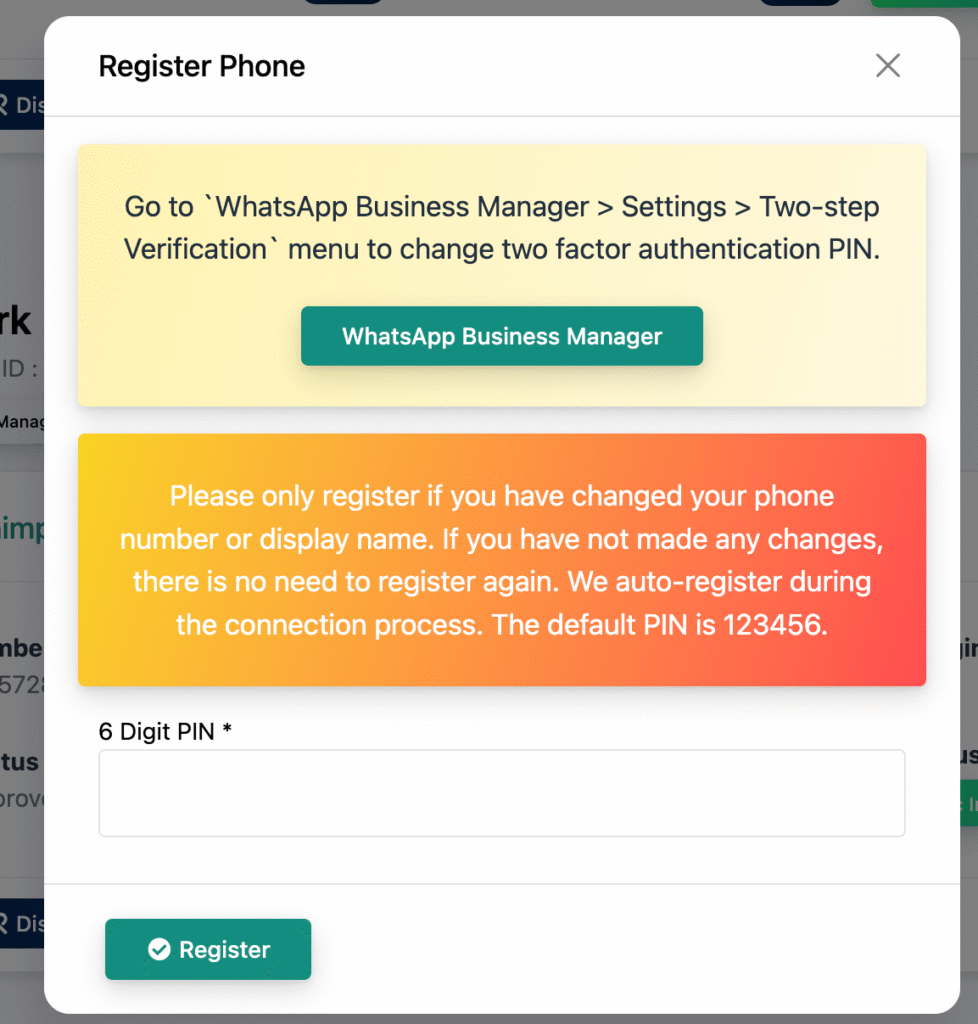
Step 3: Register Your Phone Number
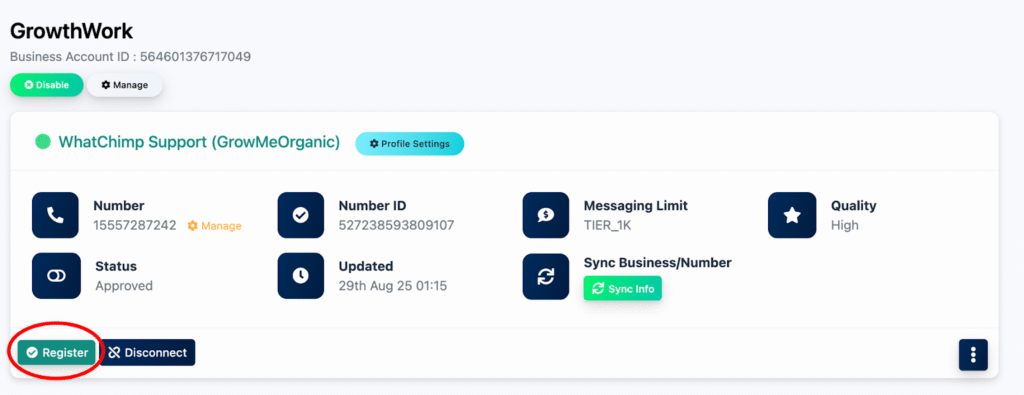
Once connected, scroll down and click the Register button
Enter the registration code: 123456
Wait a few seconds for the success confirmation
Step 4: Verify Your Migration
In your WhatChimp dashboard, go to the Messaging Limit and Quality section
Confirm that your messaging quota and quality rating match what you had with your previous BSP
That's it — your number is now on WhatChimp with all your limits and ratings preserved.
Tips
Re-enable two-step verification after migration for security. Test with a message to confirm everything works — send a template to a known number. If the registration code doesn't work on the first try, wait 30 seconds and try again.
Related Articles
How to Set Up Your WhatsApp Business API Account — First-time setup guide
How to Migrate Your WhatsApp Business API from Your Current BSP to WhatChimp — Troubleshooting migration issues