Team Collaboration aur Agent Assignment
Team members ko conversations assign karein, permissions manage karein aur effectively collaborate karein.
Updated 10 February 2026
Jab multiple team members customer conversations handle karte hain, to aapko chats assign karne, access control karne aur context share karne ke tools chahiye. WhatChimp ki team collaboration features aapko yeh sab Omnichannel Inbox se karne deti hain.
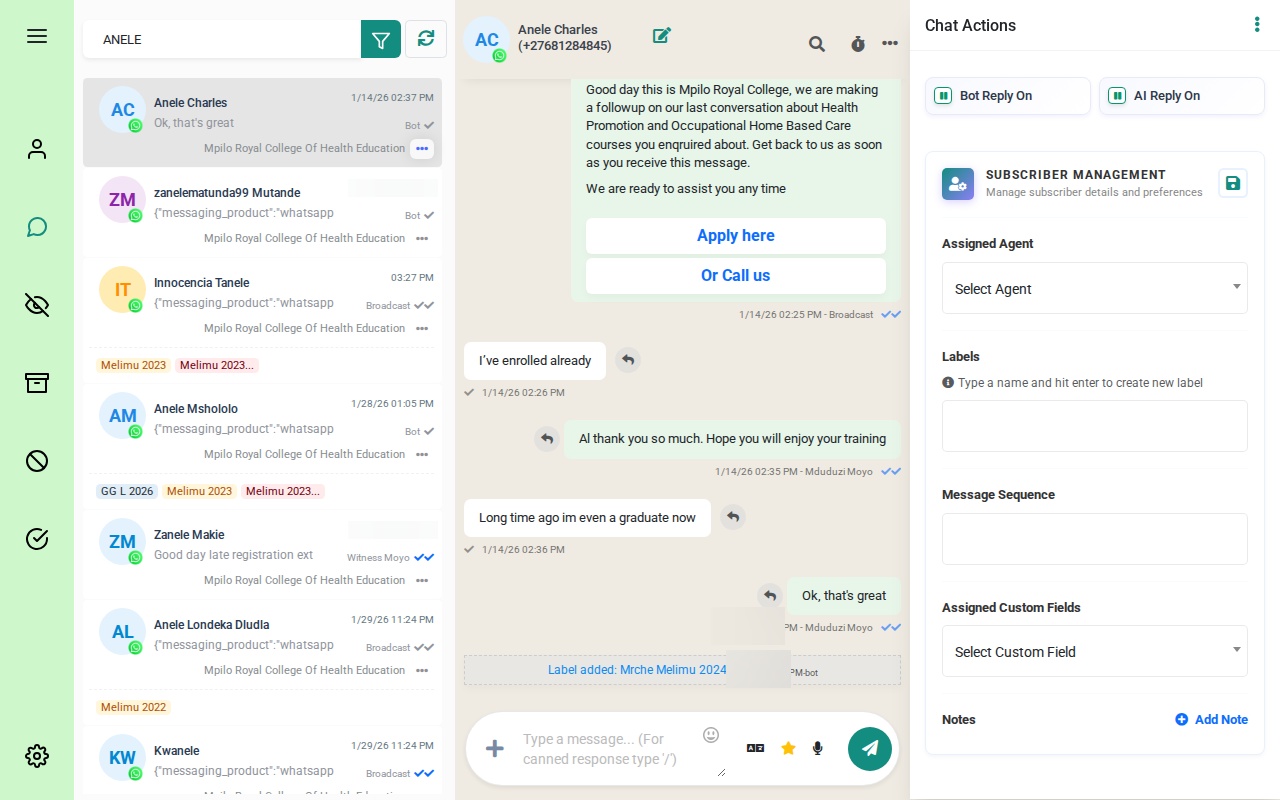 The Omnichannel Inbox with the conversation list, chat window, and Chat Actions panel on the right
Conversations ko Agents Assign Karna
Har conversation ek specific team member ko assign ho sakti hai. Assigned agent conversation list mein dikhta hai aur wo chat handle karne ke liye responsible hai.
Manual Assignment
- Ek conversation open karein
- Right side ke Chat Actions panel mein, Assigned Agent dropdown dhundein
- Dropdown par click karein aur ek team member select karein
- Conversation ab us agent ko assign ho gayi hai
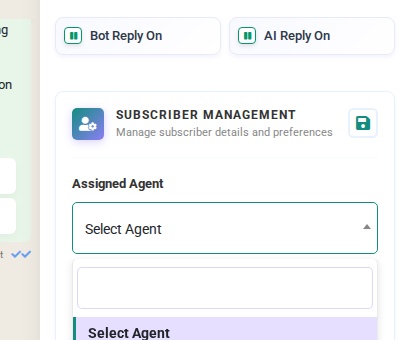 Click the Assigned Agent dropdown to select a team member from the list
Chat Actions panel Bot Reply On aur AI Reply On toggles, Labels, Message Sequence aur Assigned Custom Fields bhi selected conversation ke liye dikhata hai.
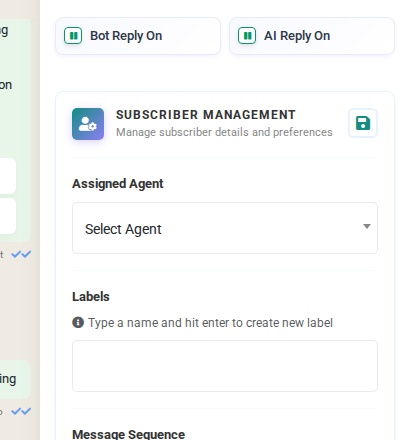 The full Chat Actions panel with Bot Reply, AI Reply, Subscriber Management, Assigned Agent, and Labels sections
Auto-Assignment
WhatChimp incoming chats ko available agents mein automatically distribute kar sakta hai:
- Apne chatbot flow mein auto-assignment rules set up karein
- Jo agents Online hain wo nayi chats receive karte hain
- Chats available team members ke beech rotate hoti hain
- Offline agents ko skip kiya jata hai jab tak wo wapas online nahi aate
Team Members Manage Karna
User Manager
User Manager page aapke account ke saare team members dikhata hai. Complete list dekhne ke liye left sidebar mein User Manager par jaayein.
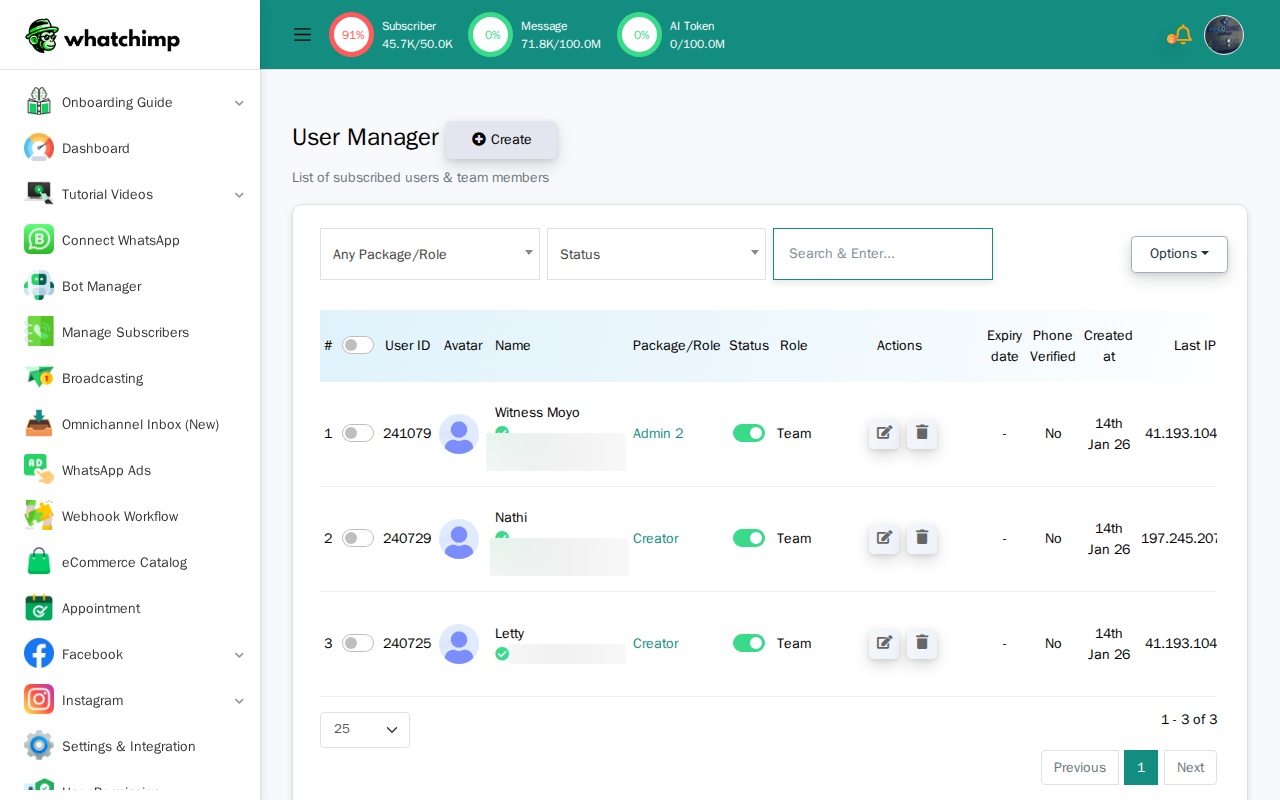 The User Manager page listing team members with their User ID, Name, Package/Role, Status, and login details
Yahan se aap:
- Green Create button par click karke naye team members create kar sakte hain
- Package/Role ya Status se filter kar sakte hain
- Existing team members ko edit ya delete kar sakte hain
- Har member ki last login date aur IP address dekh sakte hain
Har team member ko ek Package/Role (jaise "Admin 2" ya "Creator") assign kiya jata hai jo control karta hai ki wo kya access kar sakte hain.
User Permission (Roles)
Roles define karti hain ki har team member kya kar sakta hai. Roles manage karne ke liye sidebar mein User Permission par jaayein.
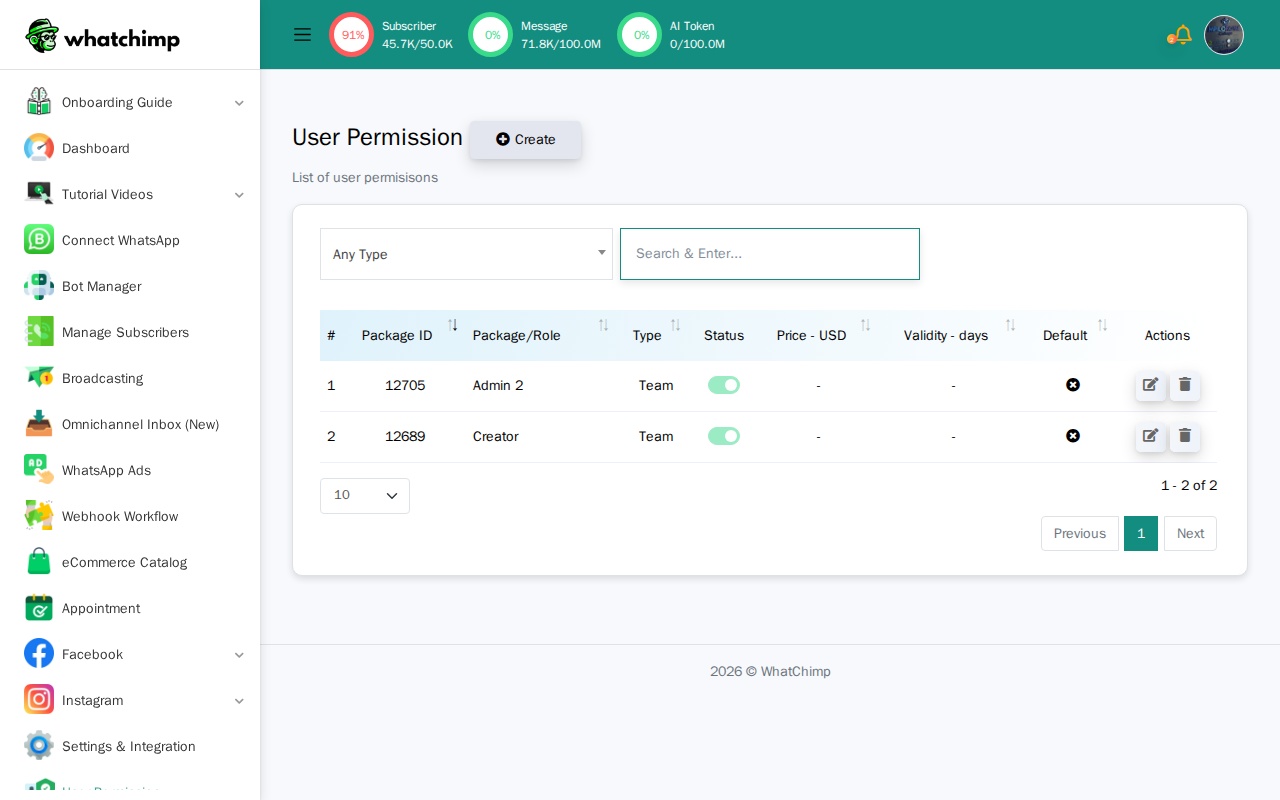 The User Permission page listing roles like Admin 2 and Creator, each with Type, Status, and Actions
Kisi bhi role ki permissions configure karne ke liye edit button par click karein.
Ek Role Configure Karna
Role editor aapko ek naam set karne, channels enable ya disable karne aur har feature ki access control karne deta hai.
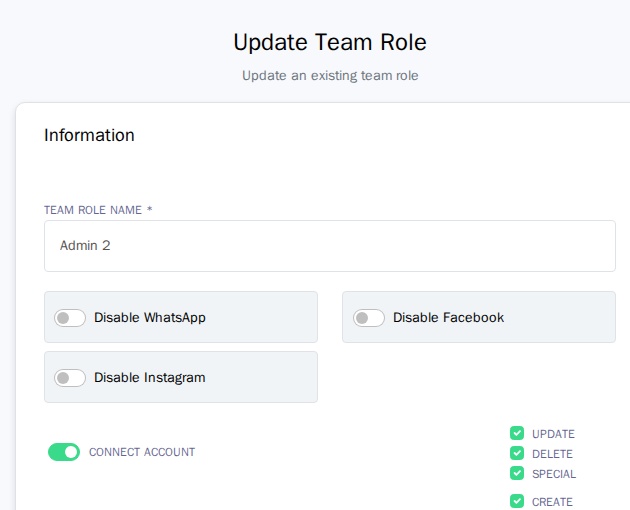 The role editor with Team Role Name, and toggles to Disable WhatsApp, Disable Facebook, and Disable Instagram
Top par aap:
- Role ko naam dein (jaise, "Admin 2", "Support Agent", "Sales Rep")
- Specific channels disable karein — WhatsApp, Facebook ya Instagram off toggle karein taaki agent kis platform ko access kar sakta hai restrict ho
Channel toggles ke neeche, har feature ki granular permissions hain:
| Permission | Kya control karta hai |
|---|---|
| Connect Account | Kya agent naye WhatsApp/social accounts connect kar sakta hai? |
| Subscribers | Subscribers ko create, update, delete ya manage karna |
| Bot Manager | Chatbot flows aur templates ki access |
| Live Chat | Omnichannel Inbox ki access |
| Broadcast | Broadcasts create aur send karna |
Live Chat Permissions
Role editor mein specific live chat permissions hain jo control karti hain ki agents inbox ke andar kya kar sakte hain.
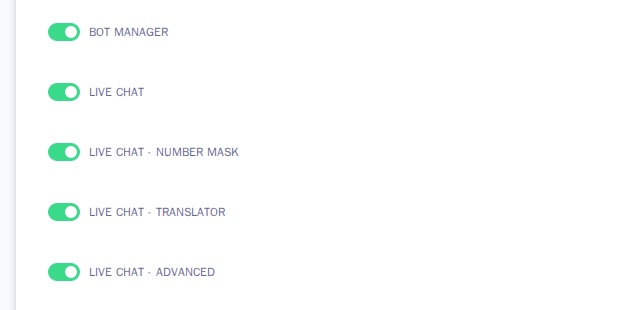 Live Chat permission toggles: Live Chat, Live Chat - Number Mask, Live Chat - Translator, and Live Chat - Advanced
| Permission | Kya karta hai |
|---|---|
| Live Chat | Omnichannel Inbox ki basic access |
| Live Chat - Number Mask | Jab enabled ho, to is agent ke liye customer phone numbers hide karta hai |
| Live Chat - Translator | Built-in message translator ki access |
| Live Chat - Advanced | Inbox ki advanced features |
Number Masking customer privacy protect karne ke liye especially useful hai. Jab ek role ke liye enabled ho, to us role wale agents customer names dekhte hain lekin unke phone numbers nahi. Wo normally chat kar sakte hain — bas actual numbers dekh ya export nahi kar sakte.
Allowed Bots aur Account Access
User Manager mein team member edit karte waqt, aap exactly control kar sakte hain ki unhe konse bots aur accounts ki access hai. Team member ki profile kholne ke liye unke paas edit button par click karein.
User edit form ke neeche, aapko milega:
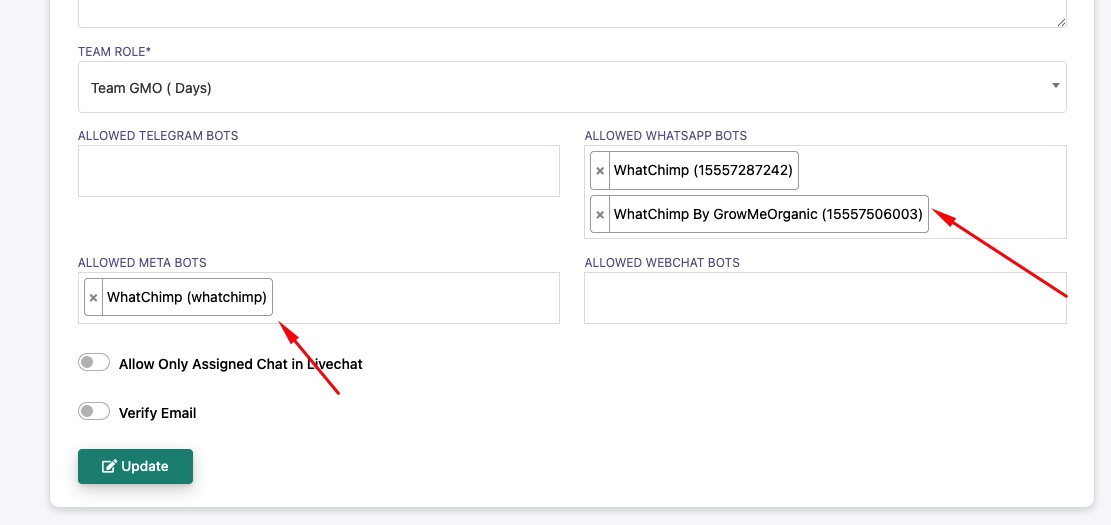 The user edit form showing Allowed WhatsApp Bots, Allowed Meta Bots, Allowed Telegram Bots, Allowed Webchat Bots, and the Allow Only Assigned Chat toggle
| Setting | Kya karta hai |
|---|---|
| Allowed WhatsApp Bots | Select karein ki yeh team member konse WhatsApp phone numbers/accounts ko access kar sakta hai. For example, ek sales agent ko sirf sales number assign karein. |
| Allowed Meta Bots | Select karein ki yeh team member konse Facebook ya Instagram accounts dekh sakta hai. |
| Allowed Telegram Bots | Select karein ki yeh team member konse Telegram bots manage kar sakta hai. |
| Allowed Webchat Bots | Select karein ki yeh team member konse website chat widgets ko access kar sakta hai. |
| Allow Only Assigned Chat in Livechat | Jab enabled ho, to team member sirf wo conversations dekh sakta hai jo specifically unhe assigned hain — inbox ke saare conversations nahi. |
Yeh hai kaise aap agents ko specific accounts tak restrict karte hain. For example:
- Ek sales team sirf sales WhatsApp number se conversations dekh sakti hai
- Ek support team sirf support number dekh sakti hai
- Ek social media manager sirf Meta (Facebook/Instagram) bots ki access rakh sakta hai
- Allow Only Assigned Chat enable karne se ensure hota hai ki agents sirf apne conversations par focus karein
Configure karne ke liye:
- Sidebar mein User Manager par jaayein
- Team member ke paas edit button par click karein
- Har Allowed Bots field se wo bots/accounts select karein jinhe unhe access karna chahiye
- Zaroorat ho to Allow Only Assigned Chat in Livechat toggle karein
- Save karne ke liye Update par click karein
Notes Add Karna
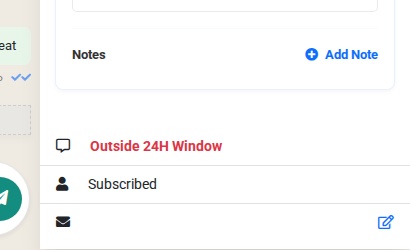
Notes aapko apni team ke saath conversation ke baare mein context share karne dete hain. Conversation ki access wala koi bhi team member notes padh sakta hai.
- Ek conversation open karein
- Chat Actions panel mein, Notes section tak scroll karein
- Add Note par click karein
- Apna note type karein (jaise, "Customer ne payment kar di, delivery confirmation ka intezaar hai")
- Note save ho jaata hai aur sabhi team members ko visible hai

Notes ek timeline create karte hain taaki team members conversation ka poora context dekh sakein, chahe wo original agent na hon.
Bot aur AI Reply Toggles
Chat Actions panel ke top par, do toggles har conversation ke liye automated responses control karte hain:
- Bot Reply On — chatbot automatically replies handle karta hai
- AI Reply On — AI assistant messages ko respond karta hai
 The Chat Actions panel showing Bot Reply On and AI Reply On toggle buttons
Jab aap manually ek conversation ka control lena chahte hain to Bot Reply off toggle karein. Bot pause hone par automated messages nahi bhejega. Jab aap ho jayein to wapas on karein taaki bot resume kar sake.
Tips
- Conversations jaldi assign karein. Unassigned chats miss ho sakti hain. Auto-assignment use karein ya incoming conversations manually assign karein.
- Data protection ke liye Number Masking use karein. Ise un roles ke liye enable karein jinhe customer phone numbers ki direct access ki zaroorat nahi hai.
- Hand off karne se pehle notes add karein. Jab ek conversation doosre agent ko transfer kar rahe hain, to ek note chhodein jo context explain kare taaki wo customer ko repeat karwaye bina aage badh sakein.
- Roles minimal rakhein. Sirf wo permissions dein jo har role ko chahiye. Ek support agent ko broadcast ya bot manager access ki zaroorat nahi hai.
- Live conversations ke dauran bot off karein. Jab aap actively ek customer ke saath chat kar rahe hain to Bot Reply off toggle karein taaki bot interrupt na kare.
Related Articles
- Introduction to Omnichannel Inbox — inbox ka pura layout aur features seekhein
- Organize Conversations with Labels, Views & Search — apne inbox ko organized rakhne ke liye labels, views aur search use karein
- Filtering Conversations — label, team member, bot status aur zyada se conversations filter karein