Introduction to Omnichannel Inbox
Manage all your WhatsApp, Instagram, Facebook, and website conversations from one unified inbox.
Updated 9 February 2026
Manage all your WhatsApp, Instagram, Facebook, and website conversations from one unified inbox.
Video: https://www.youtube.com/watch?v=Foexz27OZx0
What is Omnichannel Inbox?
The Omnichannel Inbox is your command center for customer conversations. Instead of juggling multiple apps, you handle everything from one place:
- WhatsApp - All your business numbers in one view
- Instagram - Direct messages from connected accounts
- Facebook - Messenger conversations
- Website Widget - Live chat from your website
Quick Link: Open Omnichannel Inbox to jump straight in.
Accessing the Omnichannel Inbox
- Log in to your WhatChimp Dashboard
- Click the hamburger menu (☰) in the top-left corner
- Select Omnichannel Inbox (New)
Or simply go to app.whatchimp.com/all/livechat directly.
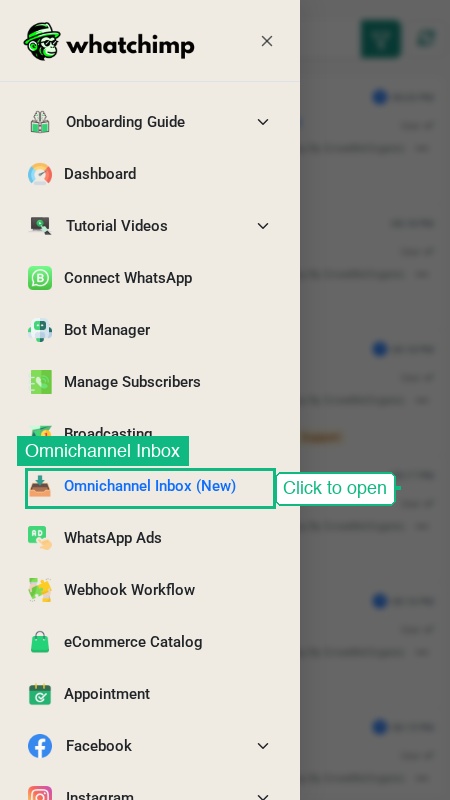 Click Omnichannel Inbox (New) in the sidebar menu
The Interface: Four Panels
When you open the inbox, you'll see four main areas:
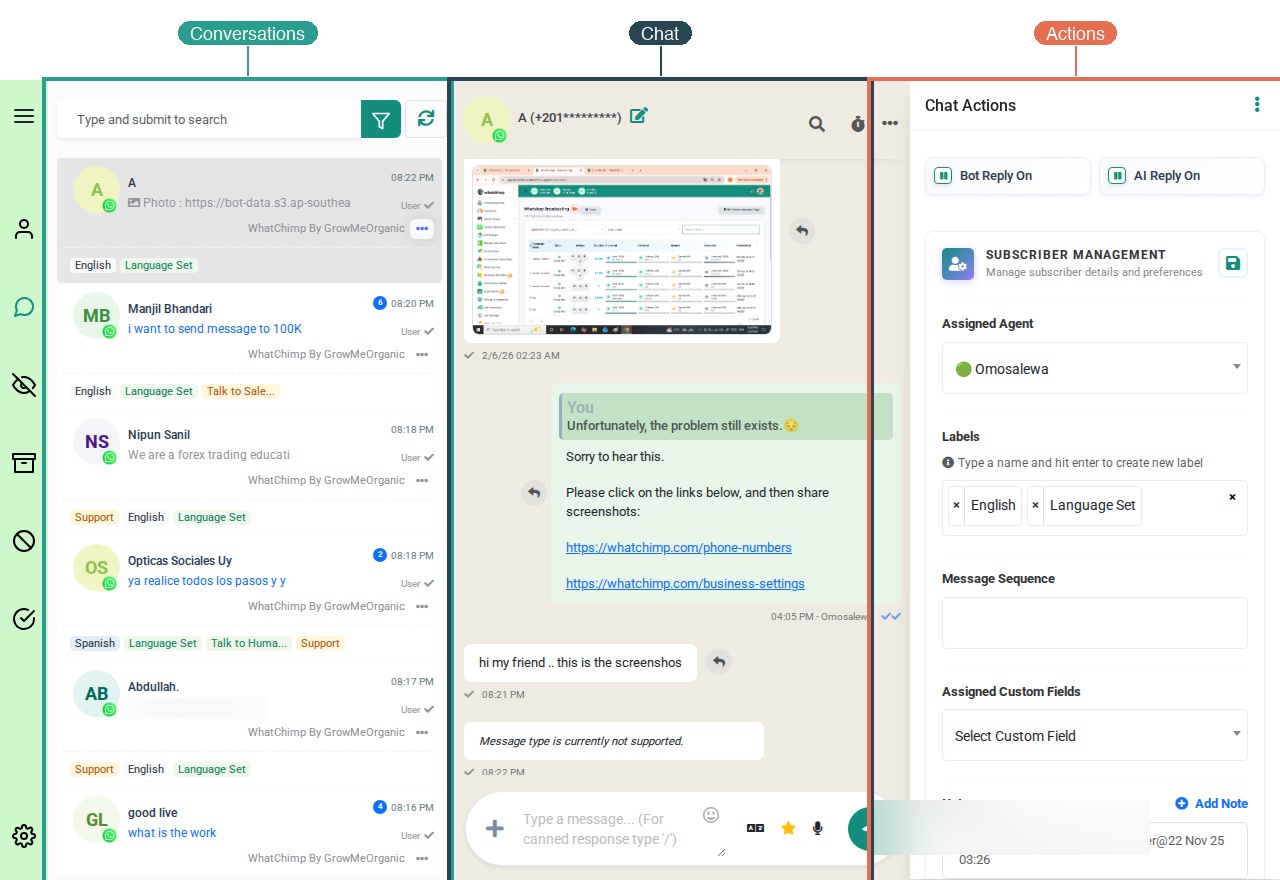 The Omnichannel Inbox showing all four panels: Sidebar, Conversations, Chat, and Actions
1. Left Sidebar (Navigation Icons)
The vertical icon bar on the far left gives you quick access to different conversation views:
| Icon | View | Description | How to Access |
|---|---|---|---|
| 💬 | All Chats | Every conversation across all channels | Click the conversations icon in sidebar |
| 👤 | Contacts | View subscriber details and contact info | Click the contacts icon in sidebar |
| 🏷️ | Labels | Manage and filter by conversation labels | Click the labels icon in sidebar |
| 💬 | Canned Responses | Quick reply templates for common questions | Click the canned-responses icon in sidebar |
| ⏰ | Follow-ups | Scheduled reminders for conversations | Click the follow-ups icon or clock icon |
| ✅ | To-Do | Personal task list for conversations | Click the to-do icon in sidebar |
| ⚙️ | Settings | Configure inbox behavior and signatures | Click the settings icon in sidebar |
2. Conversation List (Middle-Left)
This panel shows all your conversations. Each entry displays:
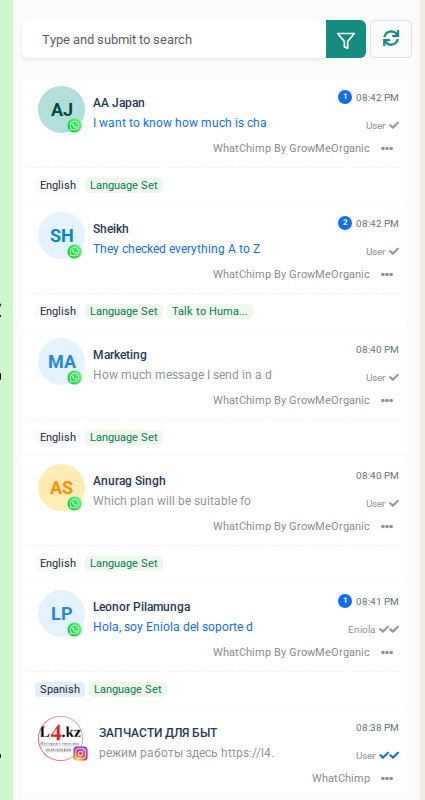 The conversation list panel with search, filter, and conversation cards
- Contact avatar - Profile picture or initials
- Name - Contact name
- Channel indicator - WhatsApp (green), Instagram (pink), or Facebook (blue) icon
- Last message preview - First few words of the latest message
- Time - When the message was received
- Labels - Colored tags for organization (e.g., "English", "Support")
- Unread badge - Blue circle with number of unread messages
Right-click (or click ⋯) on any conversation to access quick actions: assign to agent, close, mark as read/unread, or delete.
Sort your conversations by clicking the Order By selector at the top — choose between Subscriber Recent Reply or Recent Communication.
3. Chat Window (Center)
Click any conversation to open it. The chat window shows:
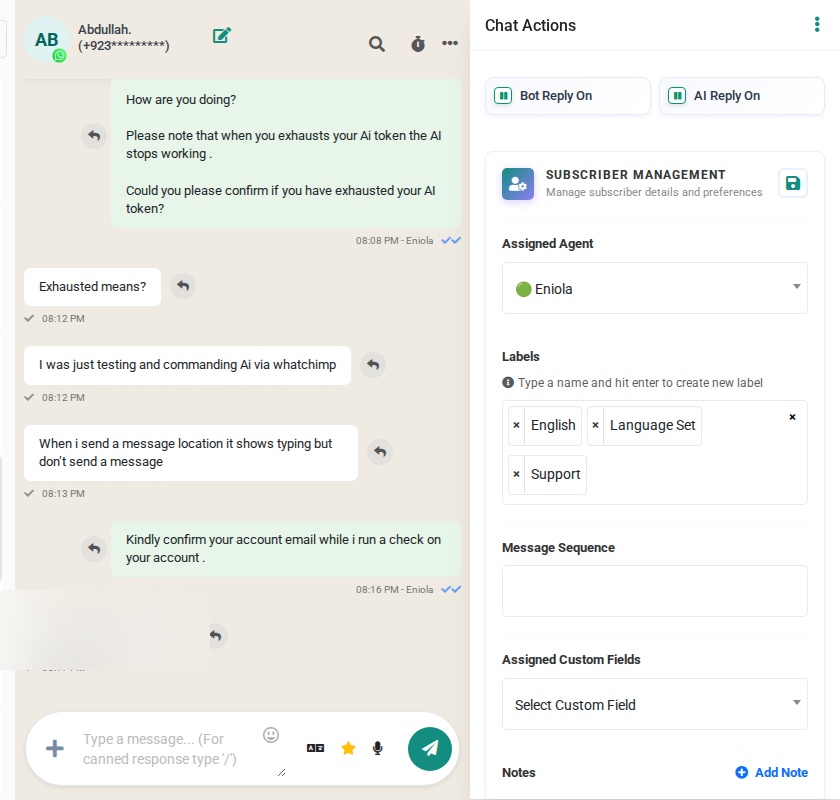 A conversation open showing the chat header, messages, and compose bar
- Message history - Complete conversation thread
- Message composer - Type your reply at the bottom
- Quick actions in composer:
- 📎 Attach images or files
- 📝 Send a message template — click the template icon in the composer
- 🤖 Send a bot flow — click the flow icon in the composer
- 📋 Send a WhatsApp Flow — click the WhatsApp Flow icon for structured data collection
- 💬 Insert a canned response for quick replies
- Send button - Blue arrow to send your message
4. Chat Actions Panel (Right)
When a conversation is open, click the subscriber name or info icon to open the right panel:
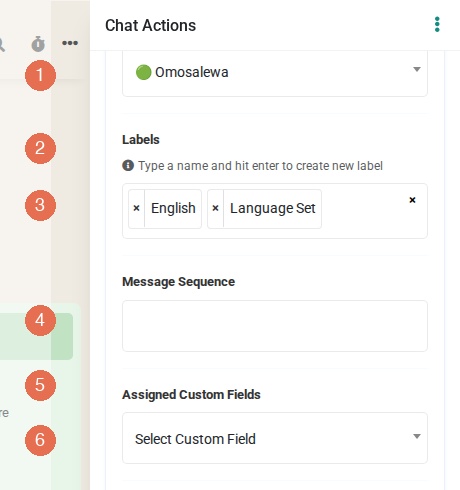 The Chat Actions panel with Labels, Message Sequence, Custom Fields, Notes, and Subscriber Info sections
- Bot Reply On/Off - Toggle automated bot responses
- AI Reply On/Off - Toggle AI-powered responses
- Assigned Agent - Who's handling this conversation
- Labels - Add tags for organization
- Message Sequence - Automated follow-up messages
- Custom Fields - Store customer information (phone, email, notes)
- Notes - Internal team notes (customers don't see these)
Filtering Conversations
Use the filter button (funnel icon) at the top of the conversation list to narrow down results:
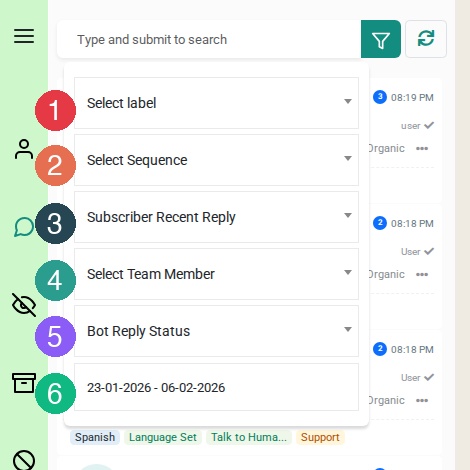 Filter menu showing all 6 filter options: Label, Sequence, Recent Reply, Team Member, Bot Reply Status, and Date Range
Filter by:
- Channel & Account — Click the filter icon to choose WhatsApp, Facebook, or Instagram and specific connected accounts
- Label - Show only conversations with specific labels
- Sequence - Conversations in a follow-up sequence
- Recent Reply - Filter by who replied last
- Team Member - Conversations assigned to specific agents
- Bot Reply Status - Click the Bot Reply Status selector to filter by Bot is replying or Bot reply is paused
- Date Range - Conversations from a specific time period
Tip: To view only conversations from a specific channel, click the filter icon at the top of the conversation list and select the channel (WhatsApp, Facebook, or Instagram).
Viewing Resolved Conversations
Click the checkmark icon (✅) in the left sidebar to see completed conversations:
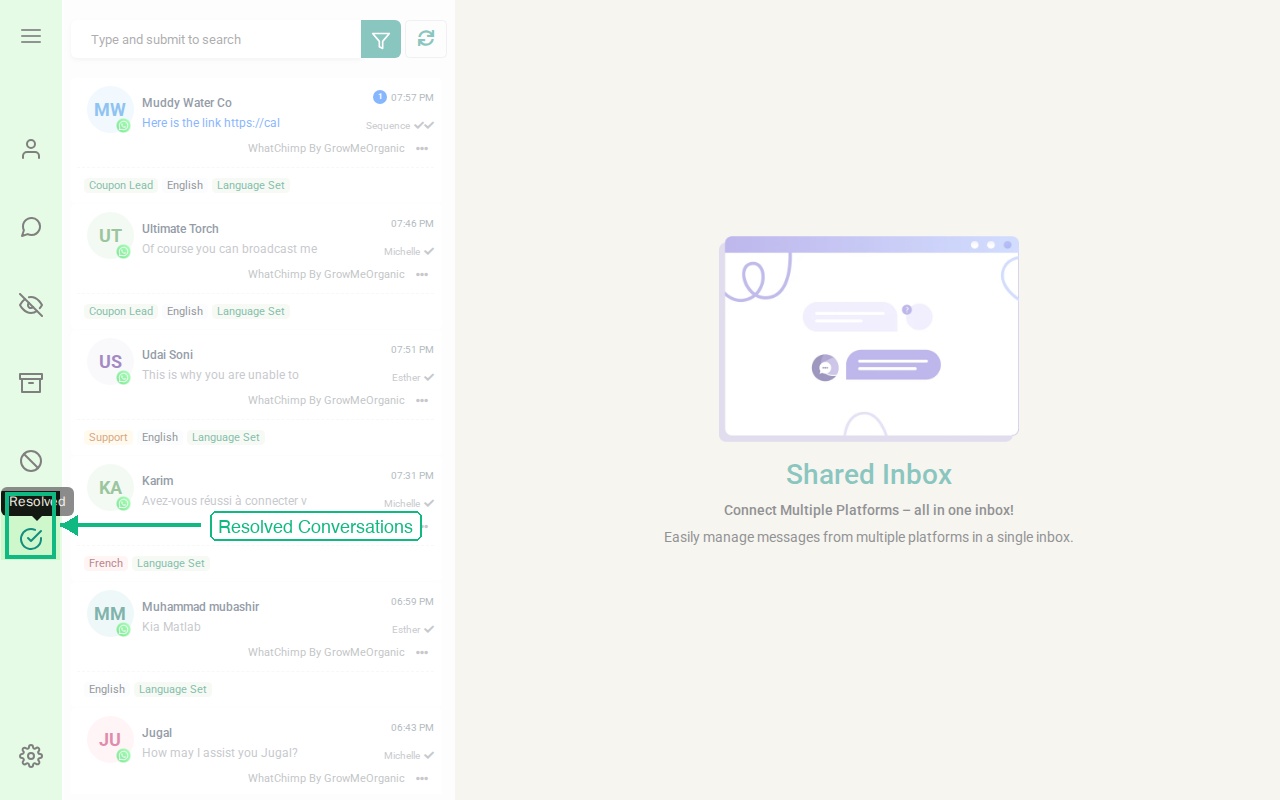 The Resolved view showing the checkmark icon in the sidebar
Resolved conversations show:
- Who resolved them (agent name)
- When they were resolved
- Full conversation history (click to review)
Basic Workflow
Here's how a typical conversation flows:
- New message arrives → Appears in your list with an unread badge
- Click to open → Read the full conversation
- Type your reply → Use the message composer at the bottom (or insert a canned response for speed)
- Organize → Add labels, assign to team members, or add notes via the right panel
- Set a follow-up → Click the clock icon to schedule a reminder if needed
- Resolve → Click ⋯ on the conversation > Close, or use the header actions
Tips for Getting Started
- Enable desktop notifications — If you see an orange warning bar, click Allow so you never miss a message
- Create labels for common categories (Support, Sales, VIP) — Click the labels icon in the sidebar
- Set up canned responses for frequently asked questions — Click the canned responses icon in the sidebar
- Assign agents to balance workload — Click ⋯ on any conversation > Assign to Agent
- Use keyboard shortcuts — Type your message and hit Enter to send quickly
- Check your to-do list — Click the to-do icon in the sidebar to track conversation tasks
Next Steps
Now that you understand the interface, explore these features:
- Filter by Channel & Account - Focus on specific platforms
- Organize with Labels - Keep your inbox tidy
- Use AI Features - Translate and improve messages
- Team Collaboration - Assign and manage conversations