Team Collaboration & Agent Assignment
Assign conversations to team members, manage permissions, and collaborate effectively.
Updated 10 February 2026
When multiple team members handle customer conversations, you need tools to assign chats, control access, and share context. WhatChimp's team collaboration features let you do all of this from the Omnichannel Inbox.
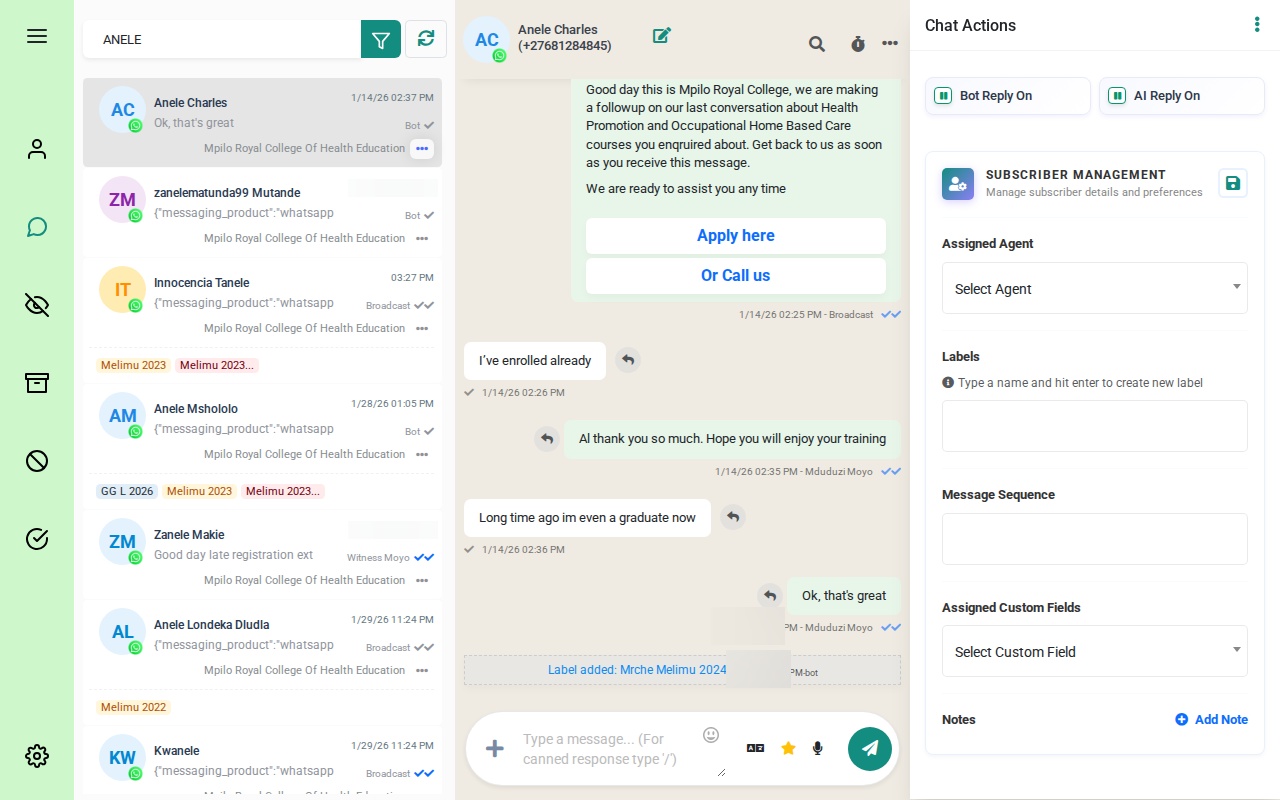 The Omnichannel Inbox with the conversation list, chat window, and Chat Actions panel on the right
Assigning Agents to Conversations
Every conversation can be assigned to a specific team member. The assigned agent appears in the conversation list and is responsible for handling that chat.
Manual Assignment
- Open a conversation
- In the Chat Actions panel on the right, find the Assigned Agent dropdown
- Click the dropdown and select a team member
- The conversation is now assigned to that agent
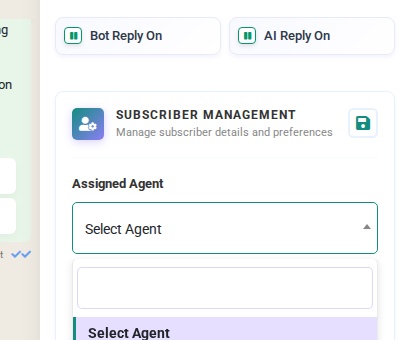 Click the Assigned Agent dropdown to select a team member from the list
The Chat Actions panel also shows Bot Reply On and AI Reply On toggles, Labels, Message Sequence, and Assigned Custom Fields for the selected conversation.
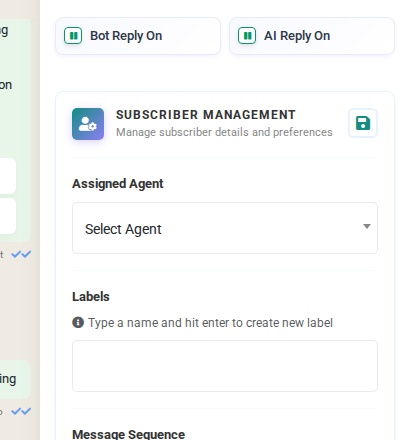 The full Chat Actions panel with Bot Reply, AI Reply, Subscriber Management, Assigned Agent, and Labels sections
Auto-Assignment
WhatChimp can automatically distribute incoming chats to available agents:
- Set up auto-assignment rules in your chatbot flow
- Agents who are Online receive new chats
- Chats rotate between available team members
- Offline agents are skipped until they come back online
Managing Team Members
User Manager
The User Manager page shows all team members on your account. Go to User Manager in the left sidebar to see the full list.
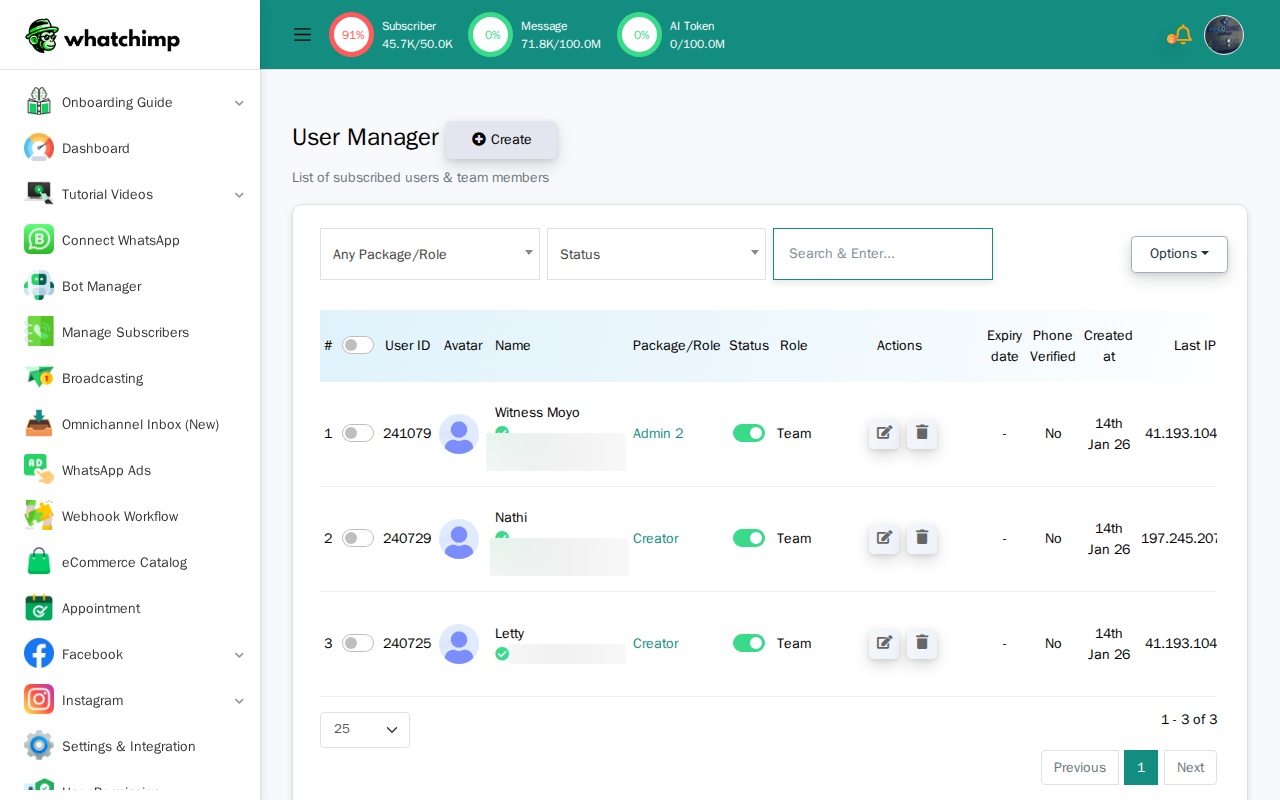 The User Manager page listing team members with their User ID, Name, Package/Role, Status, and login details
From here you can:
- Create new team members by clicking the green Create button
- Filter by Package/Role or Status
- Edit or delete existing team members
- See each member's last login date and IP address
Each team member is assigned a Package/Role (like "Admin 2" or "Creator") that controls what they can access.
User Permission (Roles)
Roles define what each team member can do. Go to User Permission in the sidebar to manage roles.
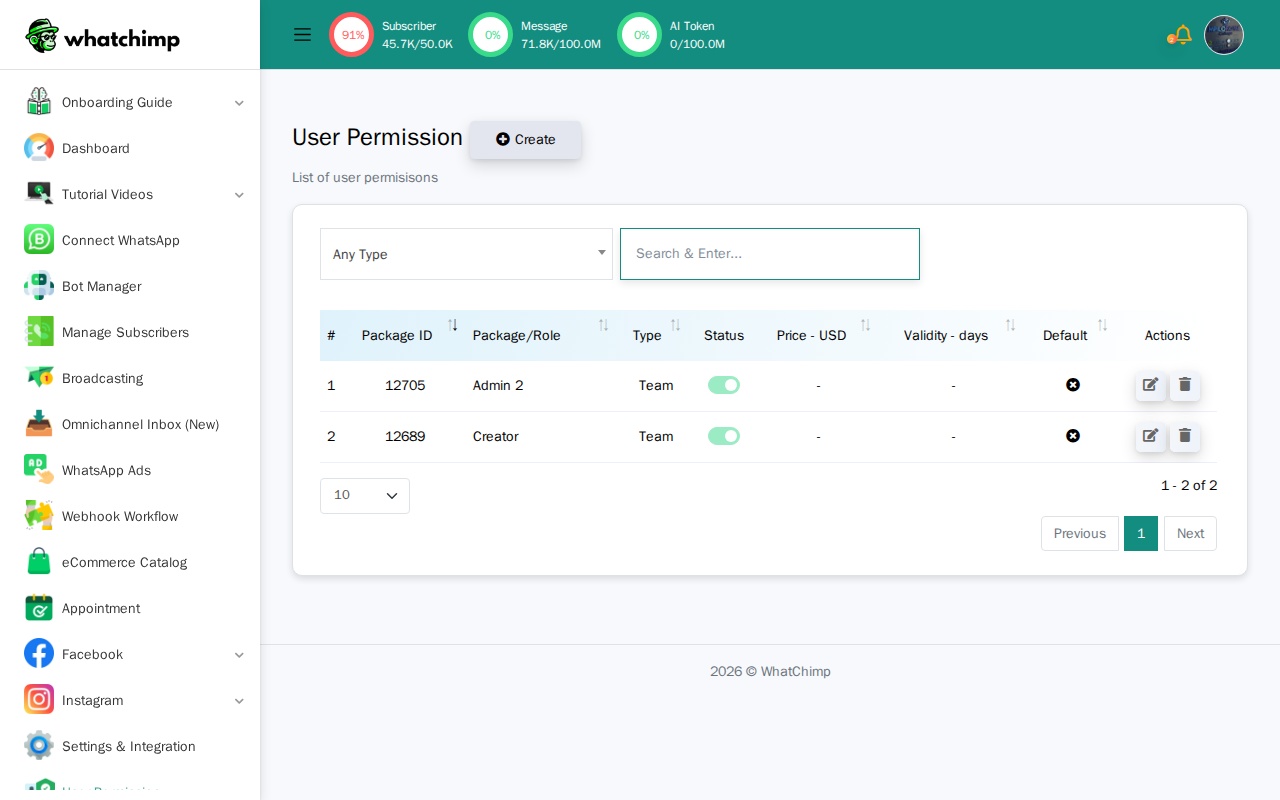 The User Permission page listing roles like Admin 2 and Creator, each with Type, Status, and Actions
Click the edit button on any role to configure its permissions.
Configuring a Role
The role editor lets you set a name, enable or disable channels, and control access to every feature.
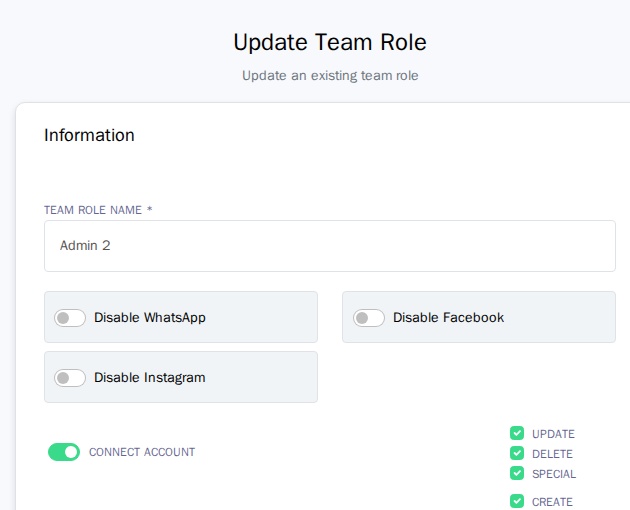 The role editor with Team Role Name, and toggles to Disable WhatsApp, Disable Facebook, and Disable Instagram
At the top you can:
- Name the role (e.g., "Admin 2", "Support Agent", "Sales Rep")
- Disable specific channels — toggle off WhatsApp, Facebook, or Instagram to restrict which platforms the agent can access
Below the channel toggles, each feature has granular permissions:
| Permission | What it controls |
|---|---|
| Connect Account | Can the agent connect new WhatsApp/social accounts? |
| Subscribers | Create, update, delete, or manage subscribers |
| Bot Manager | Access to chatbot flows and templates |
| Live Chat | Access to the Omnichannel Inbox |
| Broadcast | Create and send broadcasts |
Live Chat Permissions
The role editor includes specific live chat permissions that control what agents can do inside the inbox.
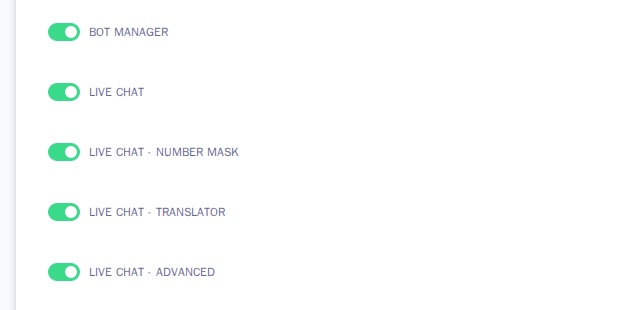 Live Chat permission toggles: Live Chat, Live Chat - Number Mask, Live Chat - Translator, and Live Chat - Advanced
| Permission | What it does |
|---|---|
| Live Chat | Basic access to the Omnichannel Inbox |
| Live Chat - Number Mask | When enabled, hides customer phone numbers from this agent |
| Live Chat - Translator | Access to the built-in message translator |
| Live Chat - Advanced | Advanced inbox features |
Number Masking is especially useful for protecting customer privacy. When enabled for a role, agents with that role see customer names but not their phone numbers. They can still chat normally — they just can't see or export the actual numbers.
Allowed Bots and Account Access
When editing a team member in the User Manager, you can control exactly which bots and accounts they have access to. Click the edit button next to a team member to open their profile.
At the bottom of the user edit form, you'll find:
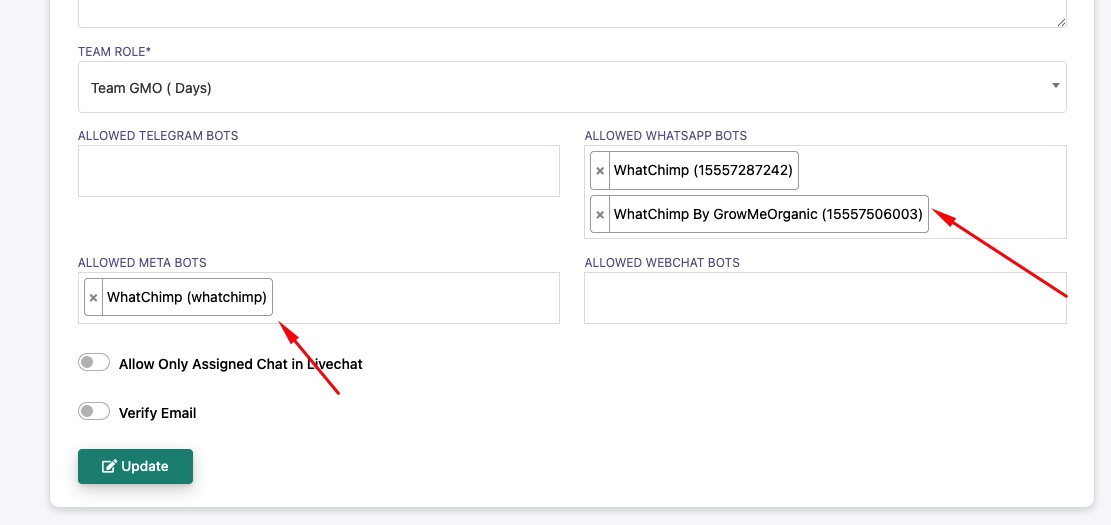 The user edit form showing Allowed WhatsApp Bots, Allowed Meta Bots, Allowed Telegram Bots, Allowed Webchat Bots, and the Allow Only Assigned Chat toggle
| Setting | What it does |
|---|---|
| Allowed WhatsApp Bots | Select which WhatsApp phone numbers/accounts this team member can access. For example, assign a sales agent only to your sales number. |
| Allowed Meta Bots | Select which Facebook or Instagram accounts this team member can see. |
| Allowed Telegram Bots | Select which Telegram bots this team member can manage. |
| Allowed Webchat Bots | Select which website chat widgets this team member can access. |
| Allow Only Assigned Chat in Livechat | When enabled, the team member can only see conversations that are specifically assigned to them — not all conversations in the inbox. |
This is how you restrict agents to specific accounts. For example:
- A sales team might only see conversations from the sales WhatsApp number
- A support team might only see the support number
- A social media manager might only have access to Meta (Facebook/Instagram) bots
- Enabling Allow Only Assigned Chat ensures agents focus only on their own conversations
To configure:
- Go to User Manager in the sidebar
- Click the edit button next to the team member
- Select the bots/accounts they should access from each Allowed Bots field
- Toggle Allow Only Assigned Chat in Livechat if needed
- Click Update to save
Adding Notes
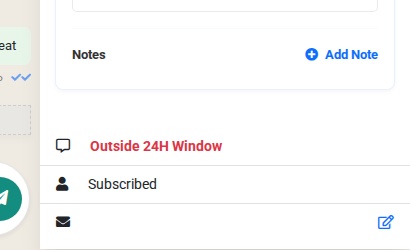
Notes let you share context about a conversation with your team. Any team member with access to the conversation can read the notes.
- Open a conversation
- In the Chat Actions panel, scroll down to the Notes section
- Click Add Note
- Type your note (e.g., "Customer paid, waiting for delivery confirmation")
- The note is saved and visible to all team members

Notes create a timeline so team members can see the full context of a conversation, even if they weren't the original agent.
Bot and AI Reply Toggles
At the top of the Chat Actions panel, two toggles control automated responses for each conversation:
- Bot Reply On — the chatbot handles replies automatically
- AI Reply On — the AI assistant responds to messages
 The Chat Actions panel showing Bot Reply On and AI Reply On toggle buttons
Toggle Bot Reply off when you want to take over a conversation manually. The bot won't send automated messages while it's paused. Turn it back on when you're done to let the bot resume.
Tips
- Assign conversations promptly. Unassigned chats can fall through the cracks. Use auto-assignment or manually assign incoming conversations.
- Use Number Masking for data protection. Enable it for roles that don't need direct access to customer phone numbers.
- Add notes before handing off. When transferring a conversation to another agent, leave a note explaining the context so they can pick up without asking the customer to repeat themselves.
- Keep roles minimal. Only grant the permissions each role needs. A support agent doesn't need broadcast or bot manager access.
- Toggle bot off during live conversations. Turn off Bot Reply when you're actively chatting with a customer to prevent the bot from interrupting.
Related Articles
- Introduction to Omnichannel Inbox — learn the full inbox layout and features
- Organize Conversations with Labels, Views & Search — use labels, views, and search to keep your inbox organized
- Filtering Conversations — narrow conversations by label, team member, bot status, and more