How to Trigger Appointment Booking from a Chatbot
Connect an appointment to a chatbot keyword so booking starts inside the chat. Add the Appointment node in the Flow Builder and pick your appointment.
Updated 18 June 2026
Once you have created an appointment, you connect it to a chatbot so a keyword starts the booking. When a customer sends your keyword (for example "Book Test Demo"), the bot launches the appointment booking right in the chat.
This guide assumes you have already created an appointment. If you are new to chatbots, read How to Create a Keyword-Based WhatsApp Chatbot first.
Step 1: Open or create your bot flow
- In the left sidebar, open Bot Manager and select your bot.
- Open Bot Reply, then click Create to start a new flow (or edit an existing one). Set the trigger keyword, for example "Book Test Demo", that should start the booking.
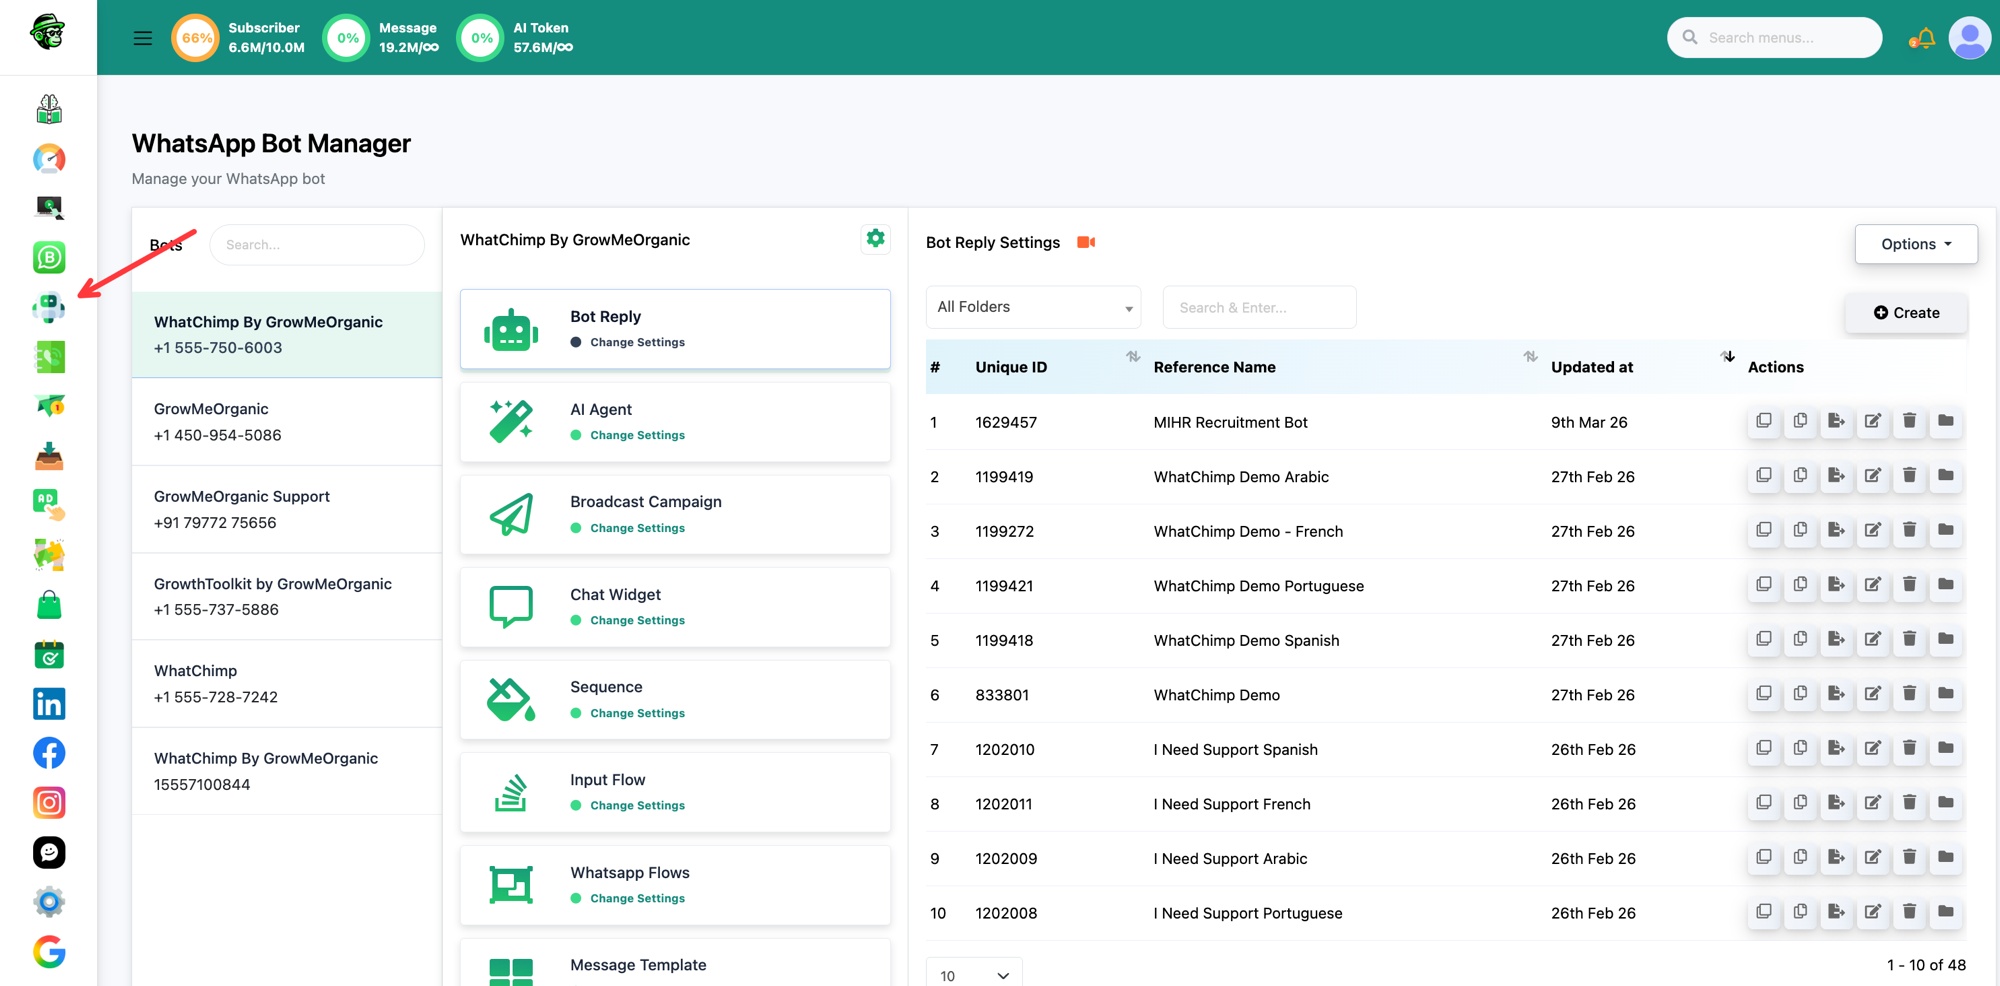 Open Bot Manager, then Bot Reply, then Create
Step 2: Add the Appointment node
In the Flow Builder, from the Start Bot Flow node, use Compose Next Message to open the node menu, then choose Appointment.
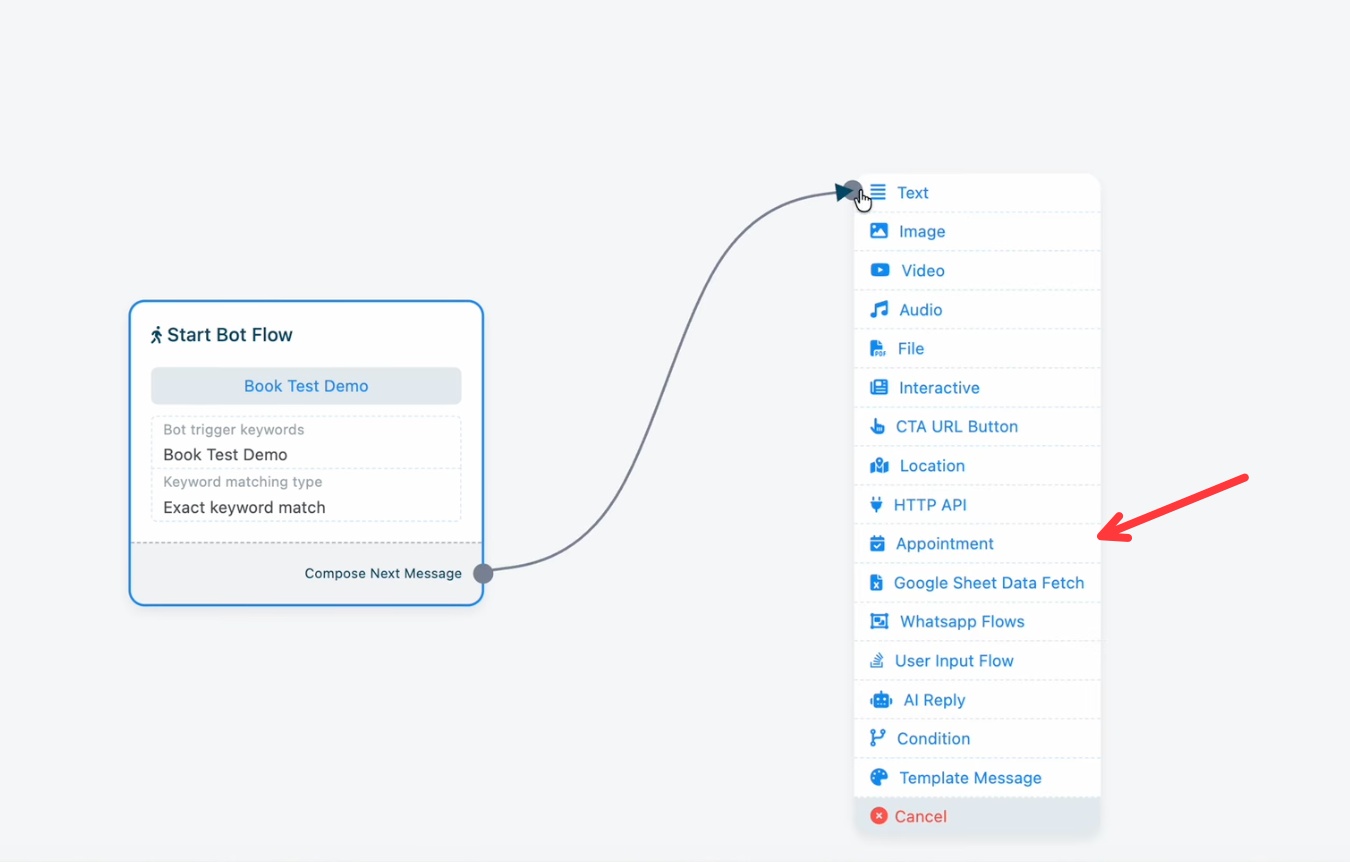 Choose the Appointment node
Step 3: Pick the appointment
In Appointment Settings, open the Appointment List dropdown and select the appointment you created, for example "Demo". From here you can also Create Appointment, Edit Appointment, or Refresh Appointments if you just made a new one and it is not showing yet.
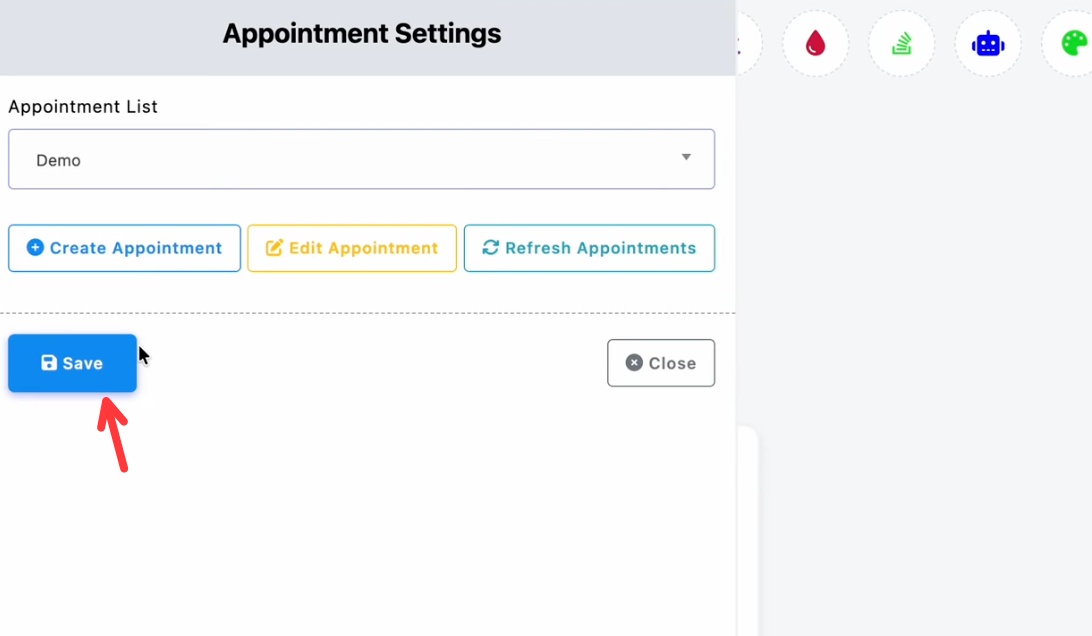 Select your appointment, then Save
Click Save.
Step 4: Save the flow
The Appointment node is now connected to your keyword. Click Save in the Flow Builder to publish the flow.
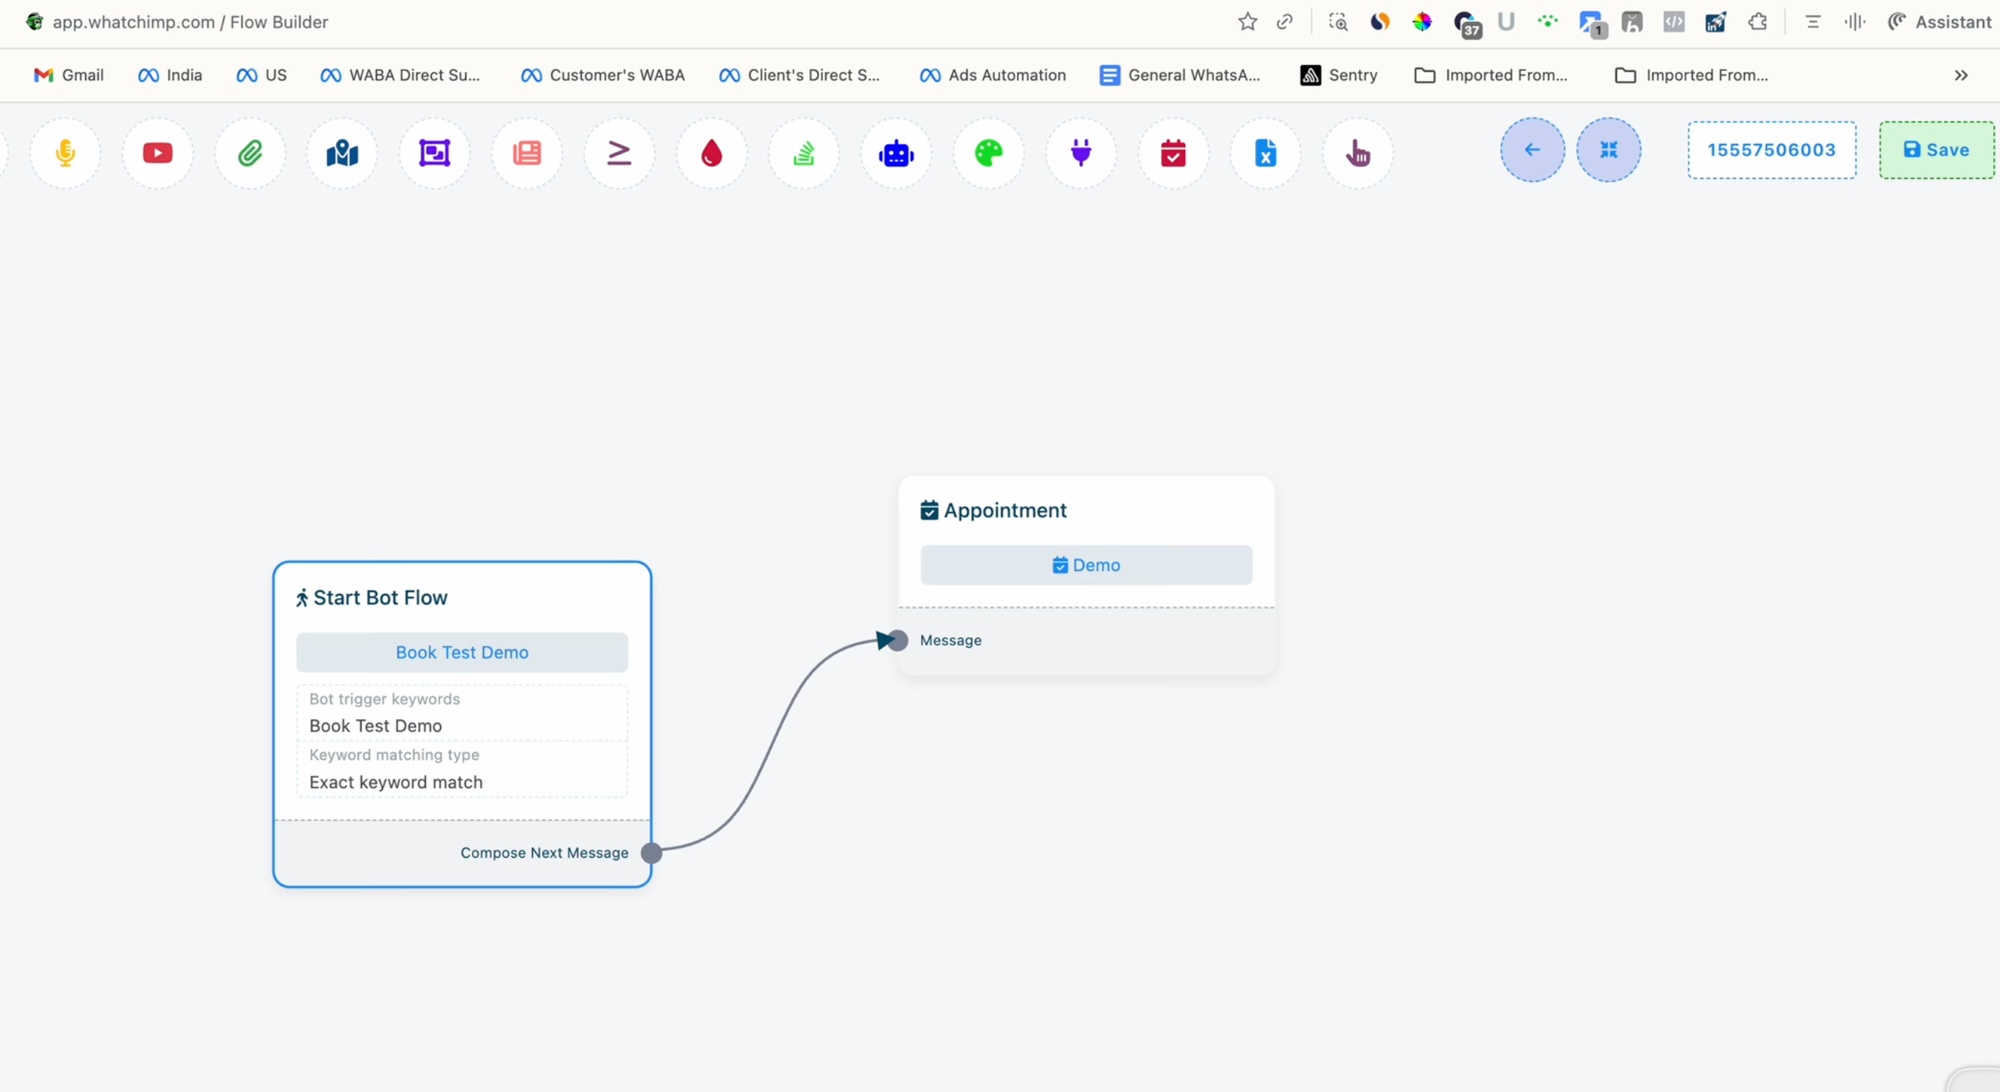 The keyword now triggers the appointment booking
That is it. When a customer sends your keyword on WhatsApp, the bot starts the appointment booking, collecting their details and offering your available slots.