Introduction to Appointment Booking
Let customers book appointments right inside WhatsApp, free or paid, synced to Google Calendar with a Meet link. See how the whole booking flow works.
Updated 18 June 2026
Video: https://www.youtube.com/watch?v=_vtfCtElqtg
WhatChimp lets your leads book an appointment with you, free or paid, directly inside a WhatsApp chat. Every booking lands on your Google Calendar with a Google Meet link, and you can send reminders automatically. There is no external booking page, the whole thing happens in the conversation.
What you can do
- Let customers book a slot from a chatbot keyword, without leaving WhatsApp.
- Collect their details (name, email, and anything else you ask) as part of the booking.
- Offer your real availability, pulled from the time slots you define.
- Take payment for the appointment with PayPal or Stripe, or keep it free.
- Sync every booking to Google Calendar with a Google Meet link for both sides.
- Send reminders before the meeting so people show up.
What the booking looks like for your customer
Here is the full flow a customer goes through, all inside WhatsApp.
1. They start the booking and answer a few questions. A keyword (for example "Book Test Demo") triggers the flow, and the bot collects their name and email.
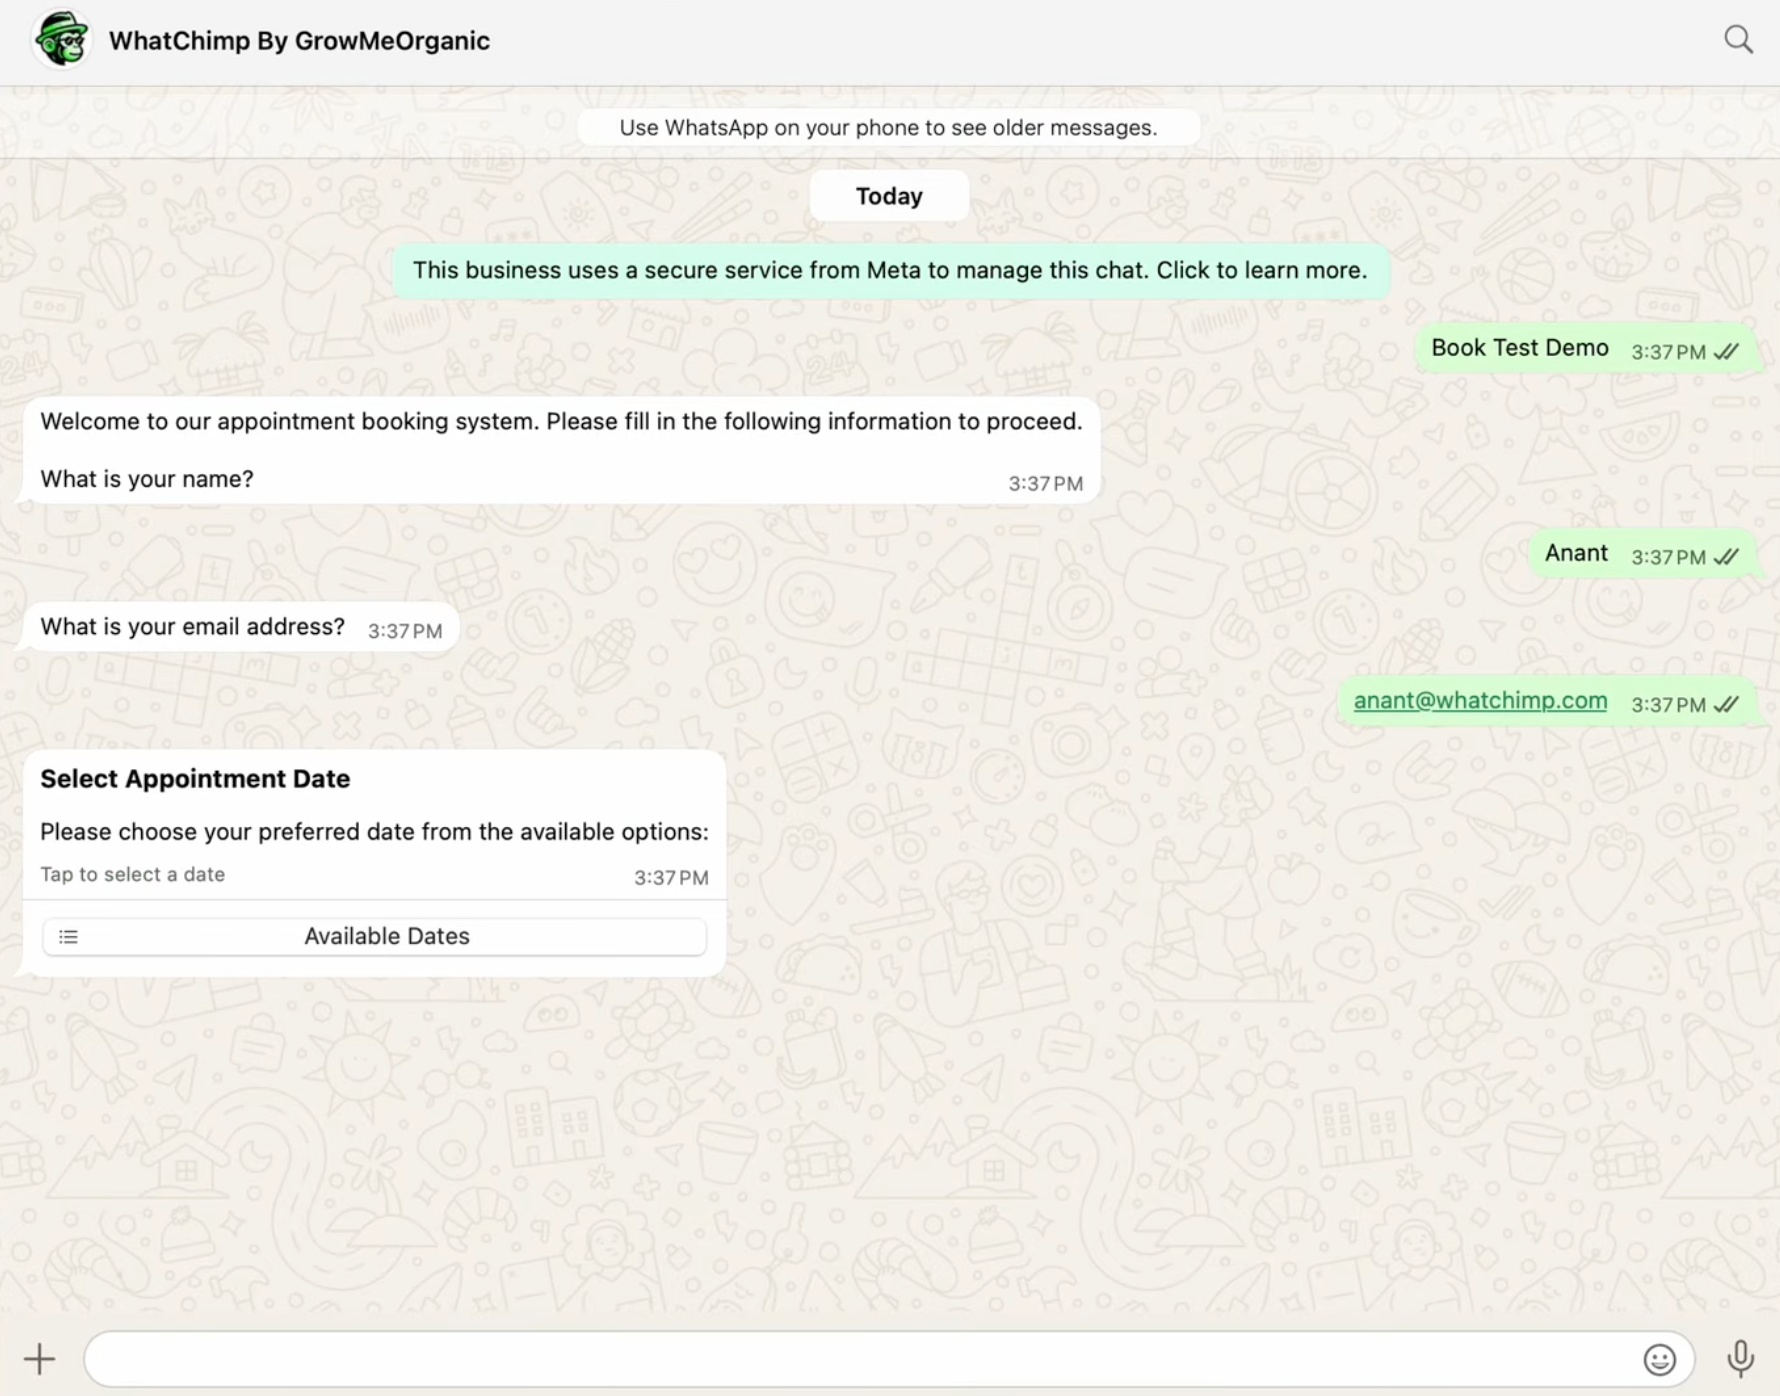 The bot greets the customer and collects their details
2. They pick an available date. WhatChimp shows only the dates you have open, each with the number of slots left.
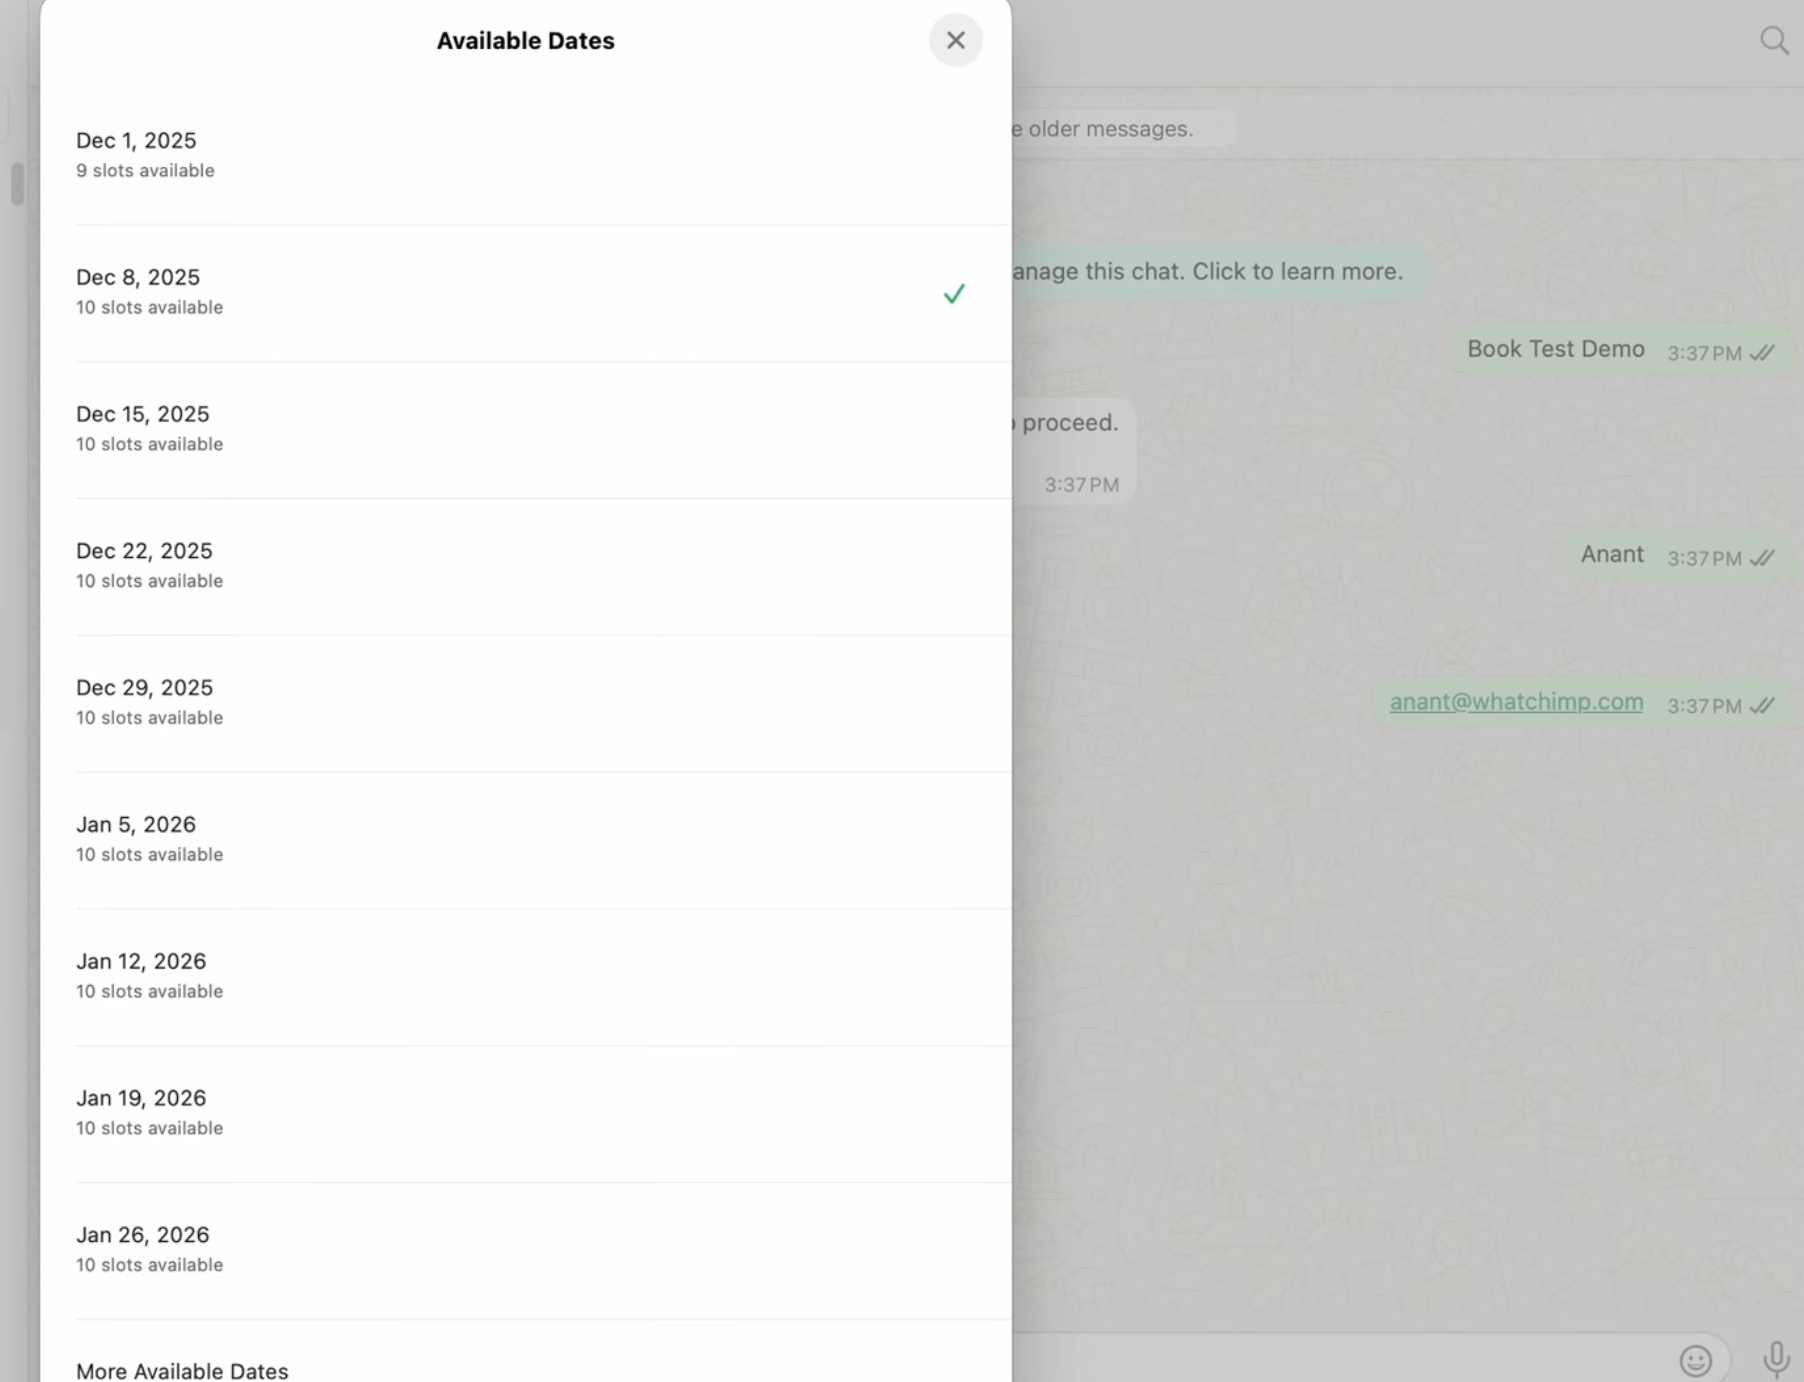 The customer chooses from your available dates
3. They pick a time. After the date, they choose an open time slot in your time zone.
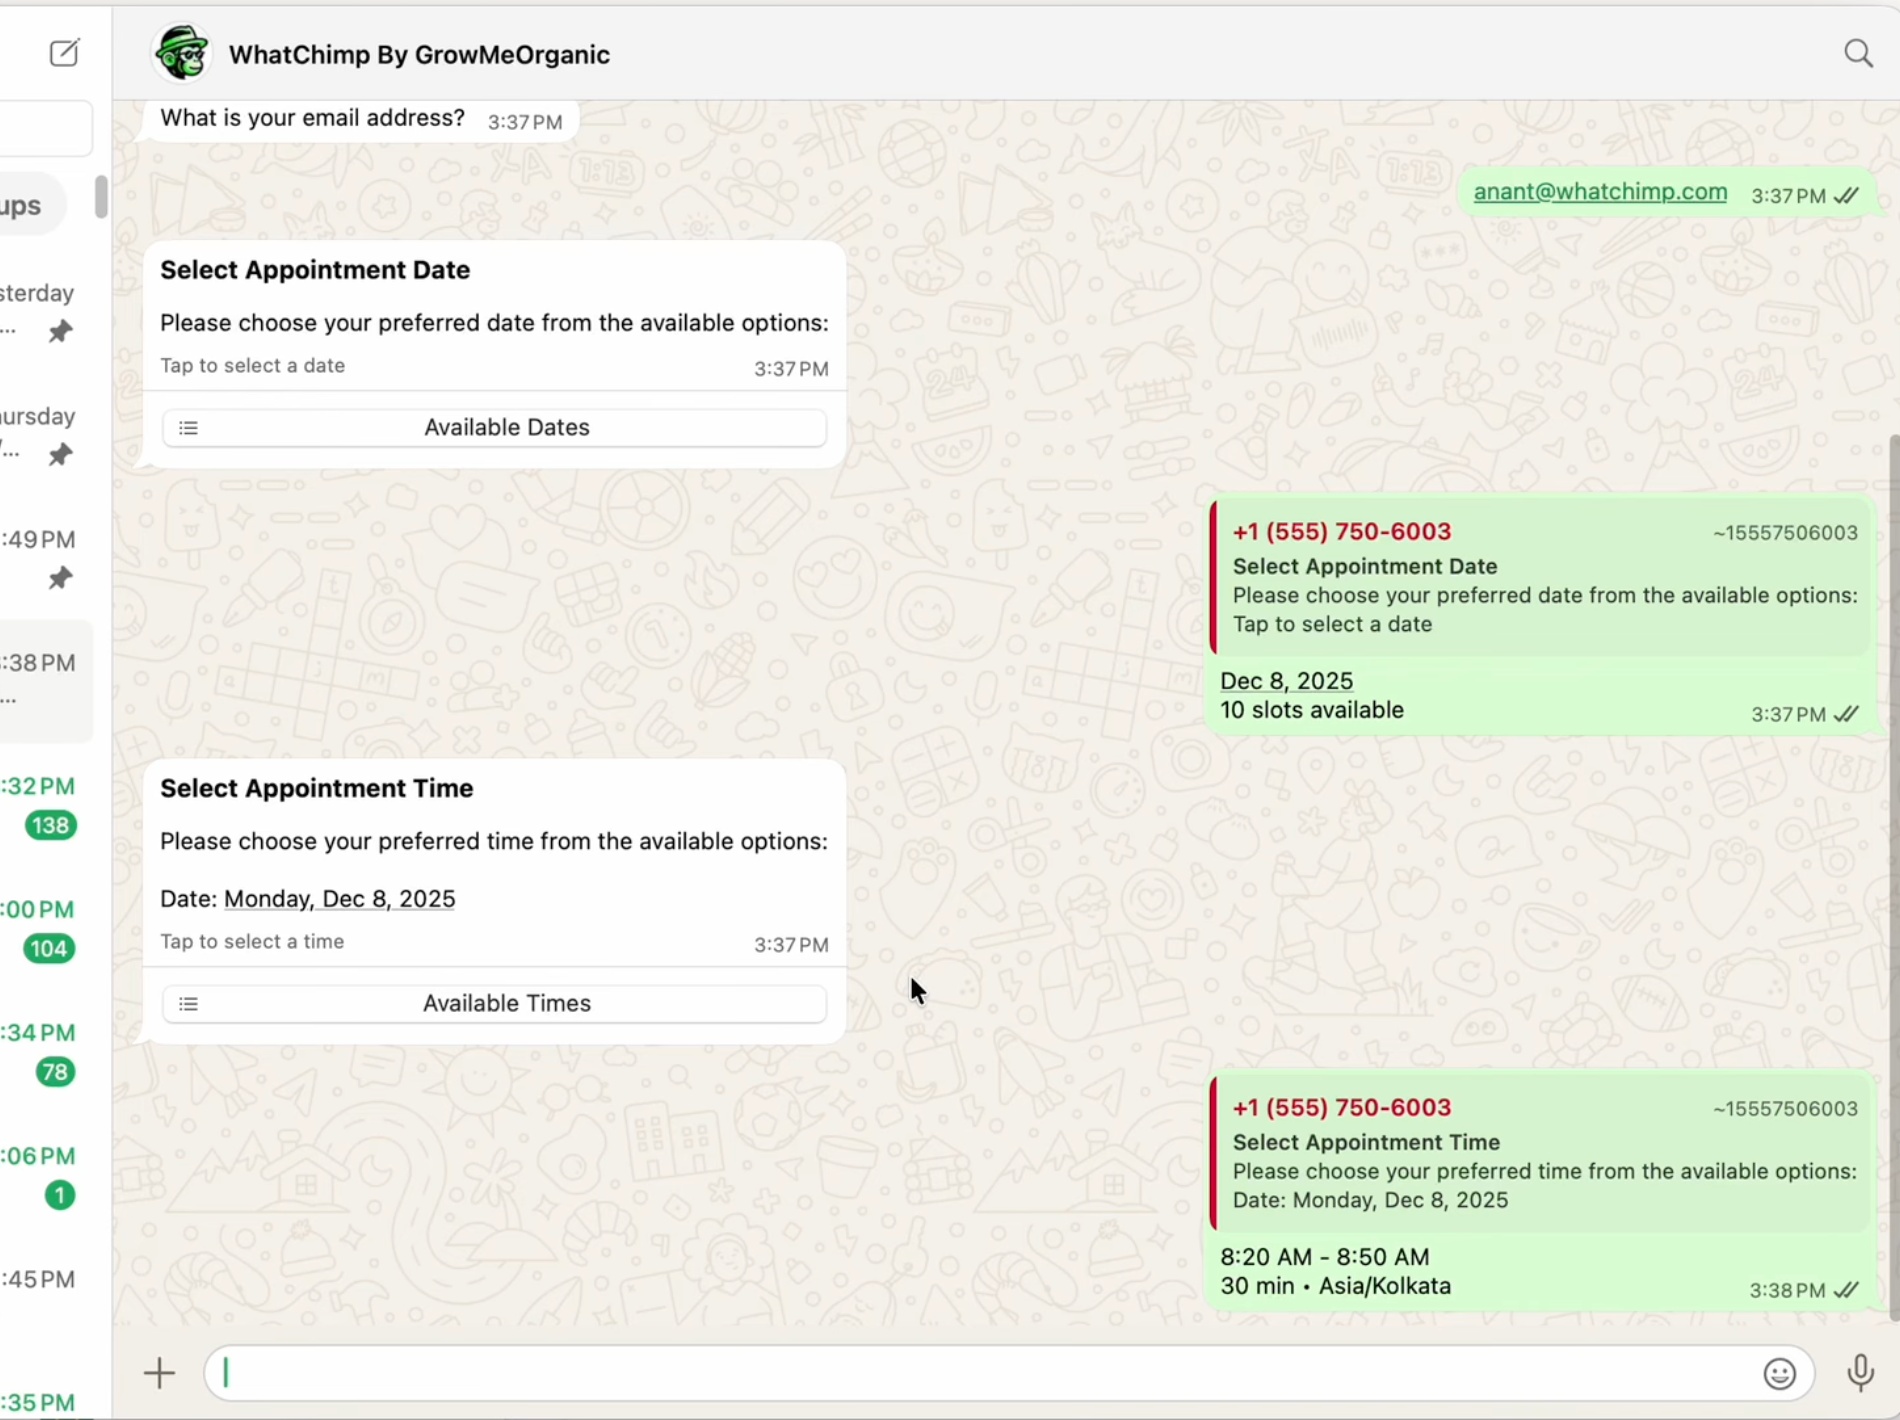 The customer chooses an available time slot
4. They confirm, and the booking is locked in. WhatChimp sends a confirmation with the booking details and a Google Meet link. If a slot is not confirmed in time, it is released so it does not block other people.
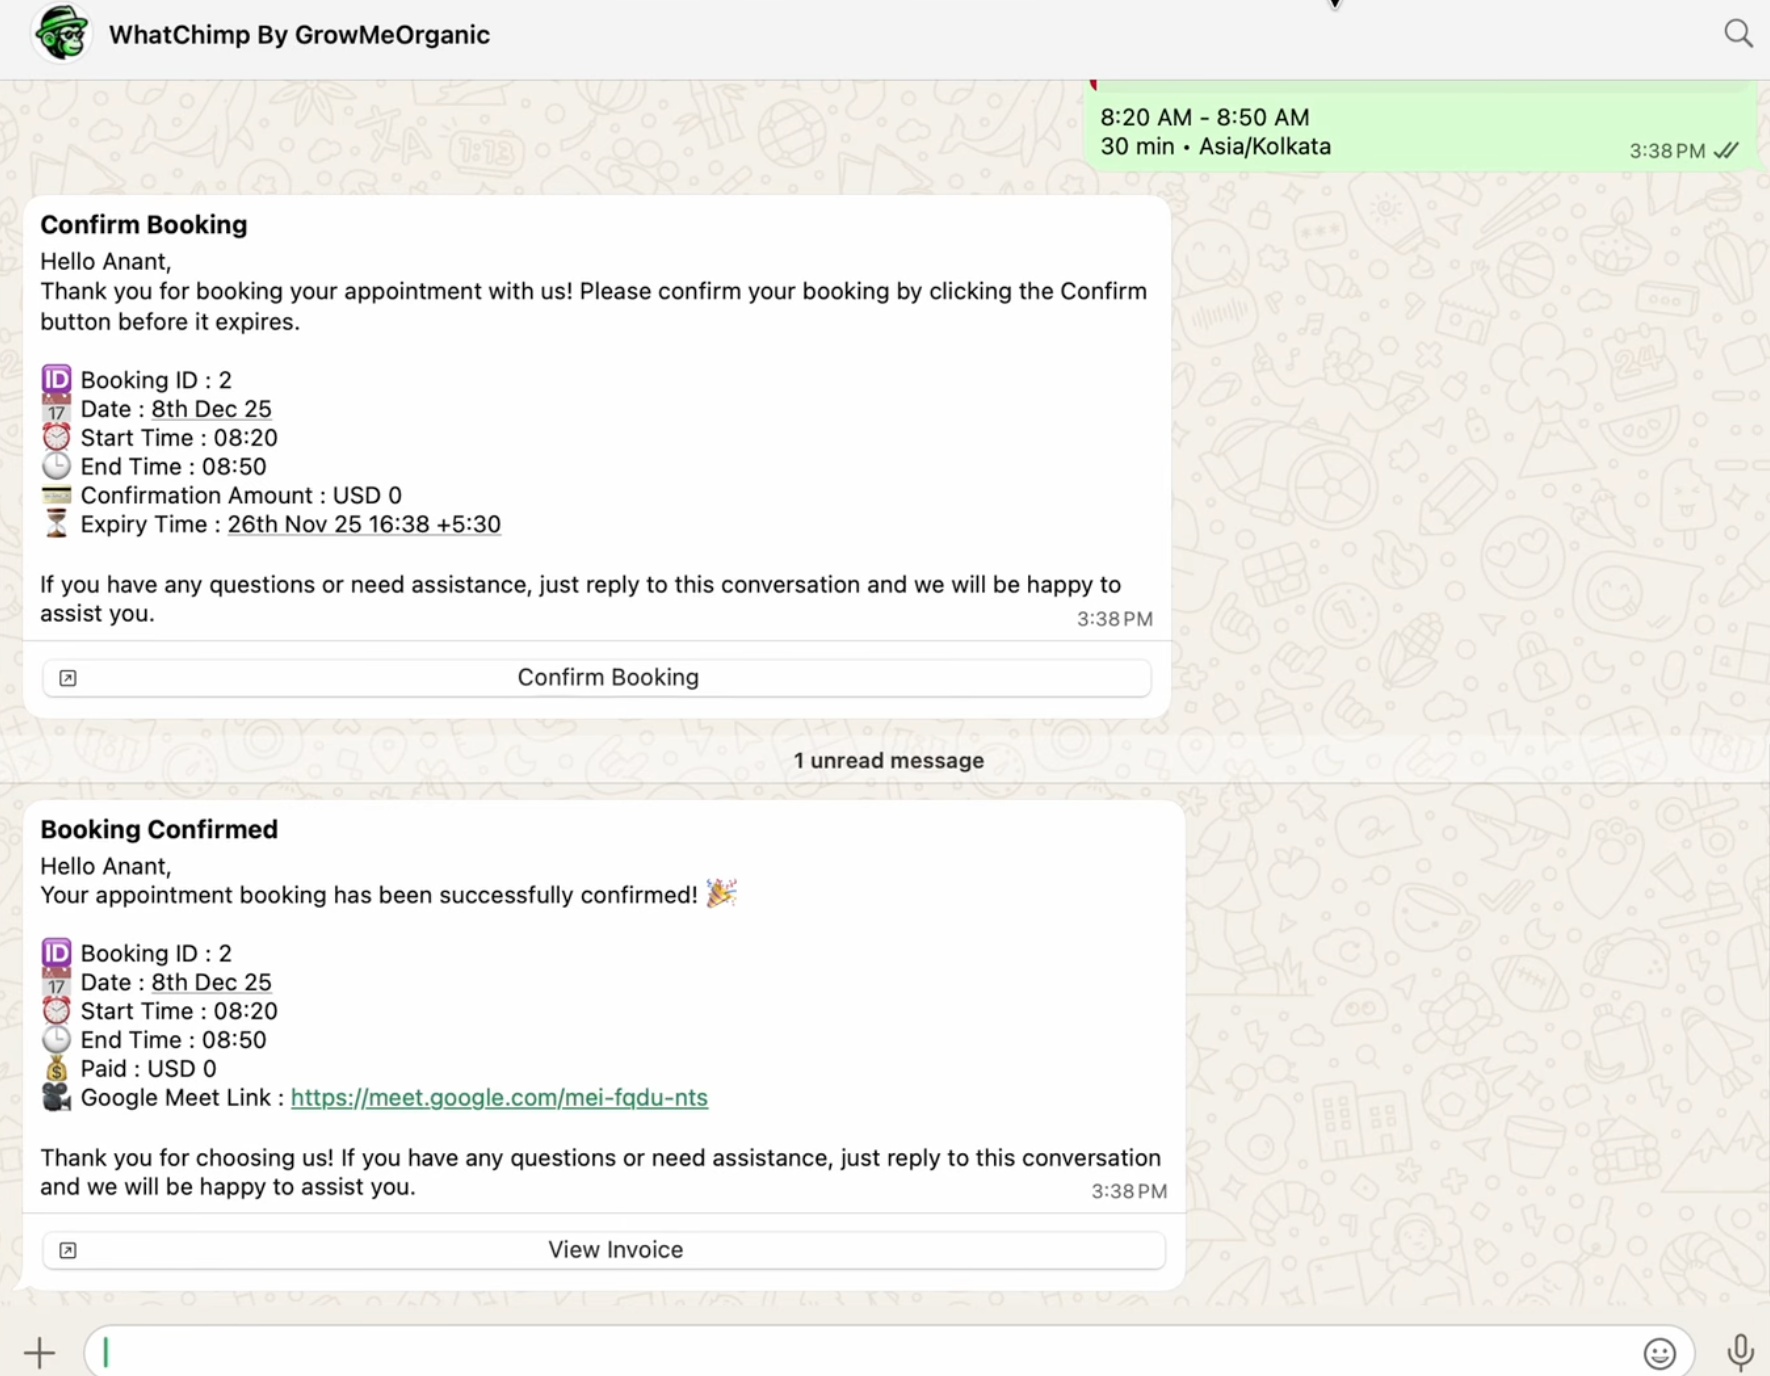 The customer confirms and receives the booking details and Meet link
5. The booking appears on Google Calendar. Both you and the customer get the event, with the Meet link and the guest added.
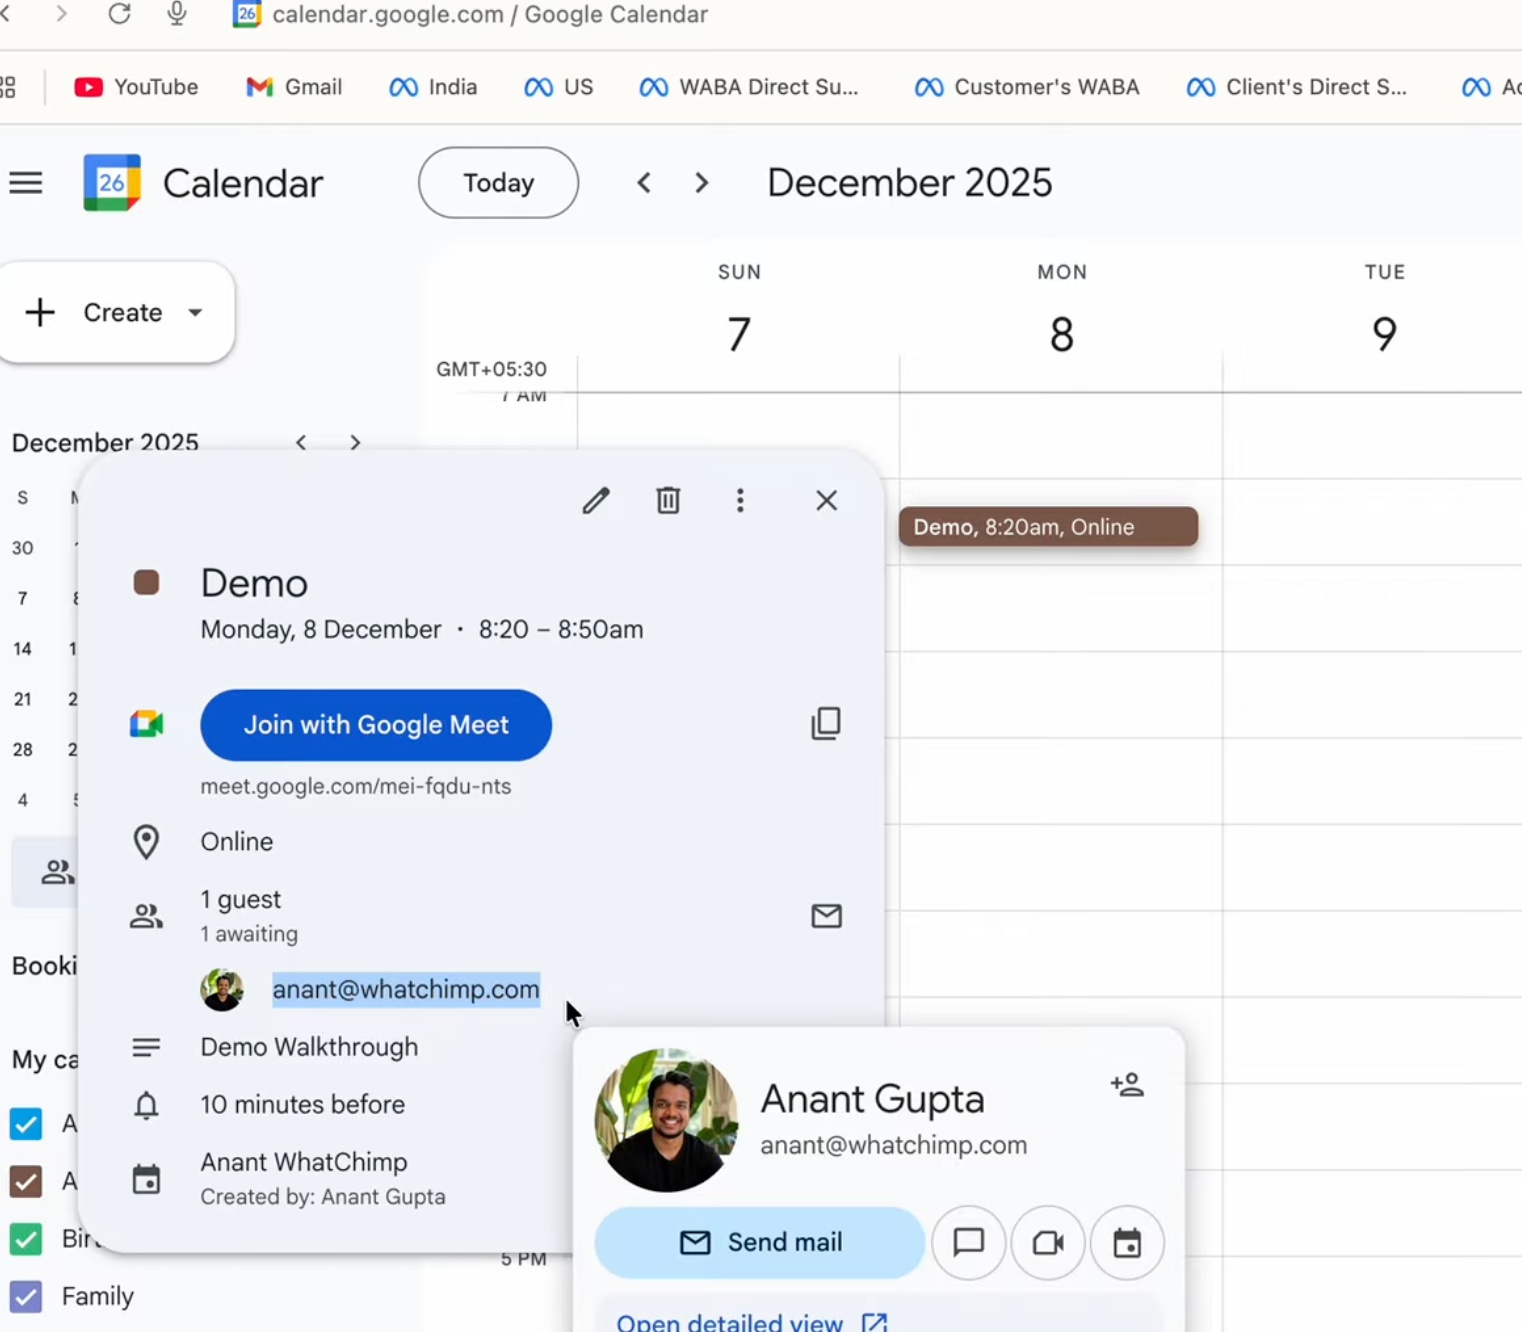 Every booking syncs to Google Calendar with a Meet link
6. They can view their invoice and booking status any time. Each booking has its own page with the invoice, the appointment details, and the payment status.
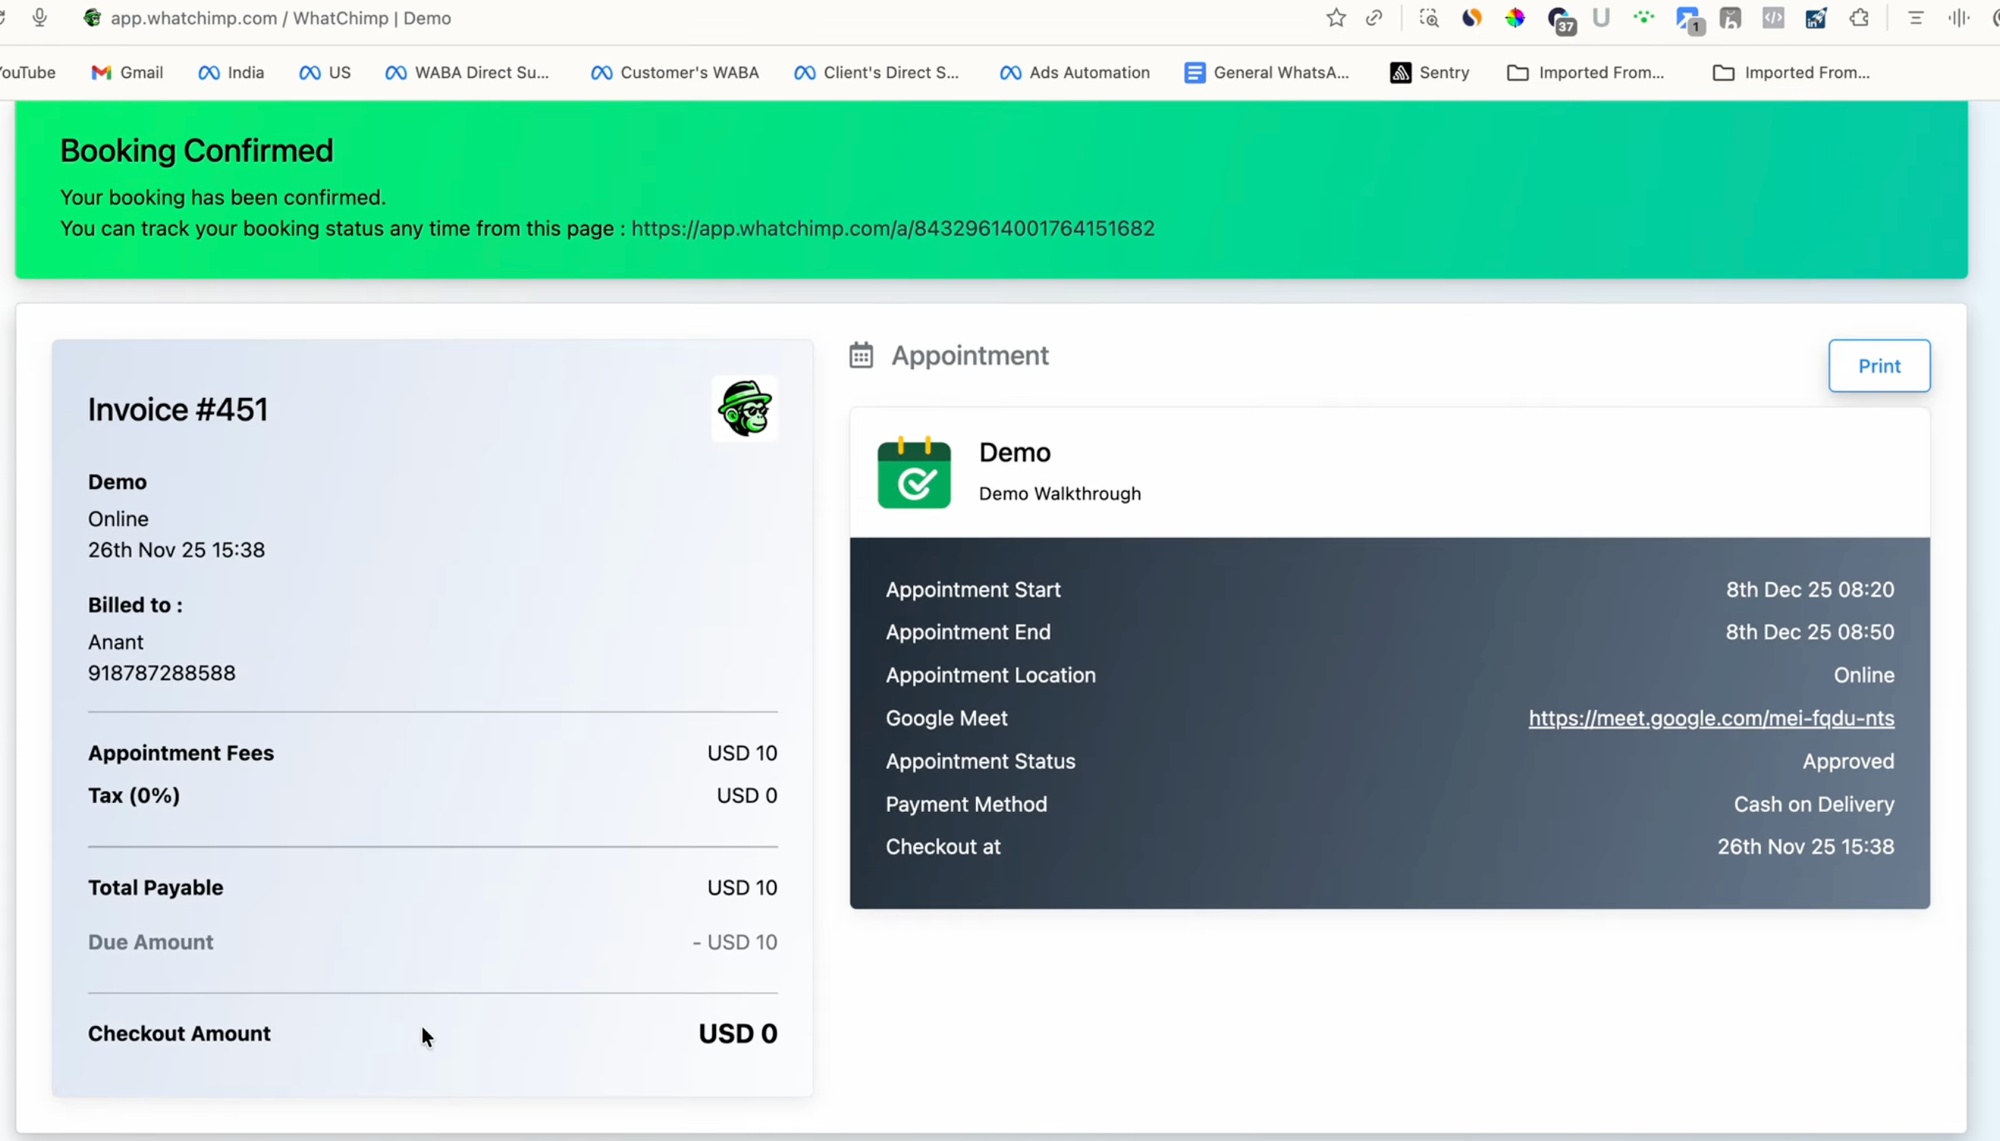 Customers can track the booking and view the invoice from a dedicated page
How it works behind the scenes
To run this, you set up three things in WhatChimp:
- Connect your Google account so bookings sync to Google Calendar and create Meet links.
- Create an appointment with your availability, duration, pricing, reminders, and the questions to ask.
- Trigger it from a chatbot so a keyword starts the booking flow.
The other articles in this category walk through each step.