How to Add a Webhook for Appointments
Send appointment booking events to an external URL with a webhook. Fire Order Submitted, Order Checkout, or Order Updated events to n8n, Zapier, or your own server.
Updated 18 June 2026
A webhook sends a booking's data to an external URL the moment something happens, so you can connect your appointments to other tools like n8n, Zapier, Make, or your own server. For example, push every new booking into a CRM or a custom workflow.
You add webhooks per appointment, so each appointment can fire to its own URLs.
Step 1: Open the appointment's webhook panel
- In the left sidebar, open Appointment.
- In the Appointment Manager, find your appointment and look at the Actions column.
- Click the webhook icon (the plug).
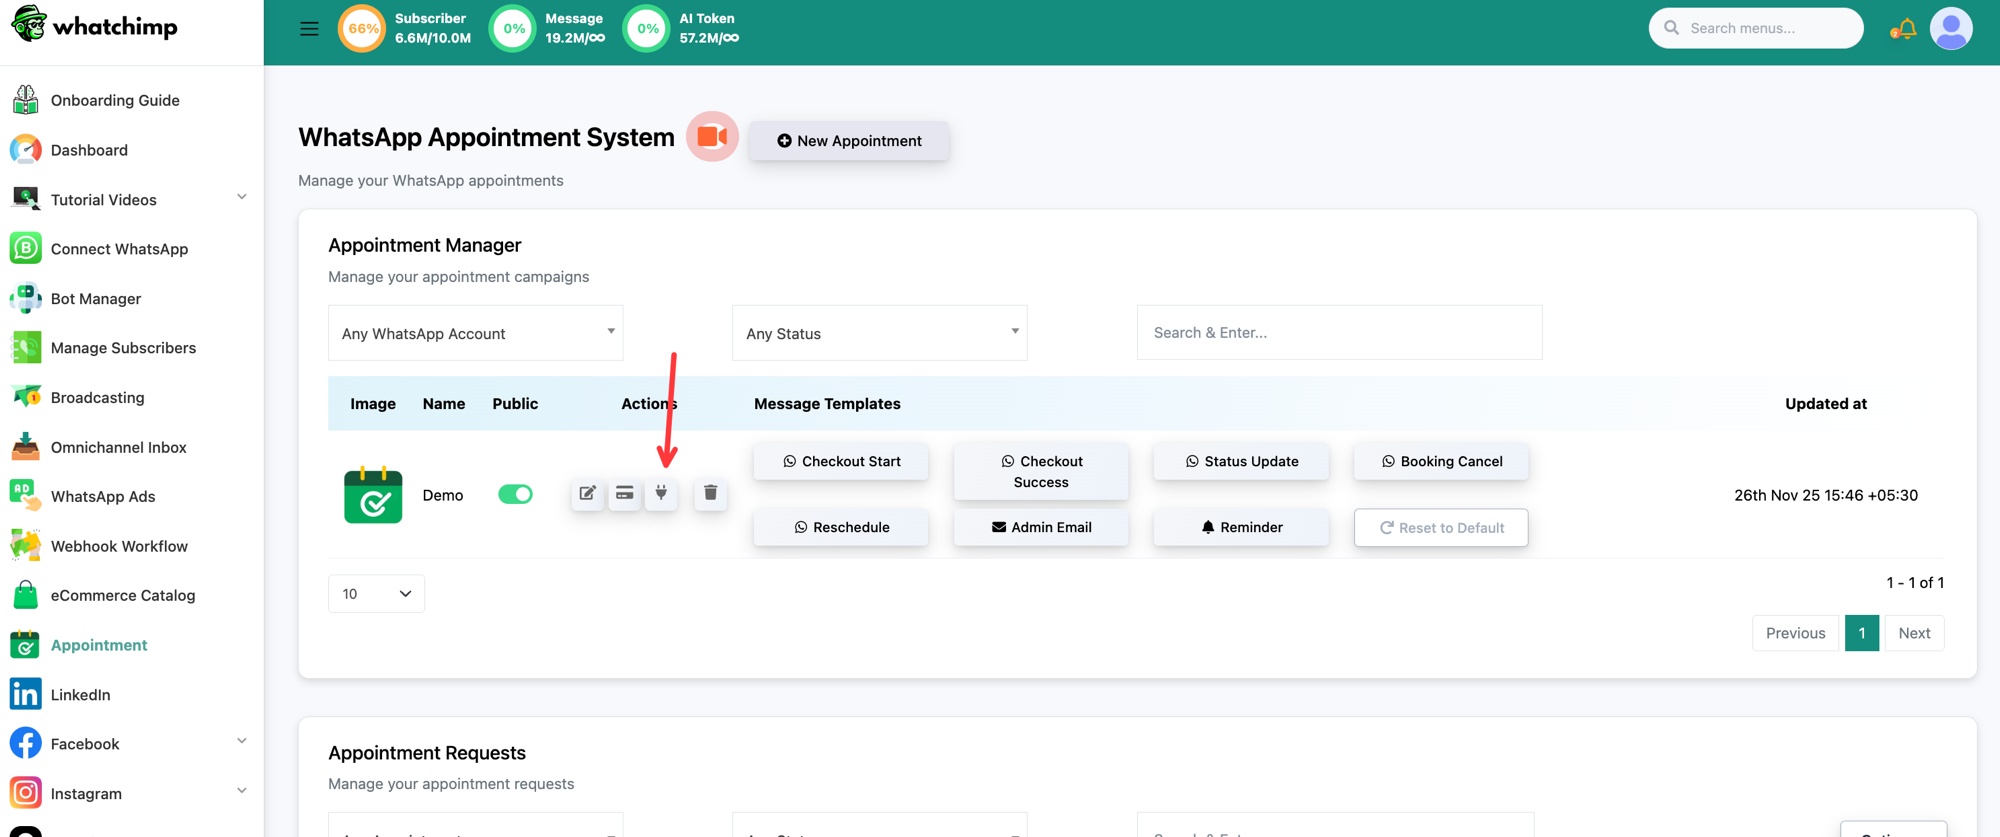 Click the webhook icon on your appointment
The Appointment Webhook panel opens and lists any webhooks you have already added.
Step 2: Add a new webhook
Click New to open the form.
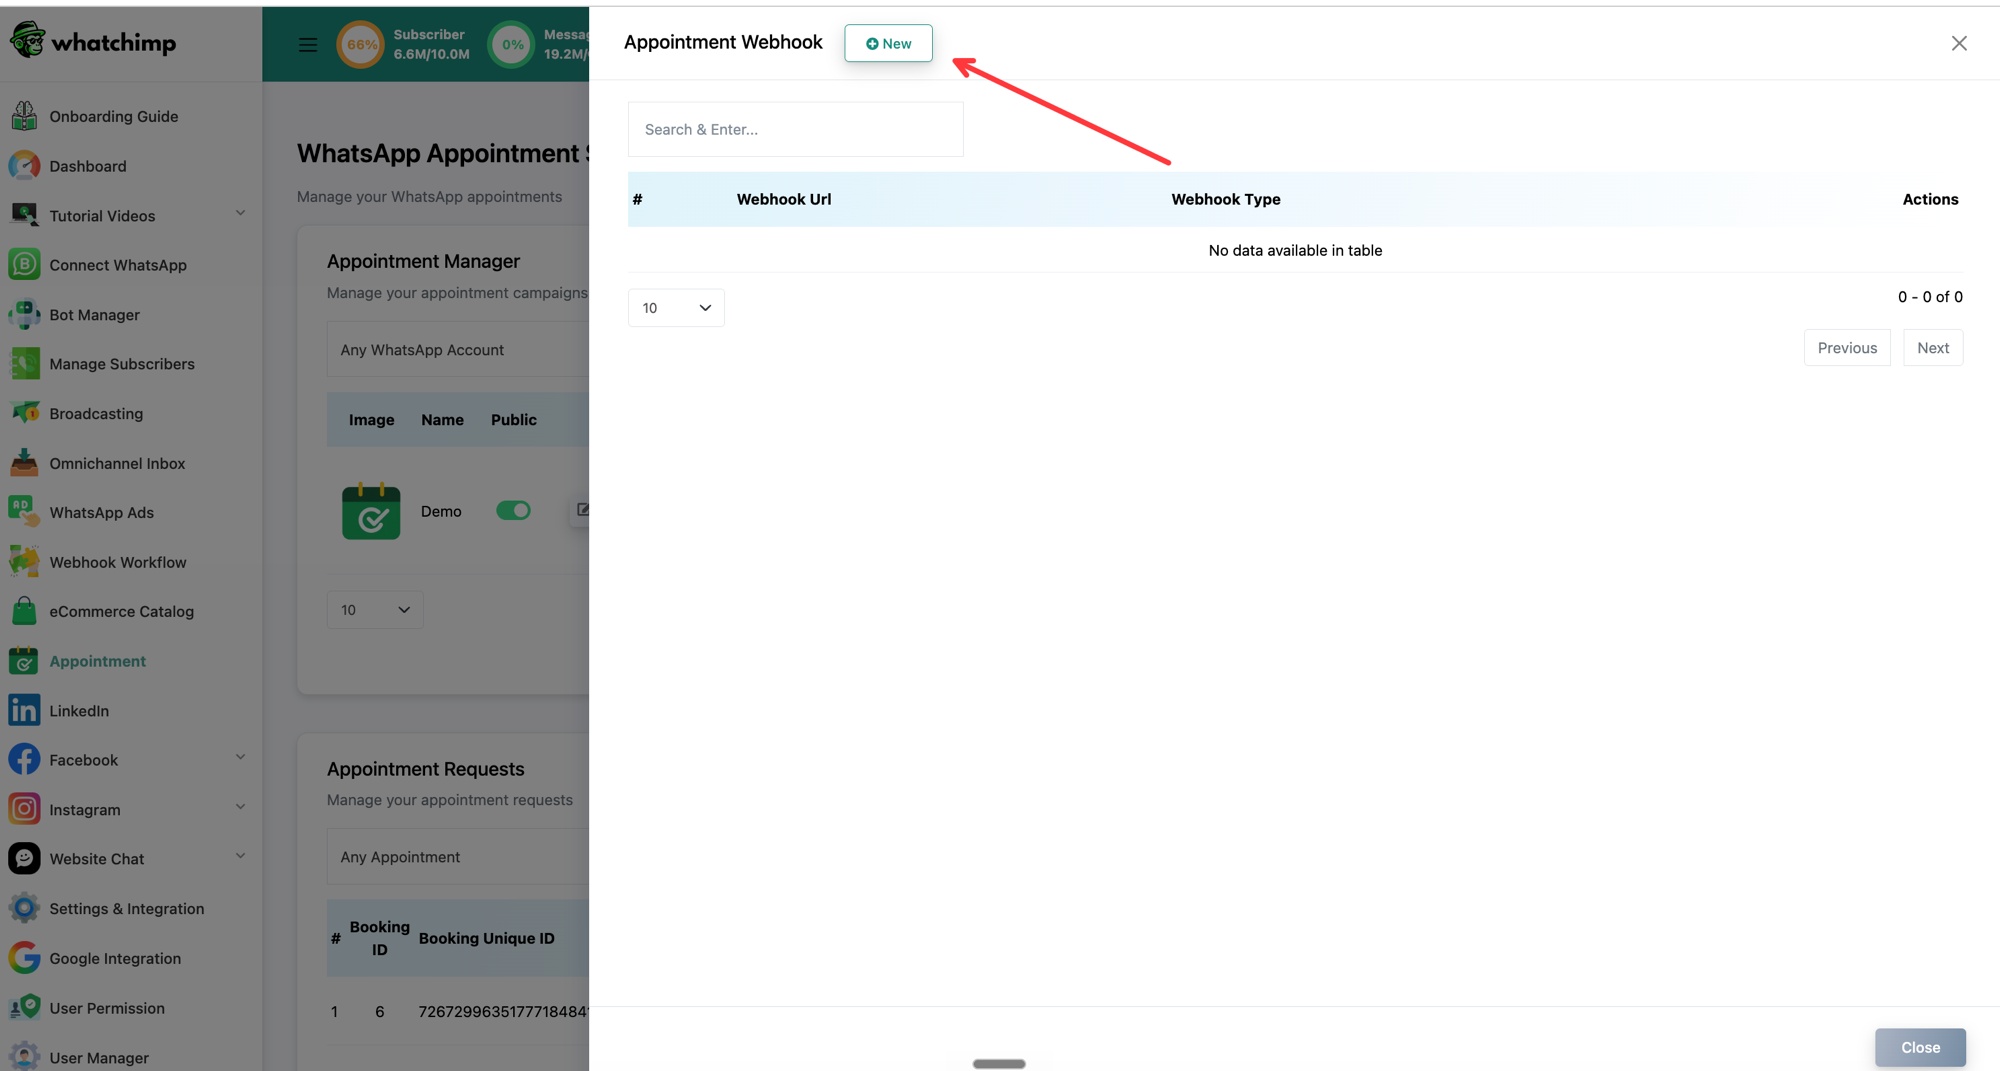 Click New to add a webhook
Step 3: Choose the event and the URL
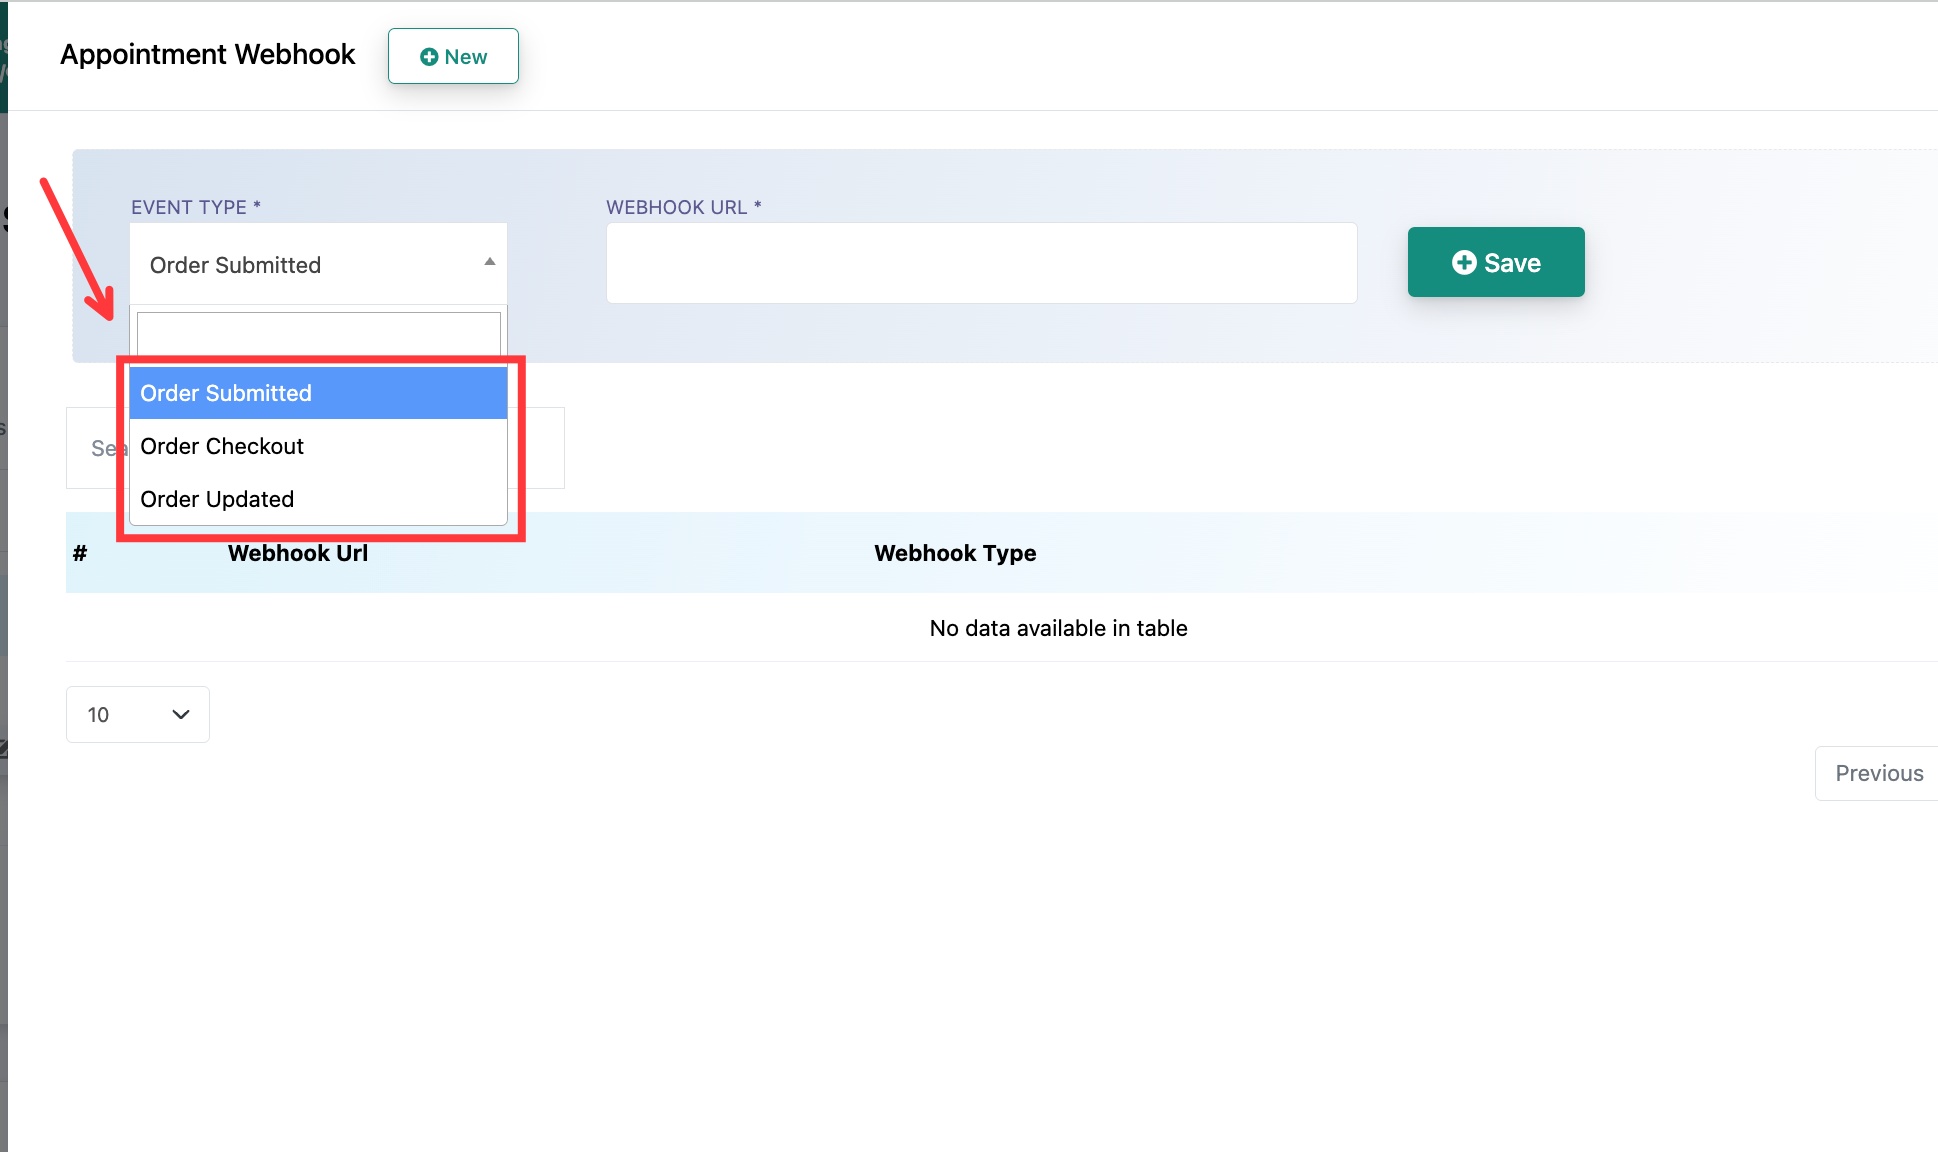 Pick the event that should fire the webhook
- Event Type: choose when the webhook should fire.
- Order Submitted: when a customer submits a booking.
- Order Checkout: when the customer reaches checkout, for a paid appointment.
- Order Updated: when a booking changes, for example a reschedule or a status update.
- Webhook URL: paste the URL that should receive the data, for example your n8n, Zapier, or server endpoint.
- Click Save.
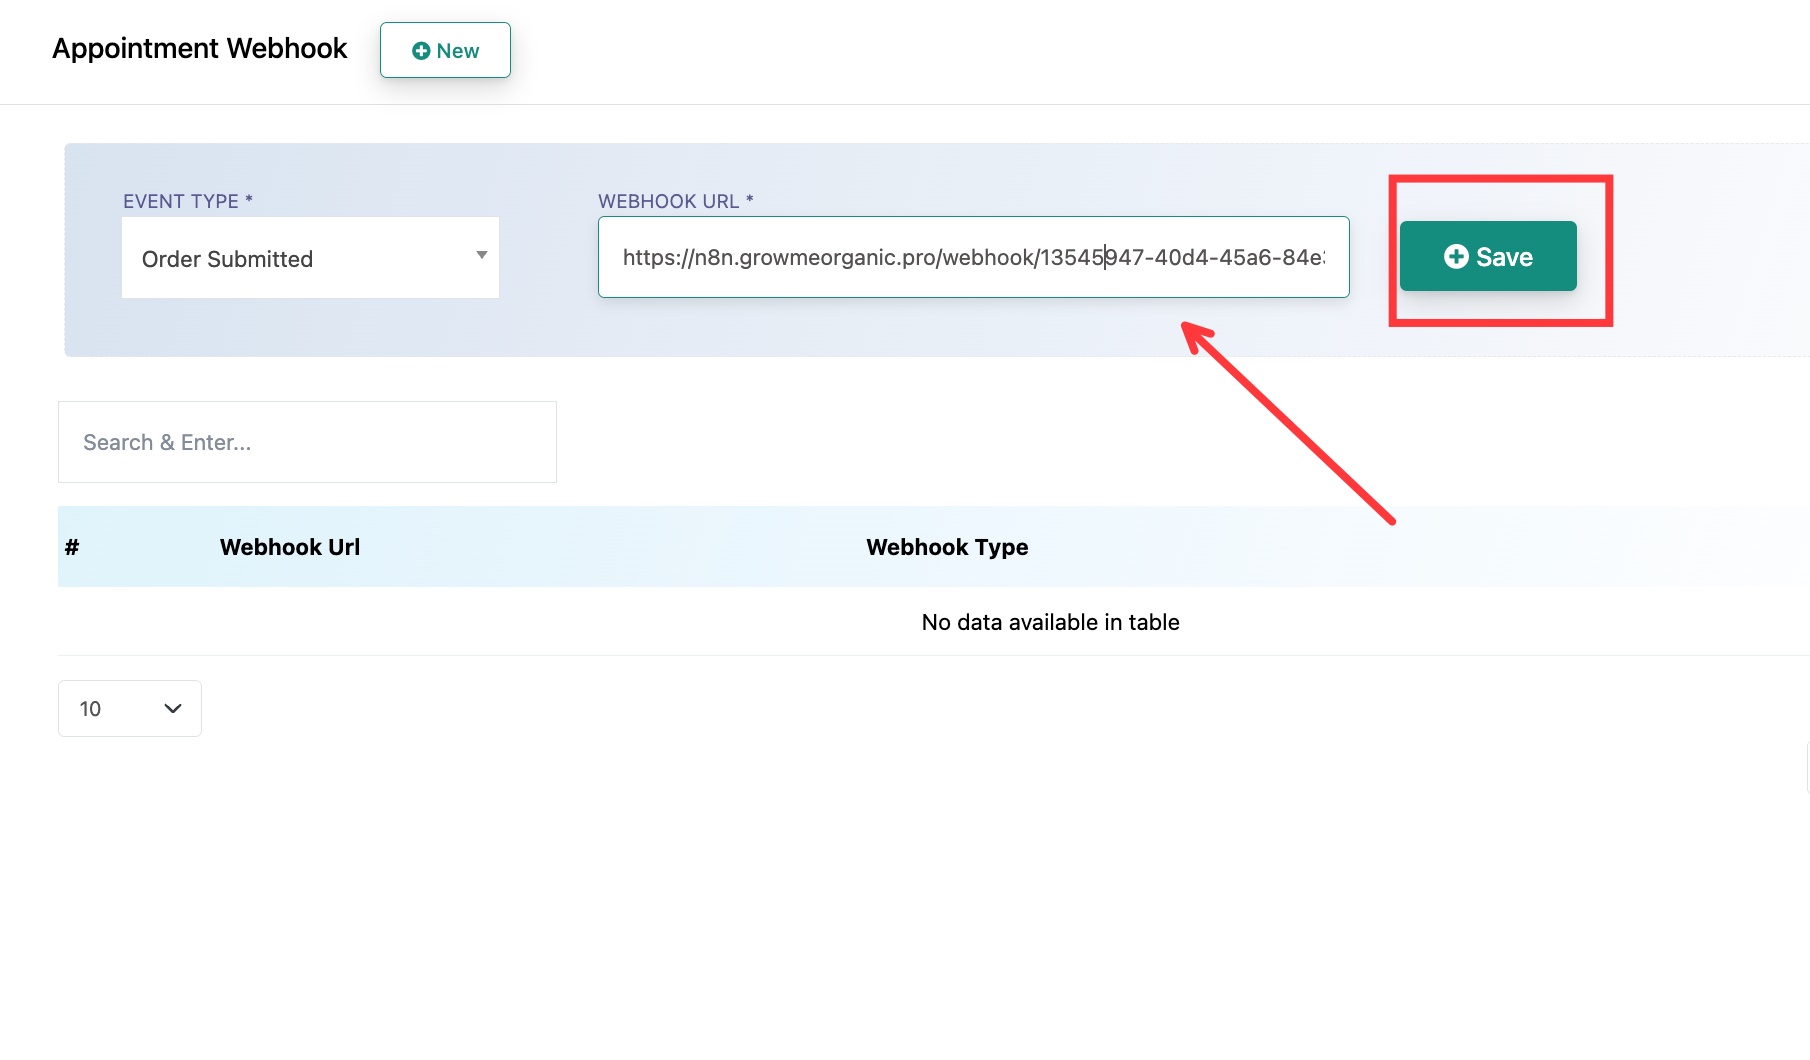 Enter the URL and click Save
Your webhook now appears in the list. WhatChimp sends the booking data to that URL every time the chosen event happens. Add more webhooks to send different events to different URLs.