How to Customize Appointment Booking Messages
Rewrite the WhatsApp messages WhatChimp sends for a booking: the confirmation, booking confirmed, reschedule, reminders, and more, using your own copy and variables.
Updated 18 June 2026
Every appointment comes with a set of message templates that WhatChimp sends at each stage of a booking. The defaults work right away, but you can rewrite any of them in your own words and personalize them with the customer's name and booking details.
The appointment message templates
Open Appointment and find your appointment in the Appointment Manager. The Message Templates column has a button for each message:
- Checkout Start: the confirmation message that asks the customer to confirm their booking, with the Confirm button.
- Checkout Success: the "booking confirmed" message sent after they confirm, with the Meet link and invoice.
- Status Update: sent when a booking's status changes.
- Booking Cancel: sent when a booking is cancelled.
- Reschedule: sent when a booking is rescheduled.
- Admin Email: the email notification sent to you when a booking happens.
- Reminder: the reminder sent before the appointment.
- Reset to Default: restores all of these messages to their original wording.
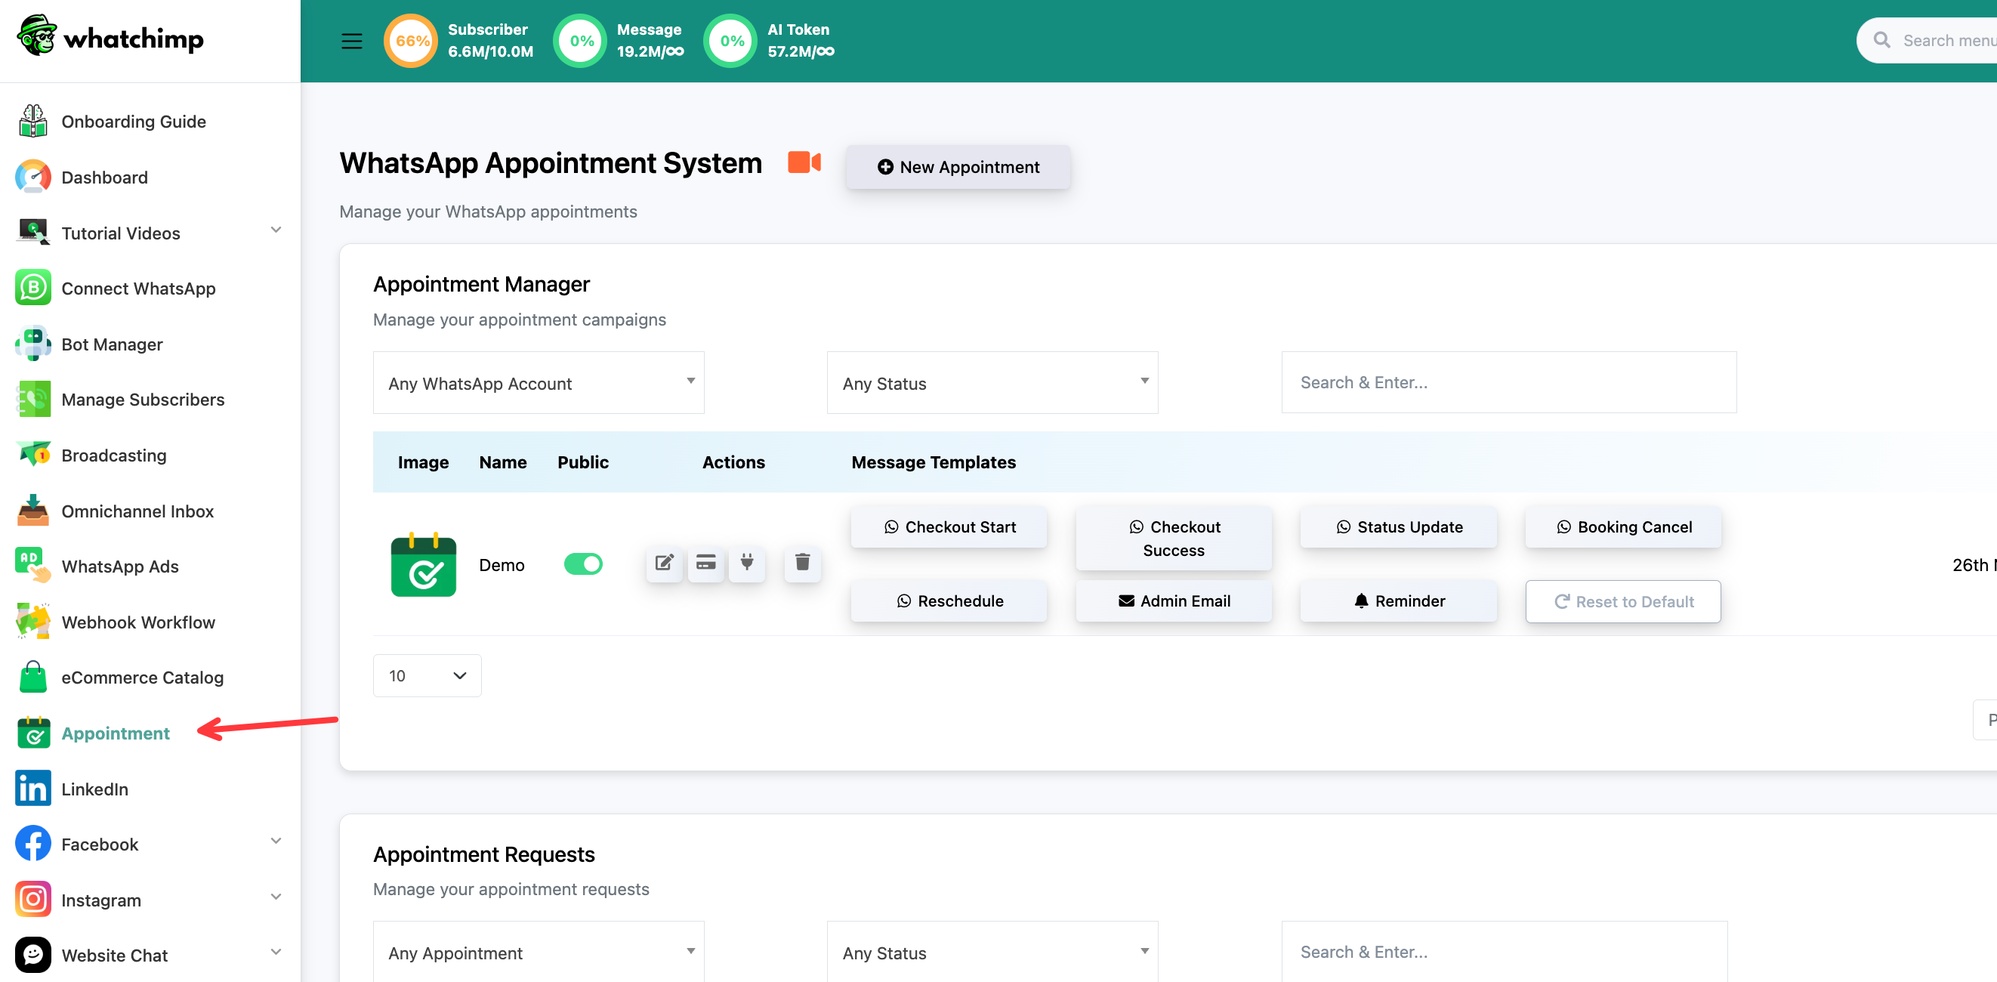 Each button opens an editable message
How to edit a message
Editing any of these works the same way:
- Click the message template button you want to change.
- It opens in the Flow Builder. Click the CTA URL Button message node to edit it.
- In Configure CTA URL Button, change the Body Message (the main text shown above the button). You can also edit the optional Header Message and Footer Message.
- Click Save Changes, then Save the flow.
The examples below show this for three common messages.
Example: the booking confirmation (Checkout Start)
Click Checkout Start, then click the CTA URL Button node ("Confirm Booking").
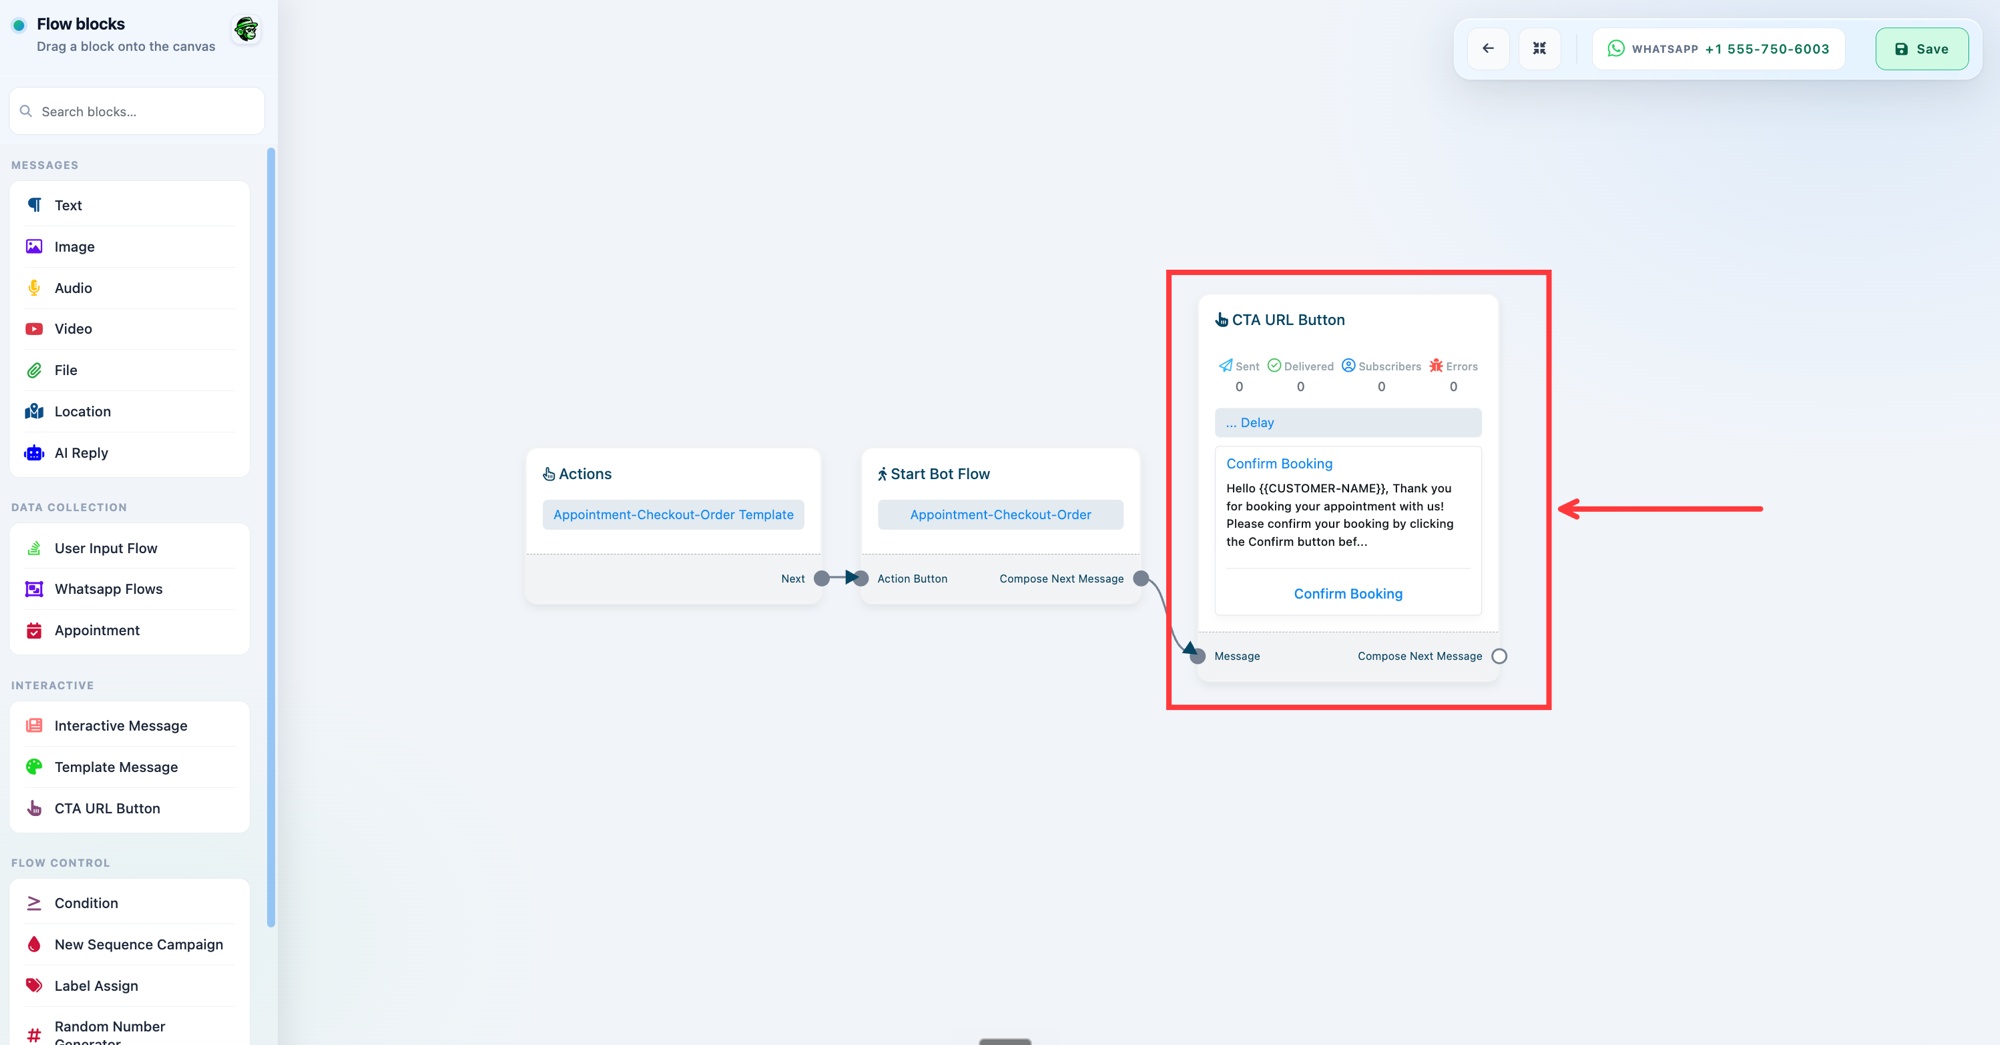 The booking confirmation message node
Edit the Body Message to your own copy.
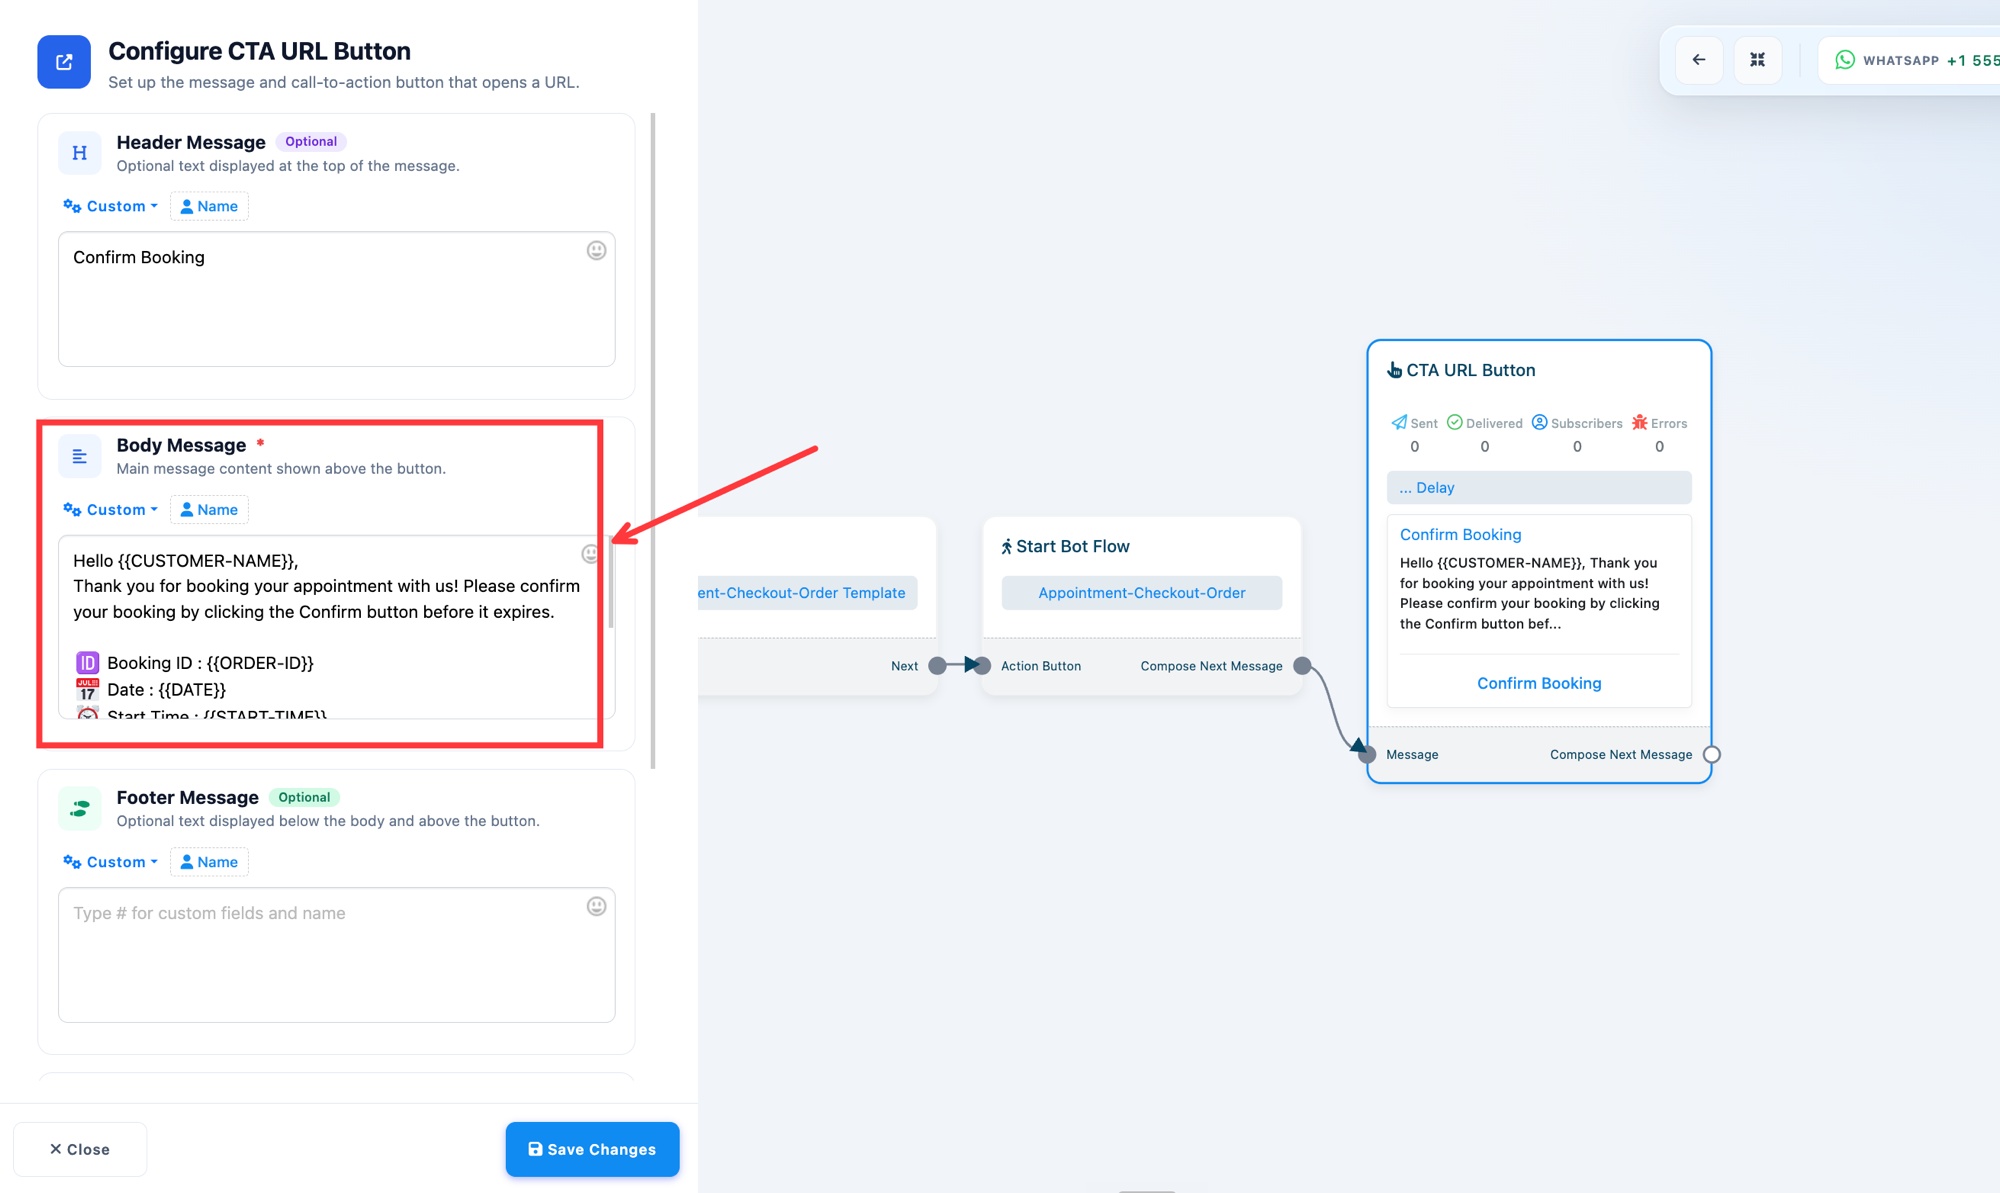 Change the confirmation wording here
Example: the booking confirmed message (Checkout Success)
Click Checkout Success, then click the CTA URL Button node ("Booking Confirmed").
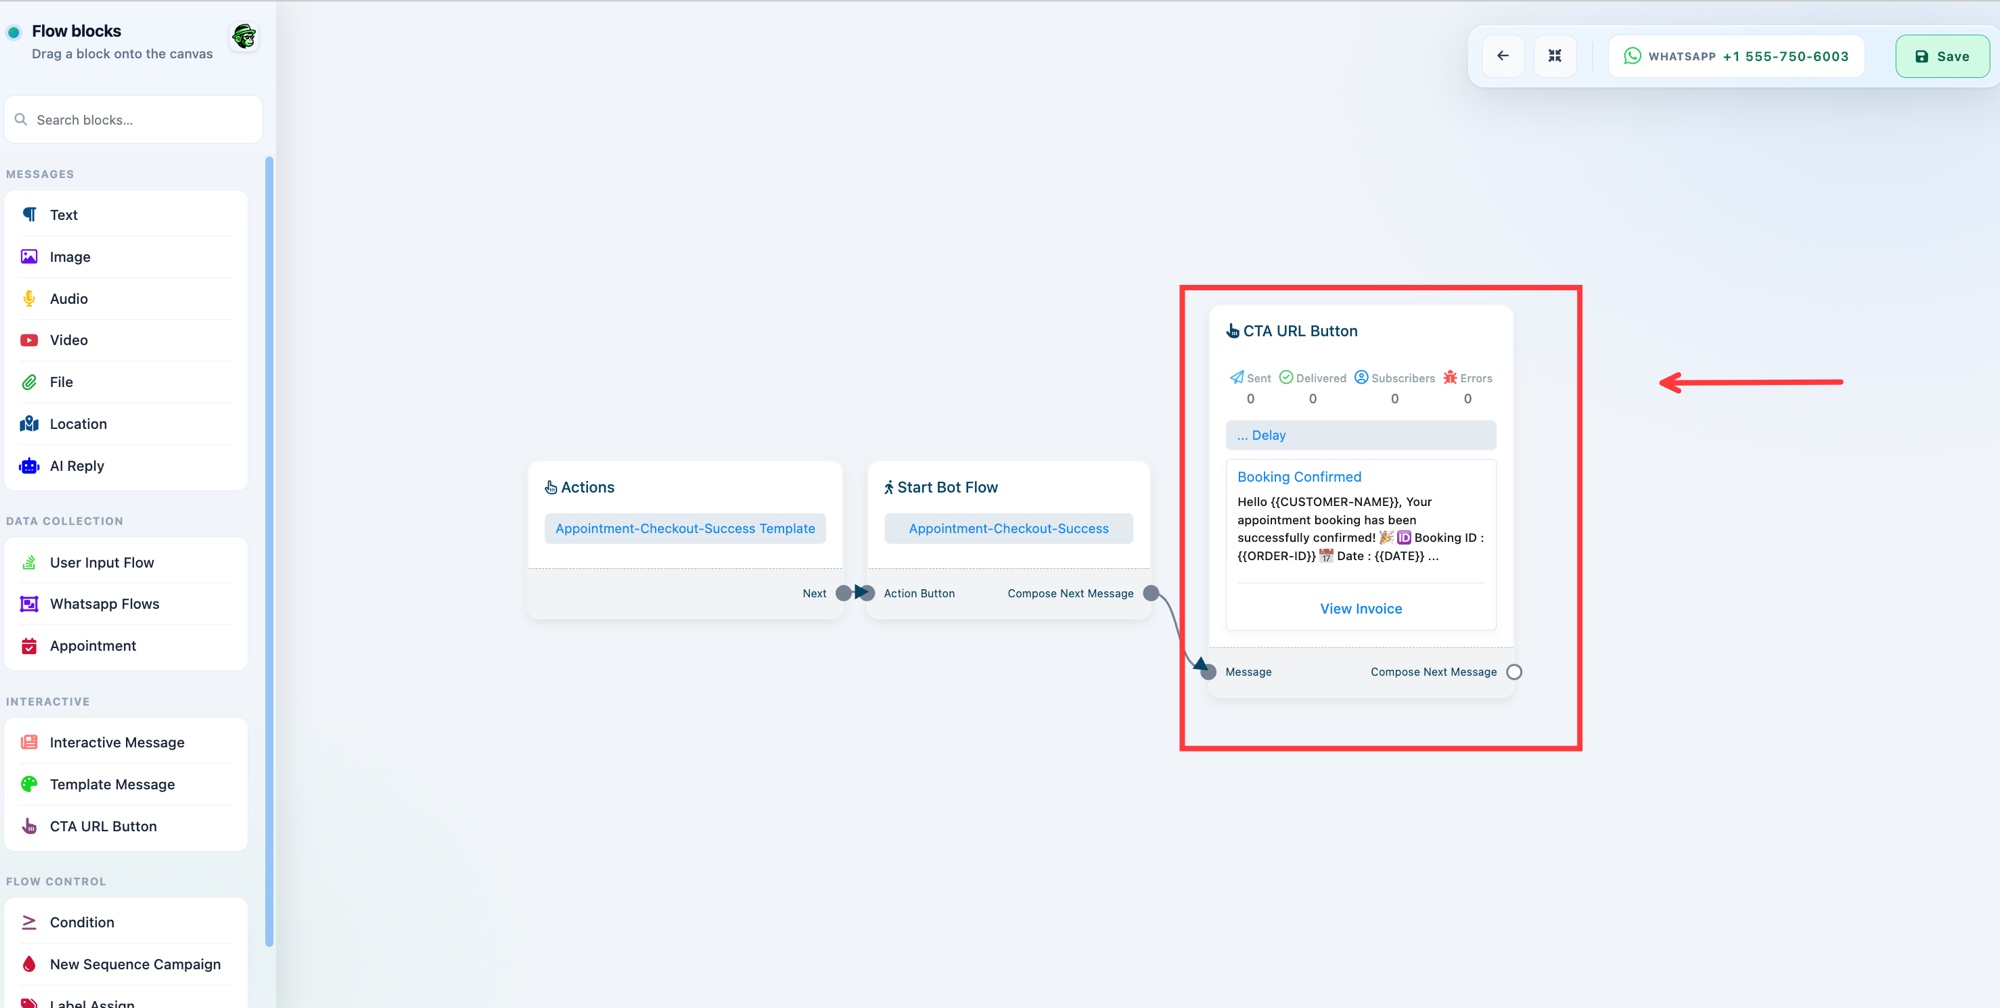 The booking confirmed message node
Edit the Body Message.
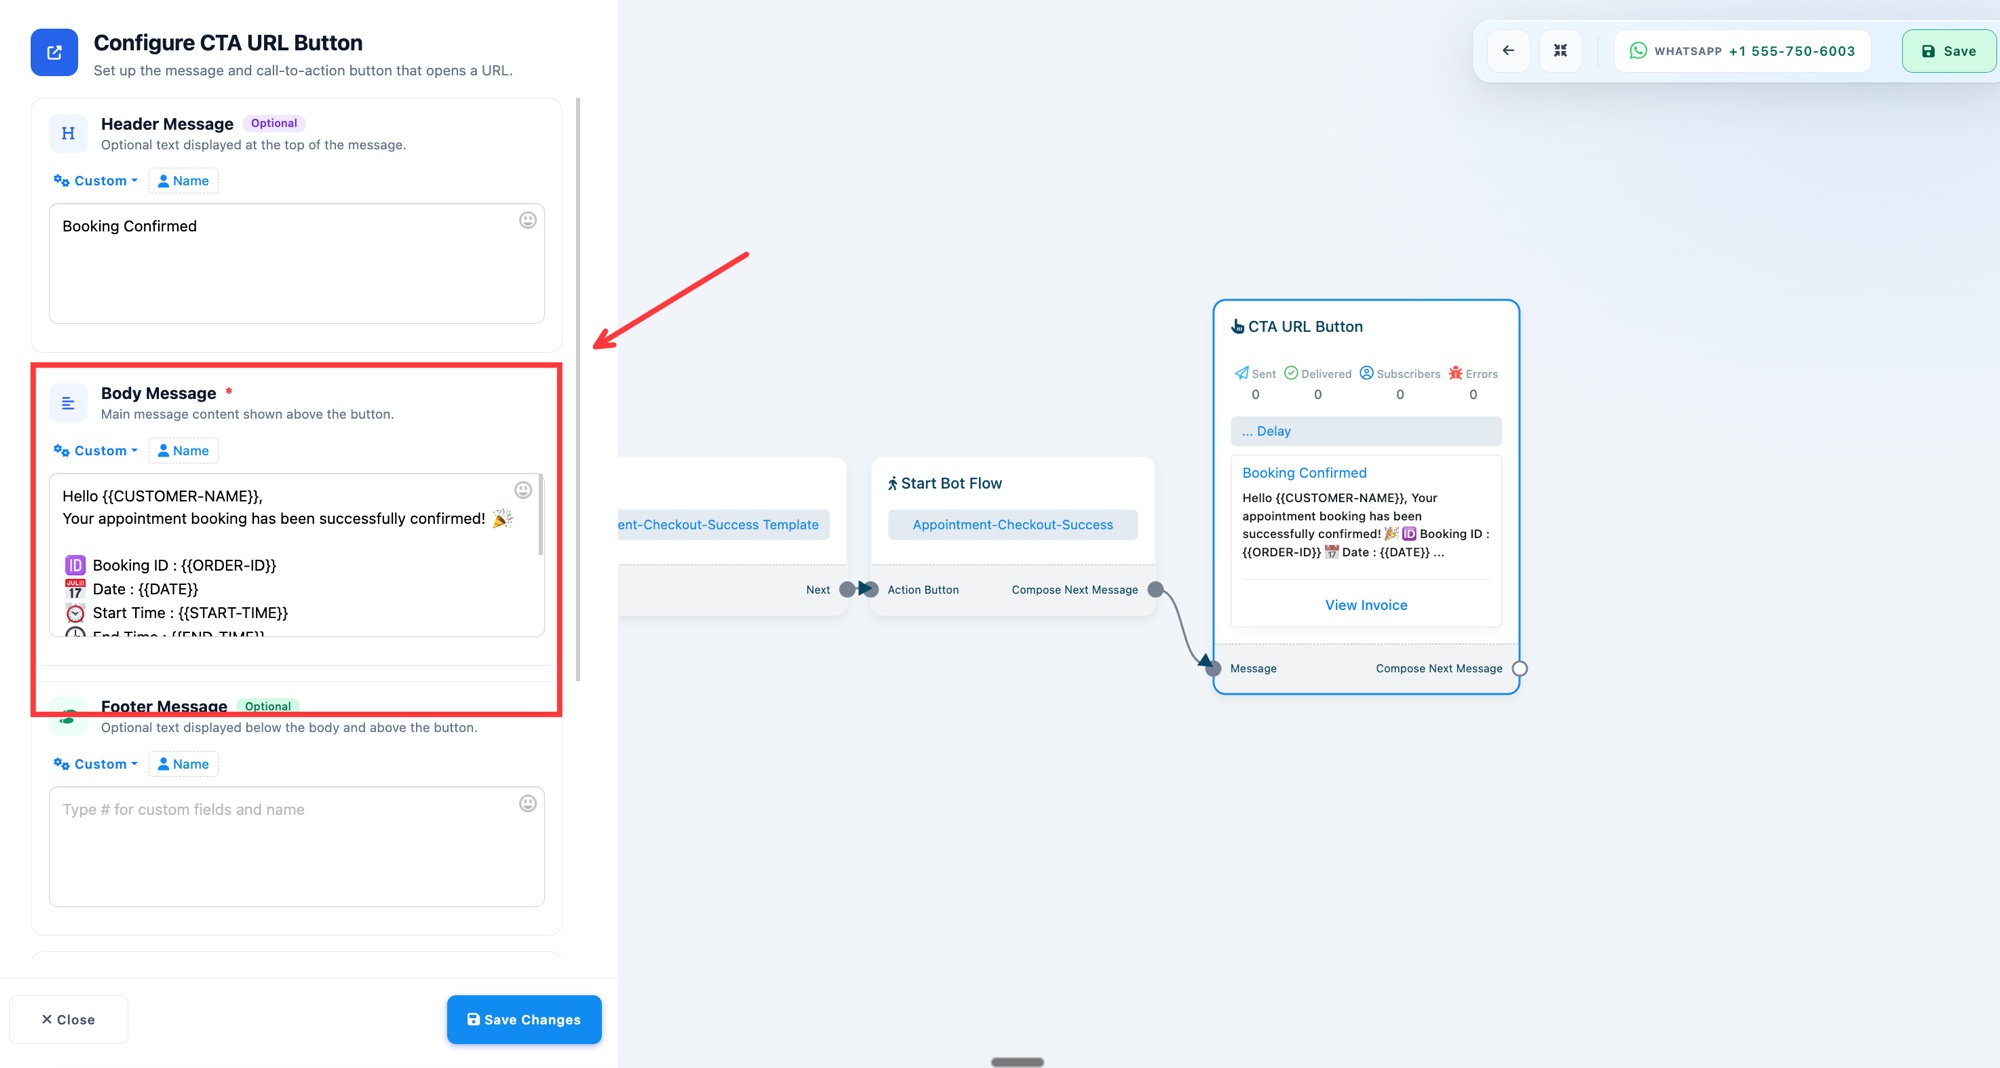 Change the booking confirmed wording here
Example: the reschedule message
Click Reschedule, then click the CTA URL Button node ("Reschedule Appointment").
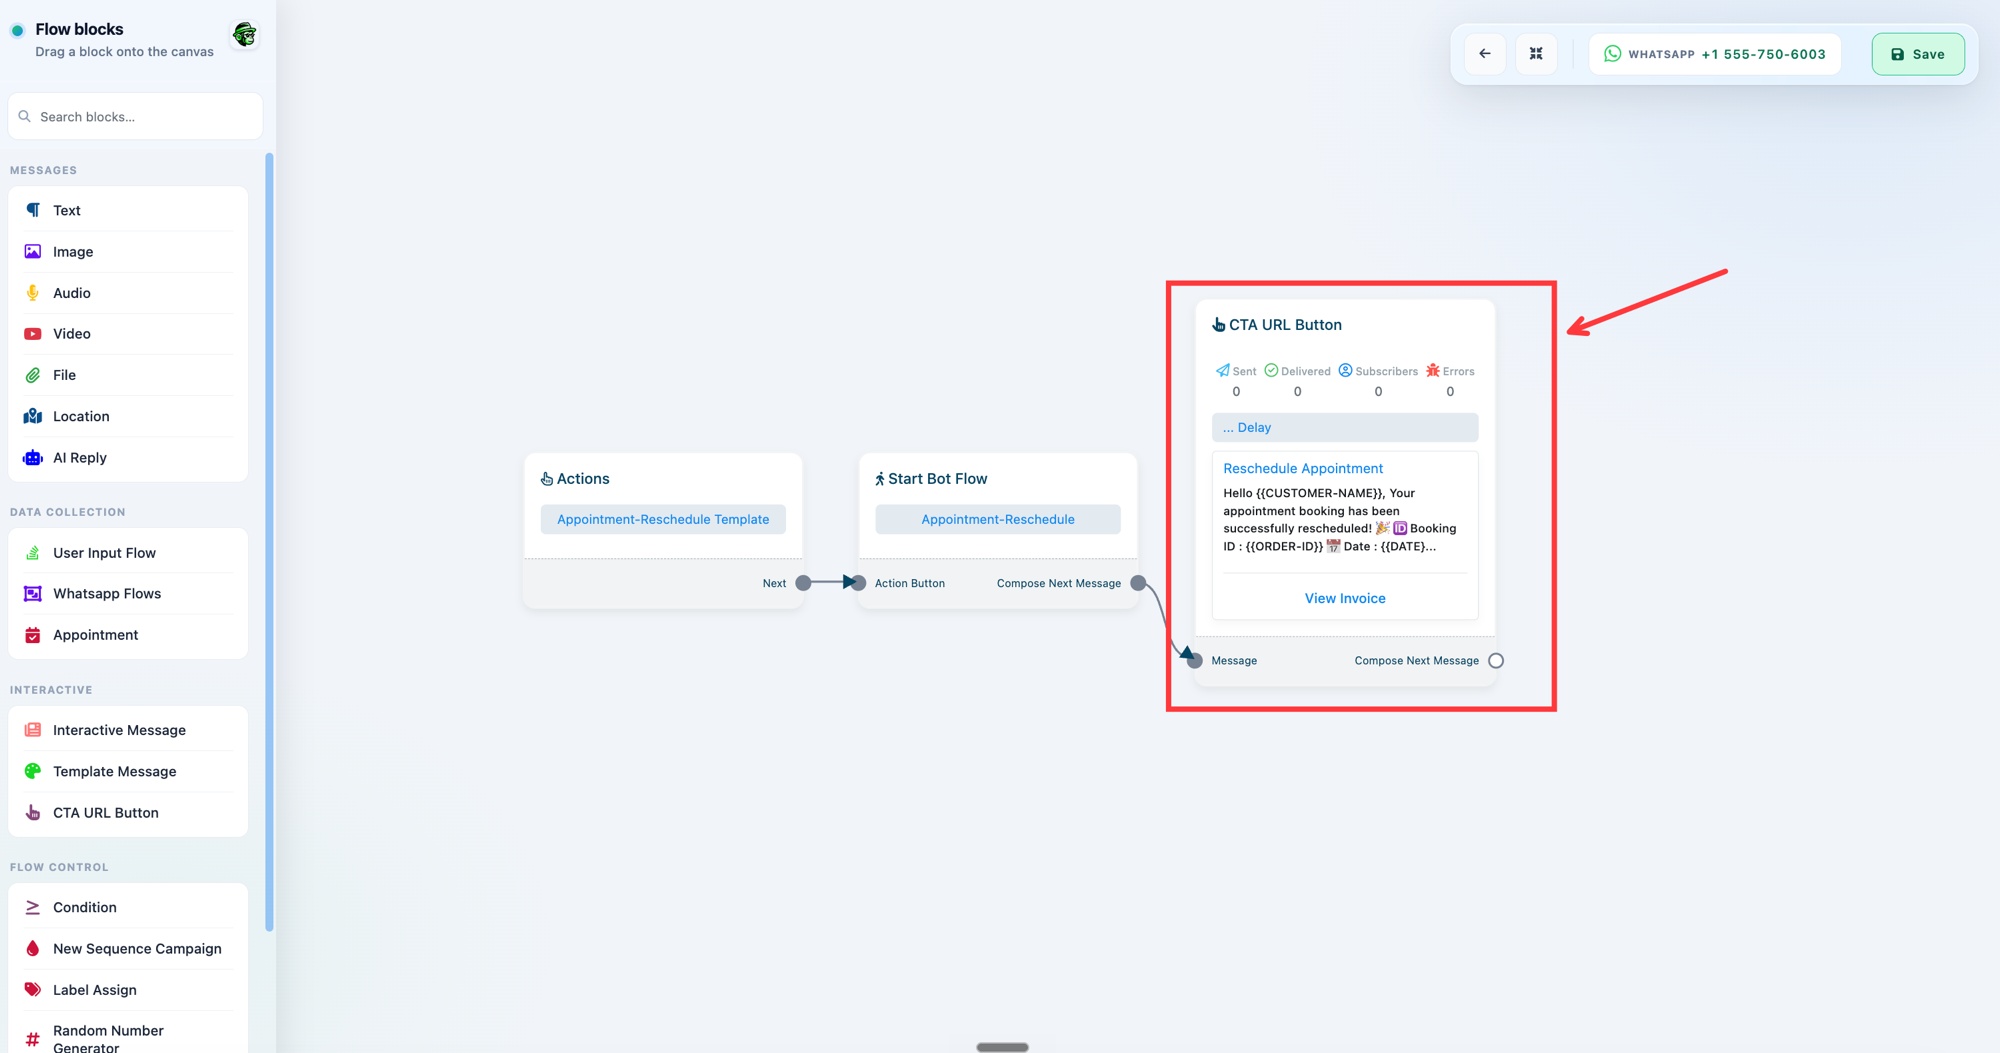 The reschedule message node
Edit the Body Message.
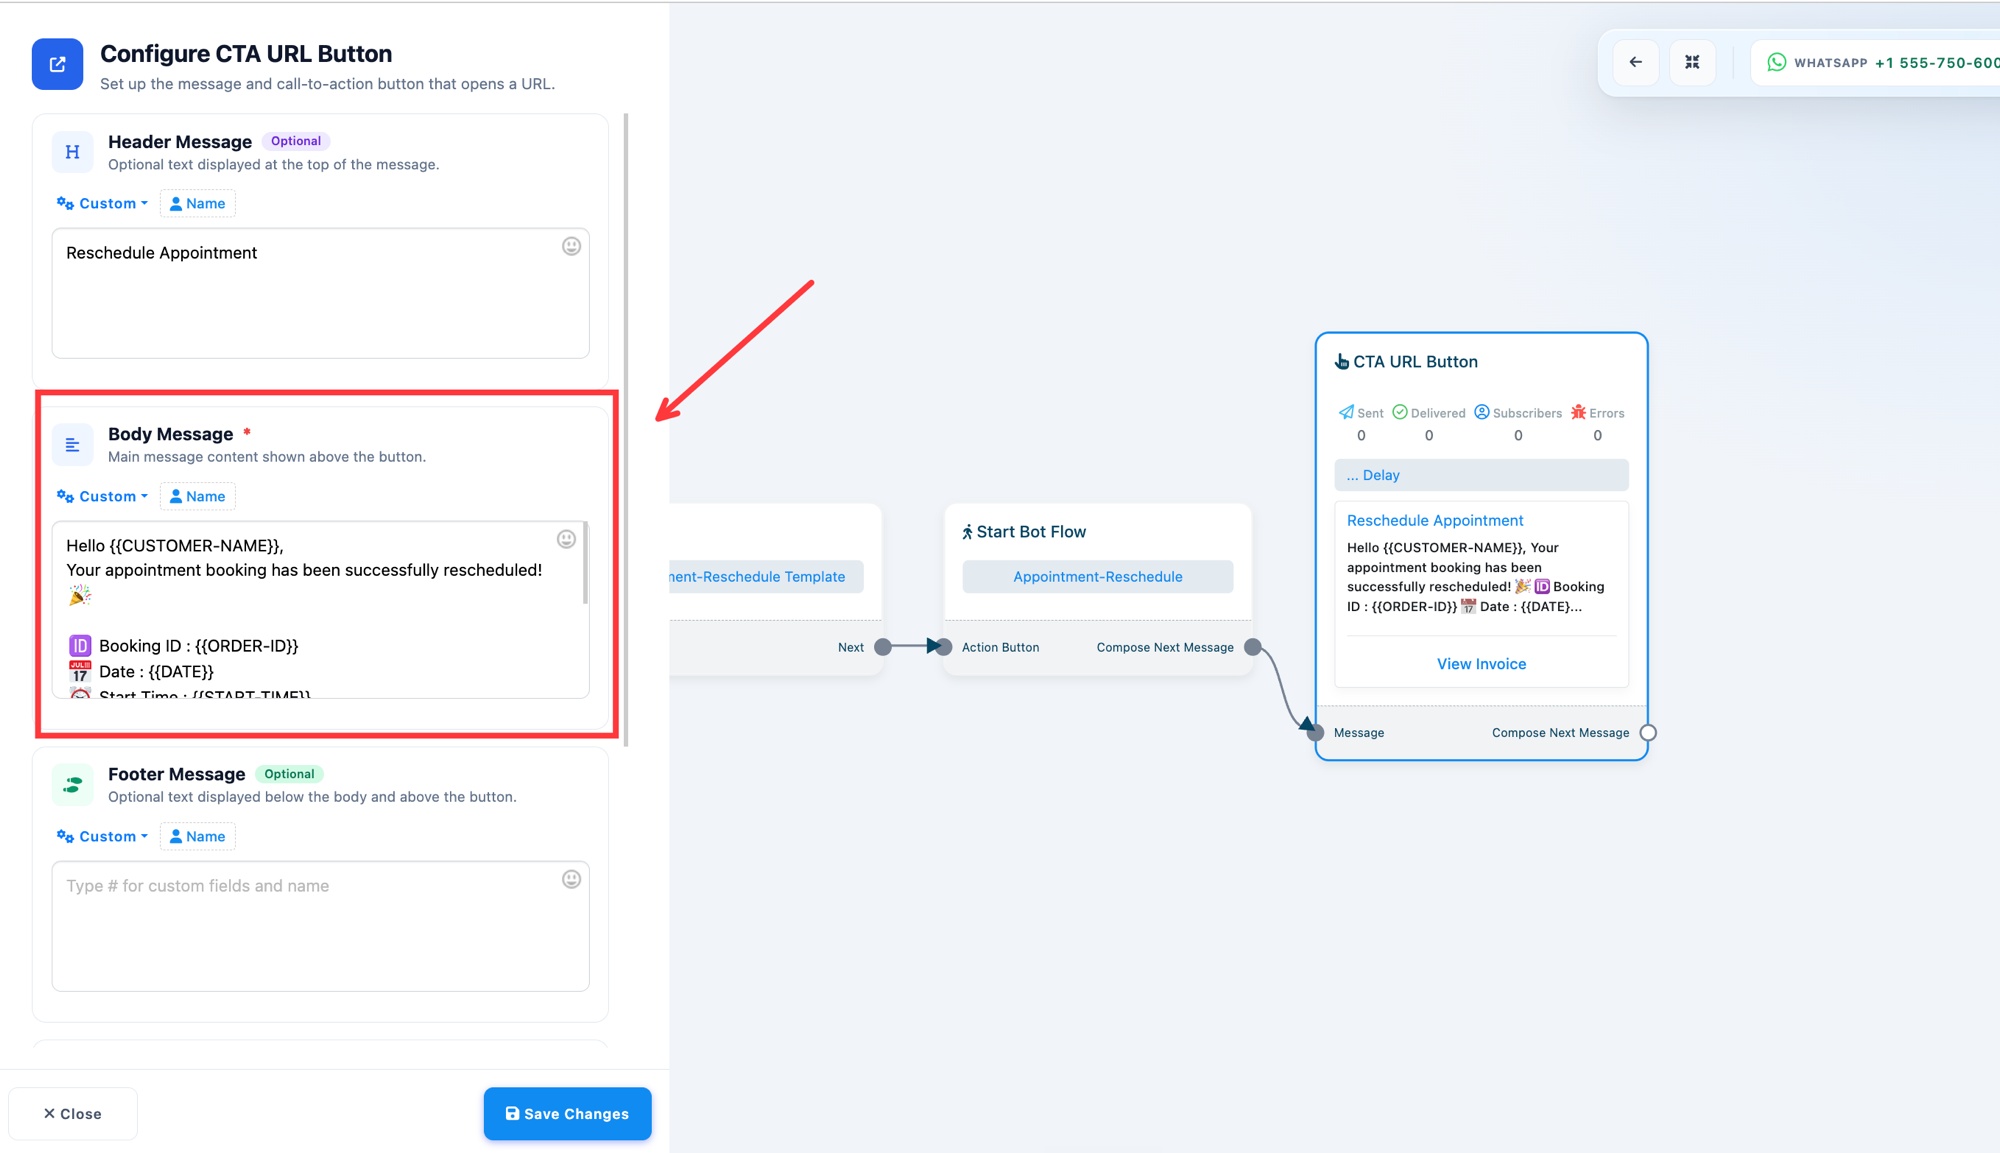 Change the reschedule wording here
Personalize with variables
Use variables in any message so WhatChimp fills in the real booking details for each customer:
{{CUSTOMER-NAME}}the customer's name{{ORDER-ID}}the booking ID{{DATE}}the appointment date{{START-TIME}}and{{END-TIME}}the start and end times
Type these exactly as shown, including the double braces. The default messages already use them, so you can see the format in any template.
Reset to the original messages
If you want to undo your changes, click Reset to Default on the appointment to restore every message to its original wording.