How to Create an Appointment
Set up a bookable appointment in WhatChimp: pick a calendar, set your availability, duration, pricing, data actions, and the questions customers answer.
Updated 18 June 2026
An appointment is the bookable service your customers reserve from WhatsApp. You define its calendar, availability, duration, price, and the questions to ask, and WhatChimp runs the booking conversation and the calendar sync for you. Before you start, connect your Google account so bookings can sync to Google Calendar.
Open the appointment form
- In the left sidebar, open Appointment.
- Click New Appointment to open the create form. To edit one you already have, use the edit icon in the Appointment Manager instead.
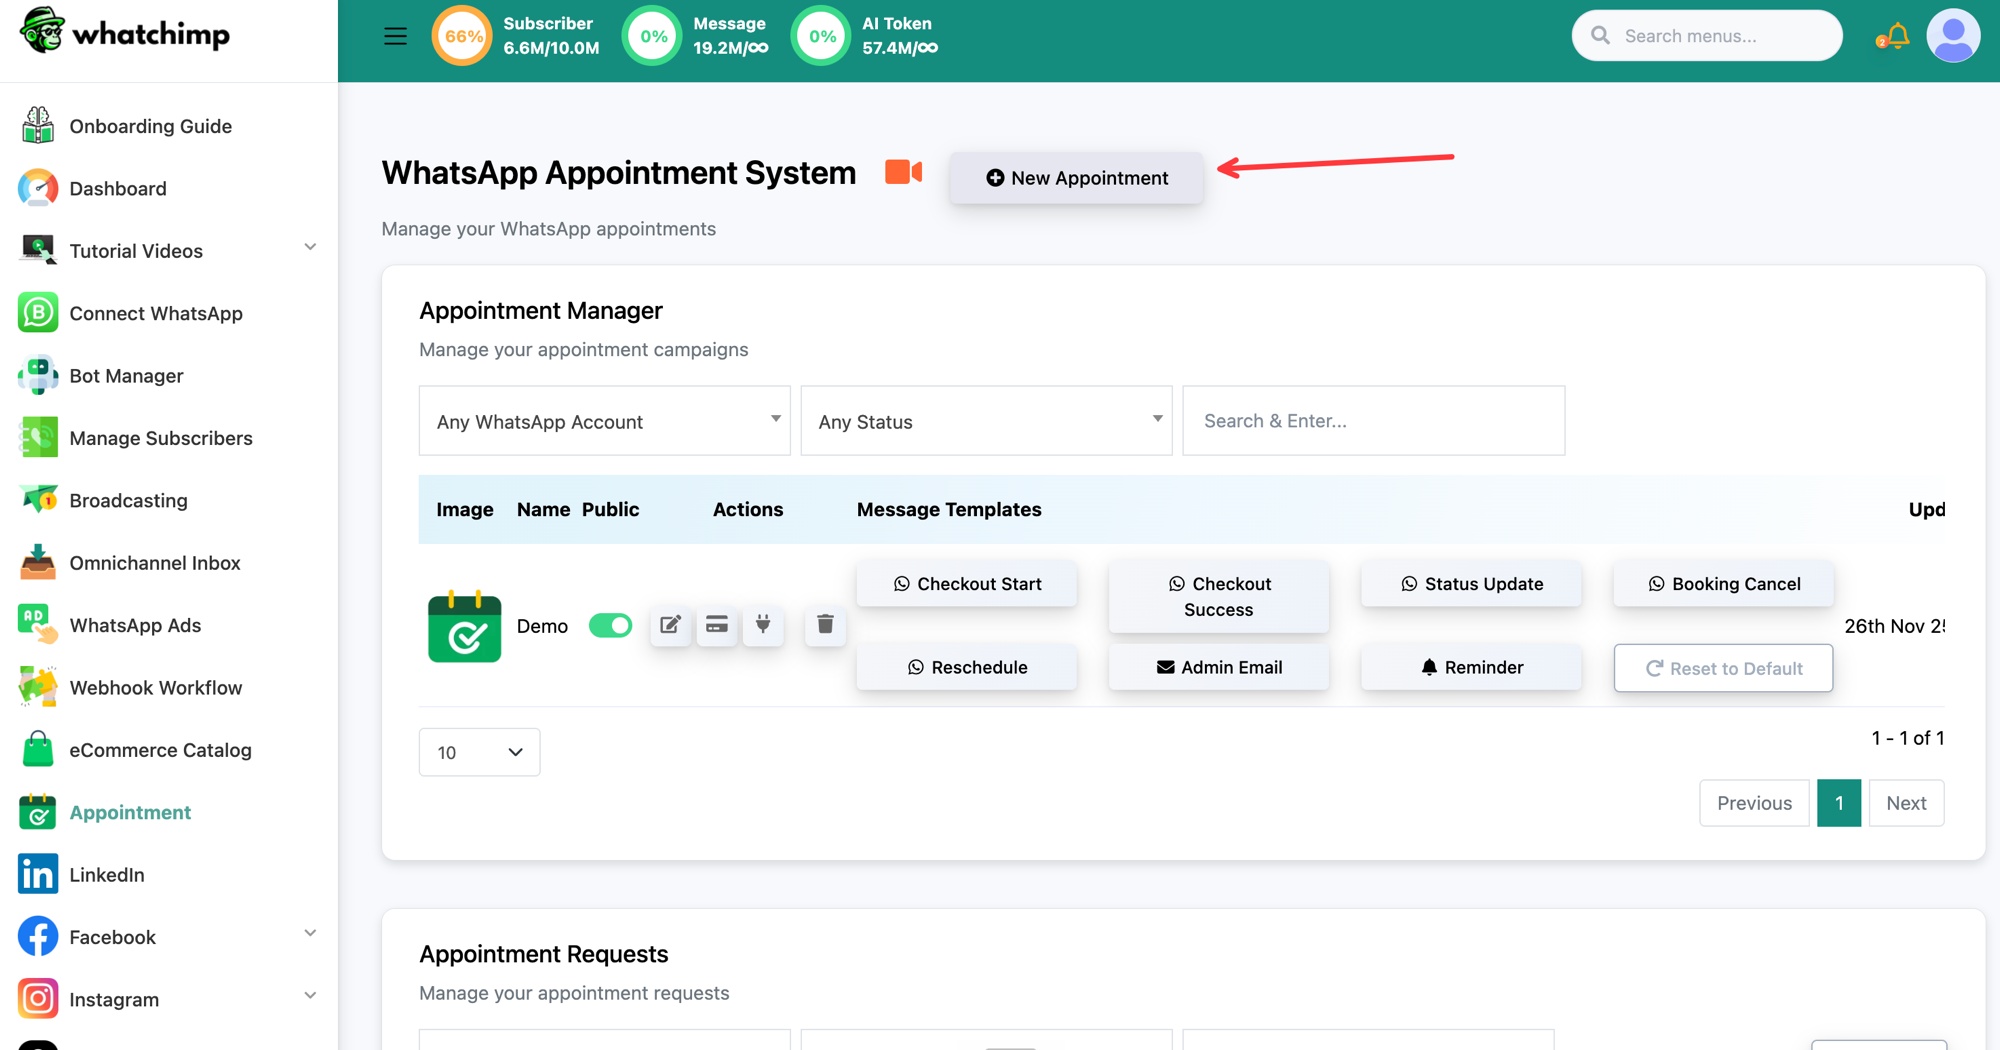 Open Appointment, then click New Appointment
The form has five sections you can jump between from the right side: Configuration, Time Slot, Checkout, Data Actions, and Questionnaires.
Configuration
This is where you define what the appointment is and the rules around booking it.
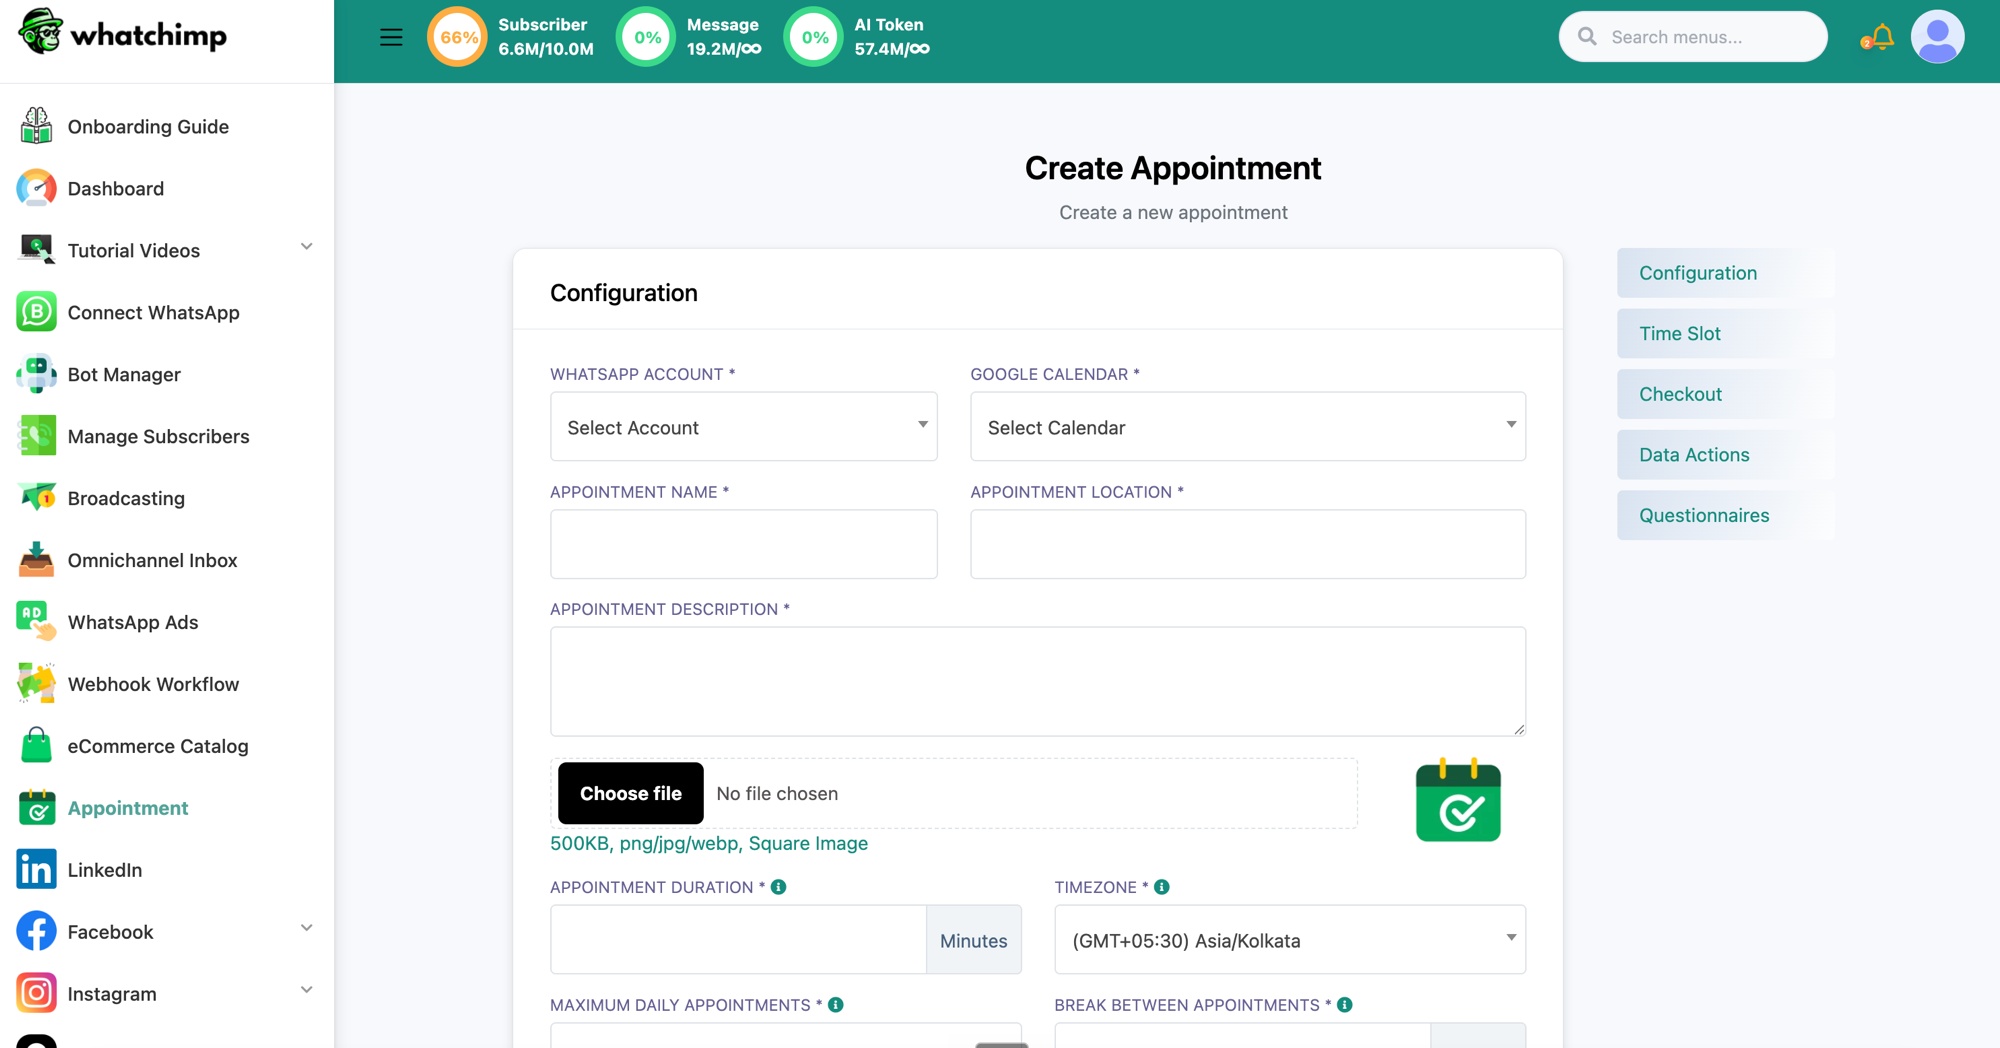 The Configuration section of the appointment form
- WhatsApp Account: the WhatsApp number that runs the booking conversation and sends the confirmation and reminder messages. Pick the number your customers actually message.
- Google Calendar: the connected calendar where confirmed bookings are created. If this dropdown is empty, connect a Google account first. Every booking becomes an event on this calendar.
- Appointment Name: the name of the service, for example "Demo" or "Consultation". It appears to the customer and on the calendar event.
- Appointment Location: where the appointment happens. Use "Online" for a virtual meeting (WhatChimp can attach a Google Meet link), or a physical address for in-person.
- Appointment Description: a short description, shown to the customer and added to the calendar event. Keep it clear, for example "Demo walkthrough".
- Image: an optional square image for the appointment, up to 500KB, in png, jpg, or webp.
The next fields control timing and availability. In the app, hover the small info icon next to any field for an in-context hint.
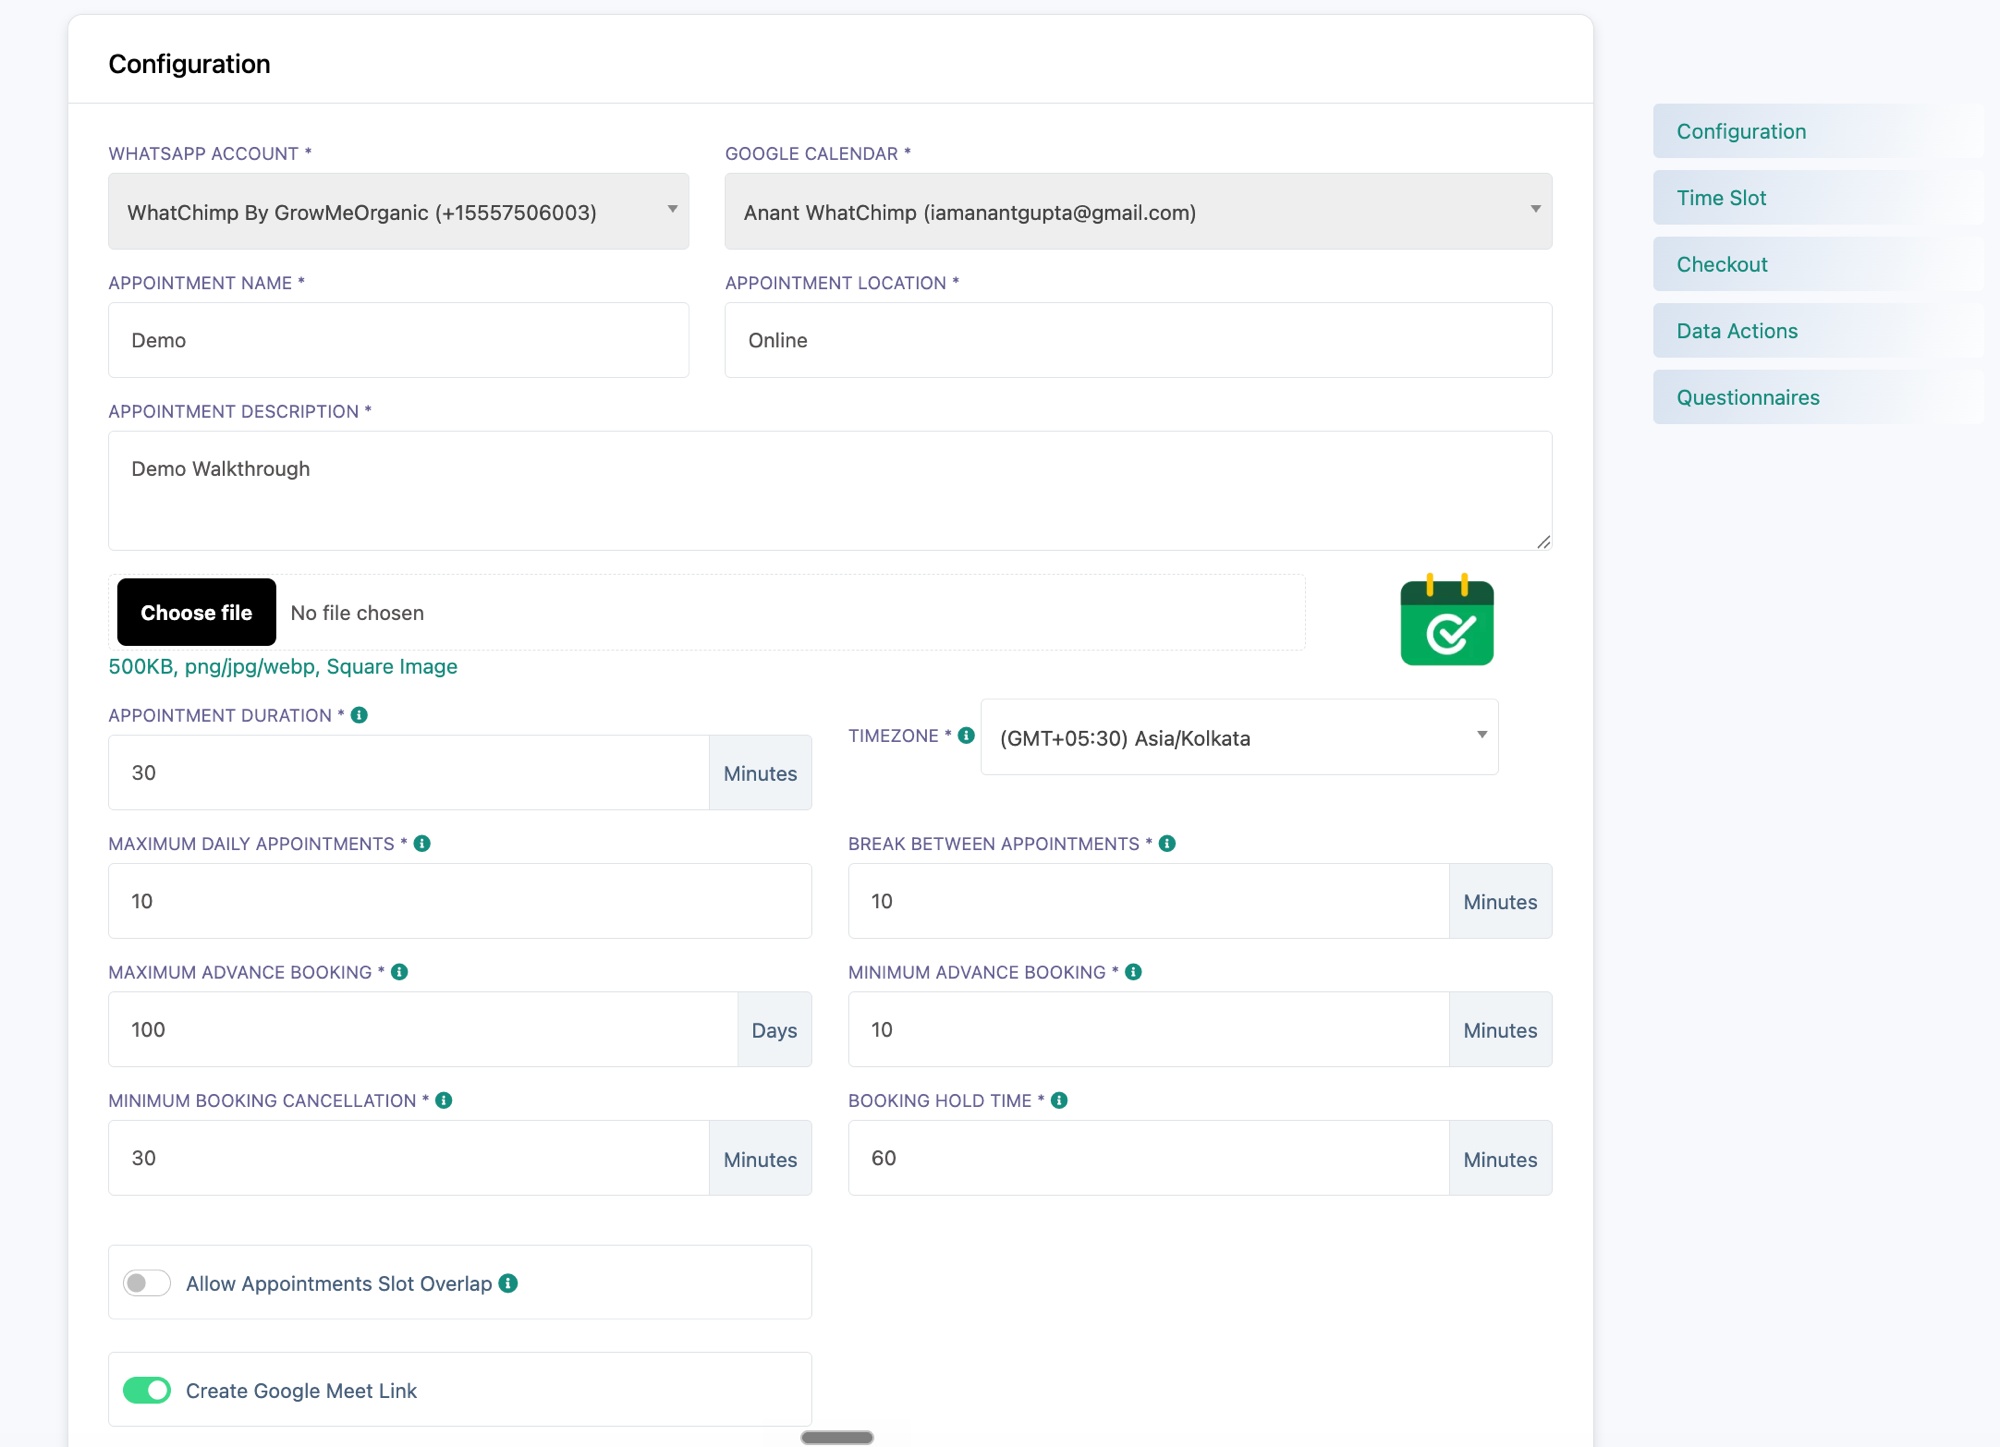 Duration, time zone, and the booking rules
- Appointment Duration (minutes): how long one appointment lasts. This sets the length of each bookable slot, for example 30 minutes.
- Timezone: the time zone your availability and offered slots are based on. Set it to the time zone you work in, so a "9:00" slot means 9:00 your time.
- Maximum Daily Appointments: the most bookings you will take in a single day. Once it is reached, that day stops showing as available. Use it to cap your workload.
- Break Between Appointments (minutes): a buffer added after each appointment so back-to-back bookings leave you time to reset. A 10 minute break means the next slot cannot start until 10 minutes after the previous one ends.
- Maximum Advance Booking (days): how far into the future customers can book. For example, 100 days means no one can book a slot more than 100 days away.
- Minimum Advance Booking (minutes): the minimum notice you need before an appointment starts, so no one books a slot that is about to begin.
- Minimum Booking Cancellation (minutes): how long before the start time a customer is still allowed to cancel. After this window, the booking is locked in.
- Booking Hold Time (minutes): how long a slot is held while the customer is confirming. If they do not confirm within this time, the slot is released so it does not block other people.
- Allow Appointments Slot Overlap: off by default, so each slot can be booked once. Turn it on only if more than one person can take the same slot, for example a group session.
- Create Google Meet Link: on by default. When on, every confirmed online booking automatically gets a Google Meet link, added to the calendar event and sent to the customer.
Time Slot
Here you set the days and hours you are available. WhatChimp only offers customers the slots that fall inside these windows.
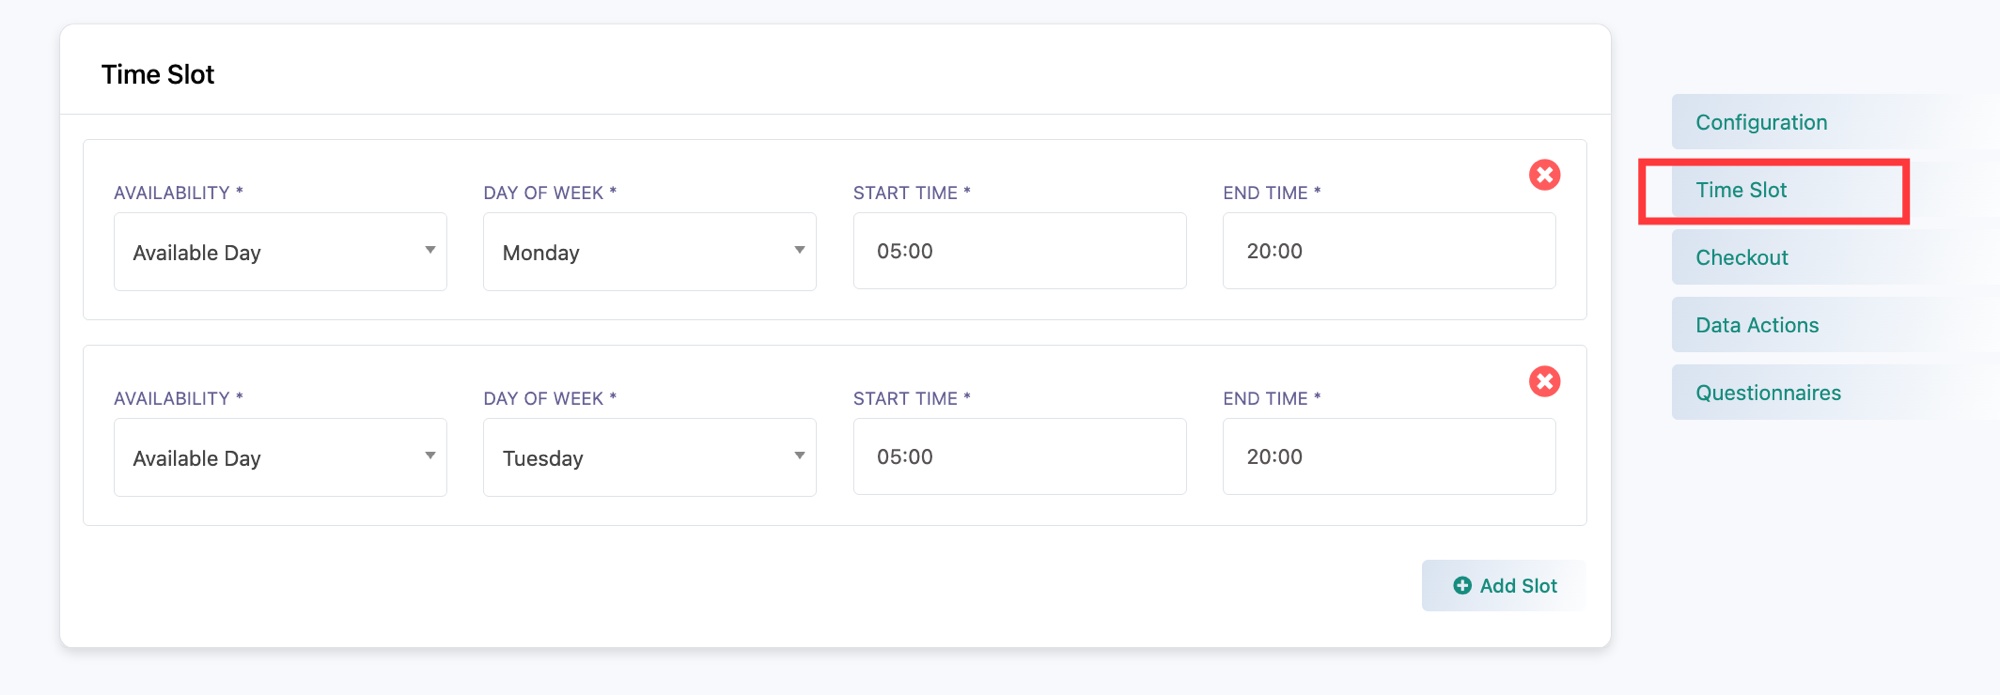 Set the days and hours you are available
For each row:
- Availability: choose Available Day to open that day for booking.
- Day of Week: the day this rule applies to, for example Monday.
- Start Time and End Time: the window you are open that day, for example 05:00 to 20:00.
Click Add Slot to add another day or another window, and add a row for every day you take bookings. The duration and break from Configuration decide how each window is split into individual slots.
Checkout
Use this section if you want to charge for the appointment. Leave the fees at zero to keep it free.
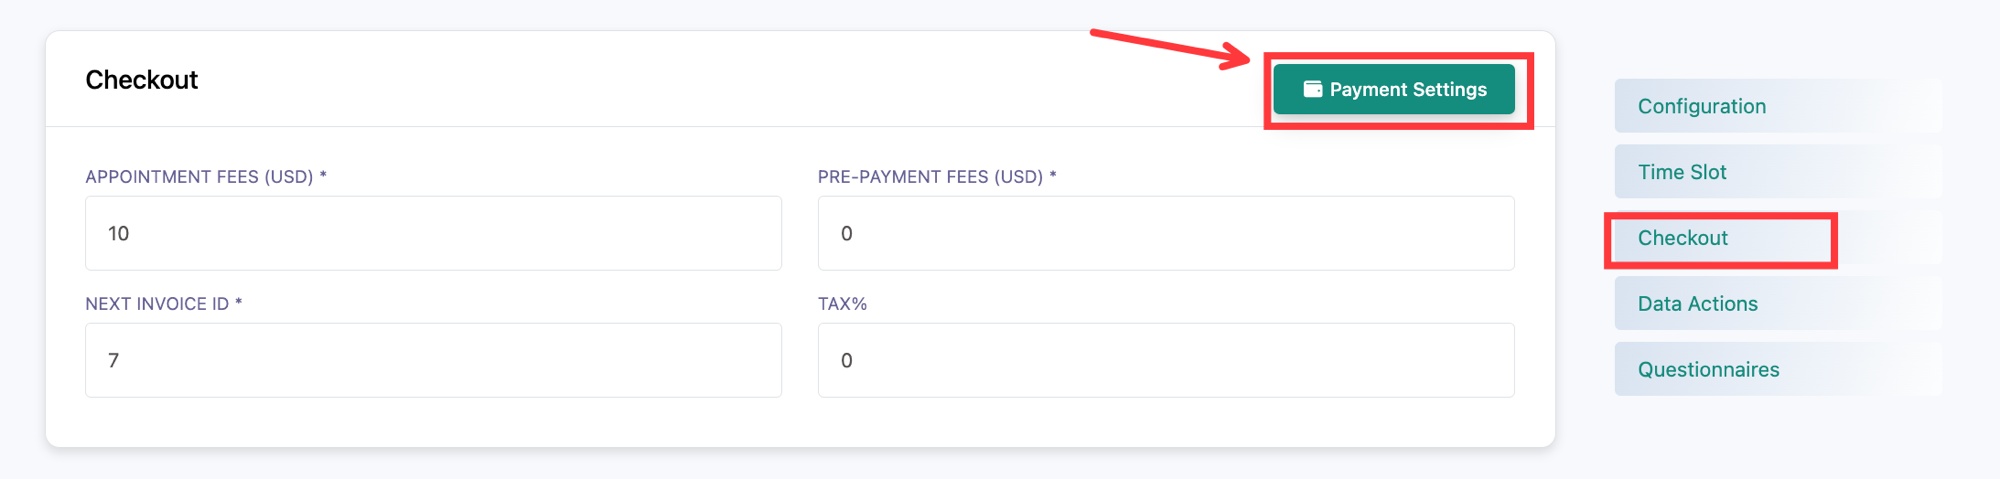 Set your fees, tax, and invoice number
- Appointment Fees (USD): the price of the appointment. You can display a price even if you do not collect it, or collect it in full.
- Pre-Payment Fees (USD): the amount the customer must pay up front to confirm the booking. Set it to part of the fee for a deposit, or to zero to let them pay later.
- Next Invoice ID: the number the next invoice will use. WhatChimp increments it automatically from here.
- Tax%: an optional tax percentage added on top of the fee.
To actually collect money you need a payment gateway. Click Payment Settings to set one up.
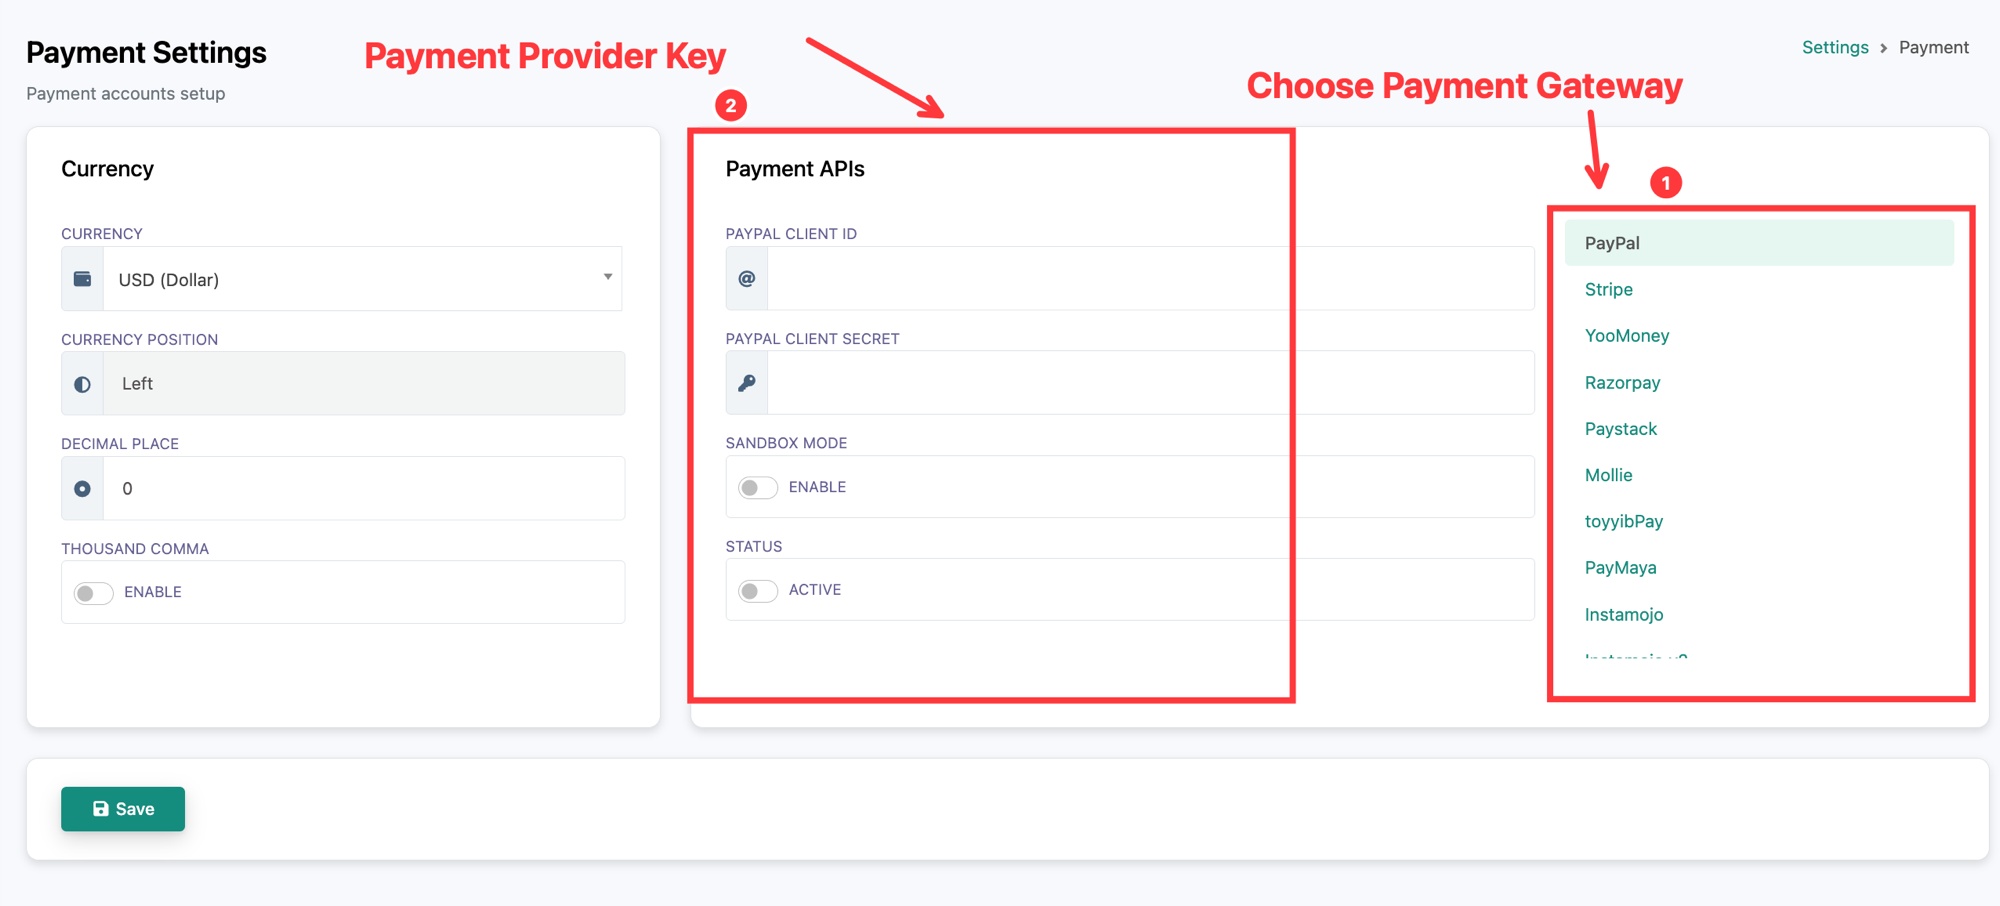 Choose a gateway and enter its keys
- Choose your payment gateway from the list on the right (PayPal, Stripe, Razorpay, Paystack, Mollie, and more).
- Enter the provider keys for that gateway in the middle, for example PayPal Client ID and Secret.
- Set Sandbox Mode on for testing or off for live payments, set Status to Active, choose your Currency, then click Save.
Data Actions
These run automatically when a booking is confirmed, so the data flows into the rest of your tools.
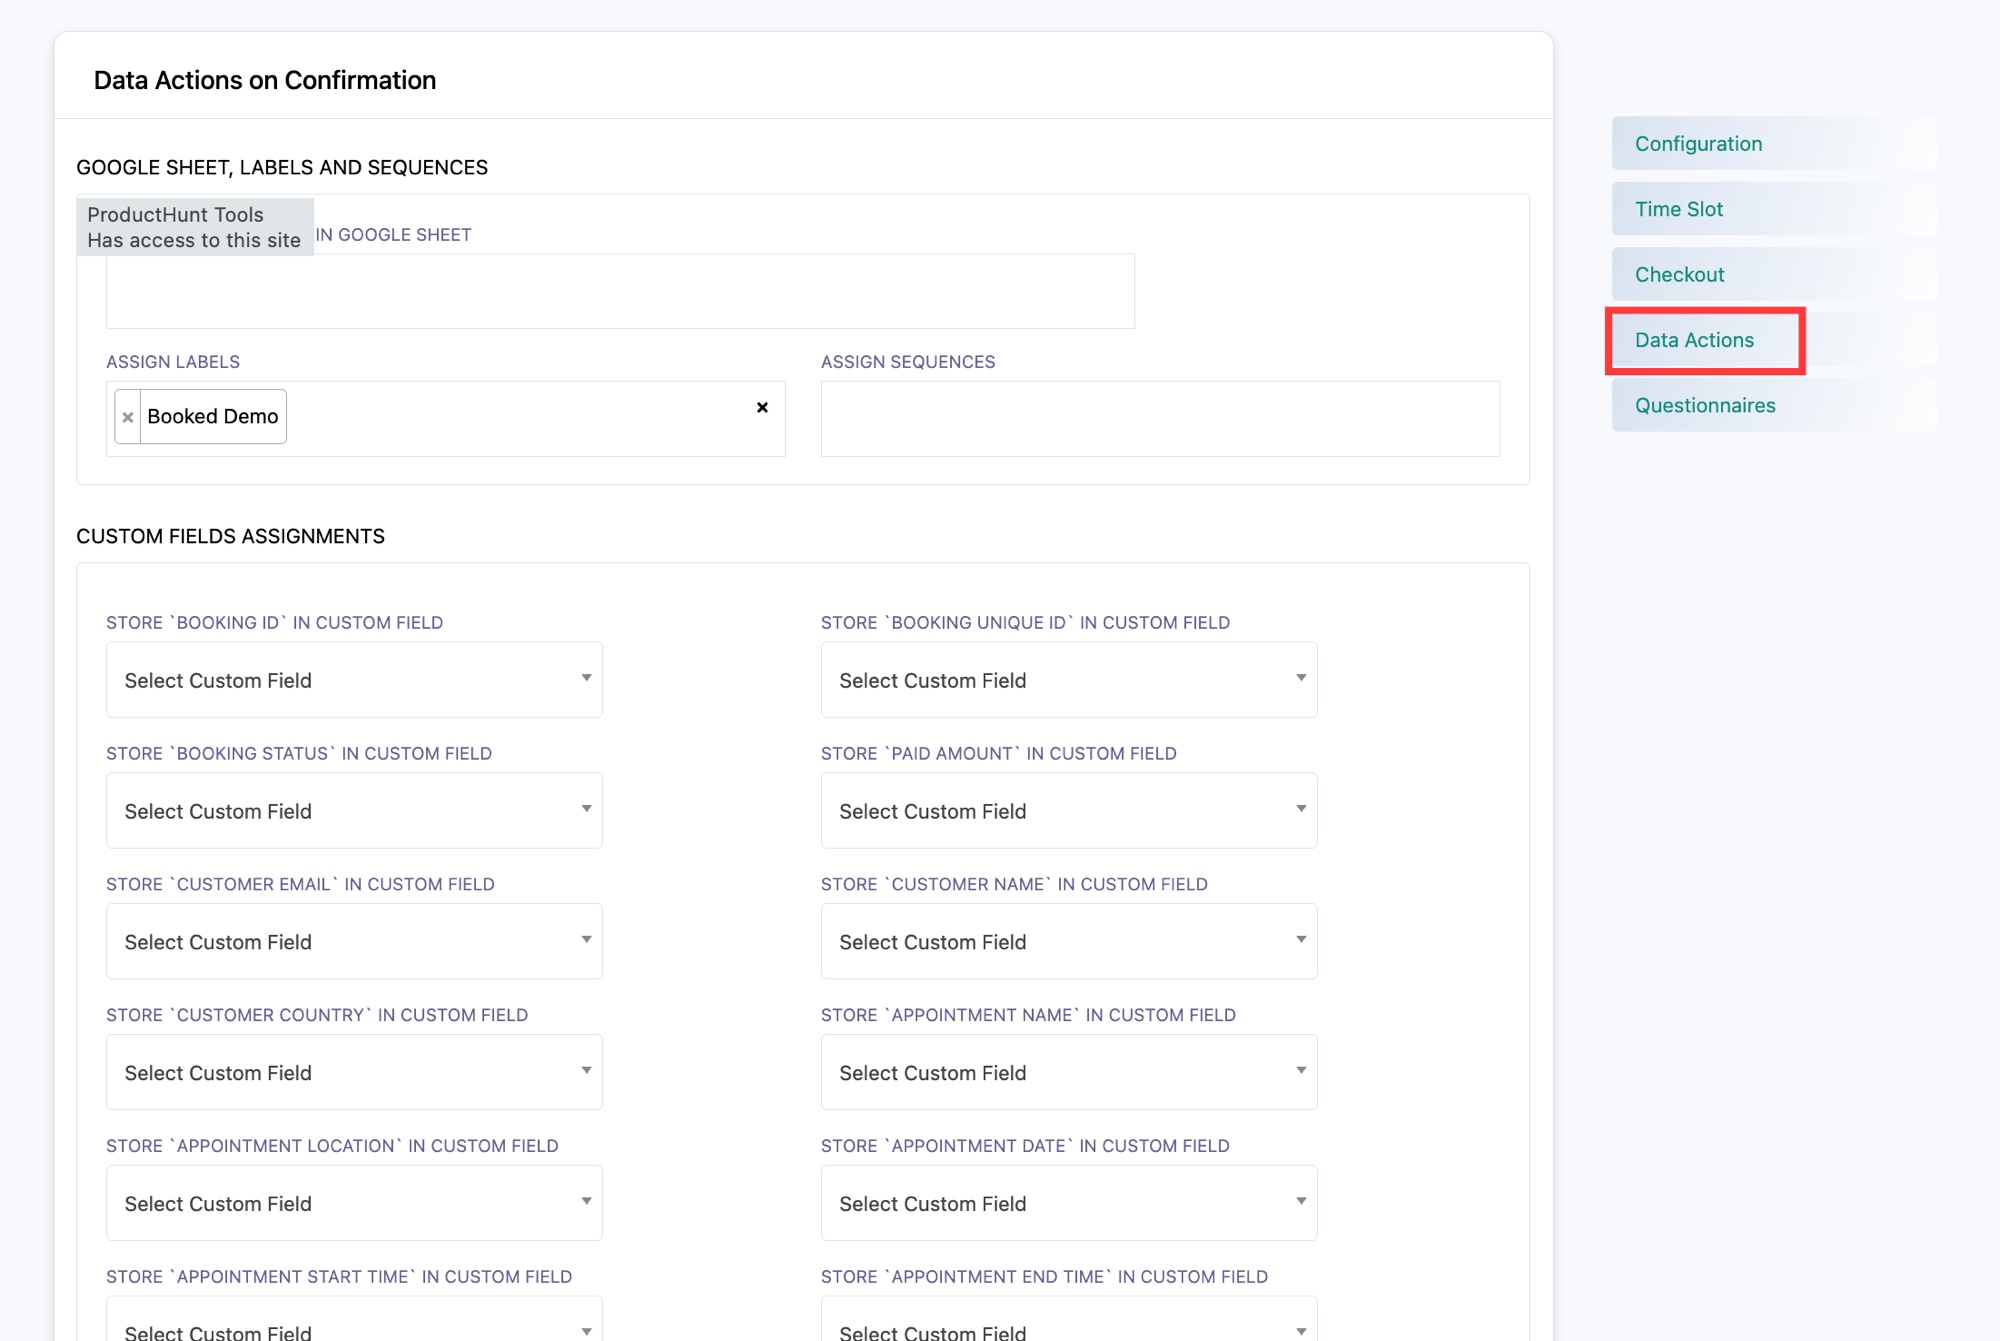 Save bookings to a sheet, tag and sequence the contact, and map fields
- Save in Google Sheet: send each confirmed booking to a connected Google Sheet.
- Assign Labels: tag the customer with a label, for example "Booked Demo", so you can segment them later.
- Assign Sequences: start a message sequence for the customer after they book, for example a prep or follow-up sequence.
- Custom Fields Assignments: store booking details such as Booking ID, Booking Unique ID, Booking Status, Paid Amount, Customer Email, Customer Name, Appointment Date, Start Time, and End Time into your subscriber custom fields. Map only the ones you want to keep. If you do not have a custom field yet, create it in Manage Subscribers first.
Questionnaires
This is the wording of the booking conversation: the messages the bot sends and the questions it asks. Sensible defaults are filled in, so you can edit only what you want to change.
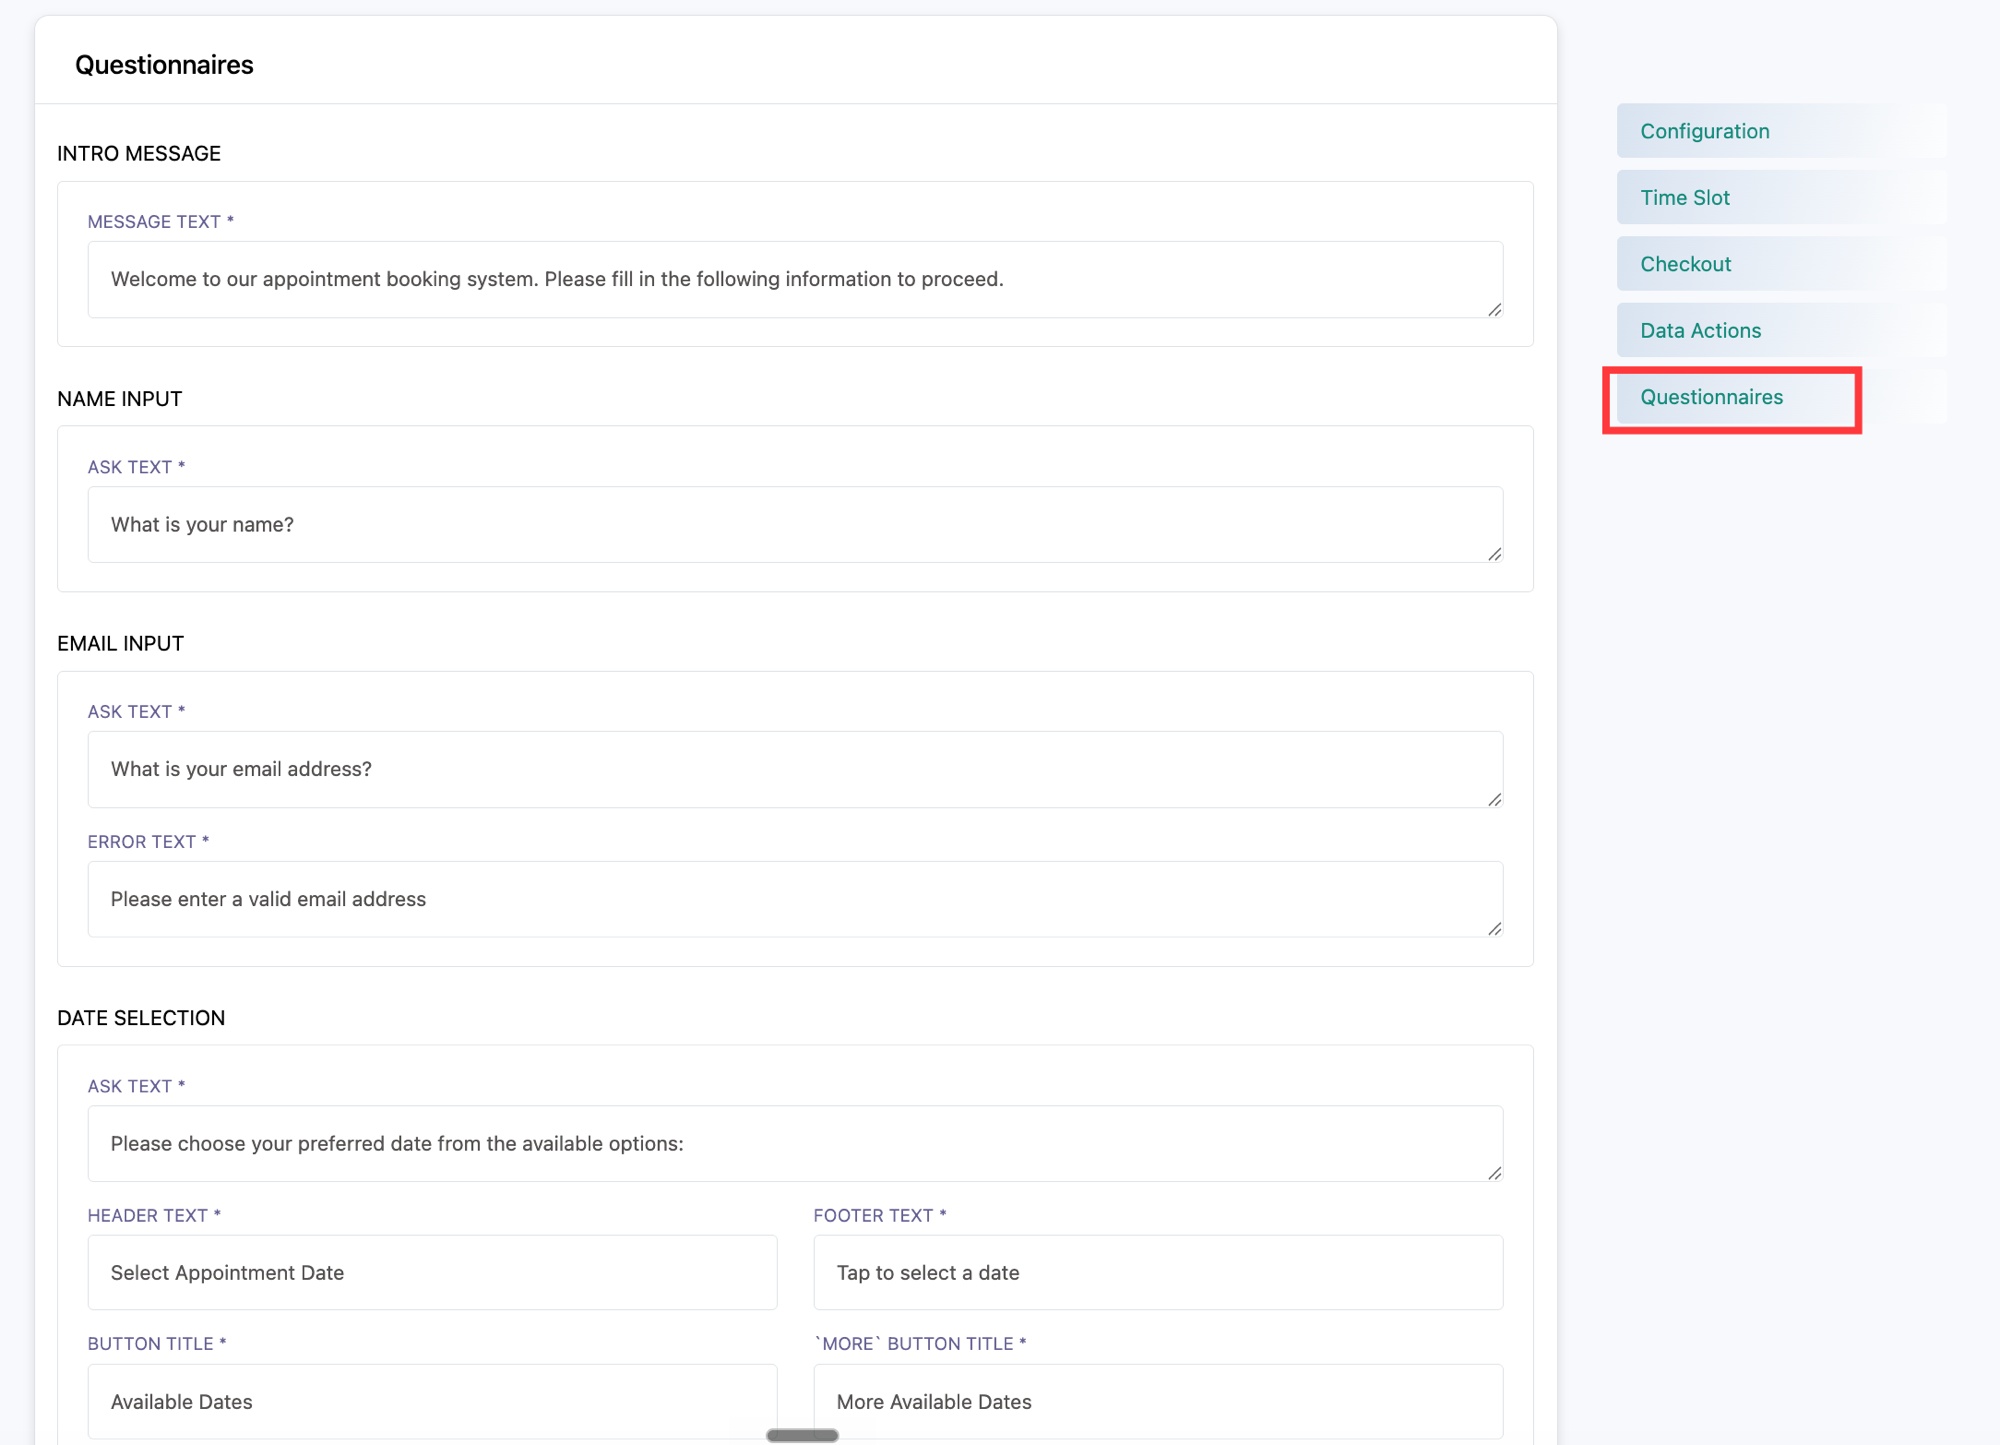 Edit the messages and questions the bot sends
- Intro Message: the first message the customer sees, for example "Welcome to our appointment booking system. Please fill in the following information to proceed."
- Name Input: the question that collects their name, for example "What is your name?".
- Email Input: the question that collects their email, plus an Error Text shown if they enter an invalid address.
- Date Selection: the prompt and labels for the date picker (ask text, header, footer, the button title, and the "more dates" button title).
- Time Selection: the same set of labels for the time picker, plus an error message for when no time slot is available.
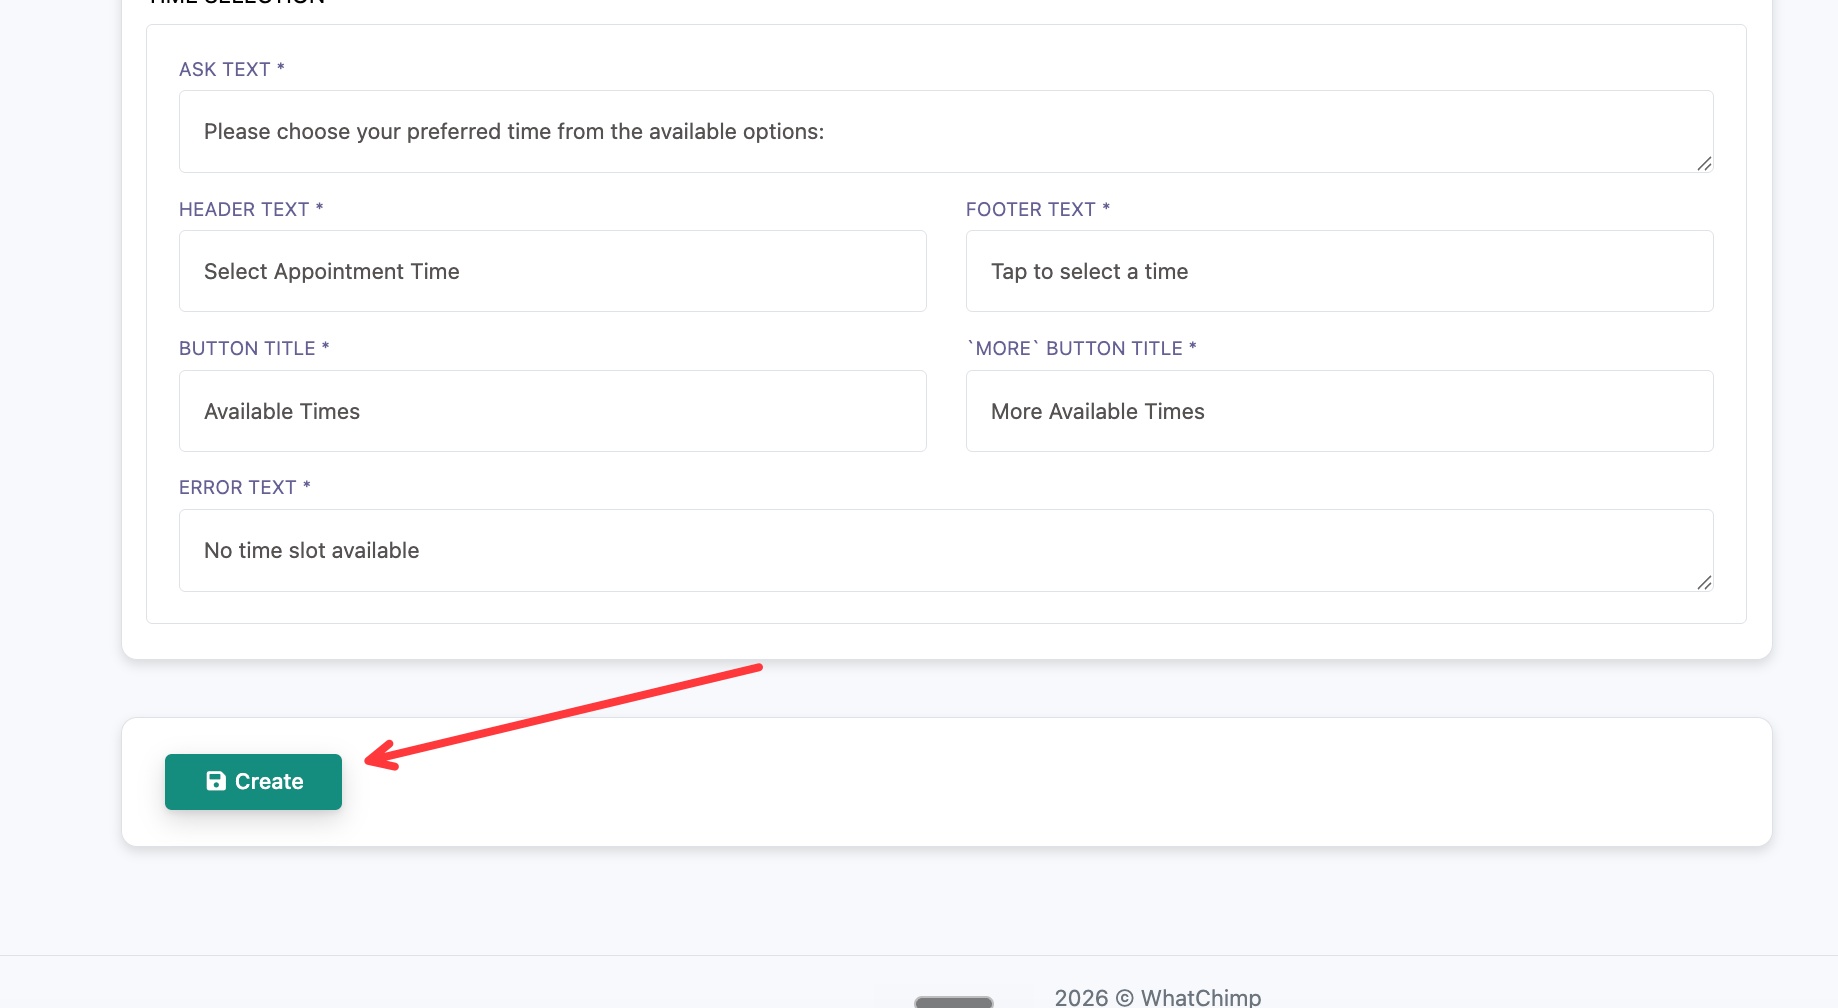 Finish the wording, then click Create
Create the appointment
When every section is filled in, scroll to the bottom and click Create. Your appointment now appears in the Appointment Manager, ready to be triggered from a chatbot.