WhatChimp Ko N8N AI Agent Ke Saath Connect Karein
N8N ke saath advanced AI agents banayein aur unhe WhatChimp se connect karein complex WhatsApp automation workflows ke liye.
Updated 10 February 2026
Video: https://www.youtube.com/watch?v=SOoM20jkaXM
Agar aapko WhatChimp ki built-in AI Agent se zyada flexibility chahiye, to aap WhatChimp ko N8N ke saath connect kar sakte hain — ek powerful workflow automation platform — taaki complex AI agents bana sakein jo WhatsApp messages ka jawab dein. Ye advanced use cases ke liye ideal hai jaise multi-step reasoning, external API lookups, database queries, ya custom business logic.
Prerequisites:
- Ek WhatChimp account connected WhatsApp number ke saath
- Ek N8N instance (self-hosted ya cloud). Agency Server affordable self-hosting ke liye recommended hai
- Ek OpenAI API key (ya dusra AI model provider)
Overview
Integration do pieces ke saath kaam karta hai:
- Outgoing Webhook — WhatChimp har incoming WhatsApp message ko N8N ko webhook ke through bhejta hai
- WhatChimp API — N8N WhatChimp API ka use karke reply messages wapas bhejta hai
Step 1: Built-in AI Agent Disable Karein
Agar aap WhatChimp ki default AI Agent use kar rahe hain, to use pehle disable karein taaki wo N8N agent ke saath conflict na kare.
- Left sidebar mein Bot Manager mein jaayein
- Apna WhatsApp number select karein
- AI Agent > Change Settings par click karein
- AI Agent disable karein aur save karein
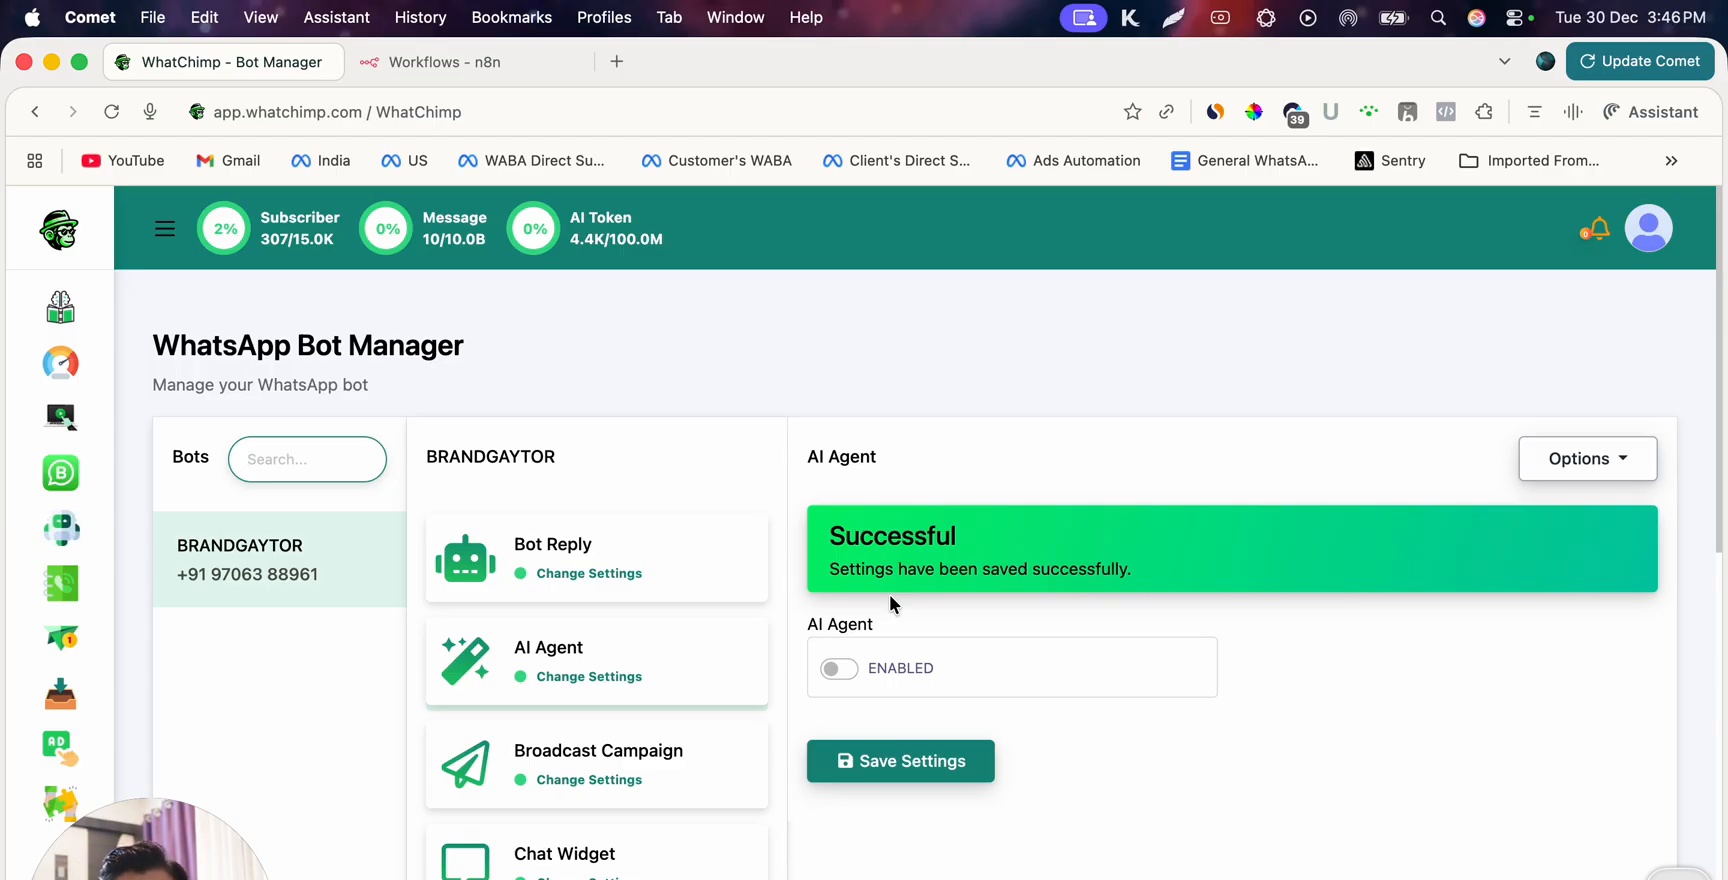 Bot Manager showing AI Agent settings with Successful message after disabling
Step 2: N8N Mein Webhook Banayein
- Apna N8N instance kholein aur ek nayi workflow banayein
- Ek Webhook node add karein
- HTTP method ko POST par switch karein
- Workflow ko Activate karein
- Production URL copy karein (test URL nahi)
Step 3: WhatChimp Mein Outgoing Webhook Set Up Karein
- Bot Manager mein jaayein > apna WhatsApp number select karein
- Configuration section tak scroll karein
- Trigger Webhook for Incoming Message dhoondhein aur enable karein
- N8N webhook Production URL paste karein
Important: Ye sure karein ki aap webhook ko incoming messages ke liye enable karte hain, outgoing messages ke liye nahi. Ye ek common mistake hai.
- Neeche scroll karein aur Save Settings par click karein
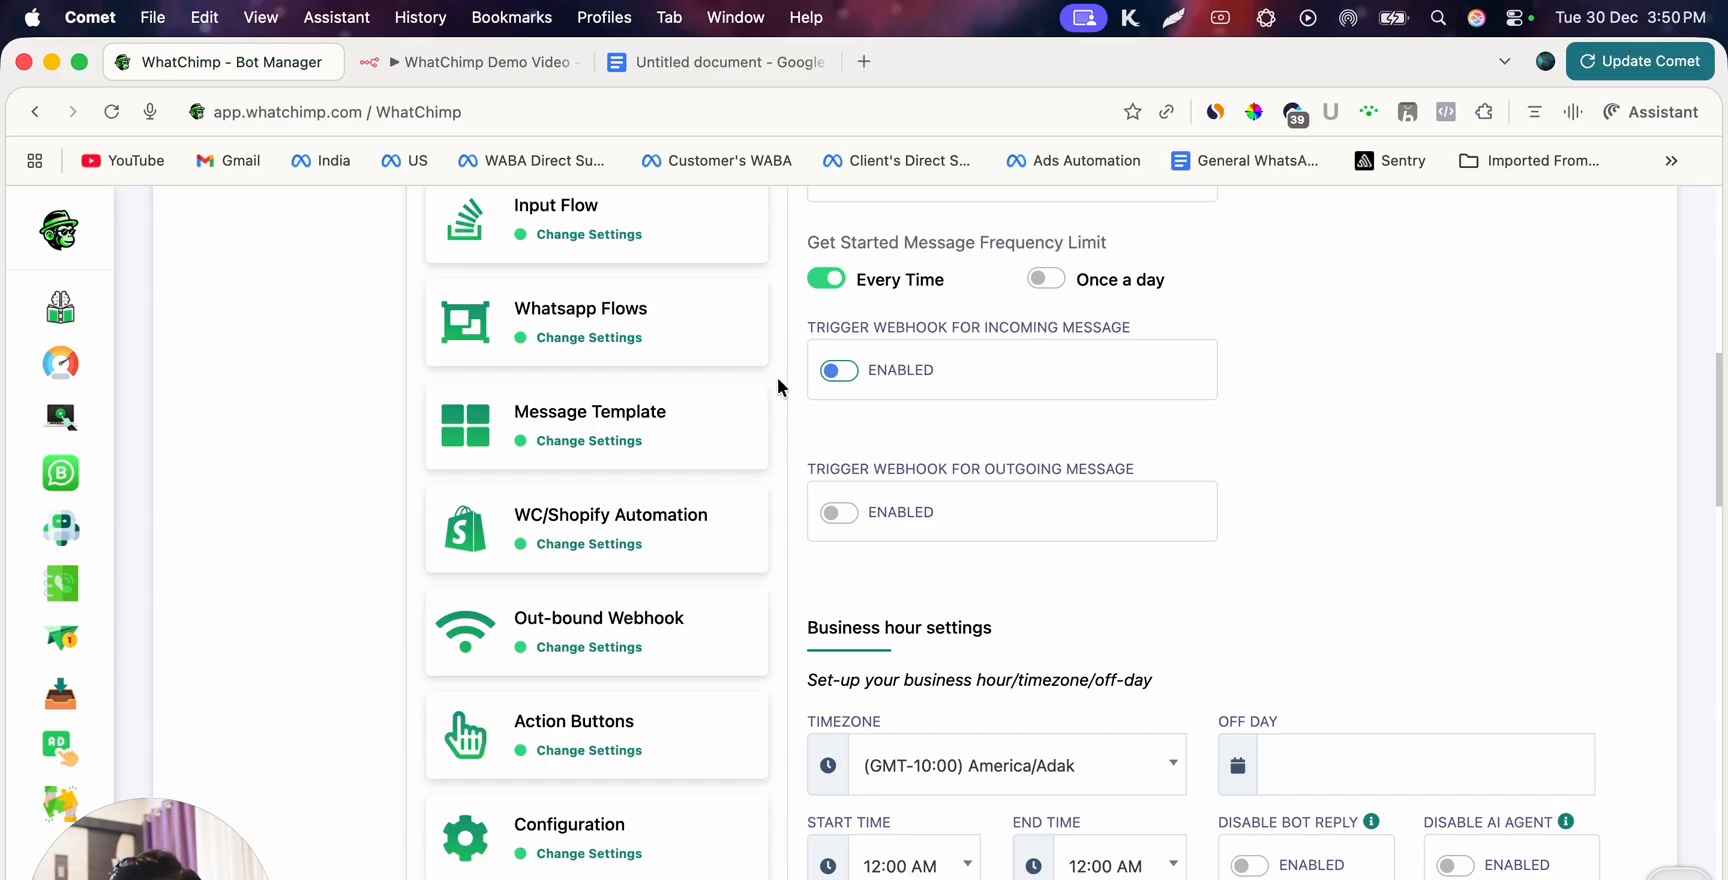 Bot Manager Configuration page showing webhook settings for incoming and outgoing messages with business hour settings
Step 4: N8N Mein AI Agent Configure Karein
Webhook node ke baad ek AI Agent node add karein:
- Source for Prompt/Chat Message ko "Define below" par set karein
- Webhook data se incoming message ko prompt ke roop mein pass karein
- Memory configure karein (production ke liye Simple Memory ya PostgreSQL use karein):
- Session ID ko sender ki chat ID (phone number) par set karein — ye ensure karta hai ki har customer ko apna khud ka conversation context mile
- Context Window Length ko 5 messages (ya aapke model ki capability ke hisaab se zyada) par set karein
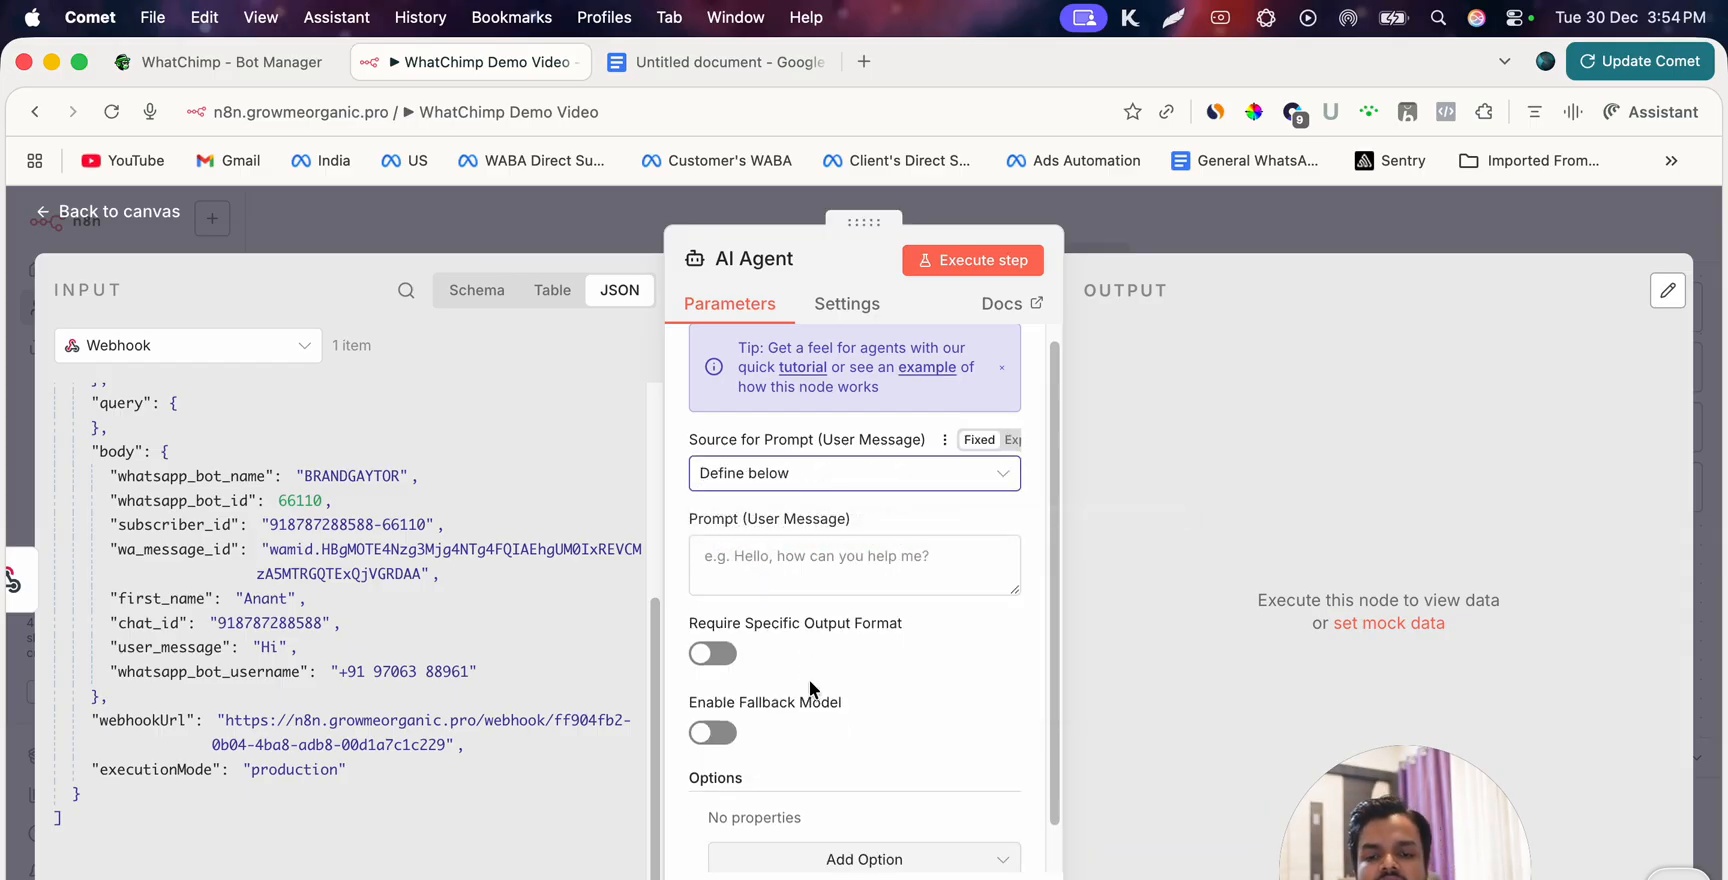 N8N AI Agent node showing Source for Prompt configuration with Define below selected and webhook JSON data visible
- Ek OpenAI Chat Model (ya dusra provider) connect karein:
- Apne OpenAI credentials add karein
- Ek model select karein (jaise, cost-effective responses ke liye GPT-4o Mini)
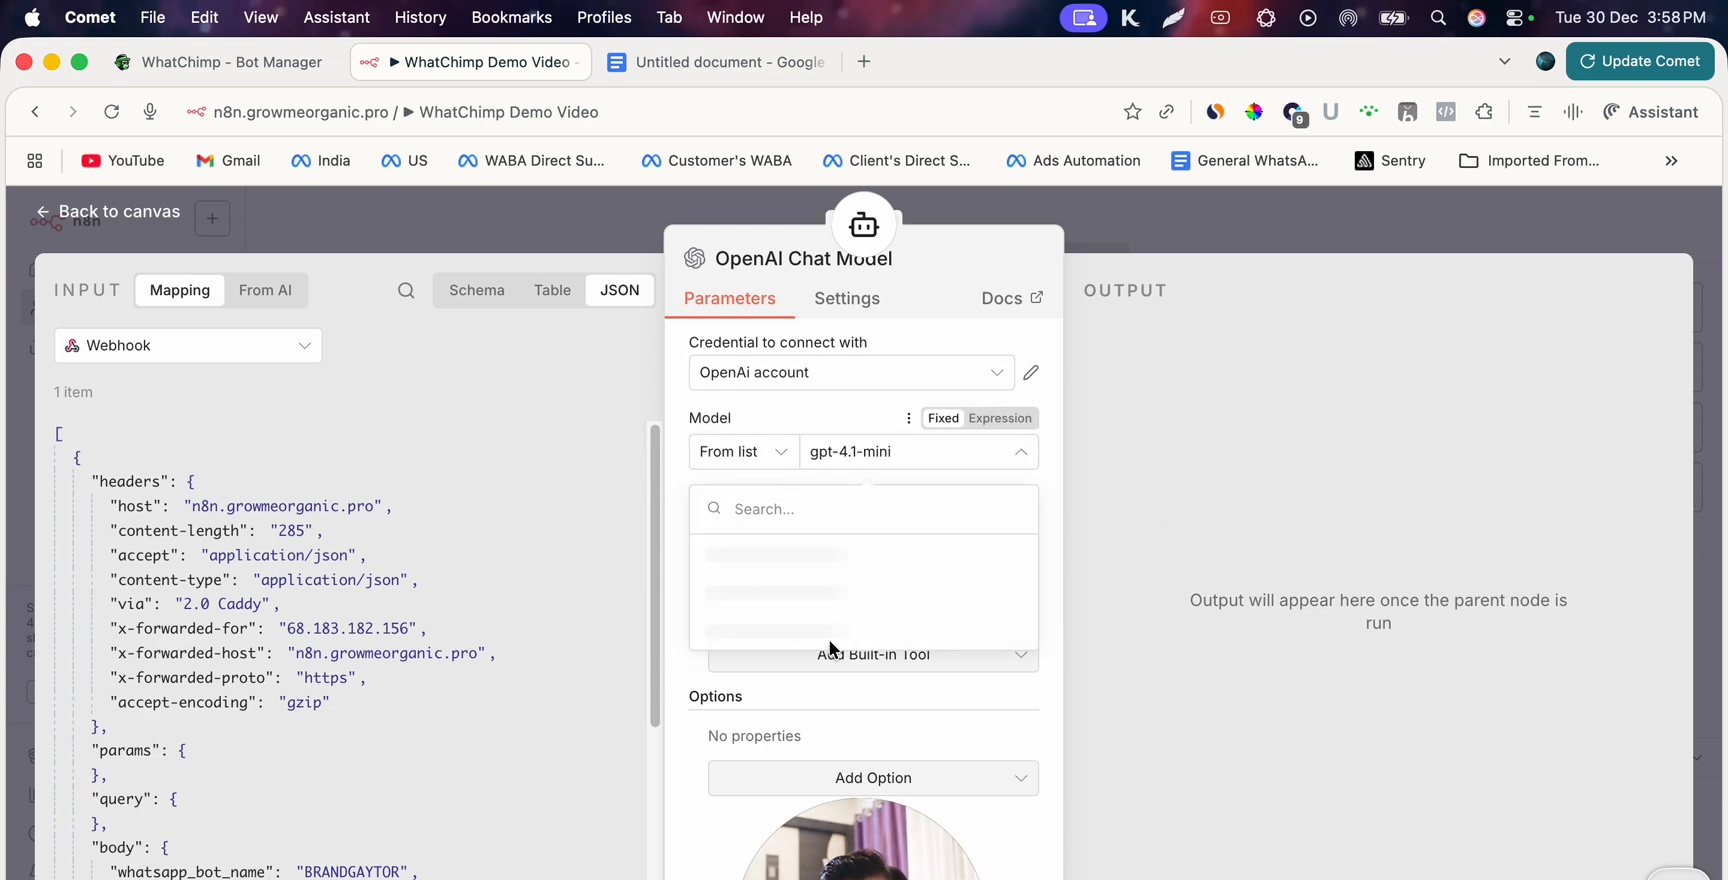 N8N OpenAI Chat Model node showing credential selection and model dropdown
Step 5: Send Message Tool Add Karein
AI Agent ko WhatsApp ke through replies wapas bhejne ke liye ek tool chahiye. Ek HTTP Request node tool ke roop mein add karein:
- AI Agent ke "Tool" input se connected ek HTTP Request node add karein
- Method ko POST par set karein
- Messages bhejne ke liye WhatChimp API endpoint use karein
- Ye parameters pass karein:
- api_token — aapka WhatChimp API token (Bot Manager > API Developer mein milega)
- phone_number_id — aapki WhatsApp phone number ID (Connect WhatsApp mein milegi)
- message — AI Agent ko ye parameter define karne dein
- phone — webhook data se sender ka phone number
- Tool ko "Send Message" naam dein ek clear description ke saath taaki AI jaane ki ise kab use karna hai
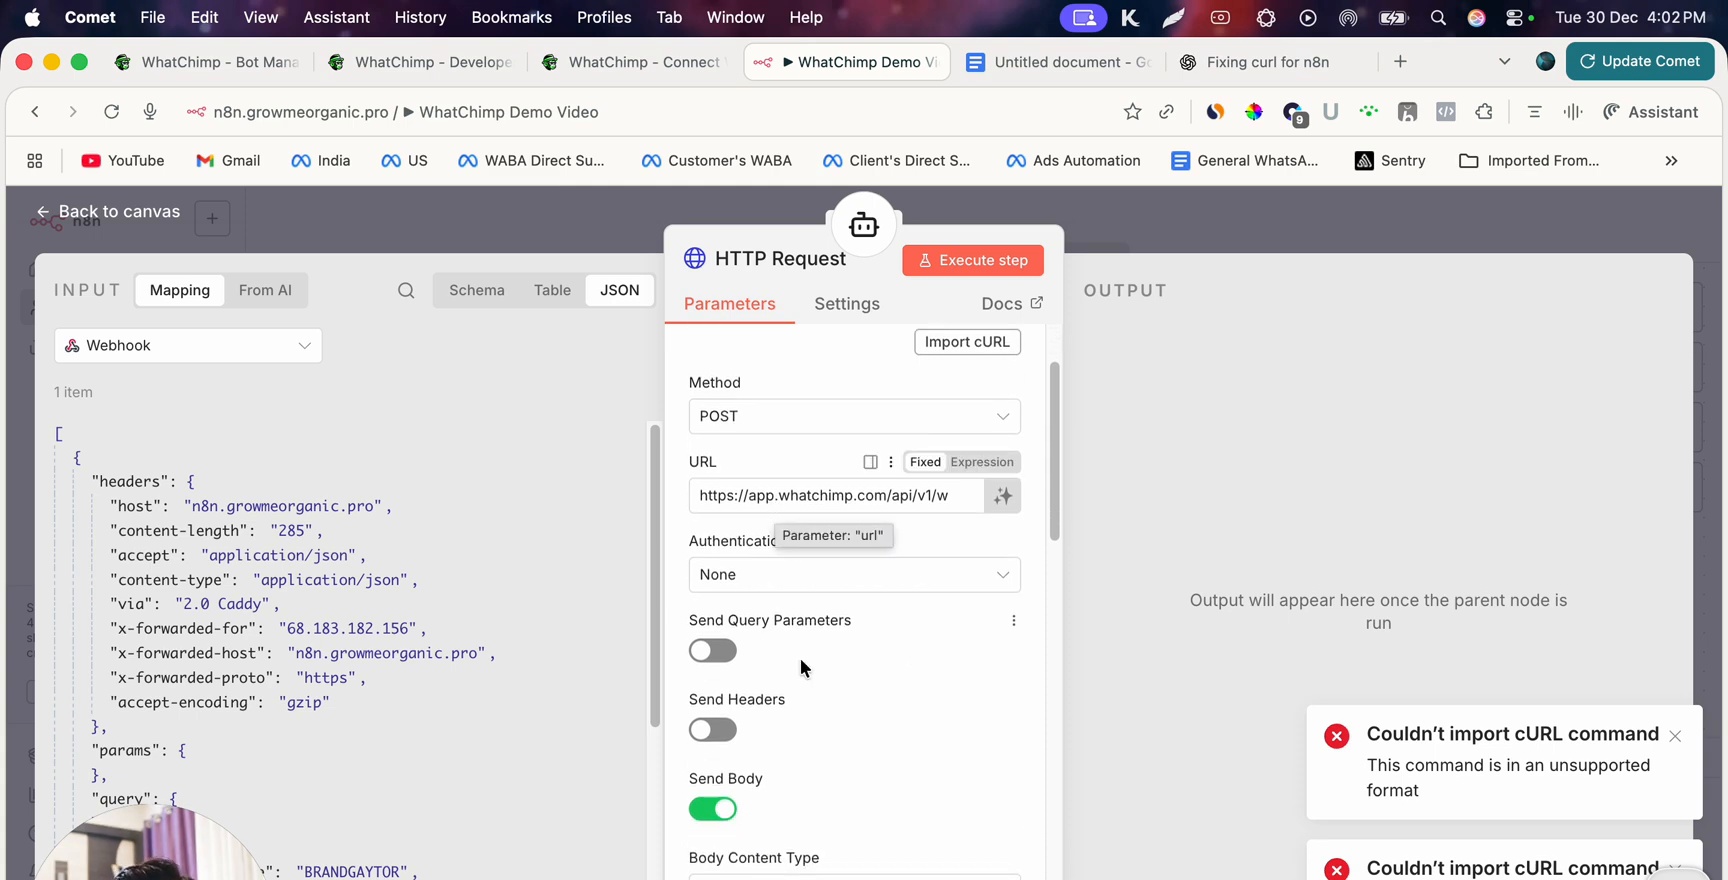 N8N HTTP Request node configured as a tool with POST method and WhatChimp API URL
Step 6: System Prompt Set Karein
AI Agent node mein, ek system message add karein jo agent ki behavior define kare:
Aap [Aapke Business Ka Naam] ke liye ek support agent hain. Aapka kaam hai WhatsApp par incoming messages sunna aur unka jawab dena. Neeche customer ka incoming message hai. Ye sure karein ki aap sirf final reply draft karein kyunki hum message ko jaise hai waise hi bhejenge. Hamesha ye sure karein ki final reply bhejne ke liye Send Message tool use karein.Step 7: Integration Test Karein
- Dusre phone se apne WhatsApp number par ek message bhejein
- N8N execution history check karein — aapko webhook fire hota dikhai dena chahiye
- AI Agent message process karta hai, reply generate karta hai, aur use WhatChimp API ke through wapas bhejta hai
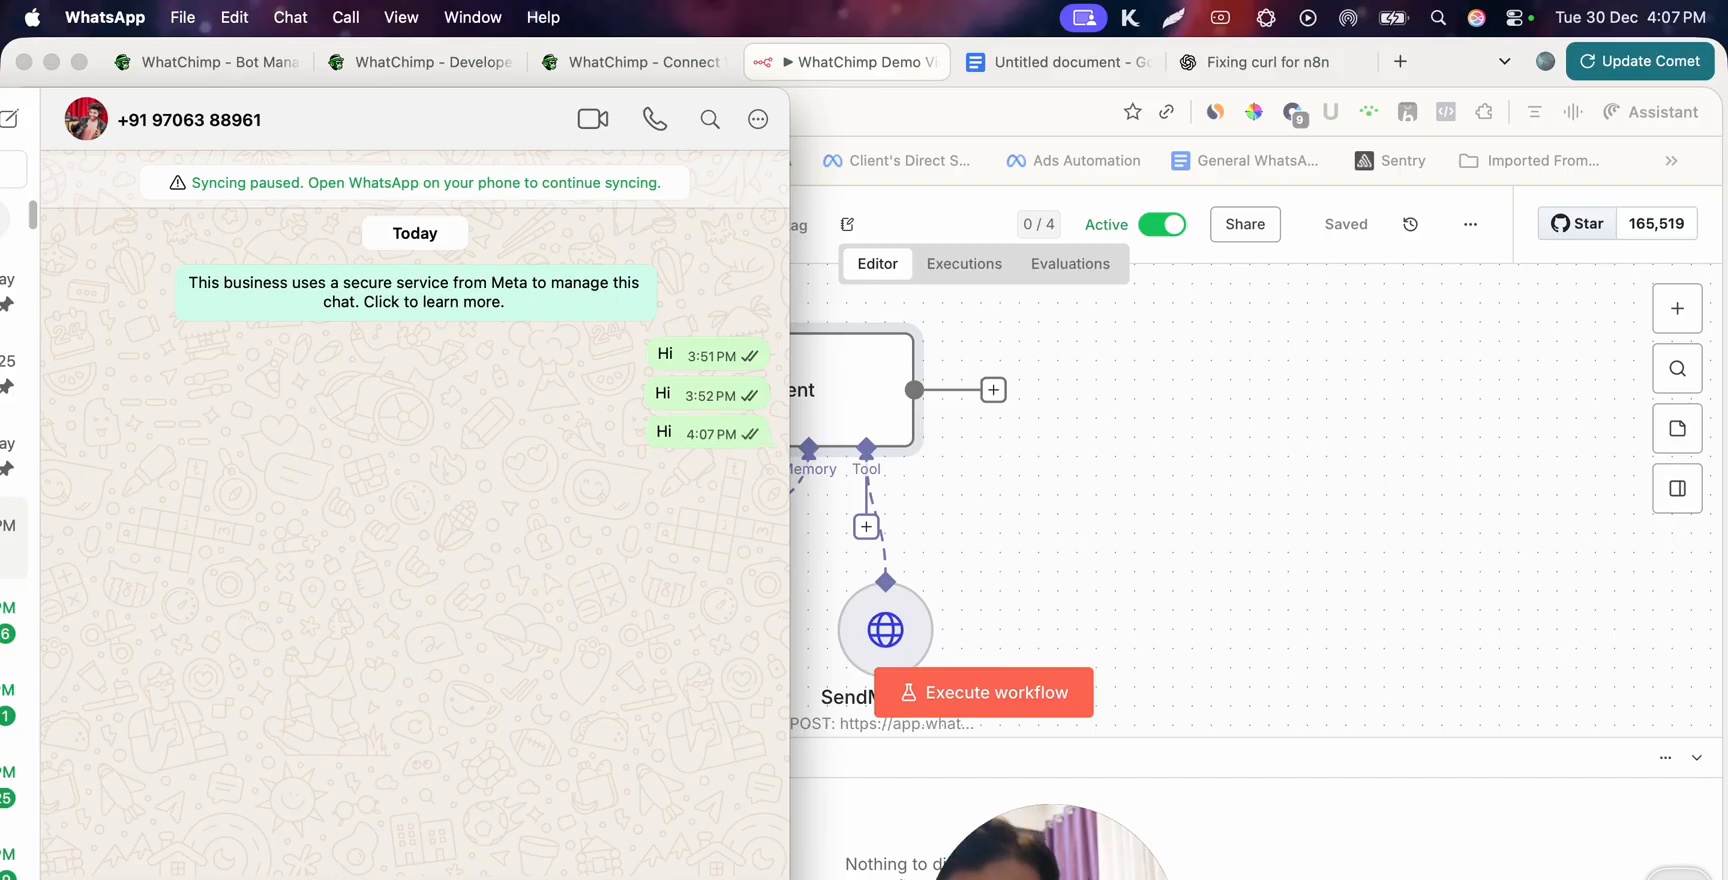 Split screen showing WhatsApp conversation with test messages on the left and N8N workflow execution on the right
Aap WhatChimp ki Omnichannel Inbox mein bhi conversation verify kar sakte hain:
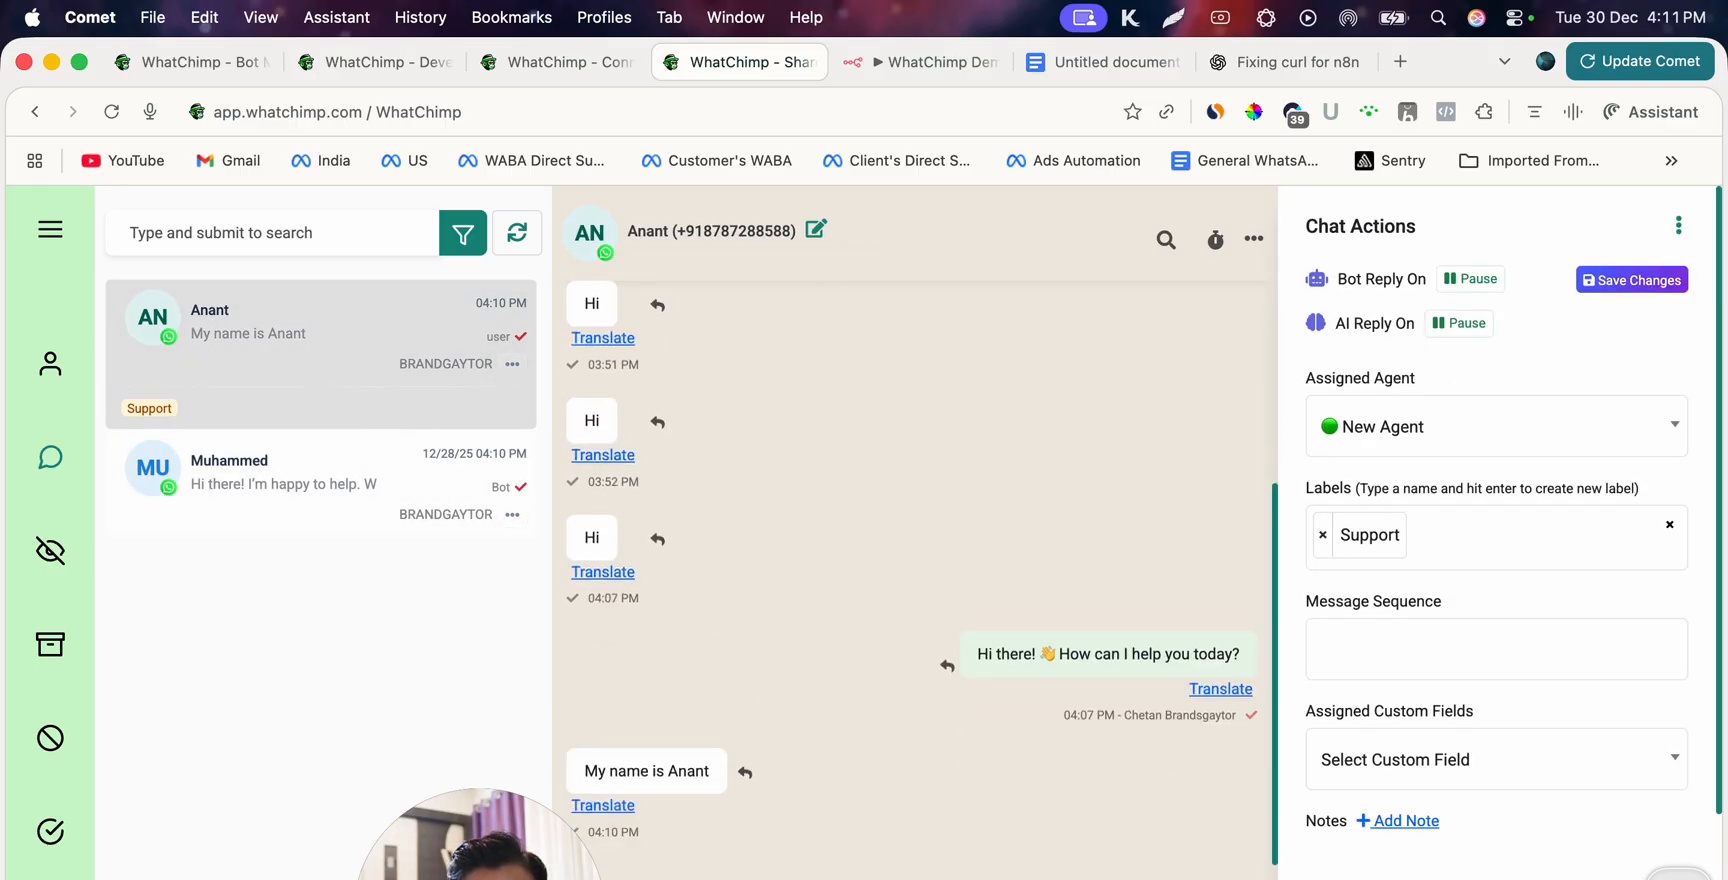 WhatChimp Omnichannel Inbox showing AI-generated replies in the conversation thread
Complete Workflow
Aapka final N8N workflow aise dikhna chahiye:
Webhook → AI Agent (Memory + OpenAI Chat Model + Send Message Tool ke saath)
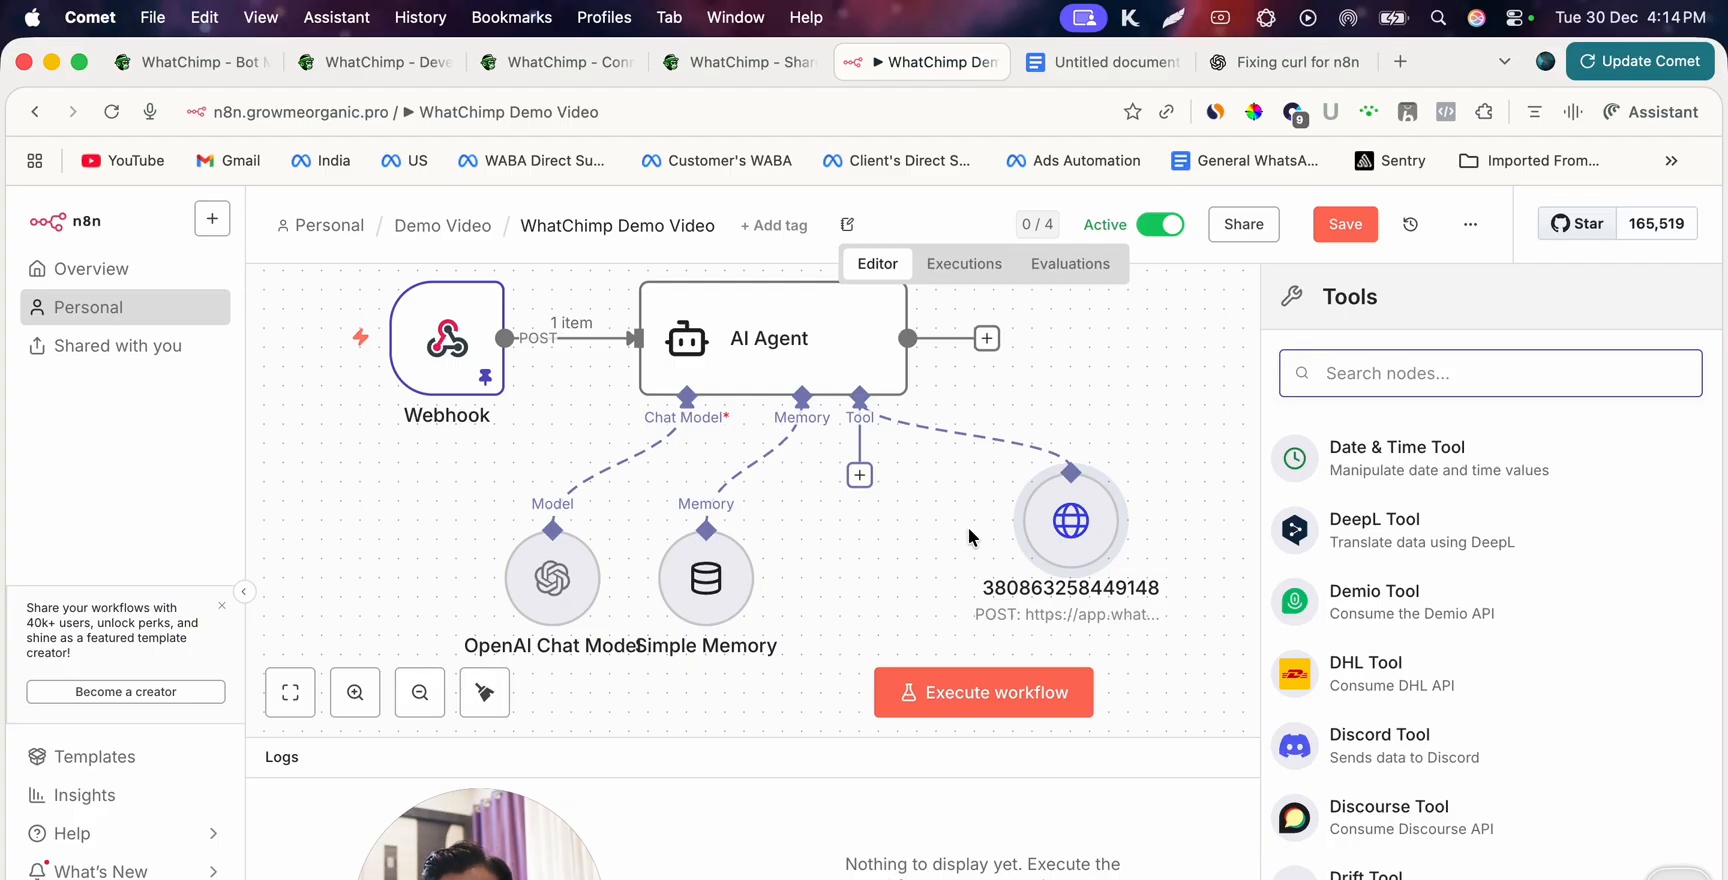 N8N canvas showing the complete workflow: Webhook connected to AI Agent with OpenAI Chat Model, Simple Memory, and HTTP Request tool nodes
Tips
- Reliability ke liye production mein in-memory storage ki jagah PostgreSQL memory ke liye use karein
- Apni business documents se advanced knowledge retrieval ke liye AI Agent mein Vector Store add karein
- N8N built-in tools offer karta hai jaise Web Search, File Search, aur Code Interpreter jo aap AI Agent par enable kar sakte hain
- Apni prompt ko carefully test karein — ek clear system message AI ko unnecessary prefixes jaise "Yeh raha reply:" add karne se rokta hai
- Webhook ya API calls ke saath koi bhi issues debug karne ke liye N8N execution history monitor karein
Aage Ke Steps
- AI Agents ke saath shuru karein — saari AI Agent features ka overview
- Intent detection set up karein — customer intent ke basis par conversations route karein