Kaise kare WhatChimp mein migration dusre BSP se
Step-by-step guide apke WhatsApp Business account ko WhatChimp mein migrate karne ke liye bina phone number, messaging quota ya Quality Rating khoye
Updated 16 June 2026
Kya aap already WhatsApp Business API use kar rahe hain kisi aur provider ke saath? Aap WhatChimp mein move kar sakte hain lagbhag 5 minutes mein. Bas aap itna kar rahe hain ki apne WhatsApp Business Account ko apne current Meta partner se disconnect karke WhatChimp se reconnect kar rahe hain — bas itna hi. Humne yeh kaam hundreds of businesses ke liye kiya hai bina ek bhi problem ke.
Kuch bhi nahi khota
Kya main apna phone number kho dunga? Nahi. Aapka number bilkul waise hi rahega. Customers ko pata bhi nahi chalega ki aapne switch kiya.
Kya meri messaging limits reset ho jayengi? Nahi. Chahe aap 1K, 10K, 100K, ya unlimited pe ho — aapka tier carry over hota hai.
Kya meri Quality Rating gir jayegi? Nahi. Aapki Quality Rating aapke WhatsApp Business Account se tied hai, aapke BSP se nahi. Woh same rahegi.
Kya downtime hoga? Nahi. Switch instant hai. Aap WhatChimp se messages bhejna shuru kar sakte hain connect karne ke turant baad.
Kya mere customers ko kuch notice hoga? Nahi. Unki taraf se kuch nahi badlega. Same number, same conversation history unke phone pe.
Kya main apna blue tick kho dunga? Nahi. Aapka verified business badge (blue tick) aapke WhatsApp Business Account se tied hai, aapke BSP se nahi. Woh rahega.
Mere subscribers ka kya hoga?
Subscribers ek aisi cheez hai jo automatically migrate nahi hoti. Aapko apni subscriber list apne purane platform se export karni hogi aur WhatChimp mein import karni hogi. Yeh ek simple CSV upload hai — dekhen Subscriber Manager guide step-by-step instructions ke liye.
Kya preserve hota hai
Aapka phone number, messaging limits, Quality Rating, display name, business profile, blue tick verification, aur Green Tick verification (agar aapke paas hai) — sab automatically carry over hote hain. Migration ek standard Meta process hai jo WhatsApp Business platform mein built-in hai.
Aapko kya chahiye hoga
Facebook Business Manager access admin permissions ke saath, aapke current BSP account ke credentials, aur woh phone number jo aap migrate karna chahte hain.
Yeh aap karenge
- Step 1 — Two-step verification disable karen apne current number pe
- Step 2 — Apna number WhatChimp se connect karen via Embedded Signup
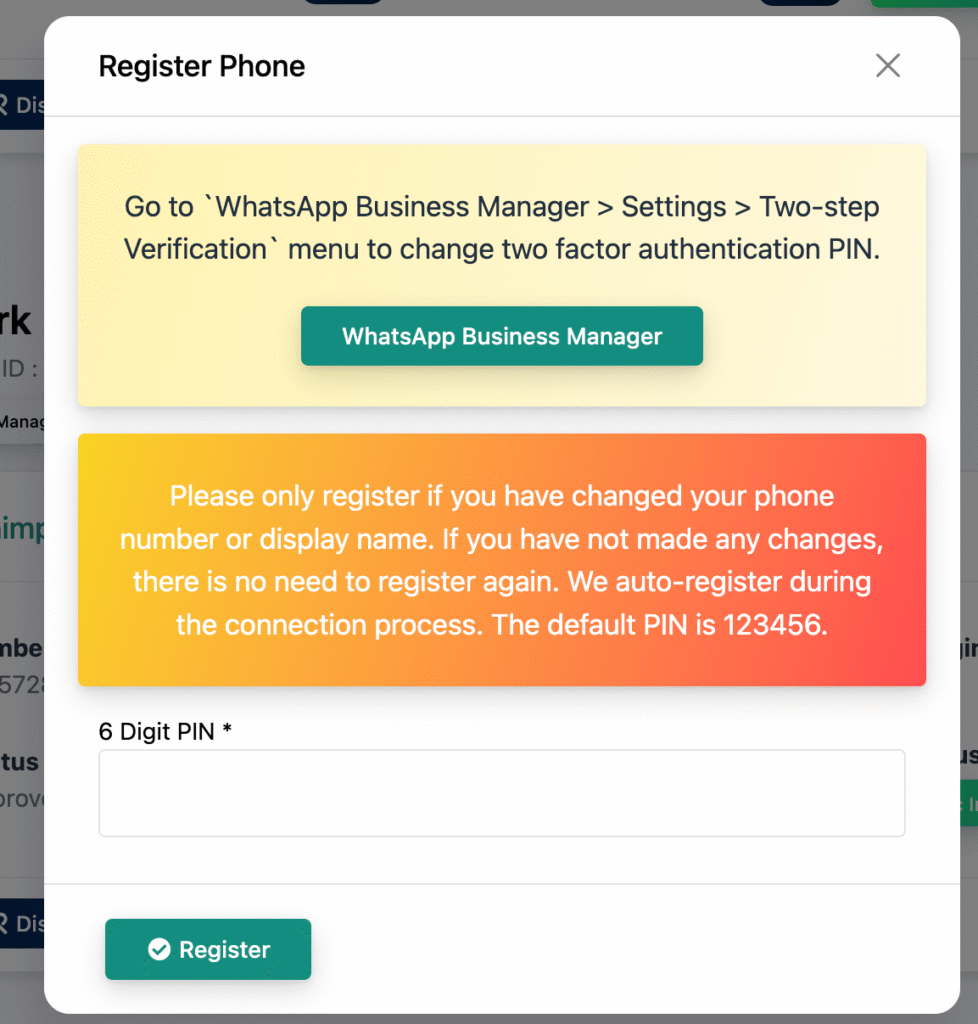
- Step 3 — Apna phone number register karen
- Step 4 — Verify karen ki sab kuch carry over hua
Bas itna hi — ~5 minutes aur aap done hain.
Step 1: Two-step verification disable karen
Migrate karne se pehle, aapko two-step verification off karna hoga apne current phone number pe. Yahan tak kaise pahunchen:
Jayen whatchimp.com/phone-numbers — yeh sirf ek shortcut link hai jo aapko directly phone numbers page pe le jaata hai Meta ke WhatsApp Manager mein. Iska WhatChimp se koi lena-dena nahi hai, yeh bas aapko Meta ke menus mein navigate karne se bachata hai. Login karen us Facebook account se jiske paas aapke Business Portfolio ka admin access hai.
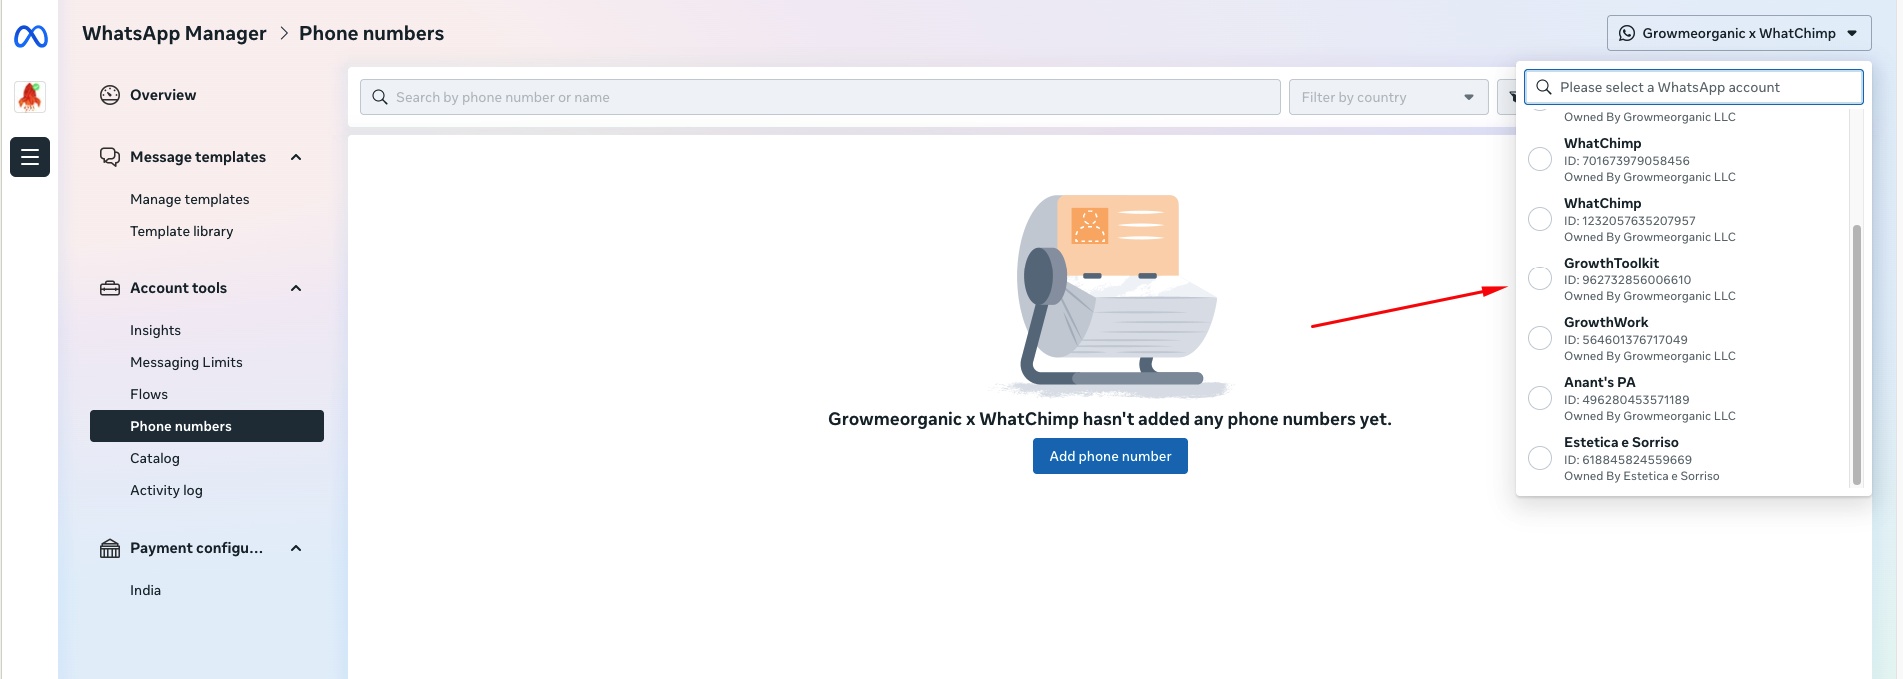
Ek baar login karne ke baad, aap WhatsApp Manager pe land karenge. Agar aapke paas multiple phone numbers hain, to top-right corner mein dropdown pe click karen aur sahi number select karen — woh phone number jo aap migrate karna chahte hain.
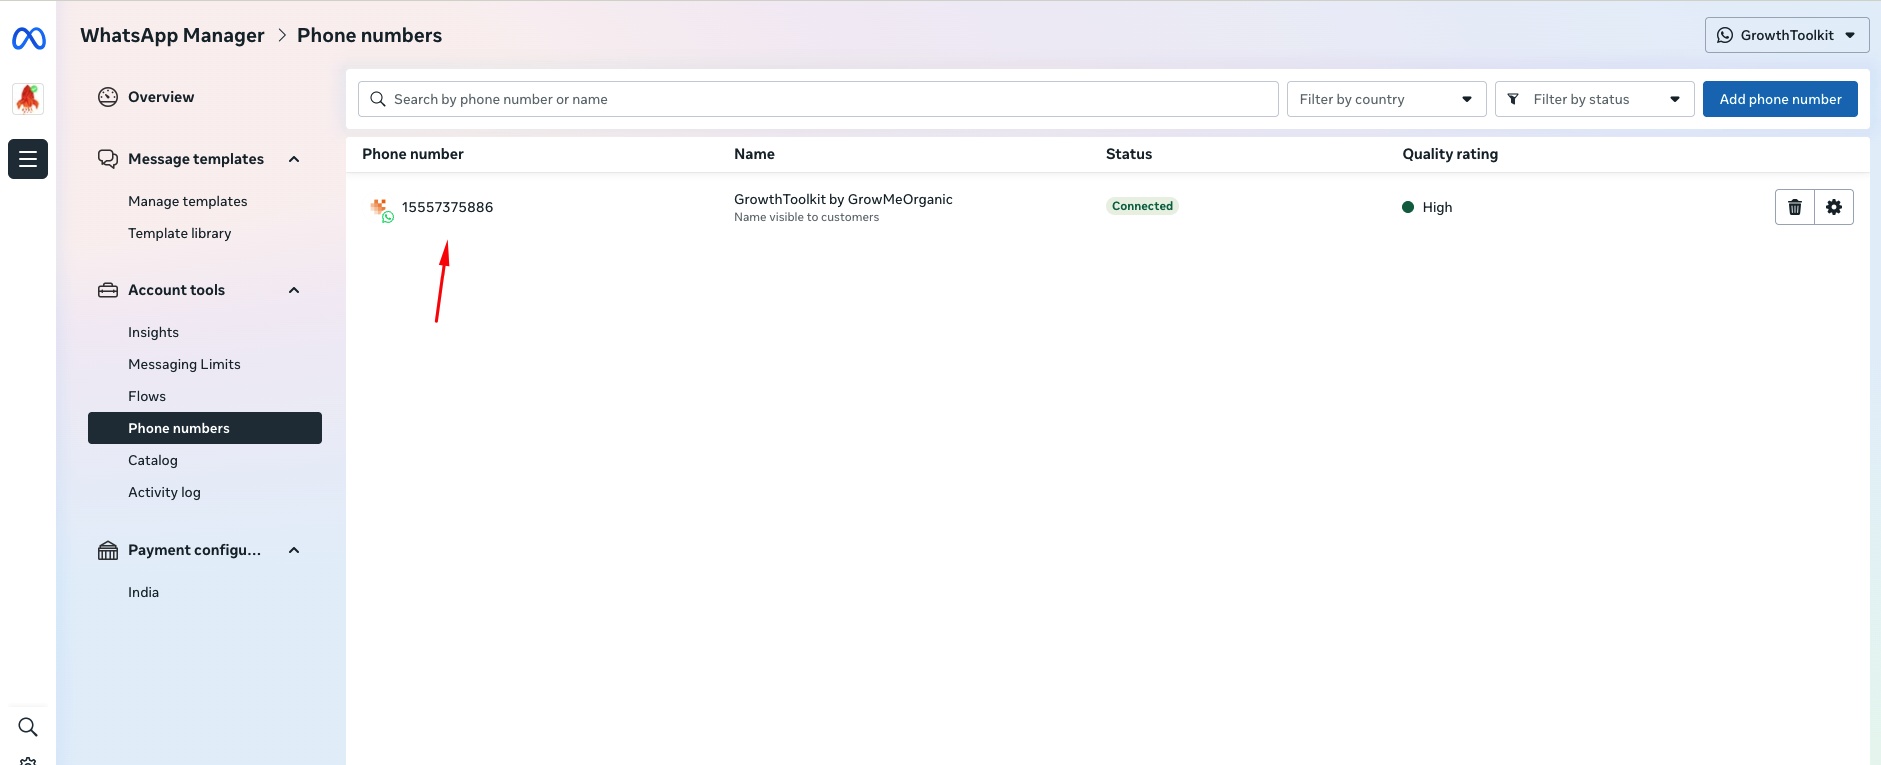
Aap apna phone number Phone numbers page pe listed dekhenge uske name, status, aur Quality Rating ke saath. Apne phone number pe click karen uski settings kholne ke liye.
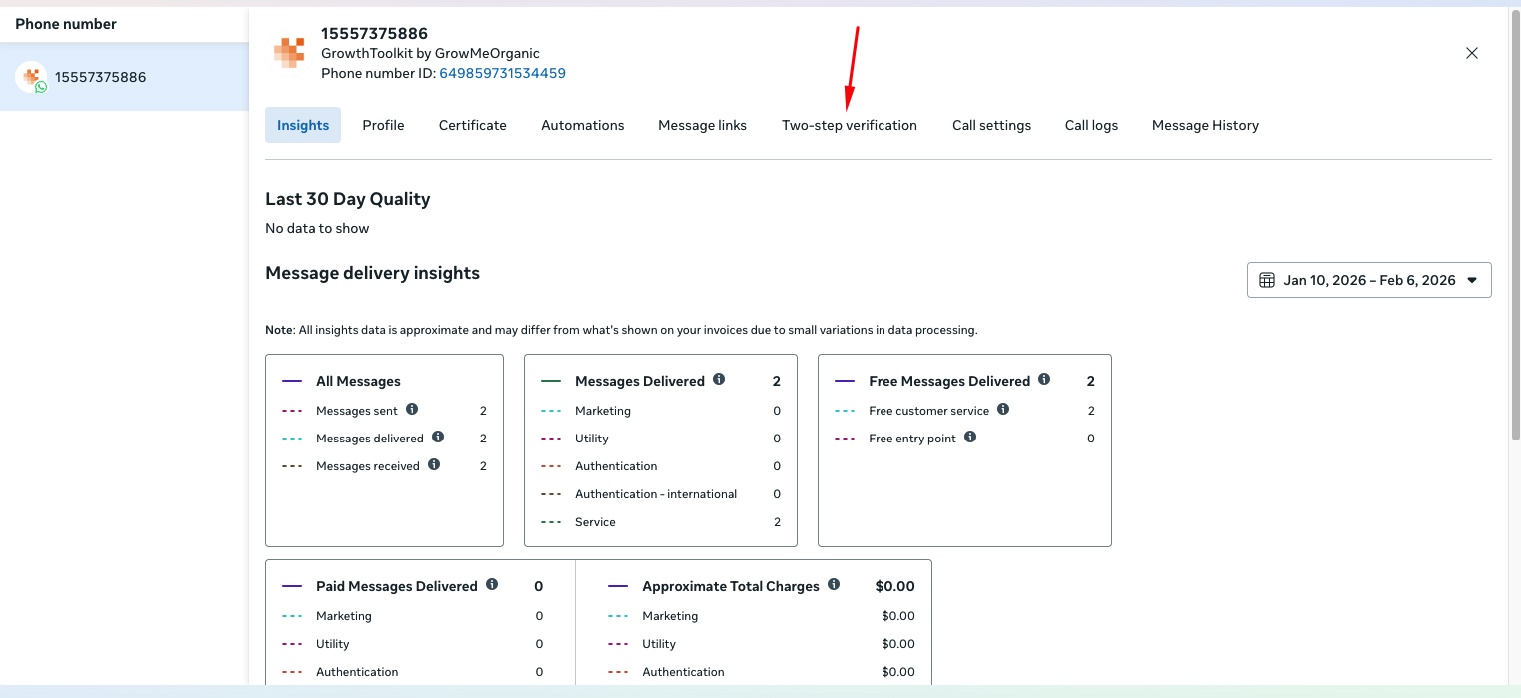
Right side pe ek settings panel khulta hai multiple tabs ke saath. Aapko tabs dikhengi jaise Insights, Profile, Certificate, Automations, Message links, Two-step verification, Call settings, Call logs, aur Message History. Two-step verification tab pe click karen.
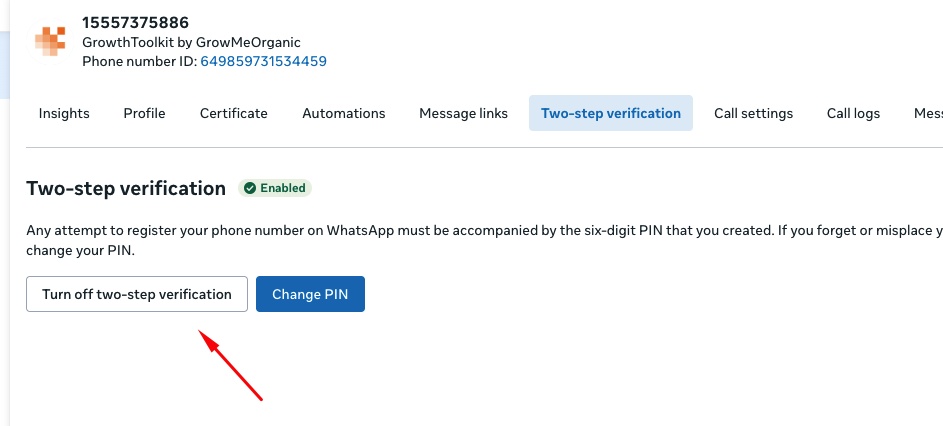
Agar yeh Enabled (green badge) dikhata hai, to Turn off two-step verification pe click karen.
Aapko ek confirmation dialog dikhega — Meta aapko ek email bhejega instructions ke saath process complete karne ke liye. Apne inbox (aur spam folder) mein email check karen aur instructions follow karen.
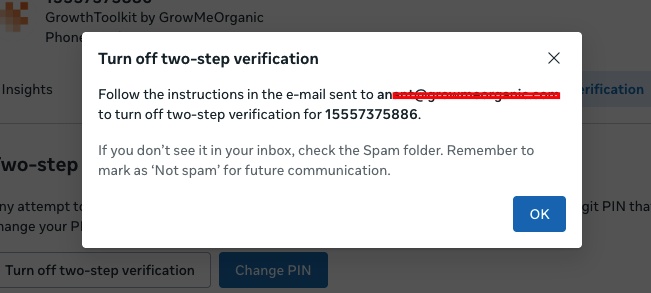
- Yeh temporary hai — aap isse migration ke baad re-enable karenge security ke liye
- Important: Migration fail ho jayega agar two-step verification abhi bhi on hai
- Agar yeh already disabled dikhata hai, to aap ready hain — Step 2 pe jayen
Step 2: Apna number WhatChimp se connect karen
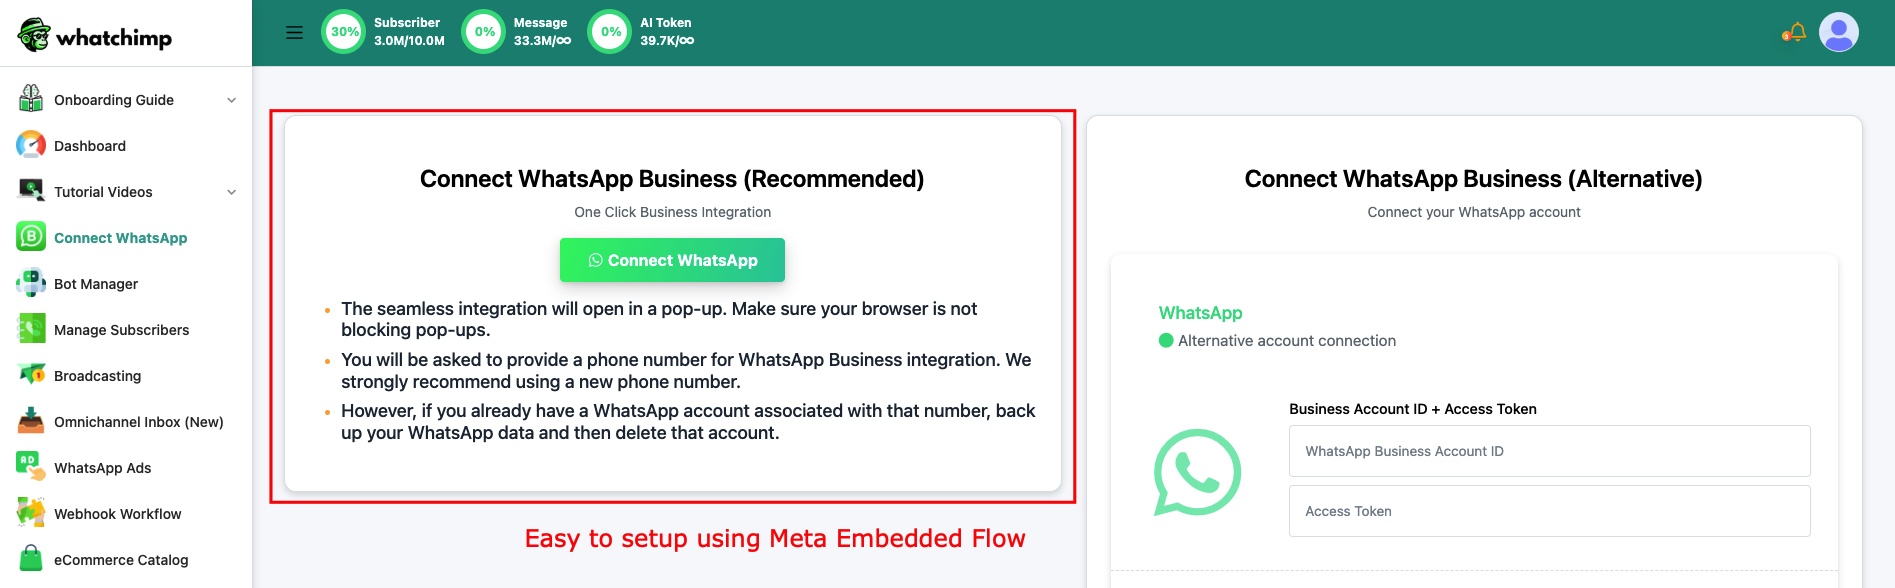
Apne WhatChimp account mein login karen aur Connect Account pe jayen.
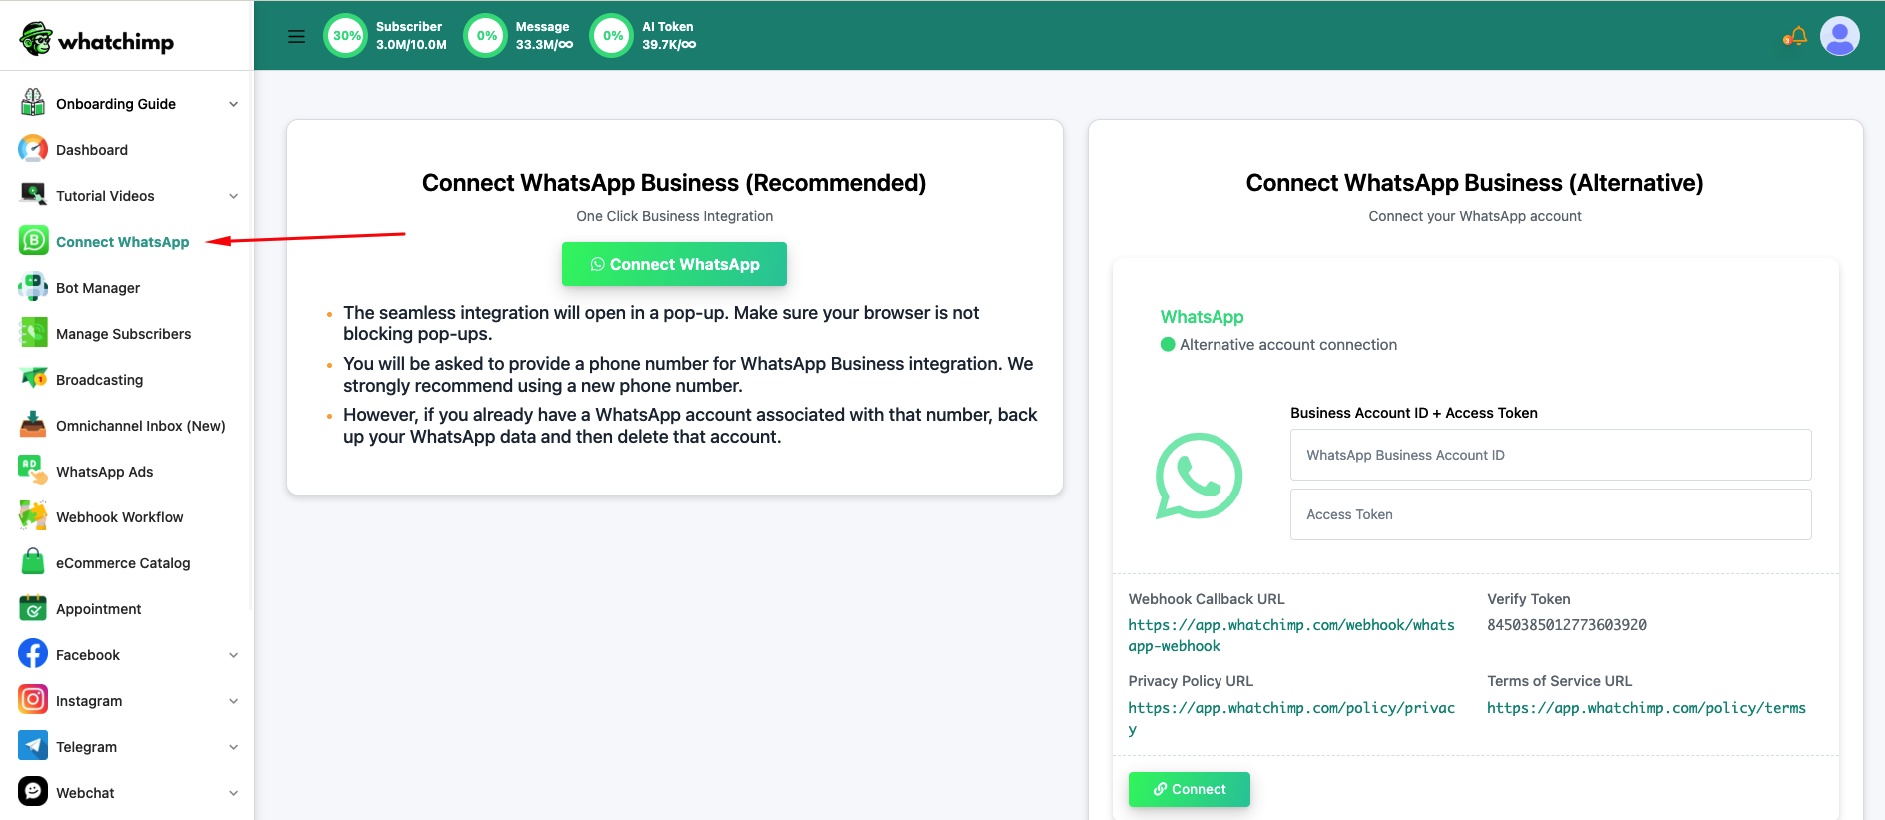
Connect WhatsApp pe click karen Embedded Signup flow start karne ke liye.
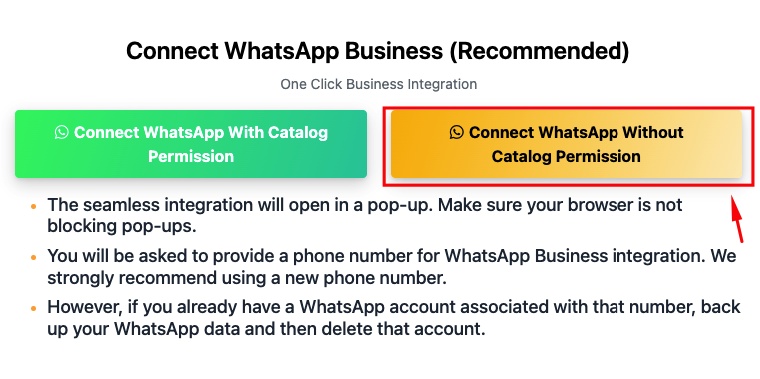
Connect WhatsApp Without Catalog Permission select karen jaldi karne ke liye — aap apna Catalog baad mein connect kar sakte hain.
Same Facebook account se login karen jiske paas aapke Business Portfolio ka access hai.

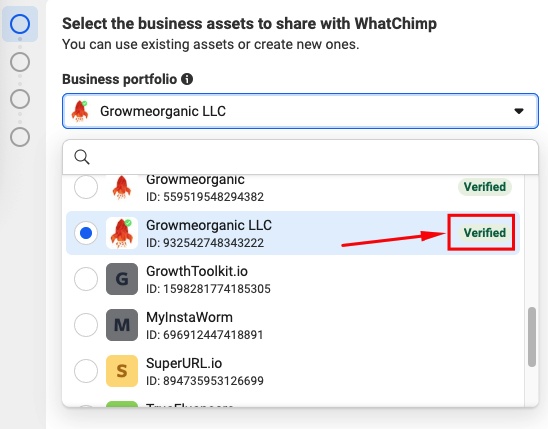
Kyunki aap pehle kisi aur BSP se connected the, aapke paas already ek verified Business Portfolio hoga. Isse dropdown se select karen — aapko green "Verified" badge dikhna chahiye apne business name ke paas.
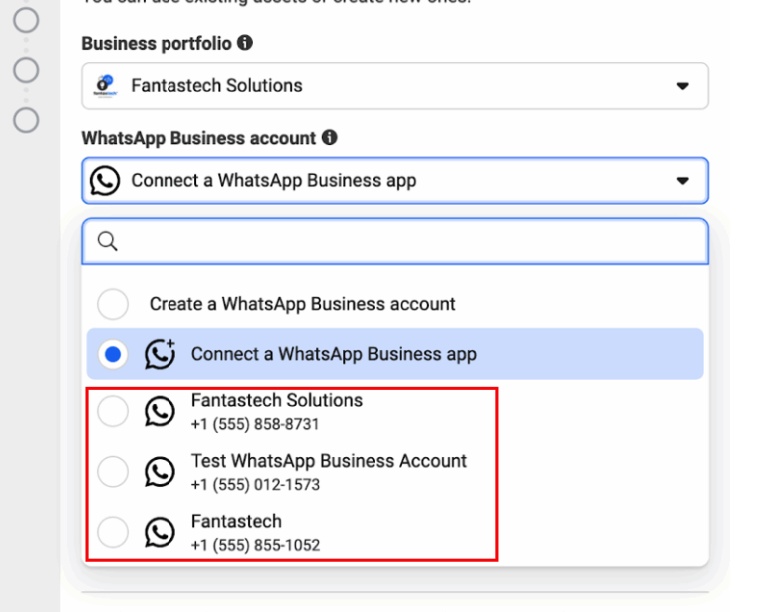
Apna existing WABA (WhatsApp Business Account) select karen — yeh woh account dikhayega jo aap apne previous BSP ke saath use kar rahe the.
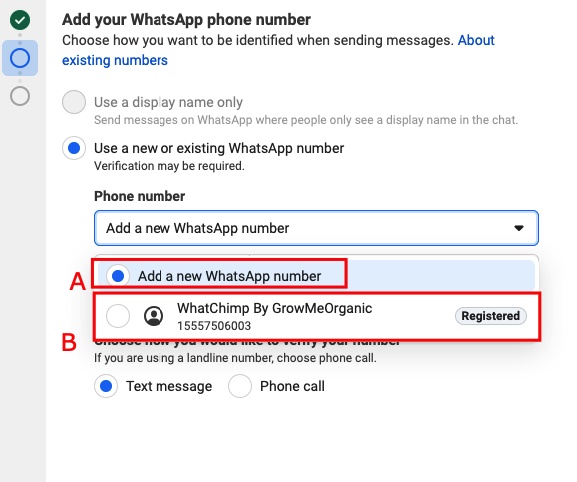
Apna existing phone number select karen — woh registered number choose karen jo aap migrate kar rahe hain, "Add a new WhatsApp number" nahi.
Step 3: Apna phone number register karen
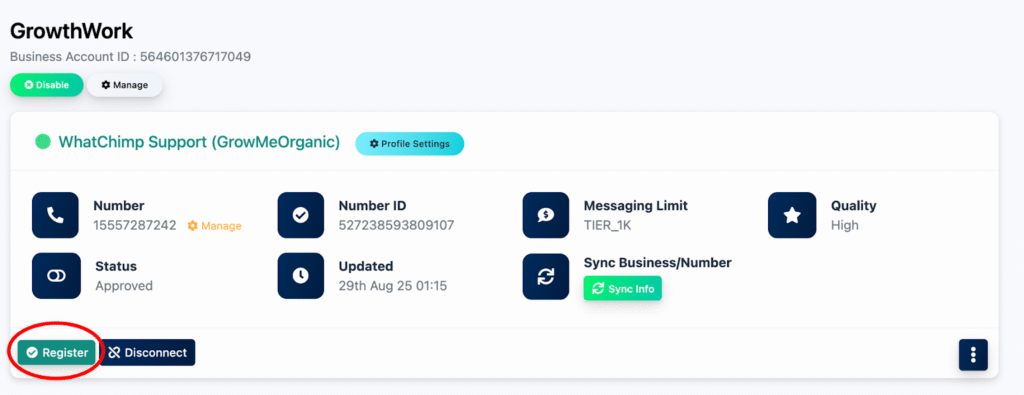
Ek baar connect hone ke baad, niche scroll karen aur Register button pe click karen
Registration code enter karen: 123456
Kuch seconds wait karen success confirmation ke liye
Step 4: Apni migration verify karen
Apne WhatChimp Dashboard mein, Messaging Limit and Quality section pe jayen
Confirm karen ki aapka messaging quota aur Quality Rating match kar rahe hain jo aapke previous BSP ke saath the
Bas ho gaya — aapka number ab WhatChimp pe hai apni saari limits aur ratings preserved ke saath.
Tips
Two-step verification re-enable karen migration ke baad security ke liye. Ek message se test karen confirm karne ke liye ki sab kuch kaam kar raha hai — kisi known number ko ek template bhejein. Agar registration code pehli baar mein kaam nahi karta, to 30 seconds wait karen aur phir try karen.
Related articles
Kaise set up karen apna WhatsApp Business API Account — First-time setup guide
Kaise migrate karen apni WhatsApp Business API apne current BSP se WhatChimp mein — Migration issues troubleshoot karna