External HTTP API Integration in Bot Flow
External HTTP API Integration in Bot Flow
Updated 25 September 2026
WhatChimp's HTTP API lets your chatbot connect to any external service — your CRM, eCommerce store, payment gateway, or any public API. Your chatbot makes an API call, gets data back, saves it to custom fields, and uses it in messages — all automatically within a conversation.
Video: https://www.youtube.com/watch?v=5sZkZb7kepI
Step 1: Create an API Connection
Go to Integration → HTTP API and click Create.
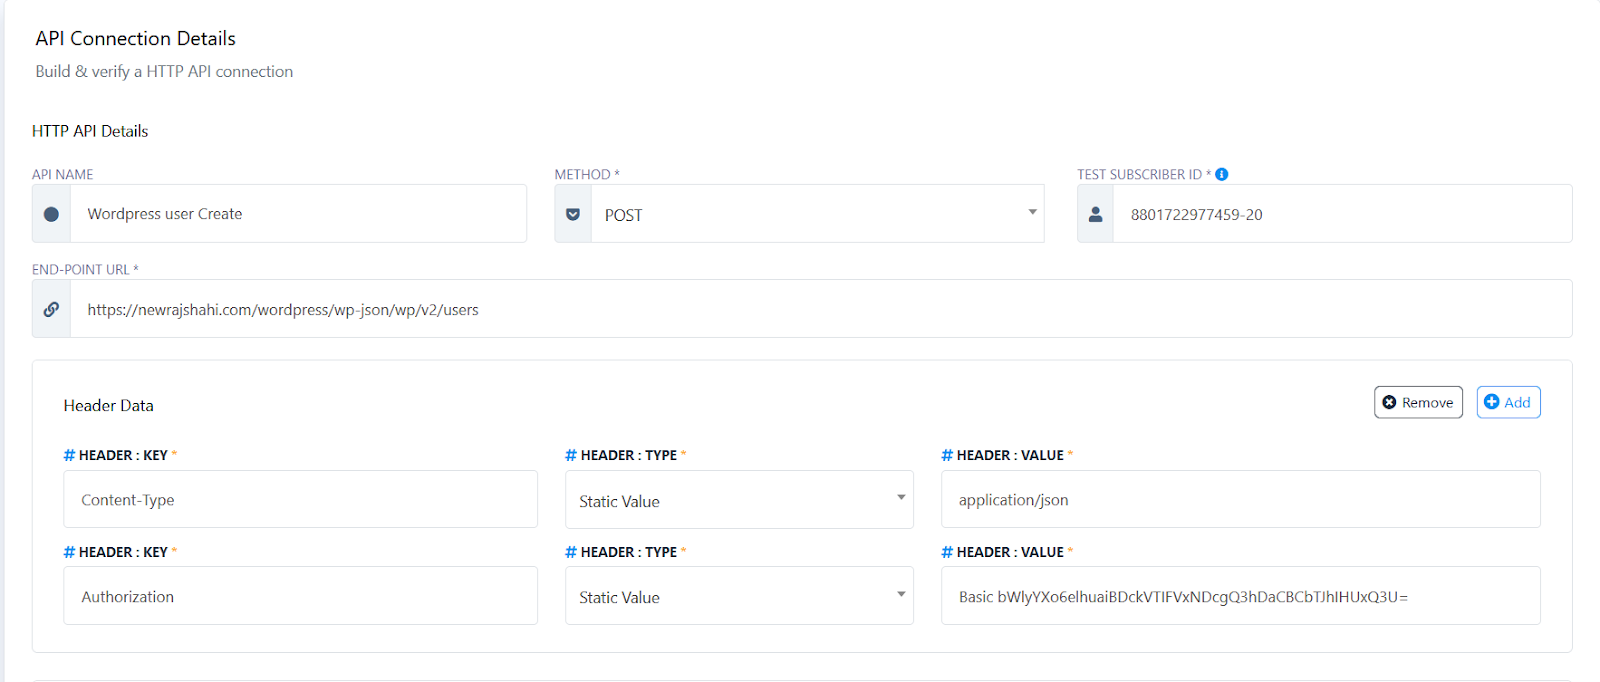
API Name — Give it a recognizable name (e.g., "Fetch Order Status").
Method — GET to fetch data, POST to send data. Check the external service's API documentation.
Endpoint URL — The API URL. Use the variable picker to insert subscriber data — e.g., https://example.com/api/orders?email={{email}} pulls the email from the subscriber's profile.
Test Subscriber ID — Any subscriber ID from Subscriber Manager, used to test the connection with real data.
Headers — Add Content-Type: application/json and any authentication headers (e.g., Authorization: Bearer your-api-key) if the API requires them.
Body Data (POST only) — Add the fields the API expects. Choose static or dynamic values, and select the format: JSON, Form Data, or X-WWW-FORM-URLENCODED.
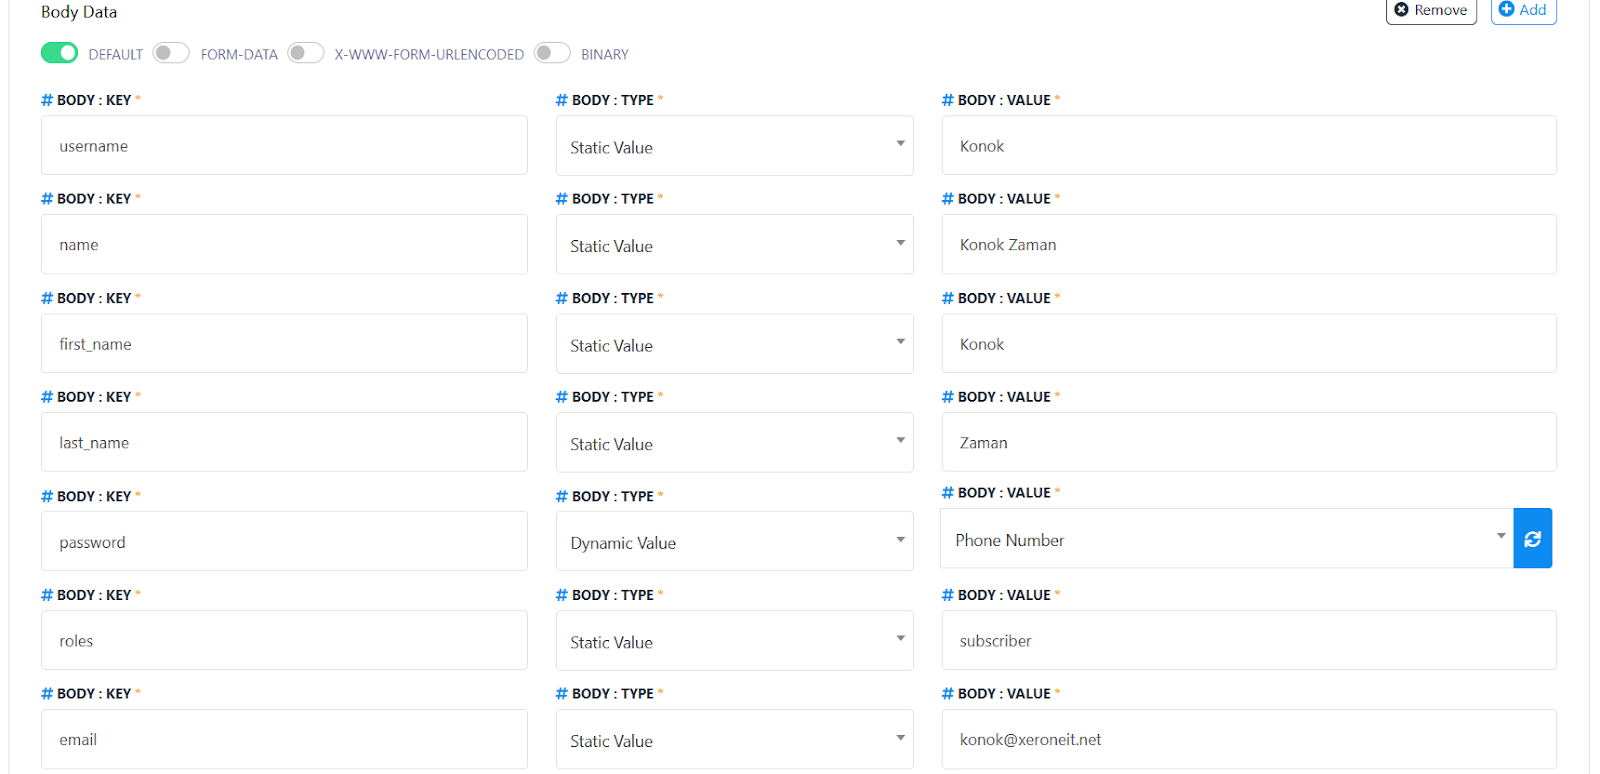
Step 2: Verify and Save to Custom Fields
Click Verify Connection to test. WhatChimp shows the JSON response from the API.
Map the response to custom fields — pick which value from the API response gets saved to which subscriber custom field. For example, if the API returns {"status": "shipped"}, map status to your "order_status" custom field. Now that data is on the subscriber's profile and available in any message or bot flow.
Click Save API.
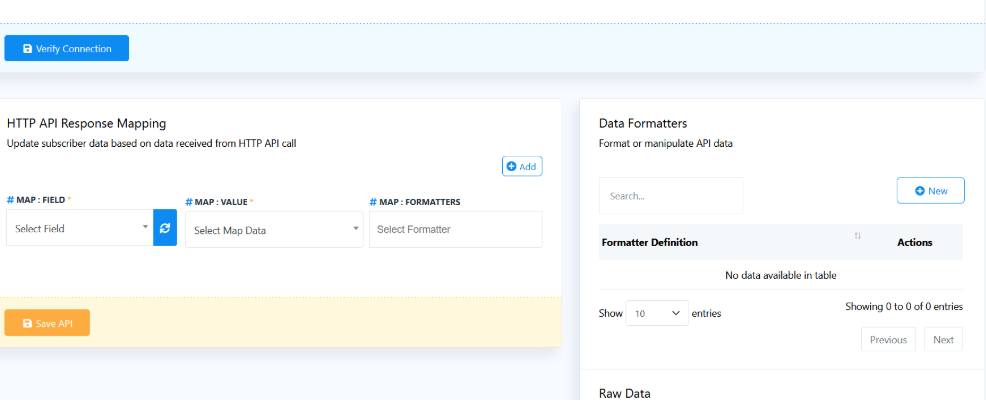
Tip: Create custom fields in Subscriber Manager first so they appear in the mapping dropdown.
Step 3: Use It in a Bot Flow
Go to Bot Manager → Bot Reply and add an HTTP API component to your chatbot flow. Select your saved API from the dropdown (click Refresh if it's new).
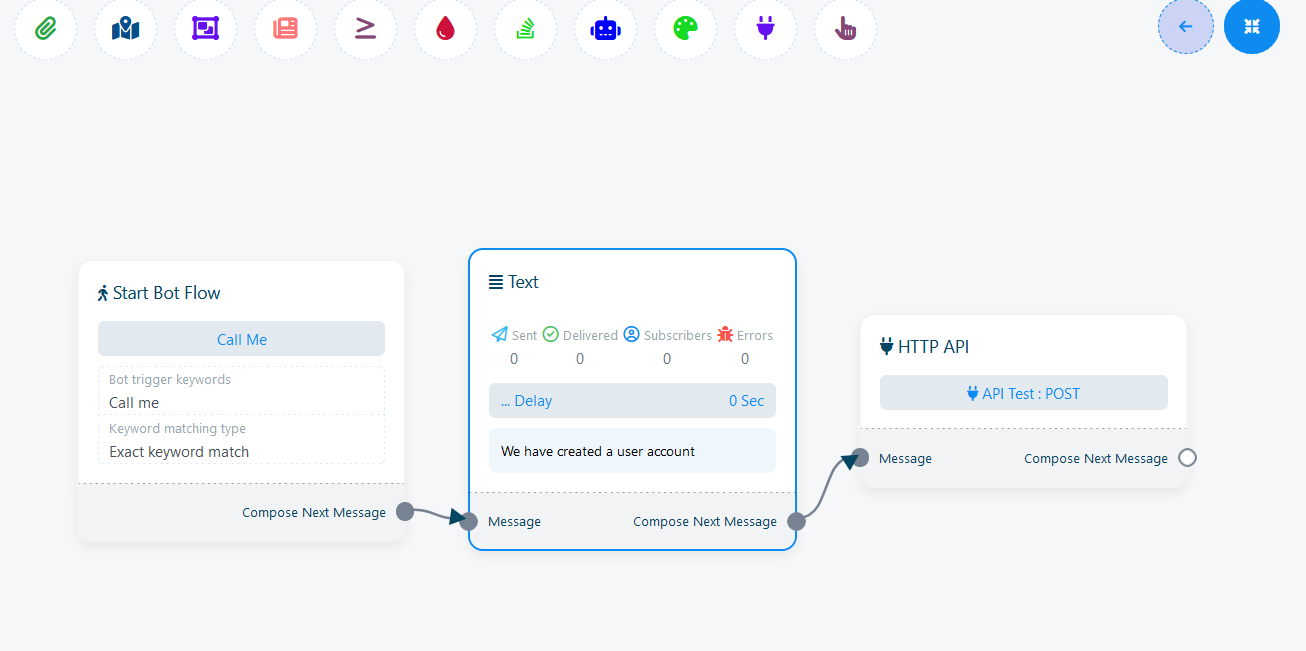
Add a text block after the API call that uses the custom fields — e.g., "Your order status is {{order_status}}." The chatbot calls the API, saves the result, and replies — all in one flow.
Related Articles
How to Create a Keyword-Based WhatsApp Chatbot — Bot flow fundamentals
How to Collect User Details with Input Flow — Collect data from users to pass to APIs
Manage Custom Fields and Labels — Create custom fields for storing API responses