Apna Google Calendar WhatChimp Se Kaise Connect Karein
Apna Google account connect karein taaki appointment bookings Google Calendar mein Meet link ke saath sync ho. WhatChimp mein appointment booking ka pehla step.
Updated 18 June 2026
Video: https://www.youtube.com/watch?v=_vtfCtElqtg
Customers ko WhatsApp ke andar appointments book karne dene se pehle, aapko ek Google account connect karna hota hai. Yeh aapke Google Calendar ko WhatChimp se link karta hai, taaki har booking aapke calendar par ek Google Meet link ke saath aaye aur aap apni availability ek hi jagah se manage karein. Yeh appointment booking set up karne ka pehla step hai.
Step 1: Google Integration Kholein
Left sidebar mein, Google Integration par click karein. Aap ise Settings & Integration ke Google section se bhi reach kar sakte hain.
Step 2: Apna Google Account Connect Karein
- Sign in with Google par click karein.
- Jis Google account ko use karna hai use chunein.
- Google permission screen par, jo access maanga jaaye use allow karein, including Calendar permission. WhatChimp ko aapke calendar par bookings create aur manage karne ke liye yeh chahiye.
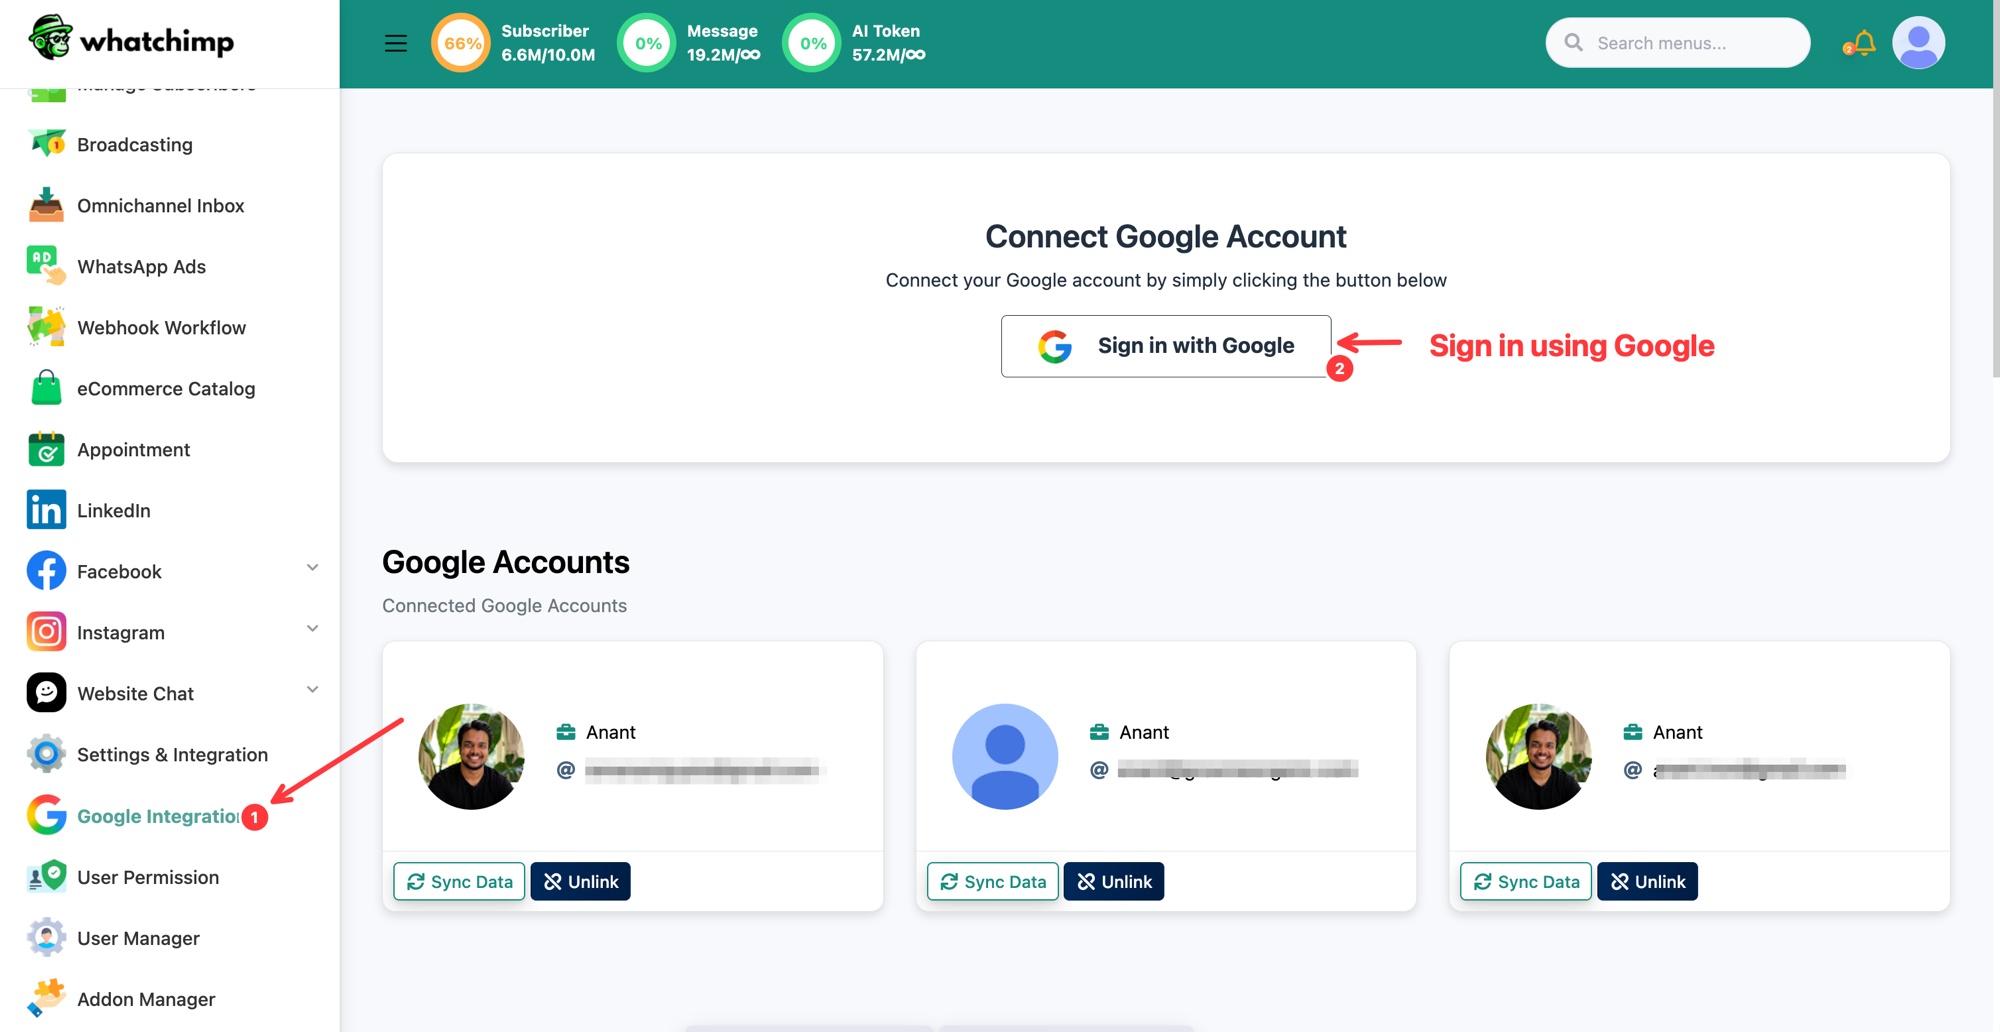 Apna account connect karne ke liye Sign in with Google par click karein
Connect hote hi, aapka account Google Accounts ke neeche dikhta hai. Har account card se aap:
- Sync Data: us account se pulled calendars aur details refresh karein.
- Unlink: account ko WhatChimp se disconnect karein.
Agar aap alag-alag calendars manage karte hain toh ek se zyada Google accounts bhi connect kar sakte hain.
Step 3 (optional): Ek Naya Google Calendar Banayein
Aap koi already maujood calendar use kar sakte hain, ya appointments ke liye ek naya bana sakte hain, jaise kisi specific time zone ke saath.
- Google Calendar section tak scroll karein.
- Create New Calendar par click karein.
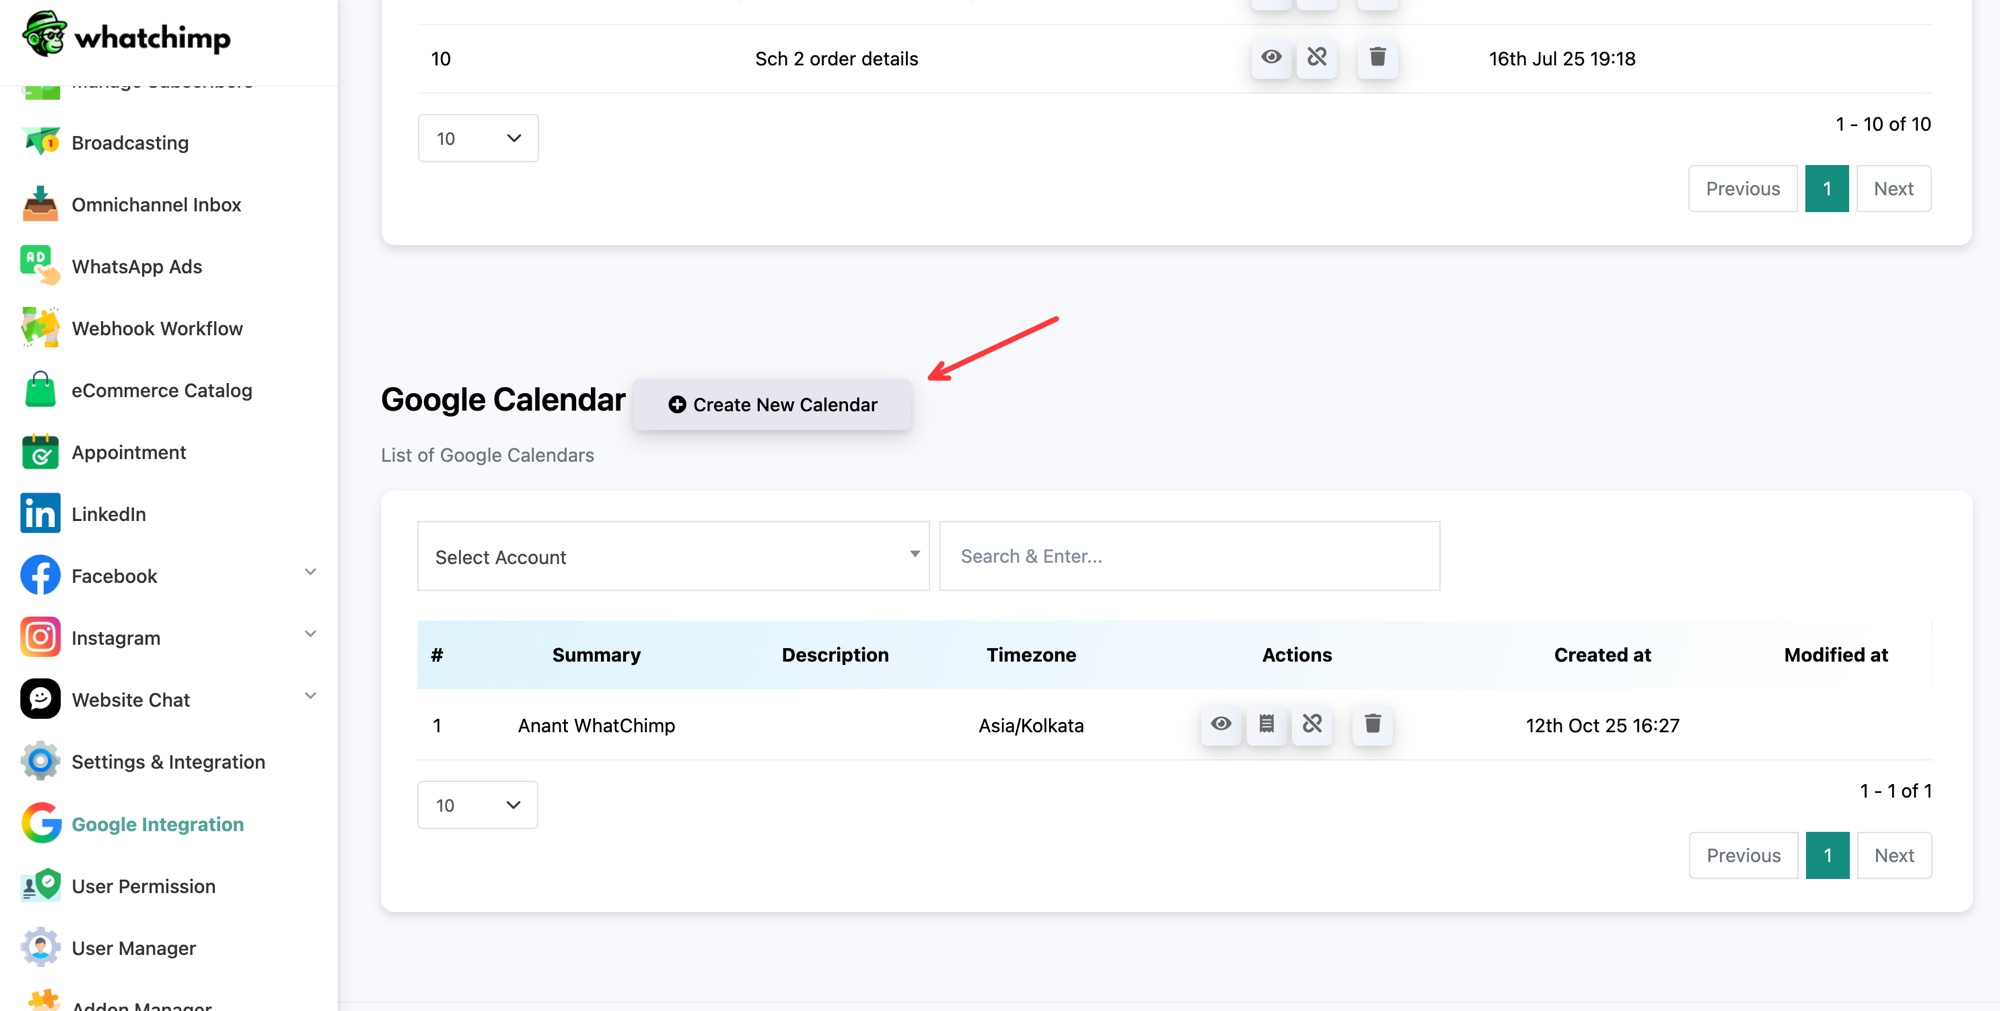 Ek dedicated calendar add karne ke liye Create New Calendar par click karein
- Create Google Calendar window mein, yeh fill karein:
- Select Account: woh connected Google account jiska yeh calendar hai.
- Calendar Summary: calendar ka ek naam, jaise "New Calendar" ya "Appointments".
- Select Timezone: woh time zone jo bookings follow karein, jaise (GMT-05:00) America/New York.
- Save par click karein.
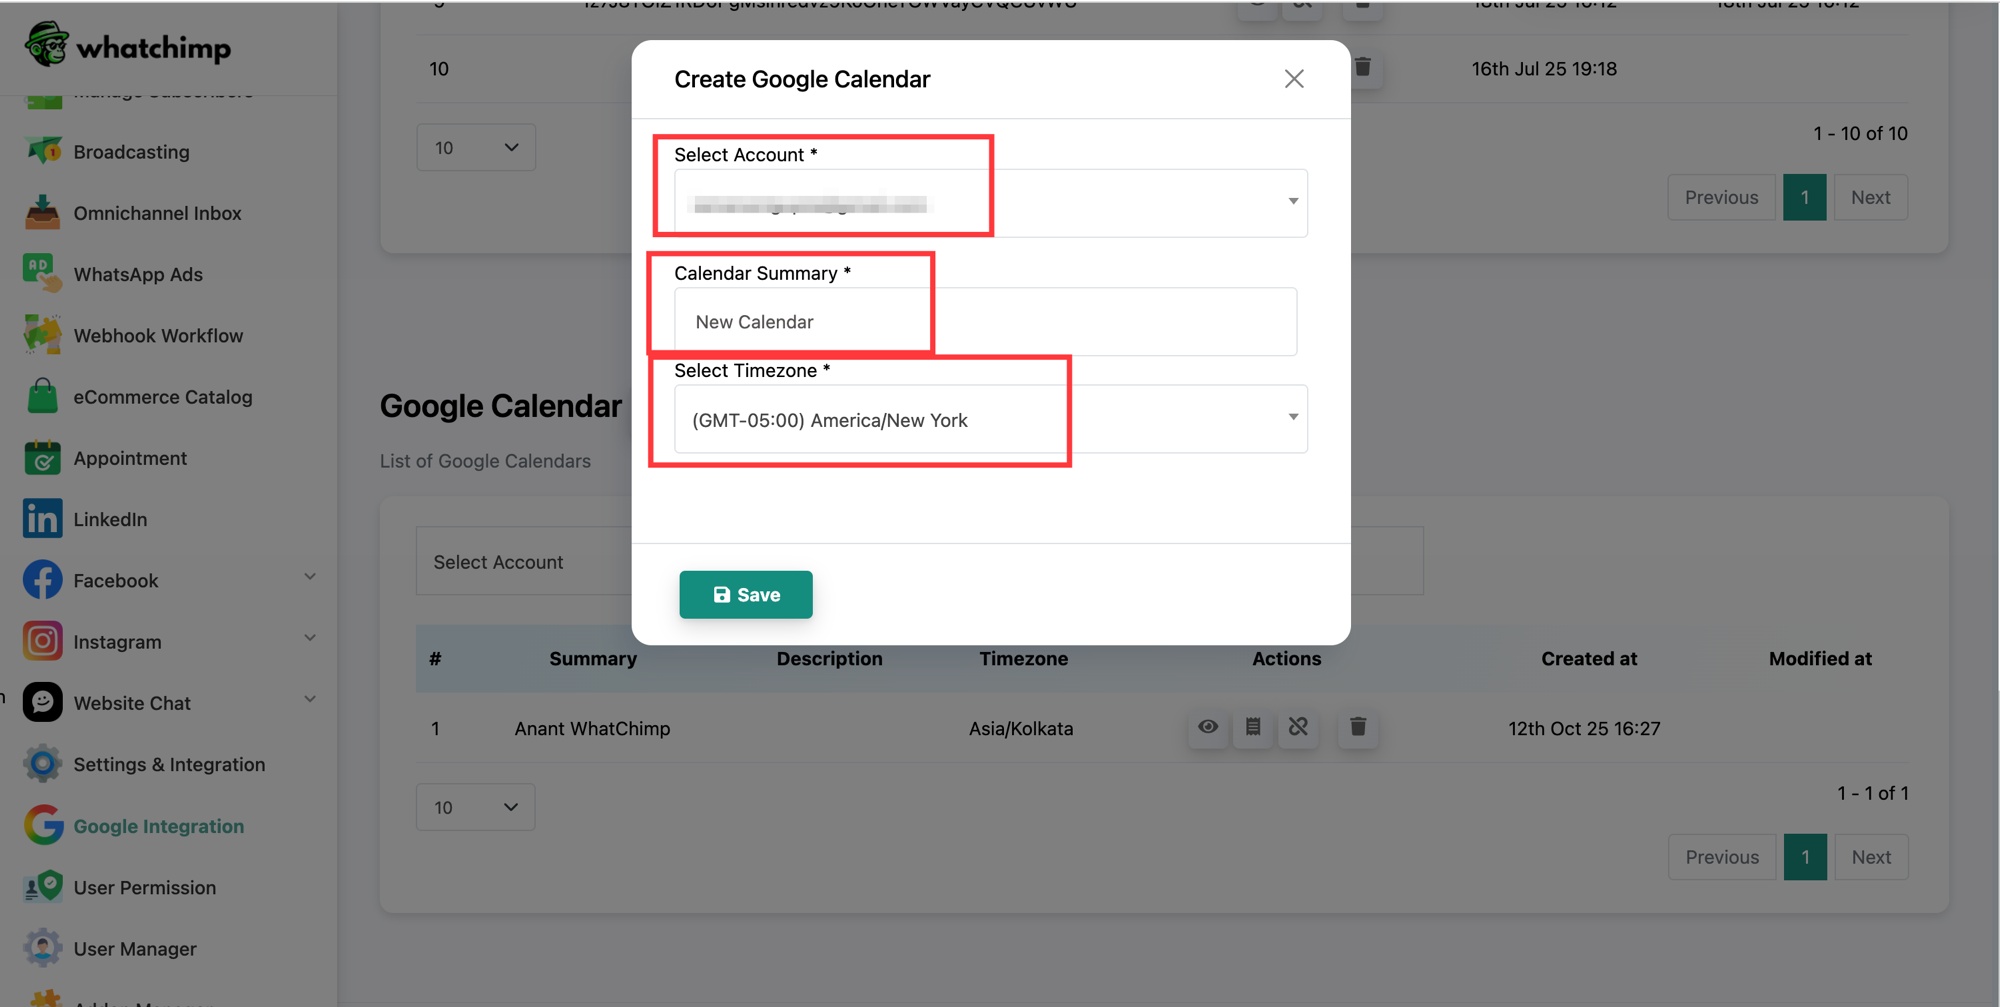 Account chunein, calendar ko naam dein, time zone set karein, phir Save karein
Aapka naya calendar List of Google Calendars mein dikhta hai. Har calendar ke liye, Actions column aapko use view karne, uska event list kholne (us par ki gayi har booking), use unlink karne, ya delete karne deta hai.
Aage Kya
Aapka Google account connected aur calendar ready hone ke baad, agla step hai ek appointment create karna taaki customers use WhatsApp se book kar sakein.