Round Robin on a Button Click
Let customers pick their department from a menu of buttons, then round-robin their chat to an available agent in the team they chose.
Updated 21 June 2026
Use this when you want customers to choose their own department. You show a menu of buttons, for example "Talk to Sales" and "Talk to Support", and the button they tap decides which team picks up the chat.
A button click happens after the flow has already started, whether from a No Match Reply or a keyword. So you place the team assignment on the button itself.
Before you start: set up your team and agents first. See Create a Team and Add Your Agents.
Step 1: Open Bot Manager
In the left sidebar, click Bot Manager. Select your bot from the Bots list, then open Bot Reply.
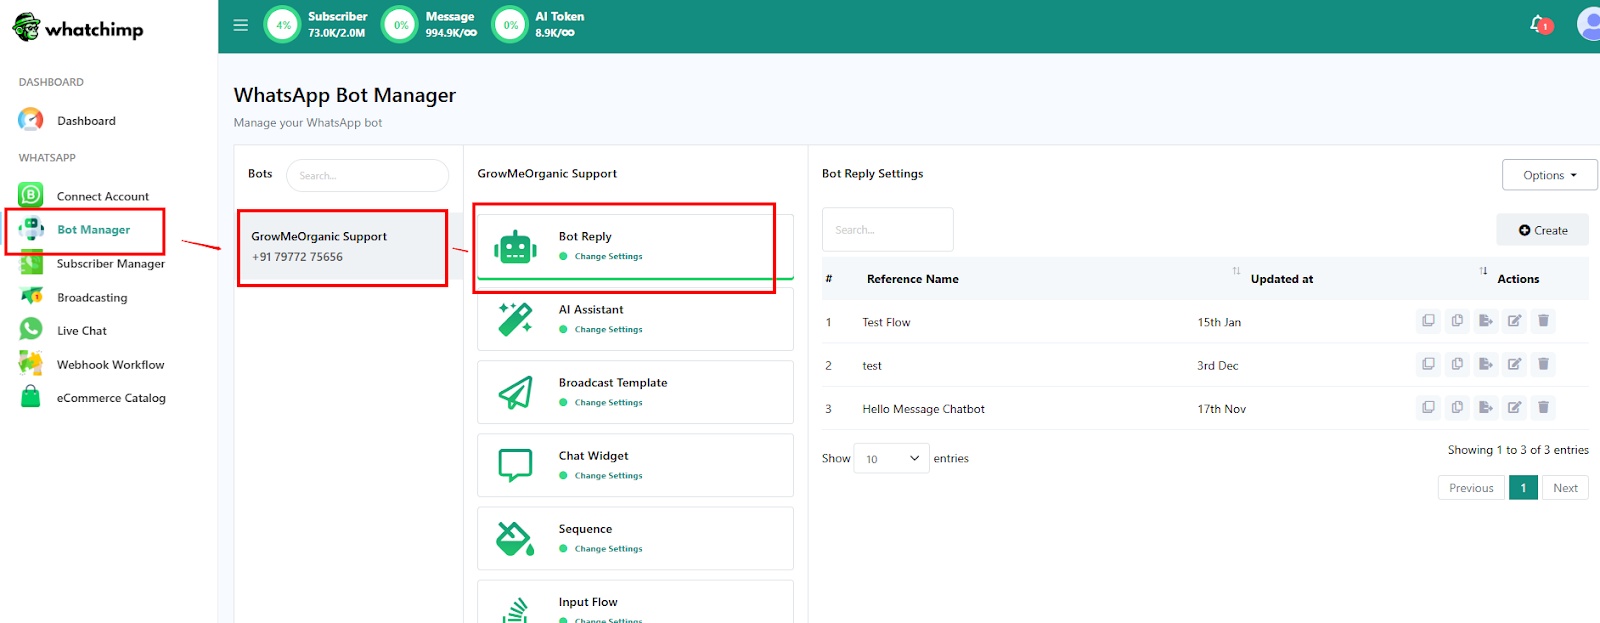 Open Bot Manager, pick your bot, and open Bot Reply
Step 2: Create a new reply
Click Create to start a new bot reply, or open the existing flow you want to add buttons to.
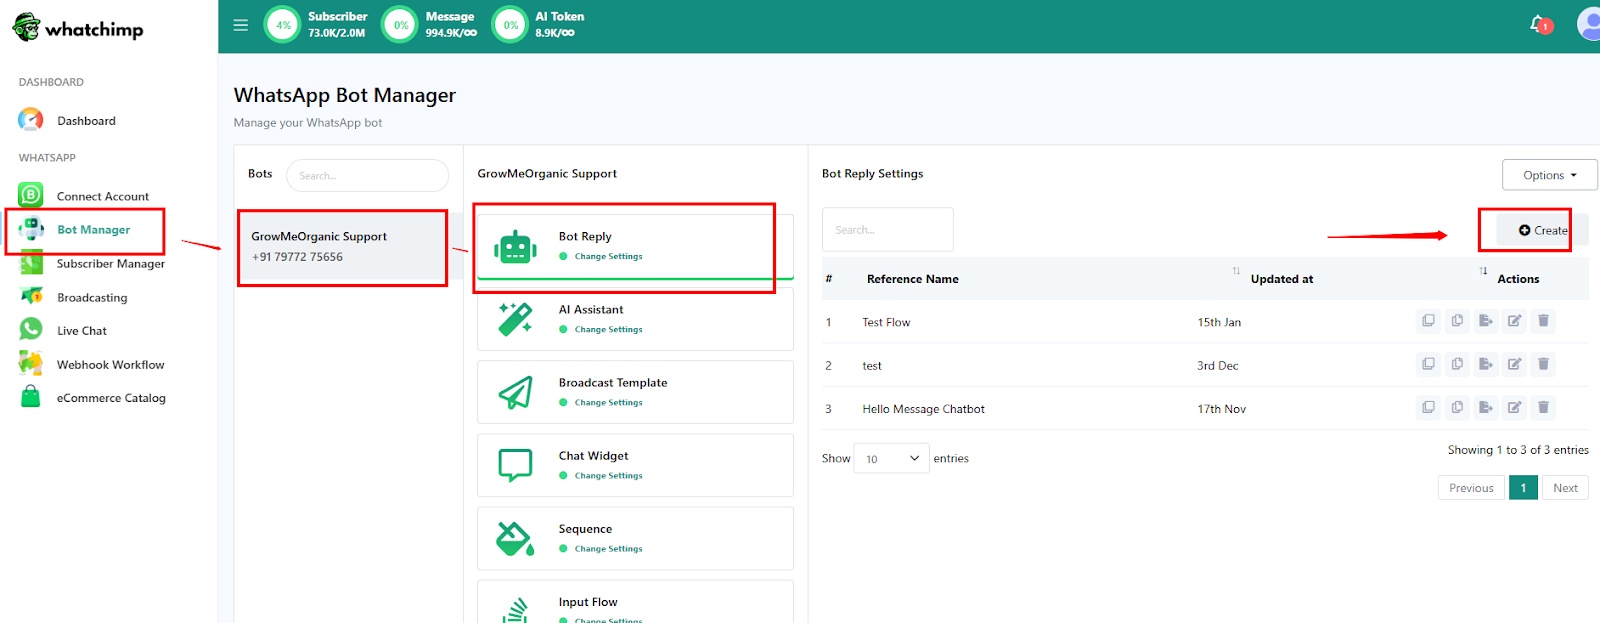 Click Create to add a new reply
Step 3: Add buttons to your message
In the Visual Flow Builder, add an Interactive Message block. From its Buttons output, each button becomes its own Button block, one per choice you want to offer (for example "Talk to Sales" and "Talk to Support").
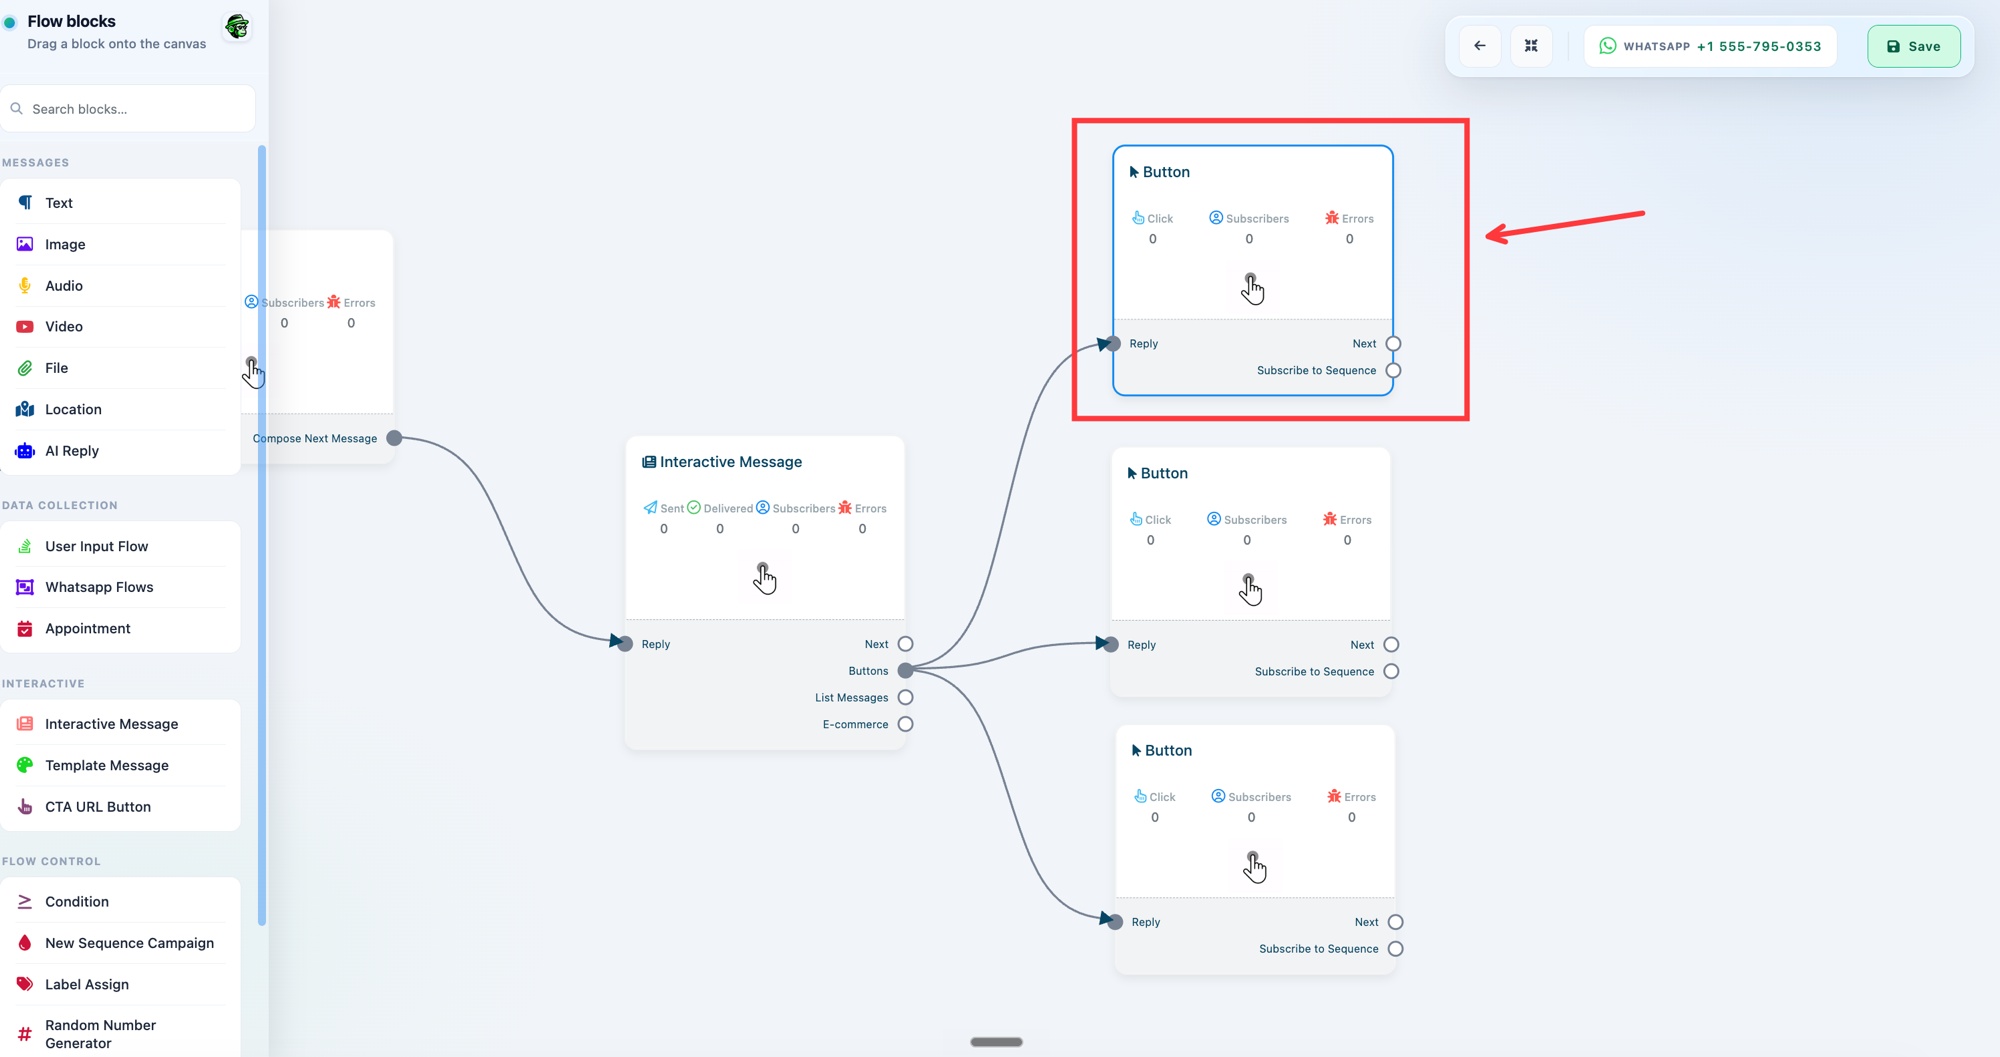 An Interactive Message branches into Button blocks, one per choice
Step 4: Configure a button
Click a Button block to open Configure Button. Set the Button Title (the text the customer sees, for example "Talk to Sales").
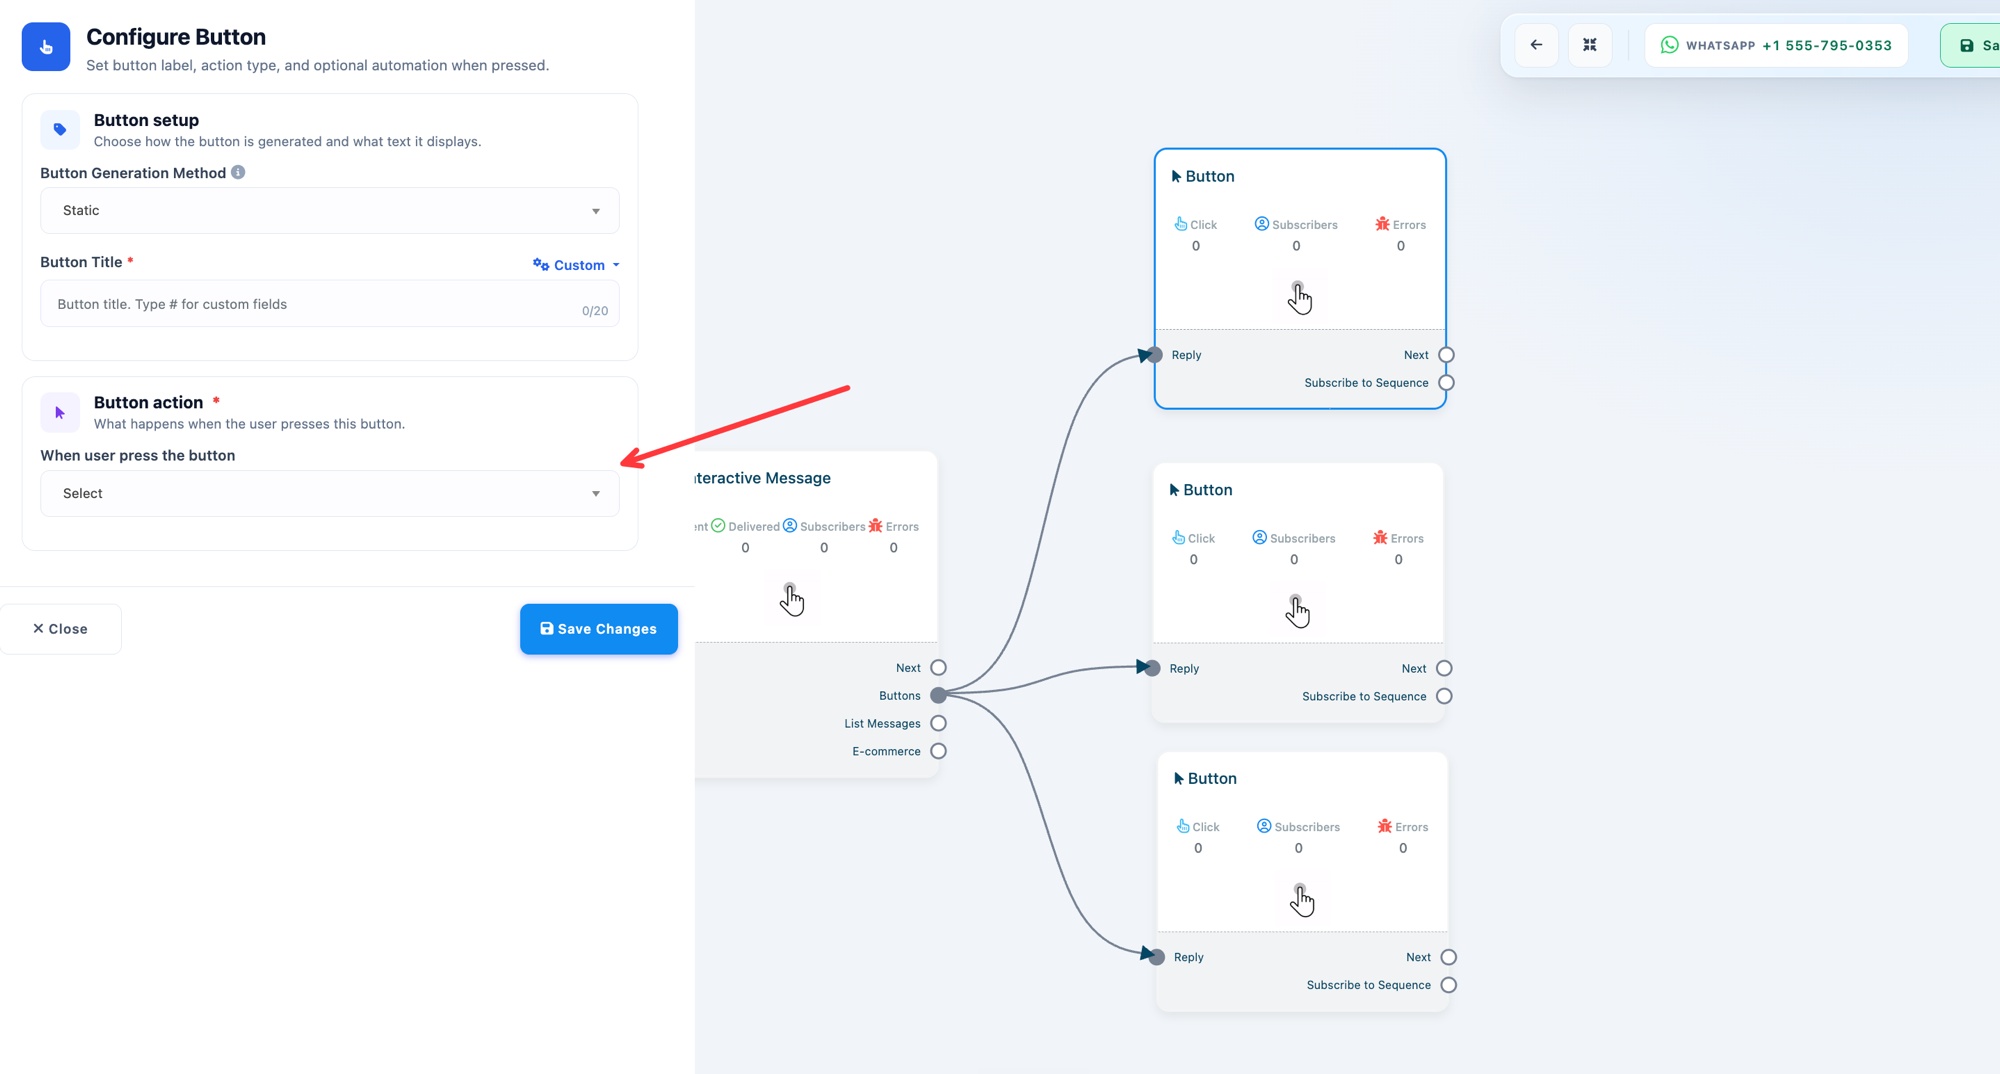 Set the Button Title and choose what the button does
Step 5: Choose what the button does
Under When user press the button, pick an action such as Send Message or Start a Flow.
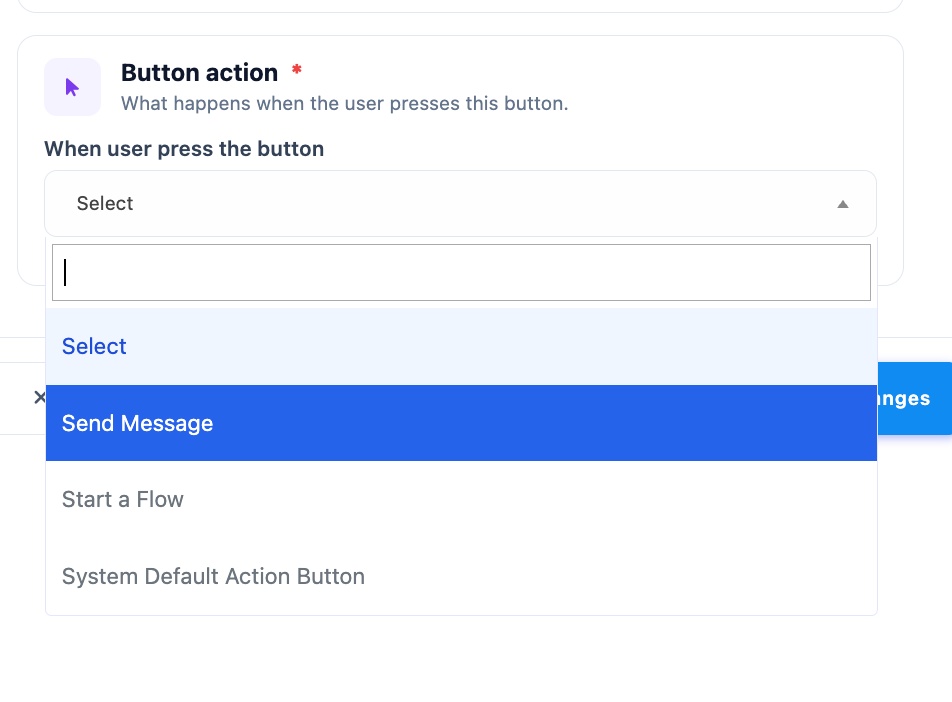 Choose the action that runs when the button is pressed
Step 6: Assign the conversation to a team
Expand the Automation section. Under Assign Conversation to a group, find the Team Role setting.
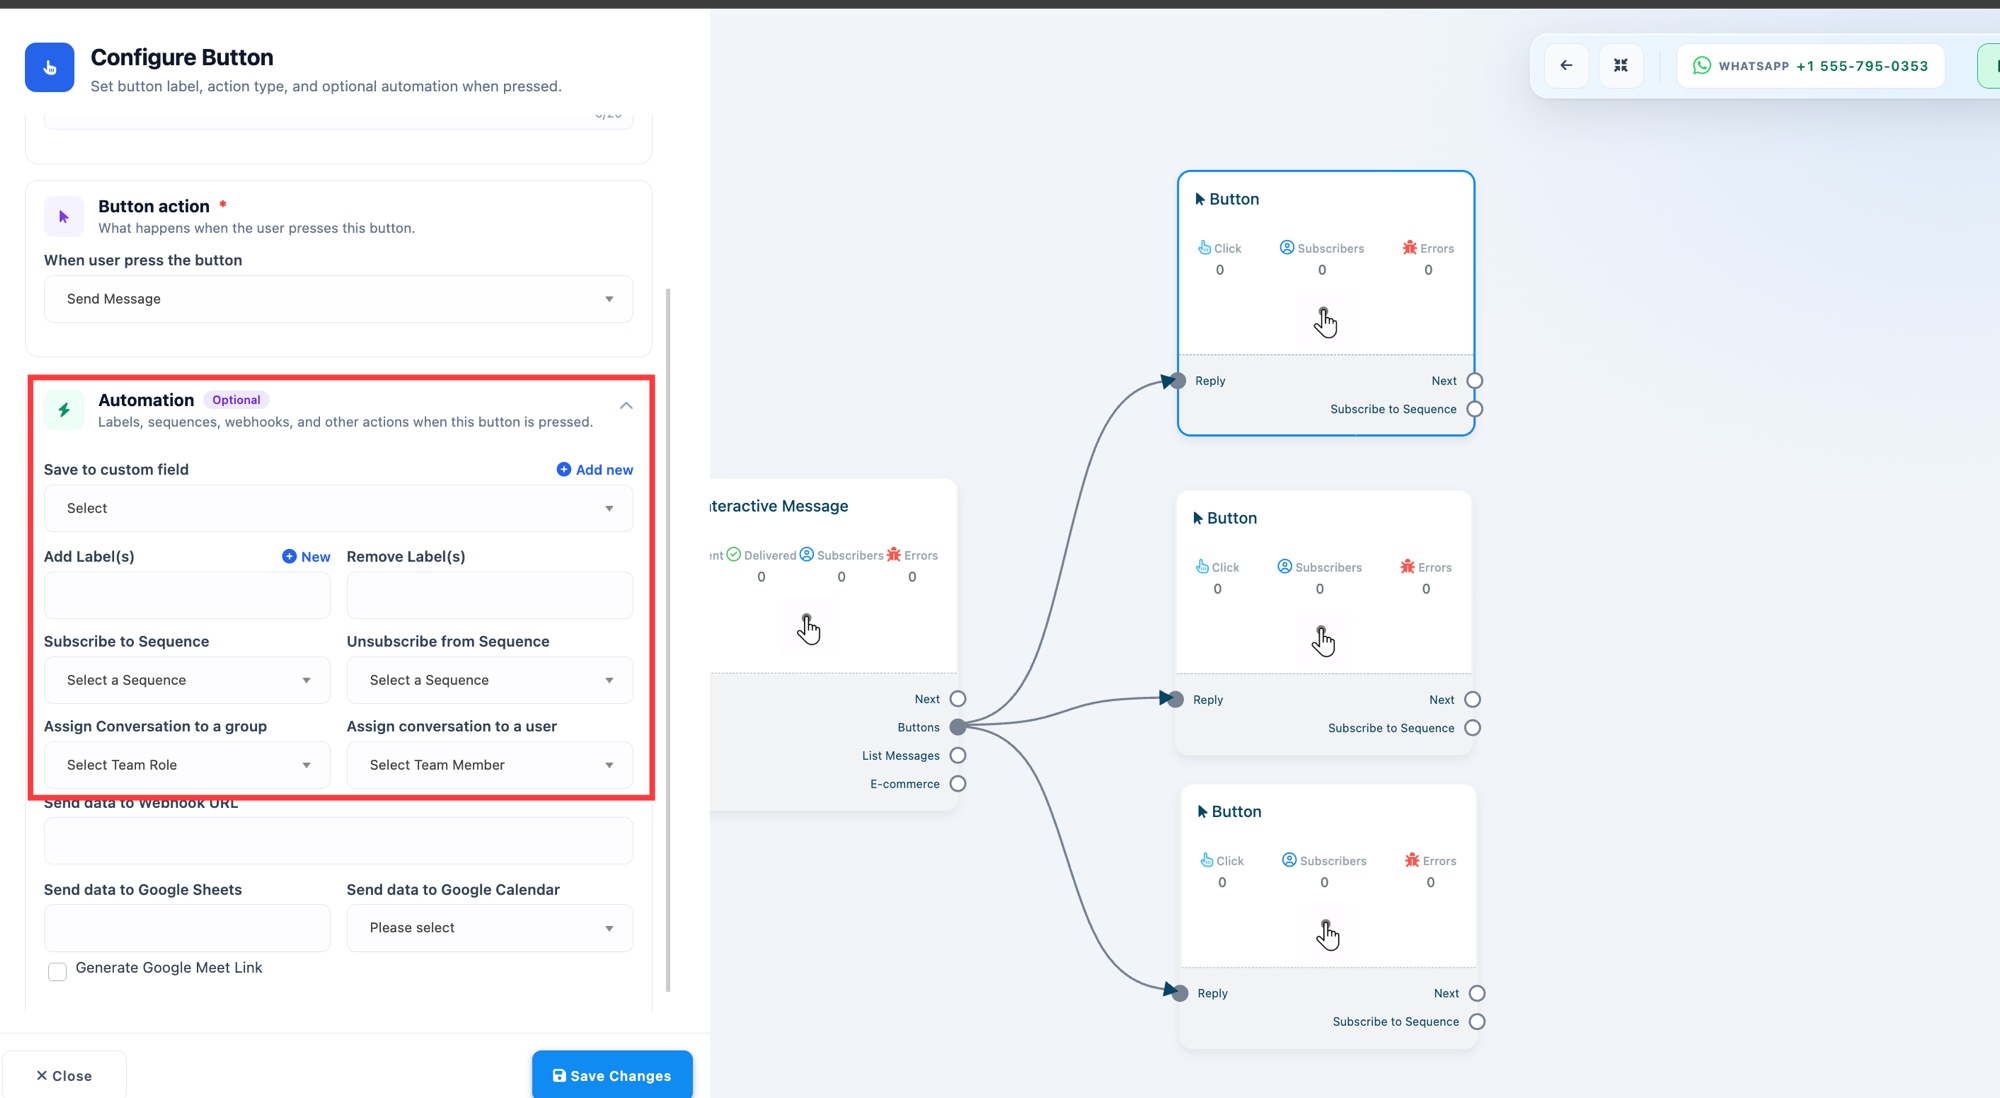 Open Automation and find Assign Conversation to a group
Open the Assign Conversation to a group dropdown and choose the Team Role for this button.
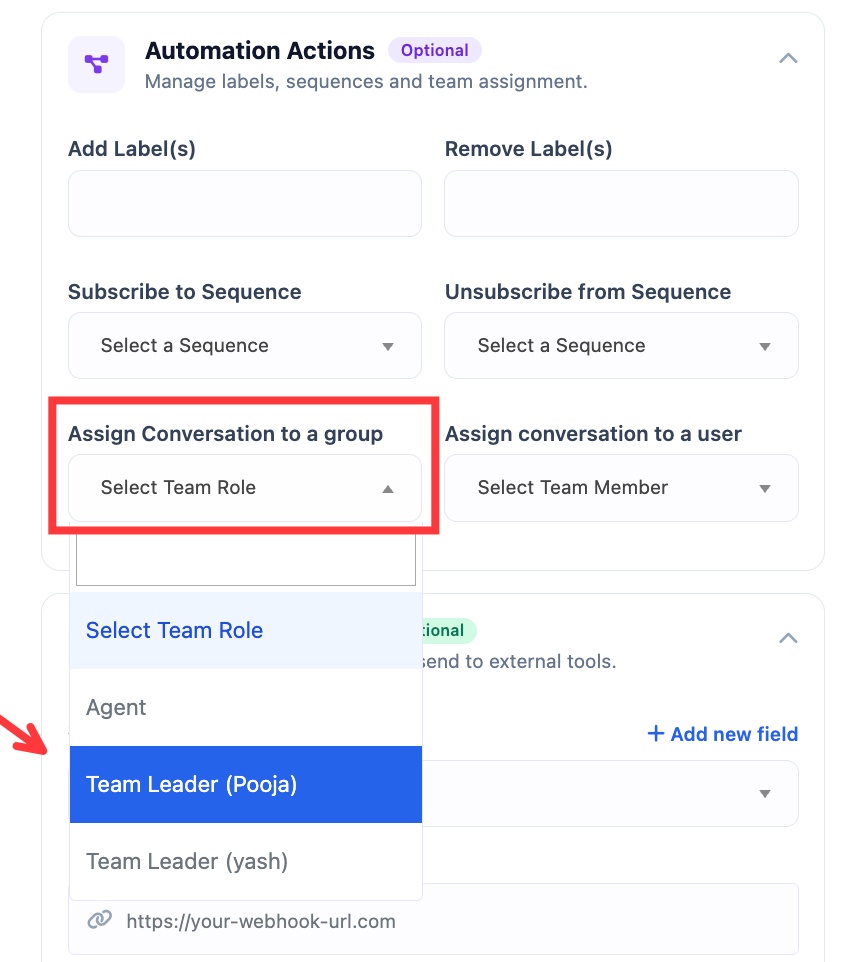 Pick the Team Role from the Assign Conversation to a group dropdown
Because the button assigns to a group, WhatChimp round-robins the chat to an available agent in that team. Give each button its own team, so "Talk to Sales" assigns to your Sales team and "Talk to Support" assigns to your Support team. To send a button to one specific person instead, use Assign conversation to a user.
Step 7: Save
Click Save Changes, then click Save at the top right to save the flow.
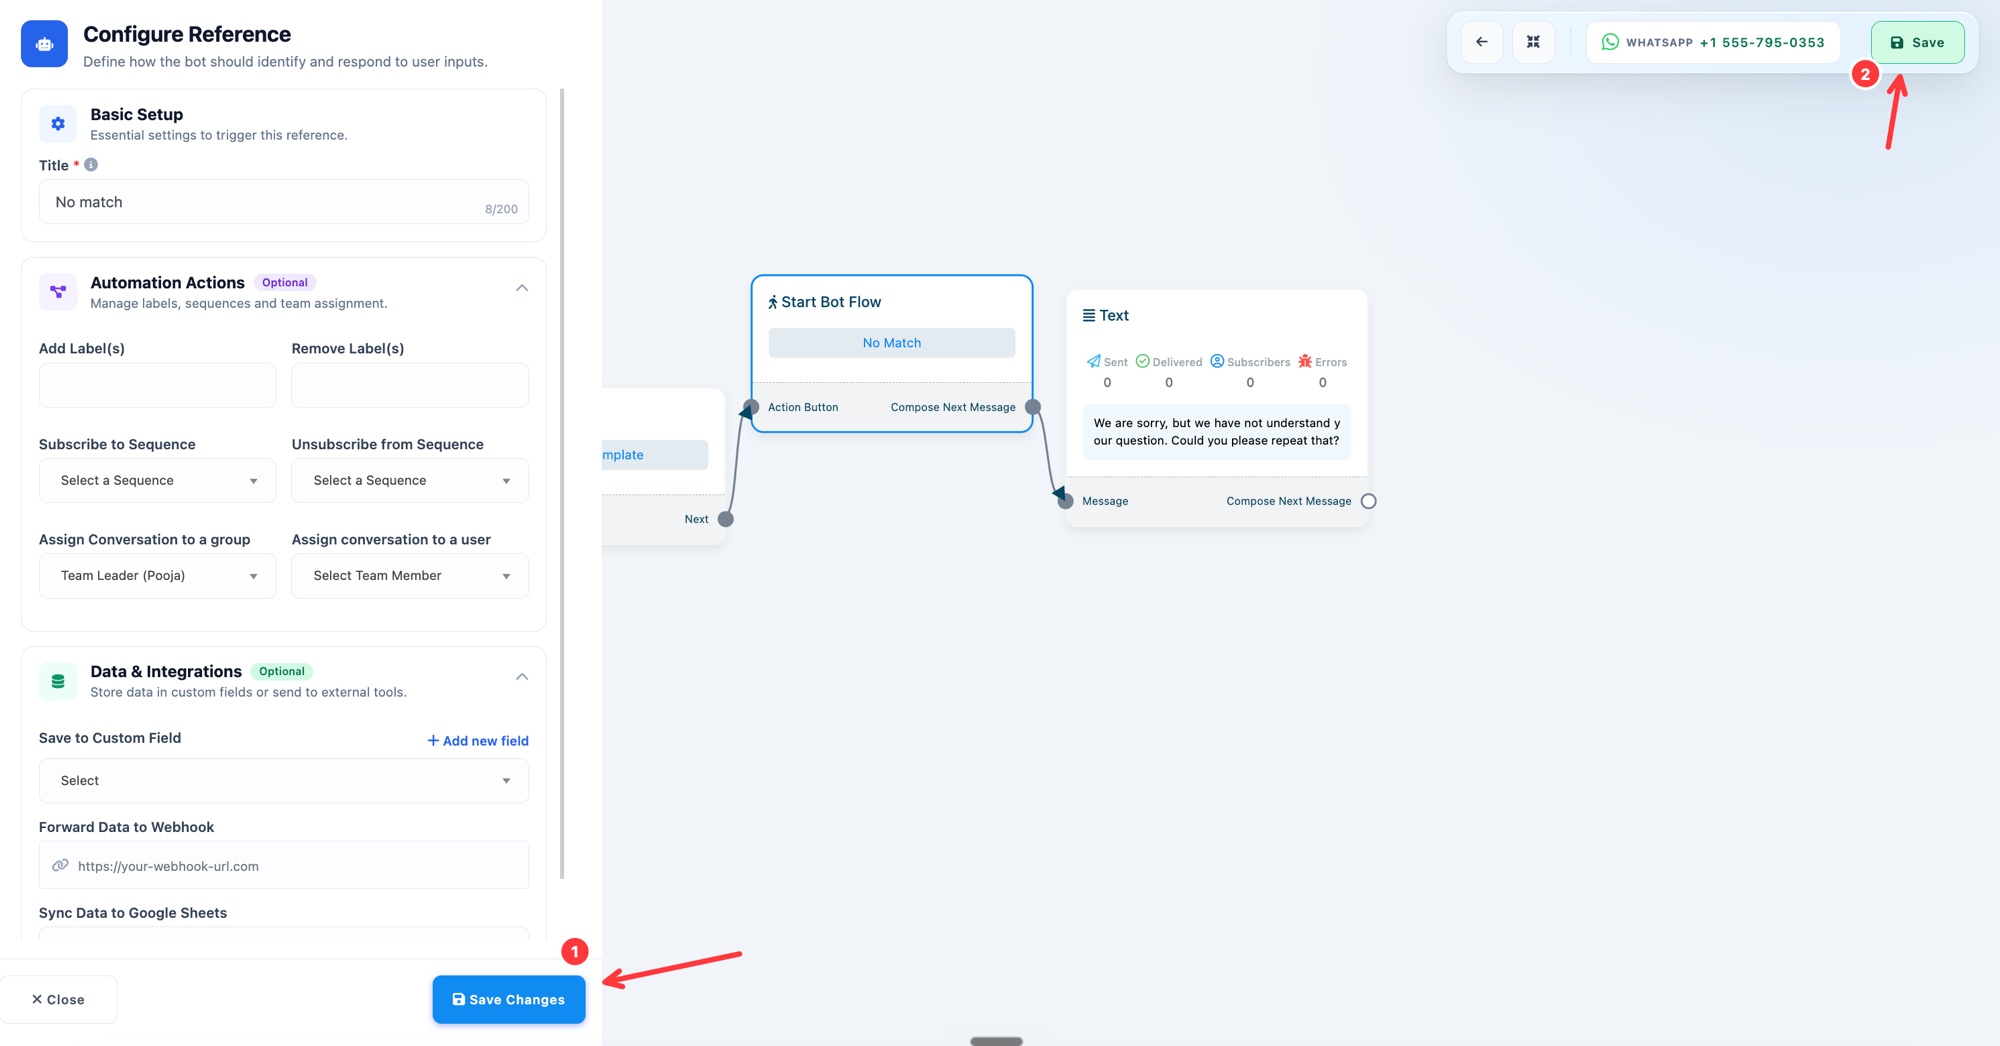 Save Changes, then Save the flow