Catalog Settings aur Sync
WhatChimp mein catalog sync, visibility, messaging, aur webhook settings manage karein
Updated 10 February 2026
WhatChimp mein eCommerce Catalog page wahan hai jahan aap apne saare connected catalogs manage karte hain — products sync karein, visibility toggle karein, messaging configure karein, aur webhooks set up karein.
Catalog Manager Overview
Saare connected catalogs dekhne ke liye left sidebar mein eCommerce Catalog par jayein.
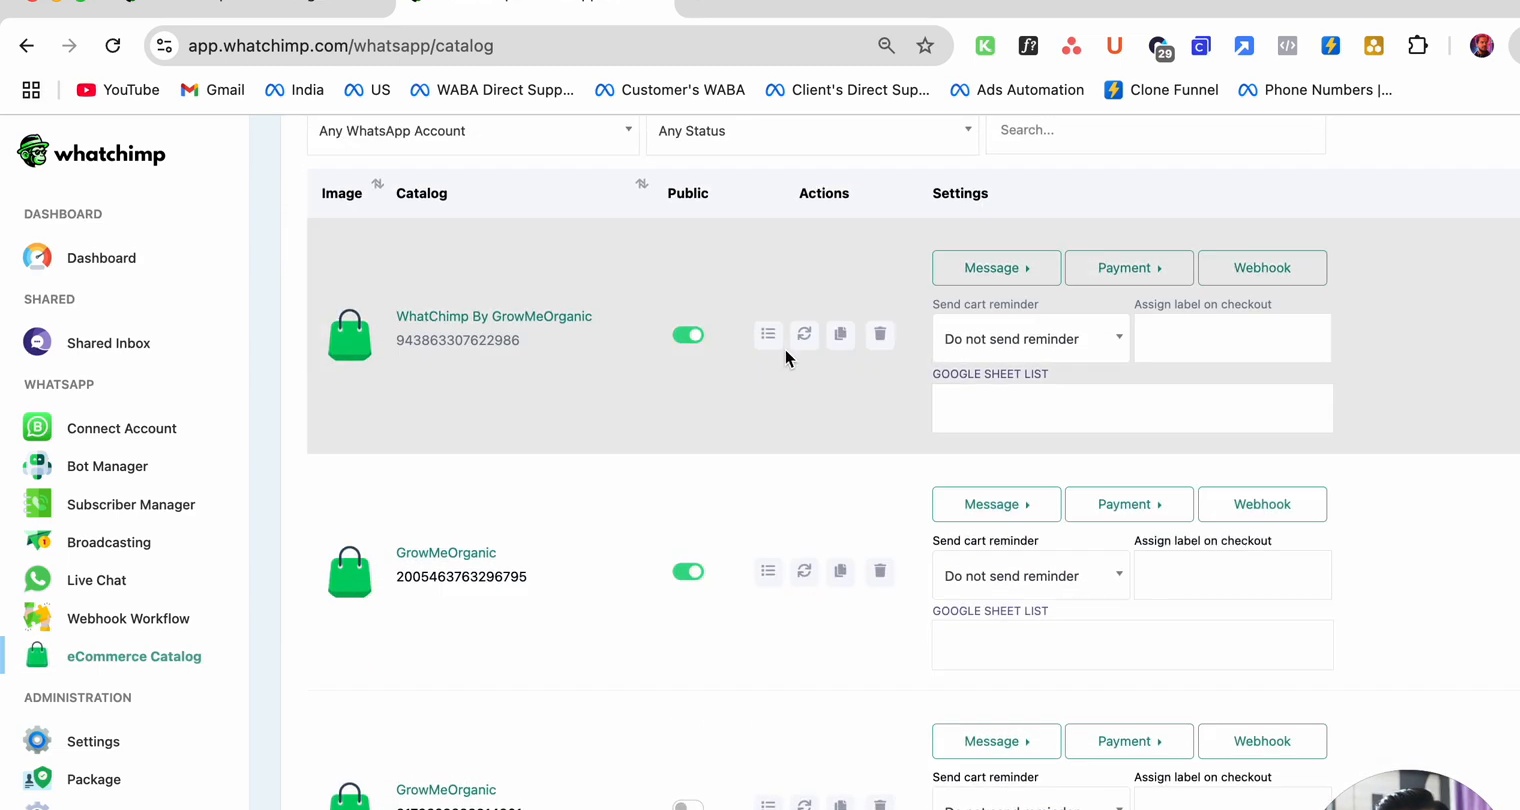
Har catalog row dikhati hai:
| Column | Description |
|---|---|
| Image | Catalog icon |
| Catalog | Catalog name aur ID |
| Public | Catalog ko customers ke liye visible banane ke liye toggle |
| Actions | Quick action buttons (products dekhein, edit karein, copy karein, delete karein) |
| Settings | Message, Payment, aur Webhook configuration tabs |
Public/Private Toggle
Public column mein green toggle control karta hai ki kya customers is catalog ko browse kar sakte hain. Ise off kar dein catalog ko hide karne ke liye jab aap ise set up kar rahe hain ya changes bana rahe hain.
Products Sync Karna
Jab aap Meta Commerce Manager mein products add ya update karte hain, aapko latest changes pull karne ke liye WhatChimp mein unhe sync karna hoga.
- Catalog Products modal kholne ke liye catalog name par click karein
- Green Sync Product button par click karein
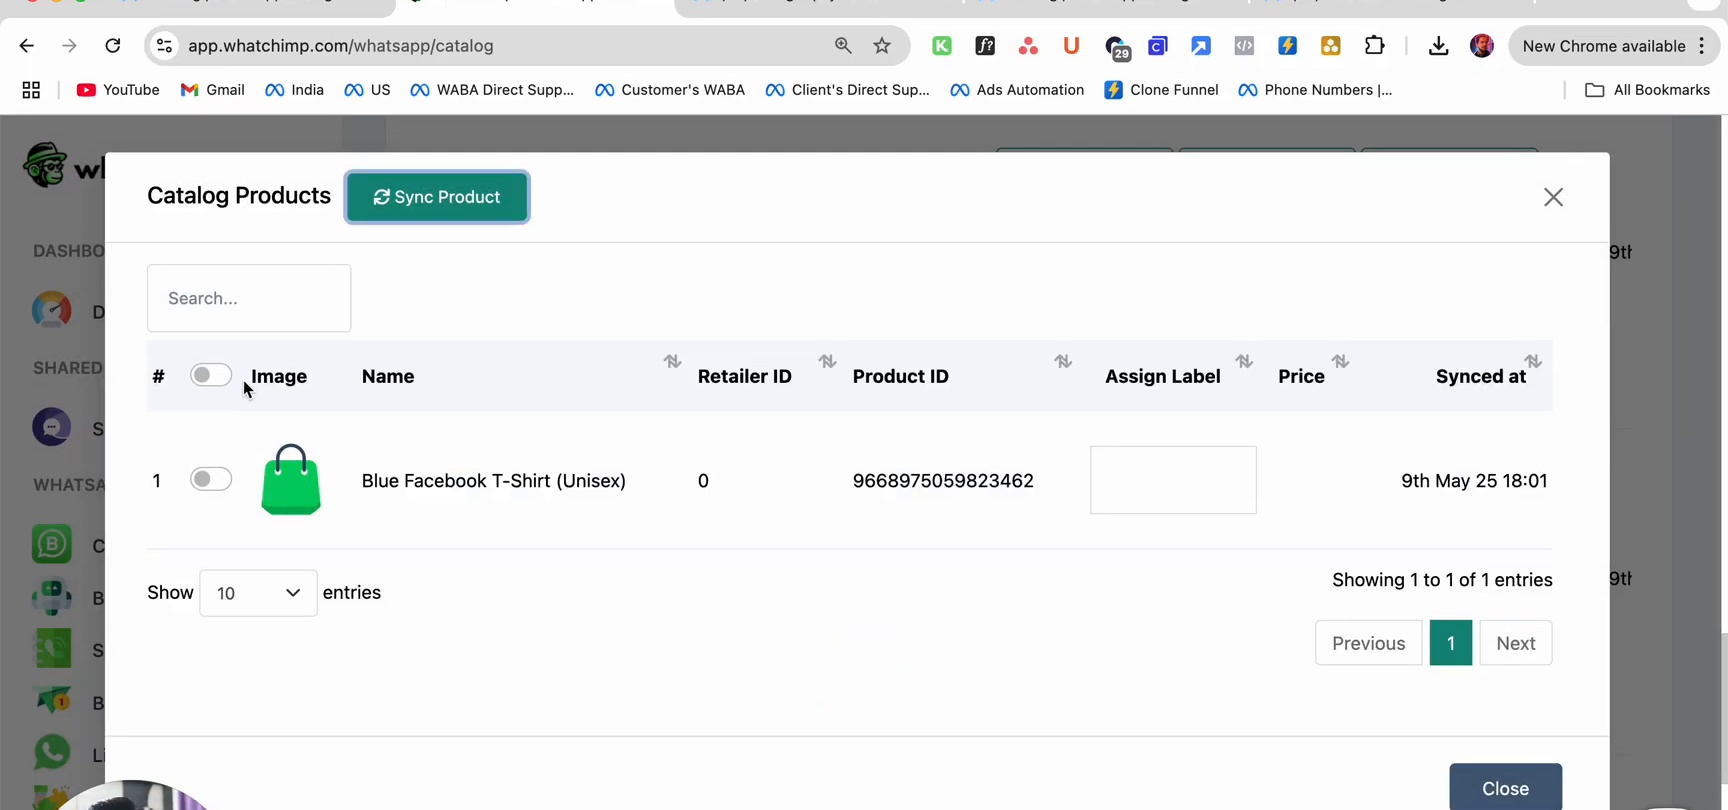
Product list Meta se latest data ke saath update ho jayegi, jismein images, names, product IDs, prices, aur labels shamil hain.
Kab resync karein:
- Meta Commerce Manager mein naye products add karne ke baad
- Product details edit karne ke baad (price, description, images)
- Apni catalog se products remove karne ke baad
- Agar koi customer purani product information dekhne ki report kare
Per-Catalog Settings
Har catalog ke teen settings tabs hain: Message, Payment, aur Webhook.
Message Settings
Is catalog ke liye automated messages configure karein:
- Send cart reminder — Un customers ko automatically remind karein jo apni cart abandon kar diye
- Assign label on checkout — Customers ko ek label ke saath tag karein jab wo order place karte hain
Payment Settings
Payment configuration access karne ke liye Payment dropdown par click karein.
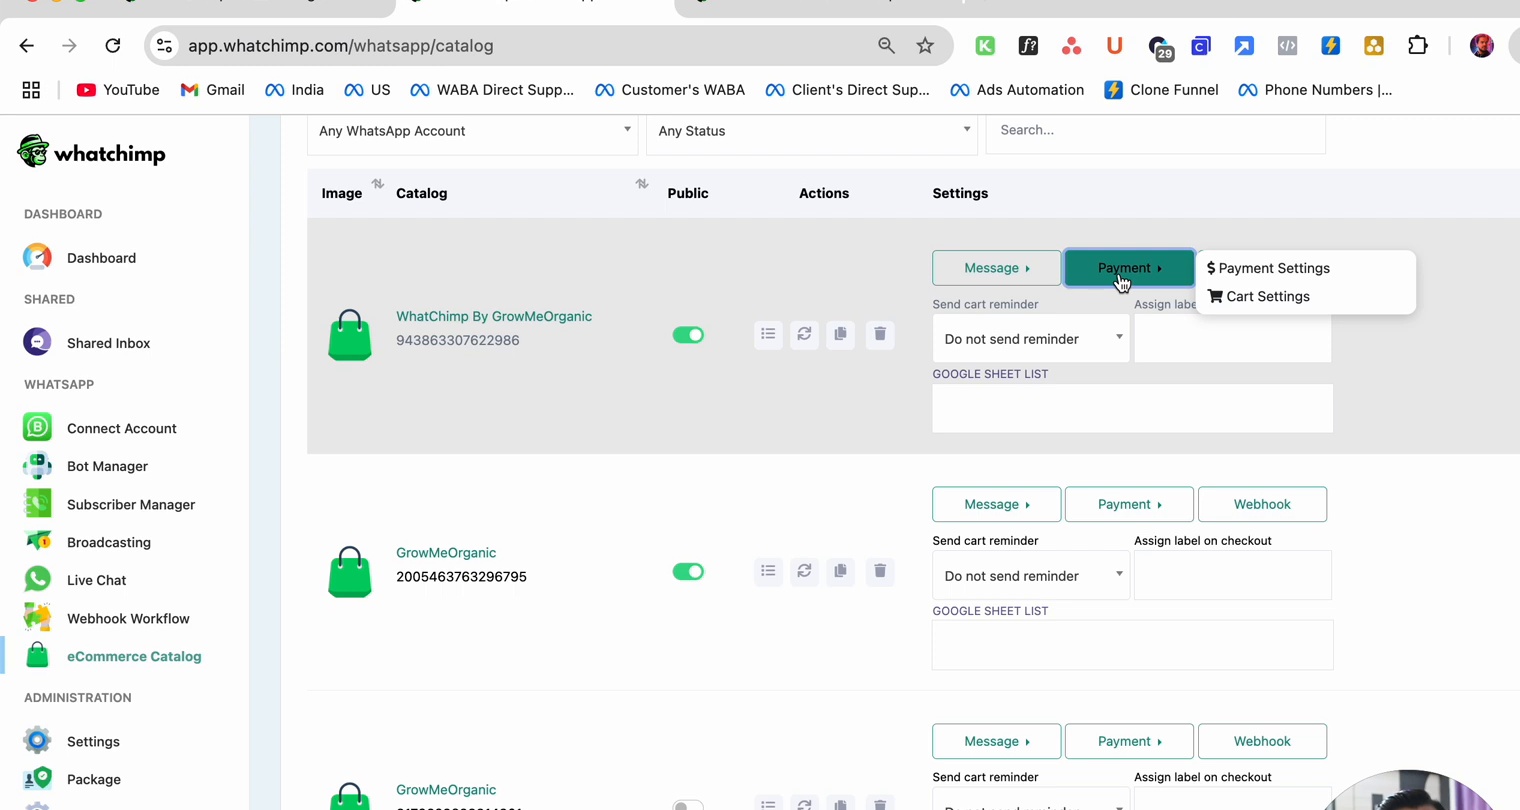
Options mein shamil hain:
- Payment Settings — Payment gateways configure karein (PayPal, Stripe, Razorpay, etc.)
- Cart Settings — Cart experience aur checkout flow customize karein
Webhook Settings
Order events ke liye notifications set up karne ke liye Webhook tab par click karein. Webhooks aapke external systems ko notify karte hain jab:
- Koi customer order place karta hai
- Order status change hota hai
- Koi cart abandon hota hai
Detailed webhook configuration ke liye, Webhook for WhatsApp Catalog dekhein.
Catalog Actions
Har catalog row mein action buttons aapko allow karte hain:
- View products — Items dekhne aur sync karne ke liye Catalog Products modal kholein
- Edit — Catalog settings modify karein
- Copy catalog ID — Bot flows ya API calls mein use ke liye ID copy karein
- Delete — Catalog connection remove karein (Meta se products delete nahi karta)
Google Sheet Export
Har catalog mein ek Google Sheet List field hai jahan aap Google Sheet link kar sakte hain. Jab linked ho, order data automatically spreadsheet mein external tracking aur reporting ke liye export ho jata hai.
Related
- Orders aur Payment Settings Manage Karein — Incoming orders dekhein aur manage karein
- WhatChimp API ke through Catalog aur Orders — Catalogs ko programmatically manage karein
- WhatsApp Catalog ke liye Webhook — Order events ke liye webhook notifications set up karein