Chatbot mein Products Showcase Karein
WhatsApp chatbot banayein jo aapki product catalog customers ko display karta hai
Updated 9 February 2026
Video: https://www.youtube.com/watch?v=DKzgOzMlv1I
Ab jab aapki catalog WhatsApp se connect ho gayi hai, WhatChimp ke Bot Manager ka use karke ek chatbot banayein jo customers ko aapke products showcase karta hai. Yeh guide aapko scratch se ek interactive catalog chatbot create karne ke through le jati hai.
Step 1: Naya Bot Create Karein
- WhatChimp mein Bot Manager par jayein
- Create Bot Flow par click karein aur ise naam dein (jaise, "Product Catalog Bot")
- Configure Reference screen par, trigger keywords set karein — yeh wo words hain jo customers catalog experience start karne ke liye type karte hain
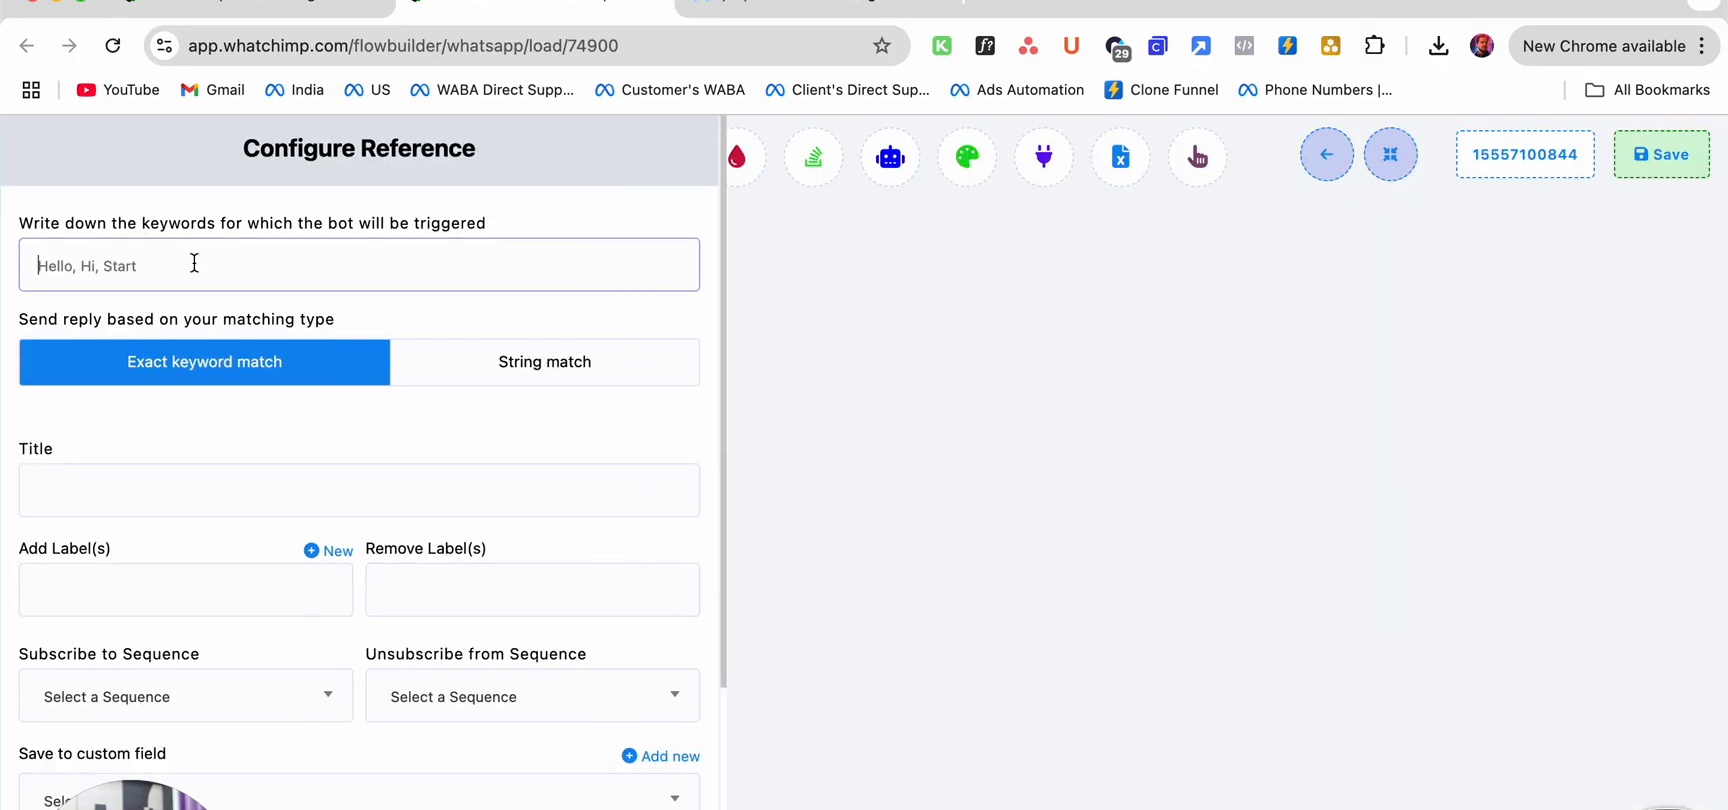
Keywords enter karein jaise Hello, Hi, Start, ya send me catalog commas se separate karke. Exact keyword match ya String match choose karein depending on kitna strict matching chahiye.
Step 2: Welcome Message Add Karein
Pehle response ke roop mein ek Text Message node add karein. Customer ko naam se greet karne ke liye personalization variables use karein.
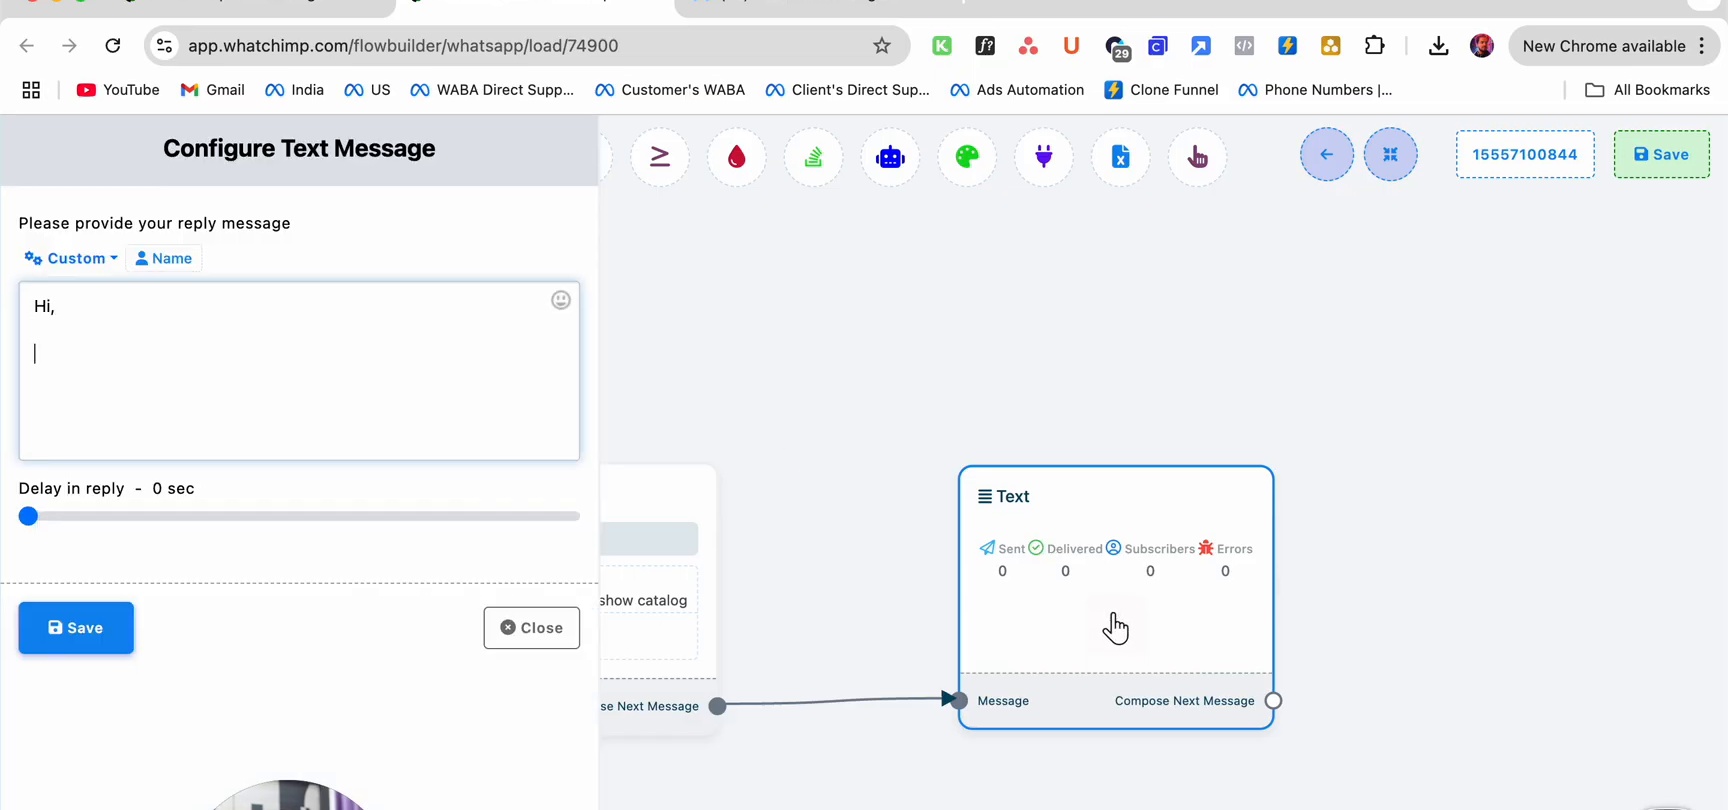
Example: "Hi {{name}}, hamare store mein aapka swagat hai! Aap kya dhoondh rahe hain?"
Step 3: Category Buttons Add Karein
Product category buttons display karne ke liye ek Interactive message node add karein. Yeh customers ko choose karne deta hai ki wo kya browse karna chahte hain.
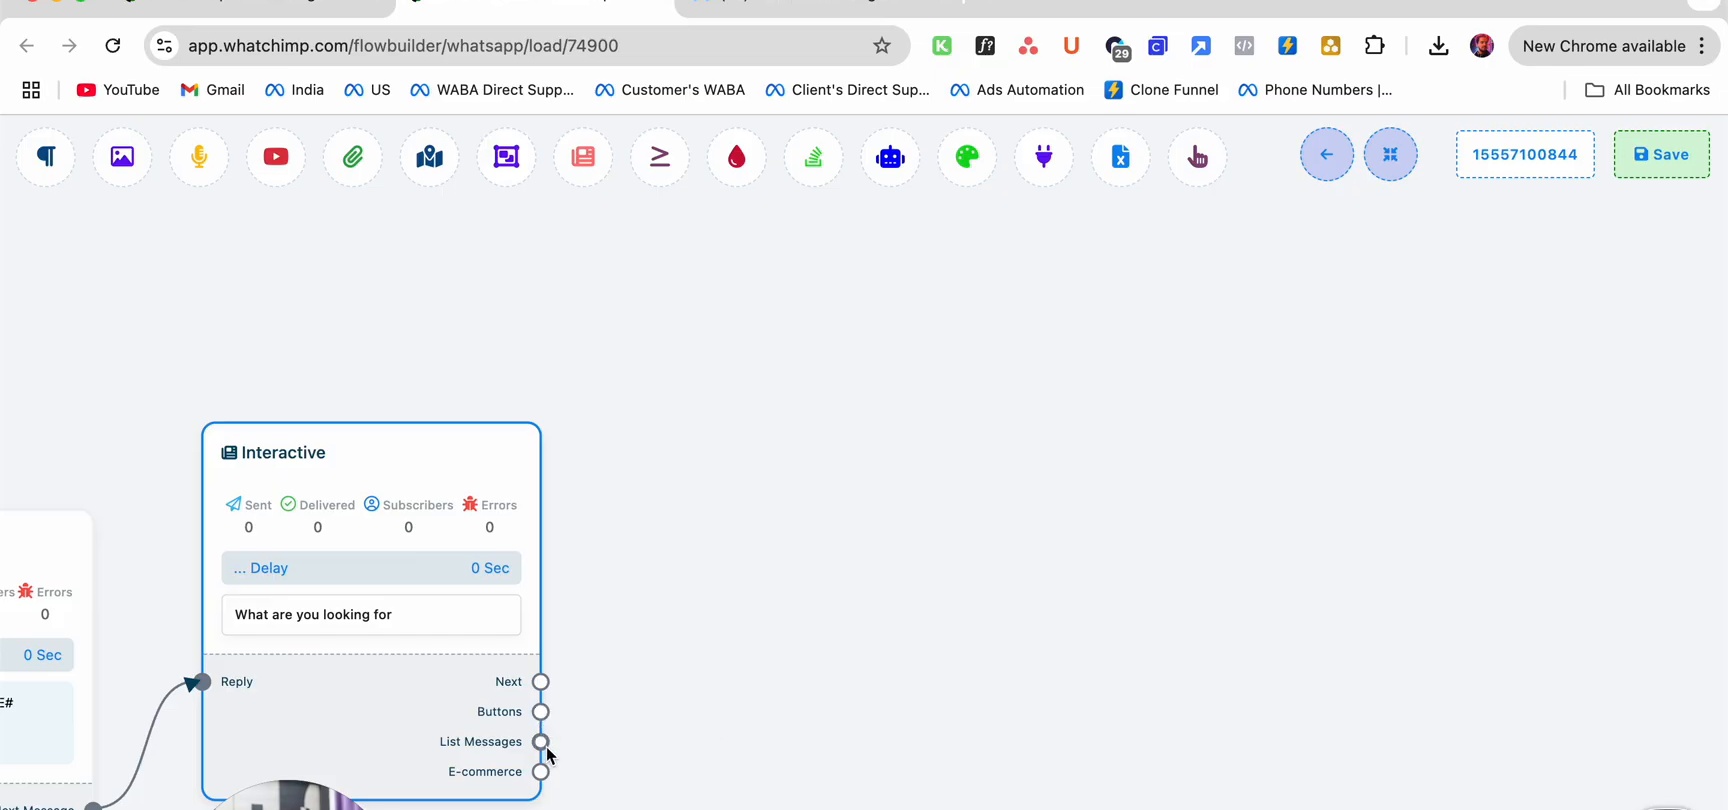
Interactive message ko configure karein:
- Body: "Aap kya dhoondh rahe hain"
- Buttons: Har product category ke liye ek button add karein (jaise, Shoes, T-shirt, Accessories)
Output ports (Reply, Buttons, List Messages, E-commerce) aapko alag-alag follow-up actions connect karne dete hain.
Step 4: Button Branches Connect Karein
Har button aapke flow mein ek alag branch create karta hai. Har button ko appropriate next step se connect karein — typically ek Catalog node jo us category se products dikhata hai.
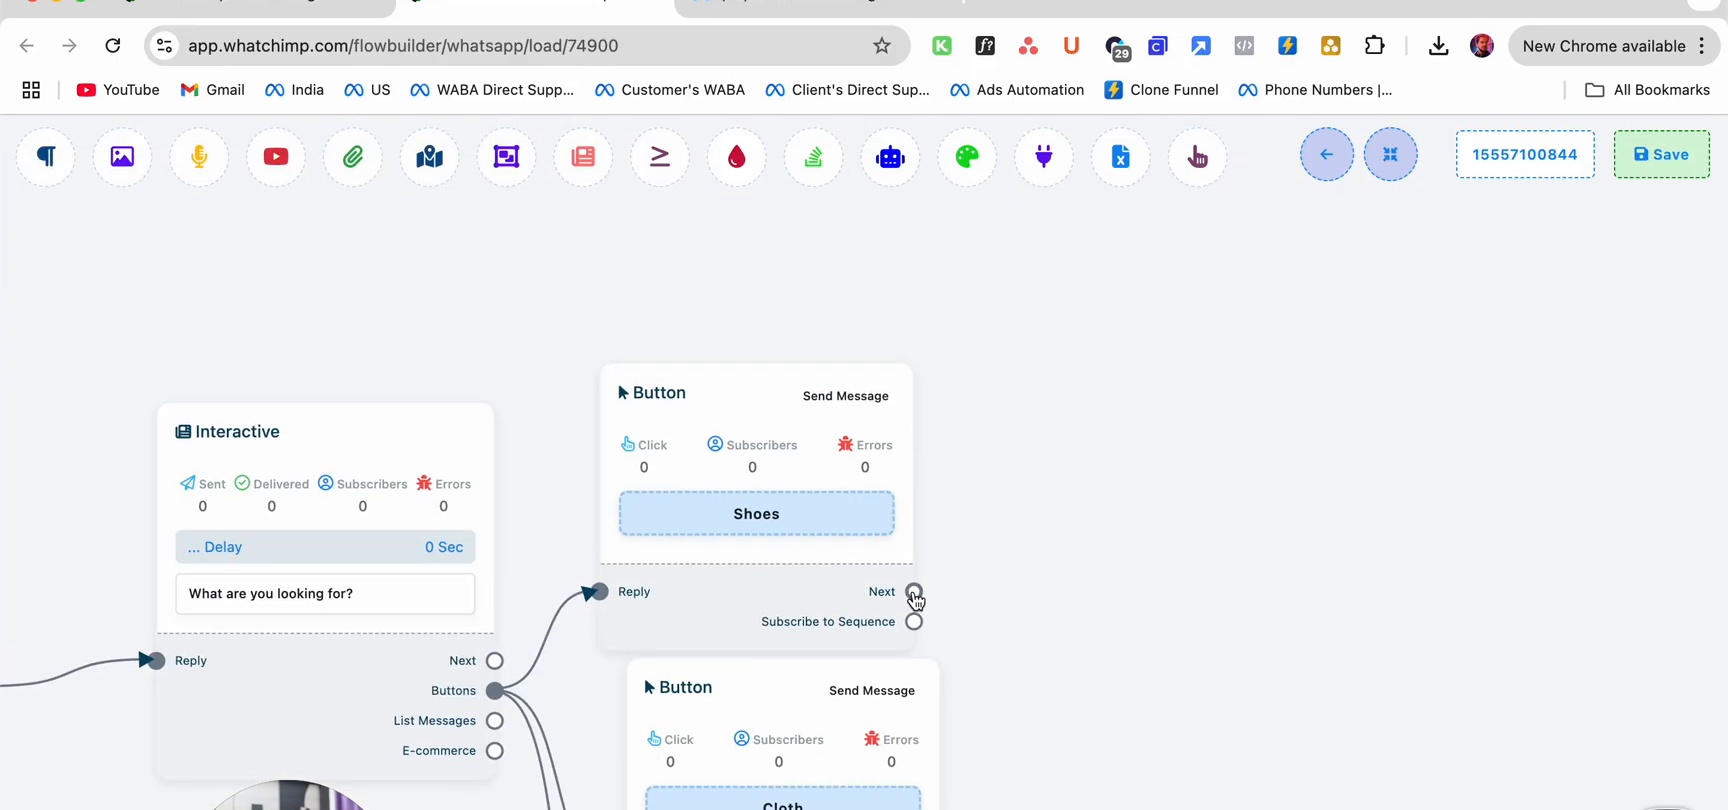
For example:
- Shoes button → Shoes par filter kiya gaya Catalog node
- Cloth button → Clothing par filter kiya gaya Catalog node
Tip: Aap har button ke baad ek Subscribe to Sequence node bhi add kar sakte hain customers ko interest ke hisaab se label karne ke liye (jaise, "shoes_interest") future targeting ke liye.
Step 5: Catalog Node Add Karein
Flow mein ek E-commerce Catalog node drag karein. Yahan aap apni actual product catalog connect karte hain.
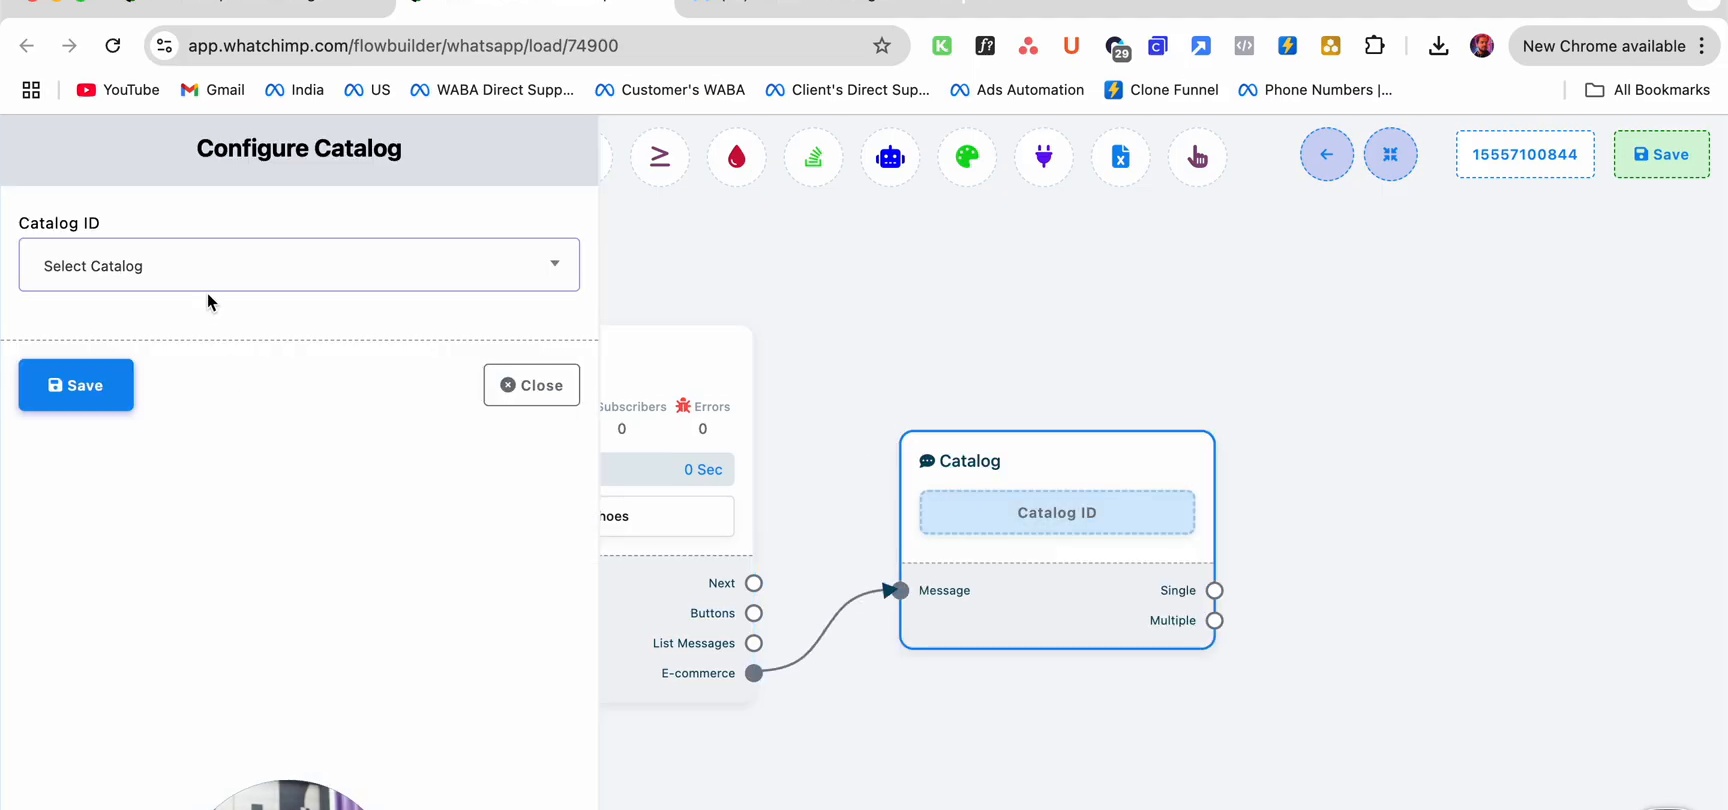
- Dropdown se apni Catalog ID select karein
- Single product ya Multiple products ke beech choose karein
- Node ek Product Section display karega jahan aap choose karte hain ki kaunse products dikhane hain
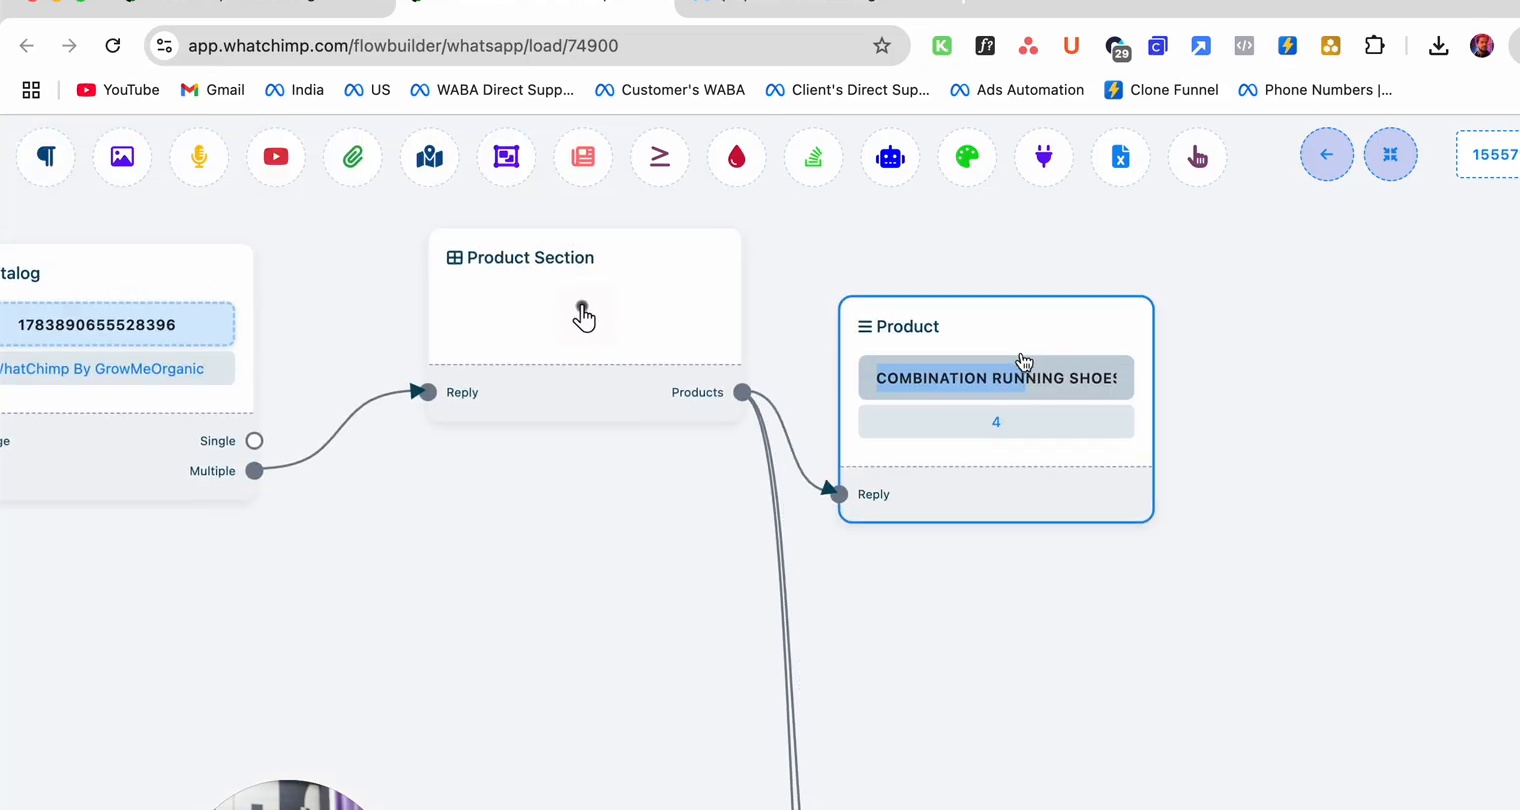
Har category branch ke liye specific products select karein. Products customer ko WhatsApp mein interactive product cards ke roop mein bheje jayenge.
Step 6: Save aur Test Karein
Apne bot flow ko publish karne ke liye Save par click karein. Phir apne WhatsApp number par ek trigger keyword bhej kar ise test karein.
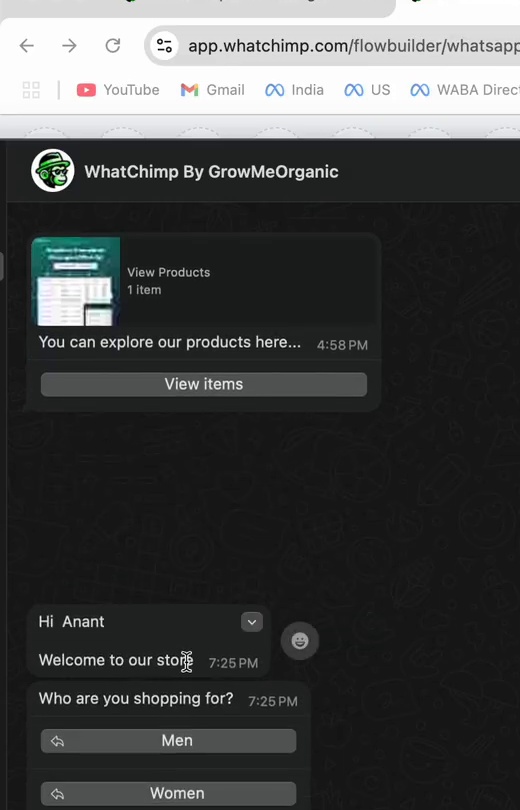
Jab koi customer aapke number par message karta hai, chatbot:
- Ek personalized welcome message bhejega
- Category buttons dikhayega
- Selected category se products display karega
- Customer ko browse karne, details dekhne aur order place karne dega
Tips
- Apni website par chat widget use karein prefilled text ke saath (jaise, "send me catalog") taaki visitors seedhe aapke catalog chatbot par le jaye jayen
- Future broadcast campaigns ke liye interest ke hisaab se customers ko categorize karne ke liye labels apply karein
- Categories ko simple rakhein — best customer experience ke liye maximum 3-4 buttons
Agle Steps
- Orders aur Payment Settings Manage Karein — Incoming orders handle karein aur payment options configure karein
- Catalog Settings aur Sync — Apne catalog products ko updated rakhein