Webhook for Incoming and Outgoing Messages
Fire webhooks to your server in real time for every incoming and outgoing WhatsApp message
Updated 8 February 2026
WhatChimp can fire a webhook to your server every time a message is sent or received on any of your connected WhatsApp numbers. This lets you push message data to external systems — your CRM, analytics platform, logging service, or any custom application — in real time.
Video: https://www.youtube.com/watch?v=78aQIUb77nw
How It Works
When enabled, WhatChimp sends an HTTP POST request to your webhook URL containing the message content, subscriber ID, timestamp, and message type. This works for both:
- Incoming messages — Messages your customers send to you (text, image, media, etc.)
- Outgoing messages — Messages your bot or team sends to customers
Step 1: Open Bot Manager Configuration
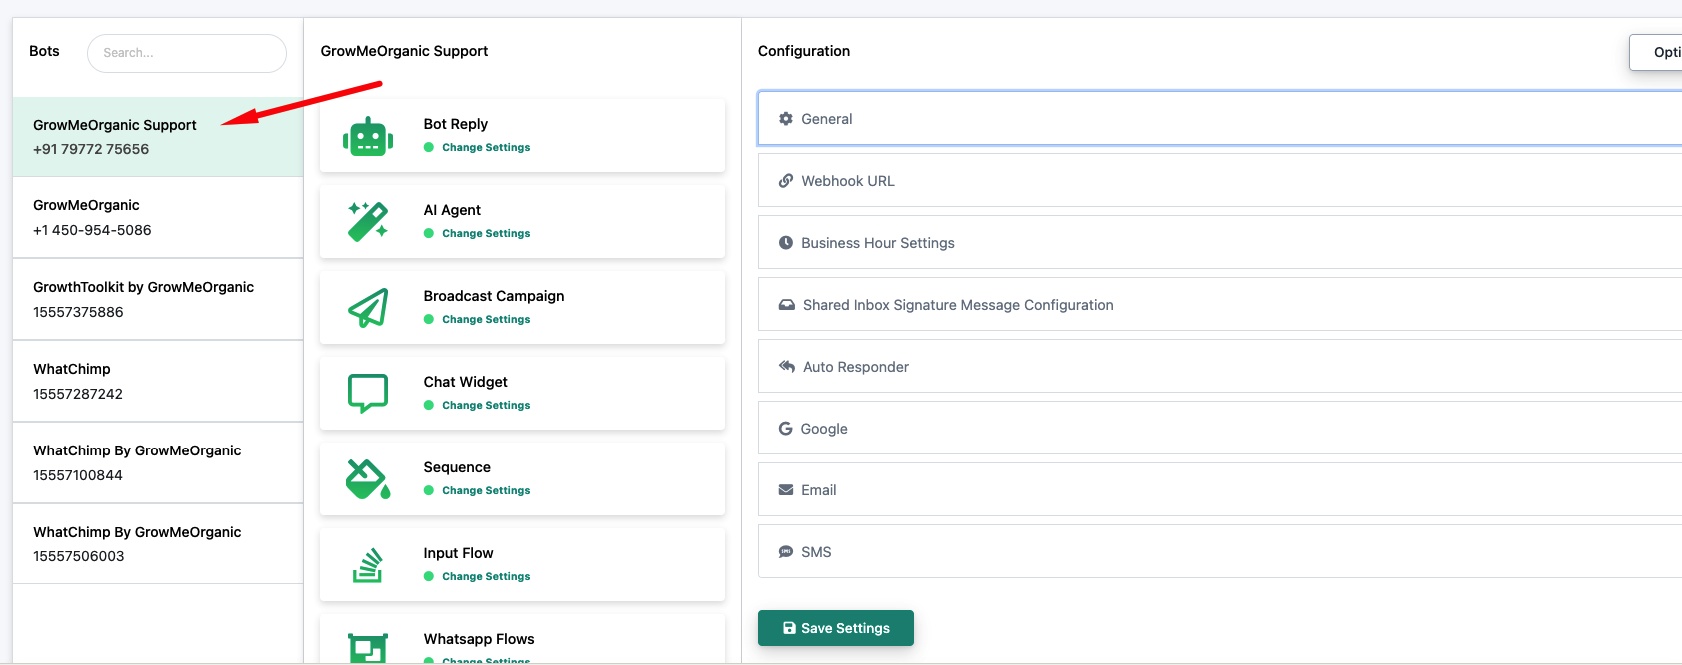
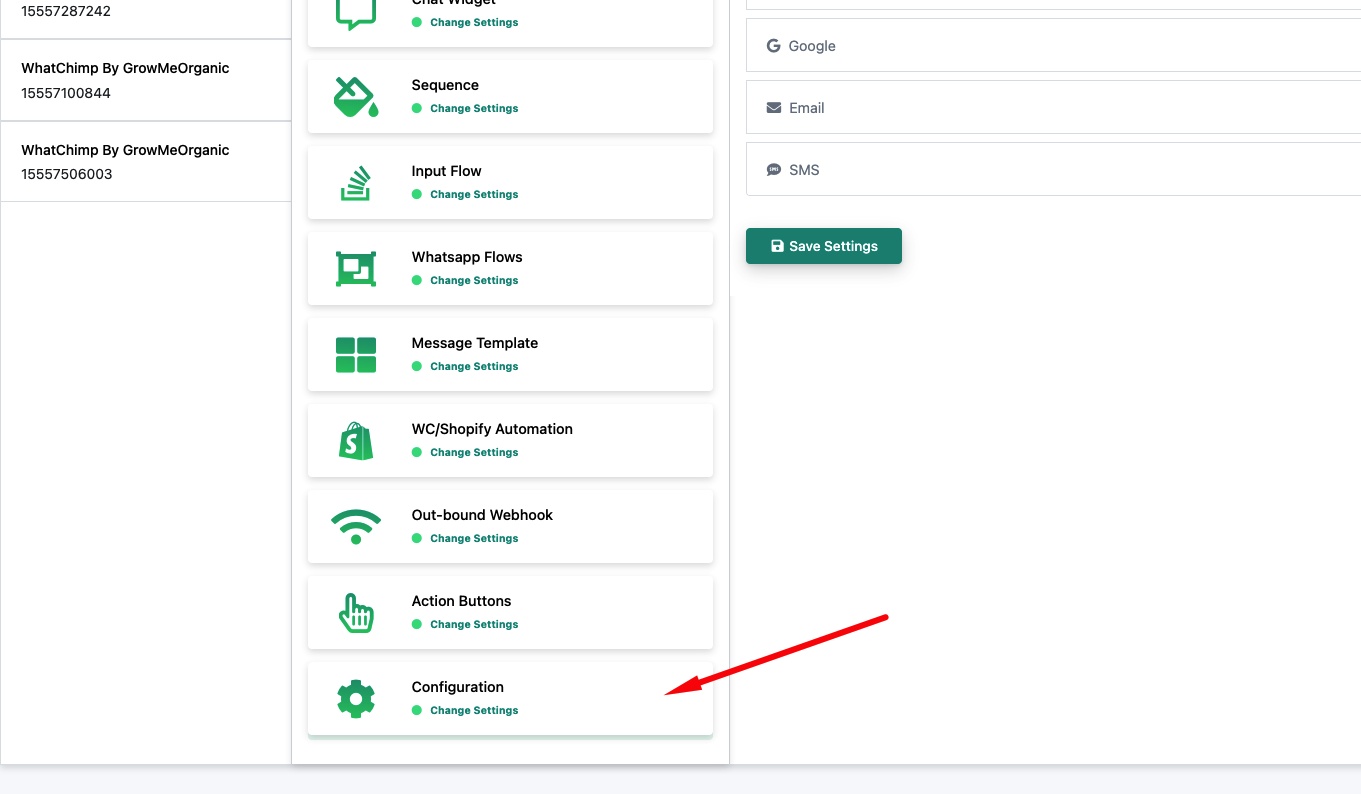
Go to Bot Manager, select the WhatsApp number you want to configure, then click Configuration on the right side panel.
Scroll down in the bot list and click Configuration at the bottom.
Step 2: Set Up Incoming Message Webhook
Click Webhook URL to expand the section. Toggle Trigger Webhook for Incoming Message to enable it.
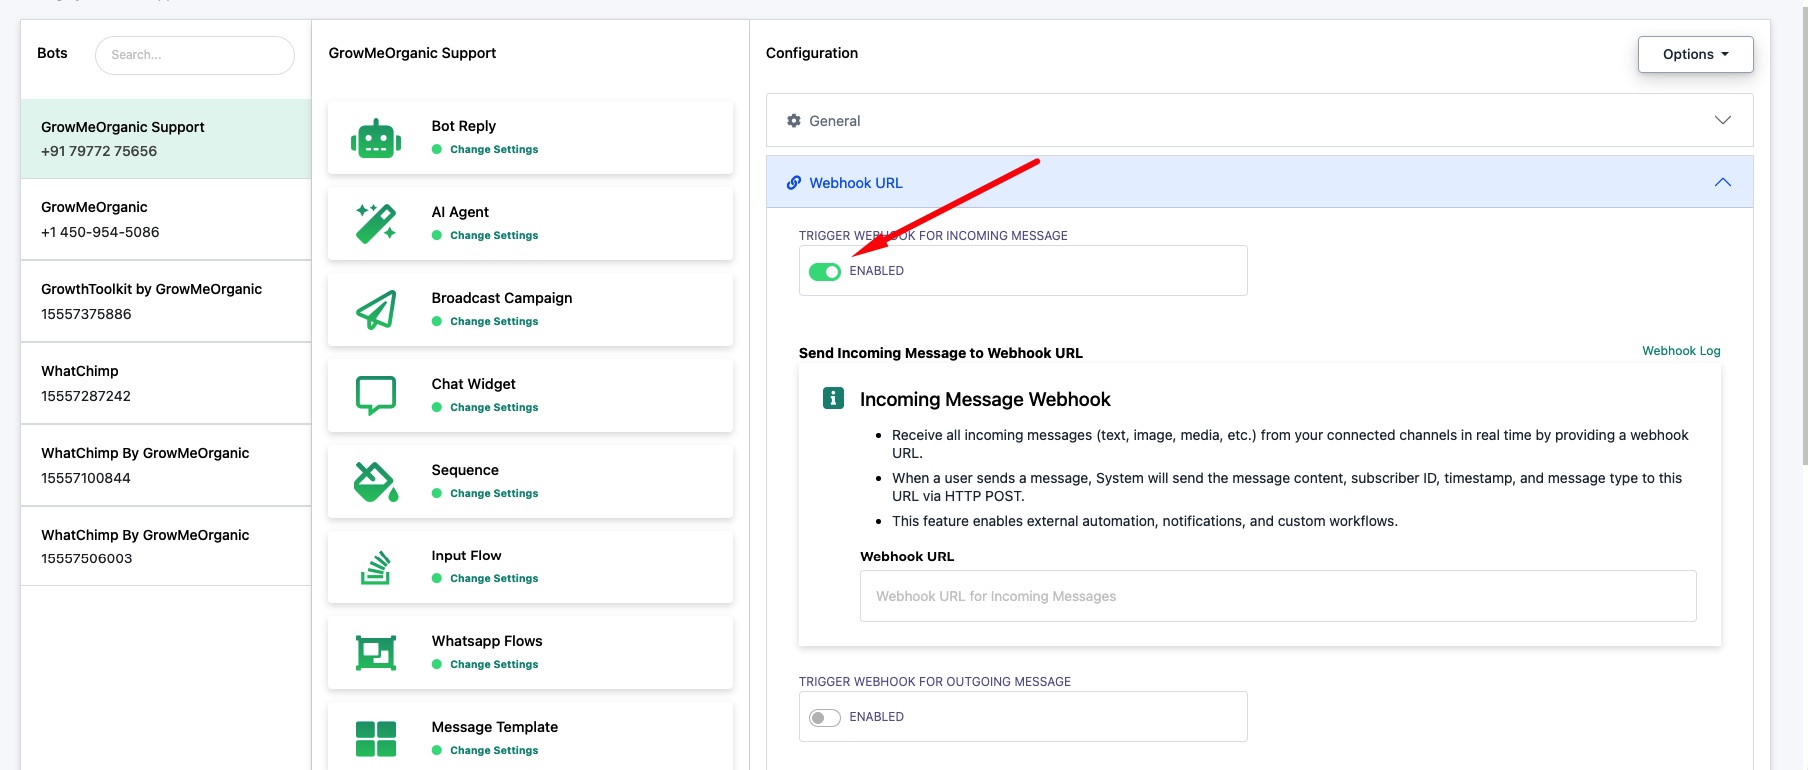
Webhook URL — Enter the URL where WhatChimp should send incoming message data. Every time a customer sends a message to this number, WhatChimp will POST the message details to this URL.
The incoming webhook sends:
- Message content (text, image, media, etc.)
- Subscriber ID
- Timestamp
- Message type
Click Webhook Log to view past webhook deliveries and debug any issues.
Step 3: Set Up Outgoing Message Webhook
Toggle Trigger Webhook for Outgoing Message to enable it.
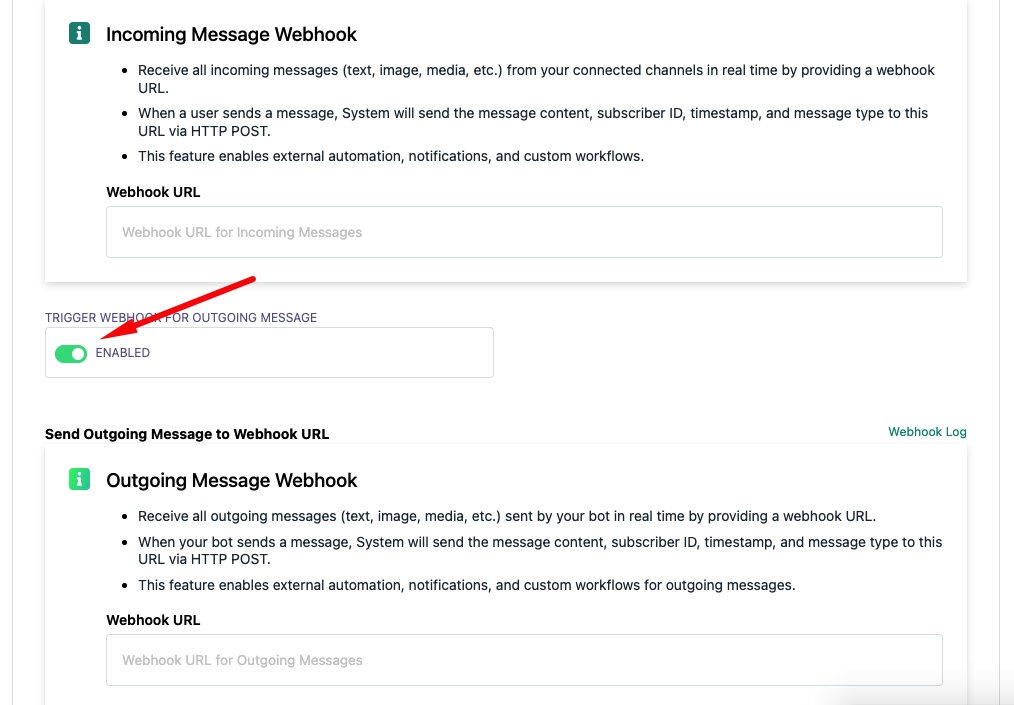
Webhook URL — Enter the URL where WhatChimp should send outgoing message data. Every time your bot or team sends a message, WhatChimp will POST the message details to this URL.
The outgoing webhook sends the same data format as incoming — message content, subscriber ID, timestamp, and message type.
Step 4: Save
Click Save Settings to activate the webhooks. Messages will start firing to your URLs immediately.
Tip: You can enable just incoming, just outgoing, or both — they work independently.