Showcase Products in a Chatbot
Build a WhatsApp chatbot that displays your product catalog to customers
Updated 9 February 2026
Video: https://www.youtube.com/watch?v=DKzgOzMlv1I
Now that your catalog is connected to WhatsApp, use WhatChimp's Bot Manager to build a chatbot that showcases your products to customers. This guide walks through creating an interactive catalog chatbot from scratch.
Step 1: Create a New Bot
- Go to Bot Manager in WhatChimp
- Click Create Bot Flow and give it a name (e.g., "Product Catalog Bot")
- On the Configure Reference screen, set the trigger keywords — these are the words customers type to start the catalog experience
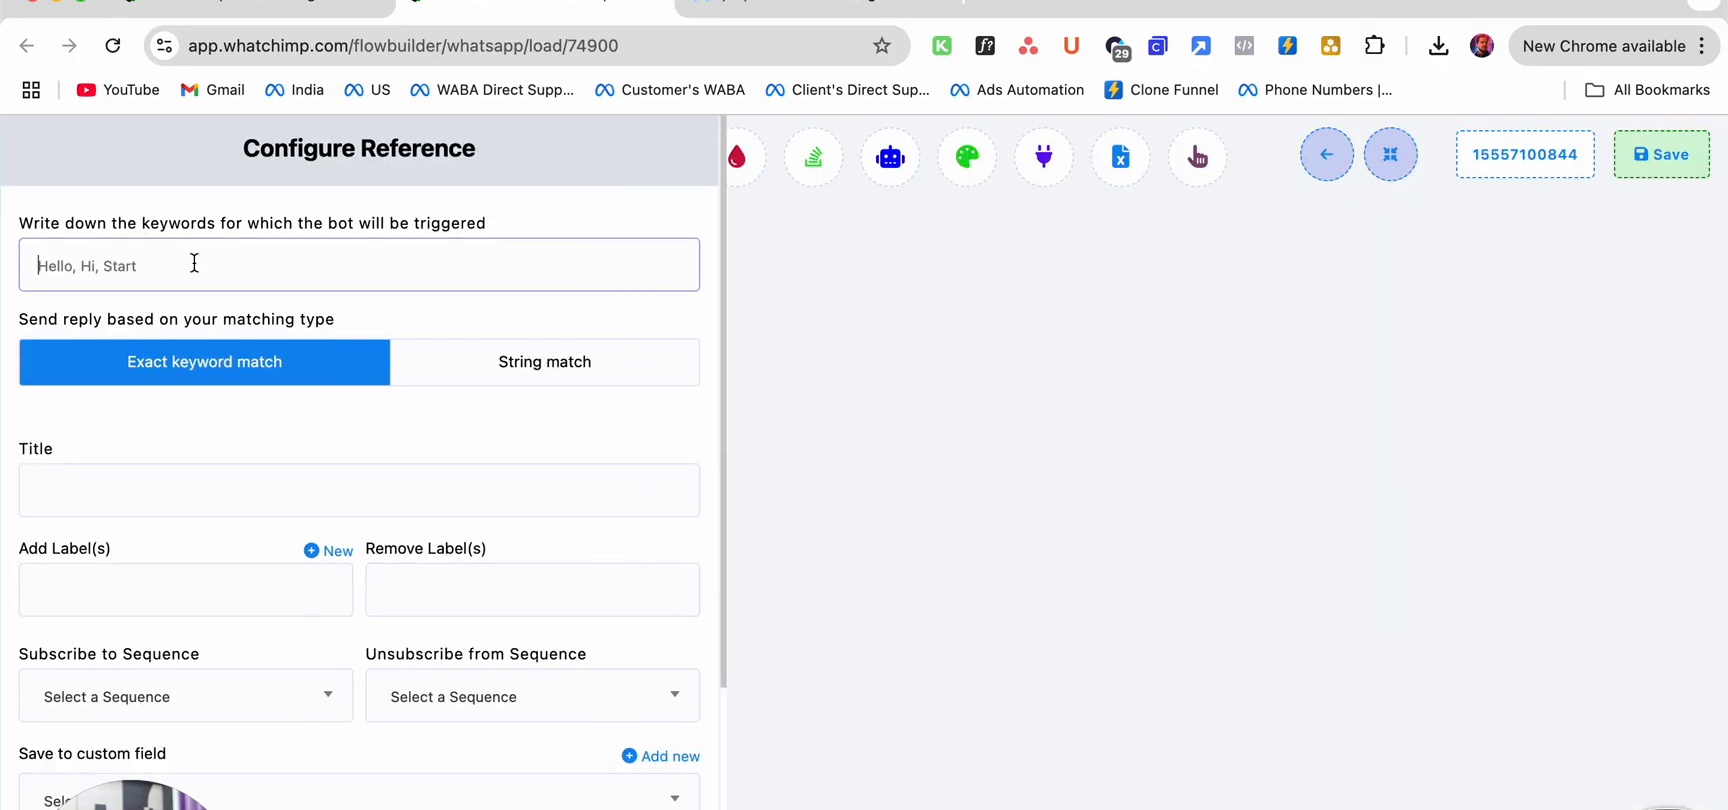
Enter keywords like Hello, Hi, Start, or send me catalog separated by commas. Choose Exact keyword match or String match depending on how strict you want the matching to be.
Step 2: Add a Welcome Message
Add a Text Message node as the first response. Use personalization variables to greet the customer by name.
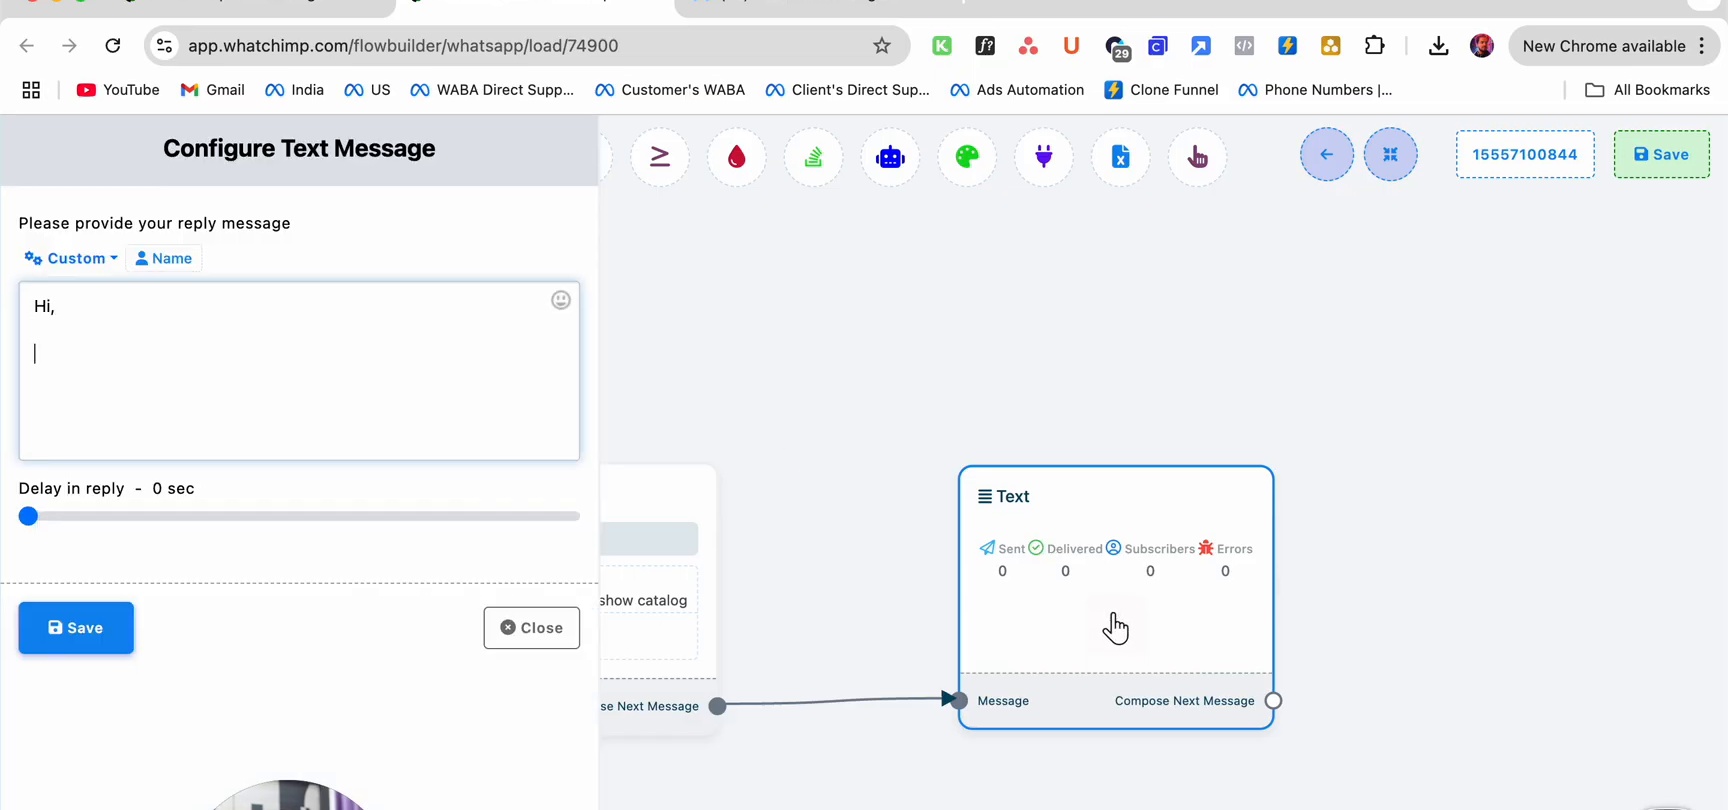
Example: "Hi {{name}}, welcome to our store! What are you shopping for?"
Step 3: Add Category Buttons
Add an Interactive message node to display product category buttons. This lets customers choose what they want to browse.
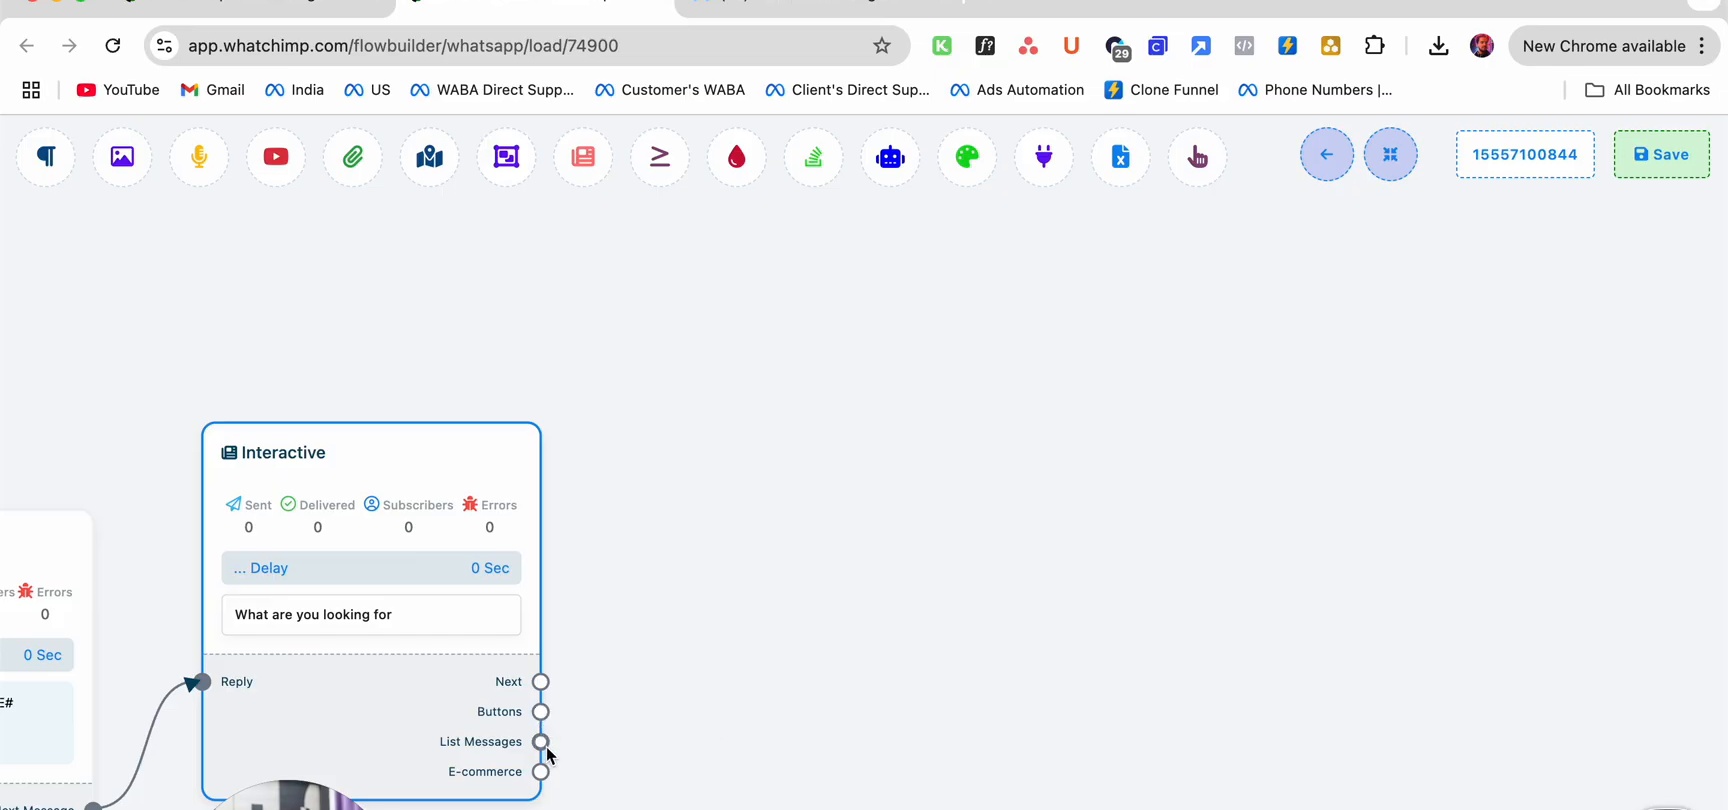
Configure the interactive message with:
- Body: "What are you looking for"
- Buttons: Add one button for each product category (e.g., Shoes, T-shirt, Accessories)
The output ports (Reply, Buttons, List Messages, E-commerce) let you connect different follow-up actions.
Step 4: Connect Button Branches
Each button creates a separate branch in your flow. Connect each button to the appropriate next step — typically a Catalog node that shows products from that category.
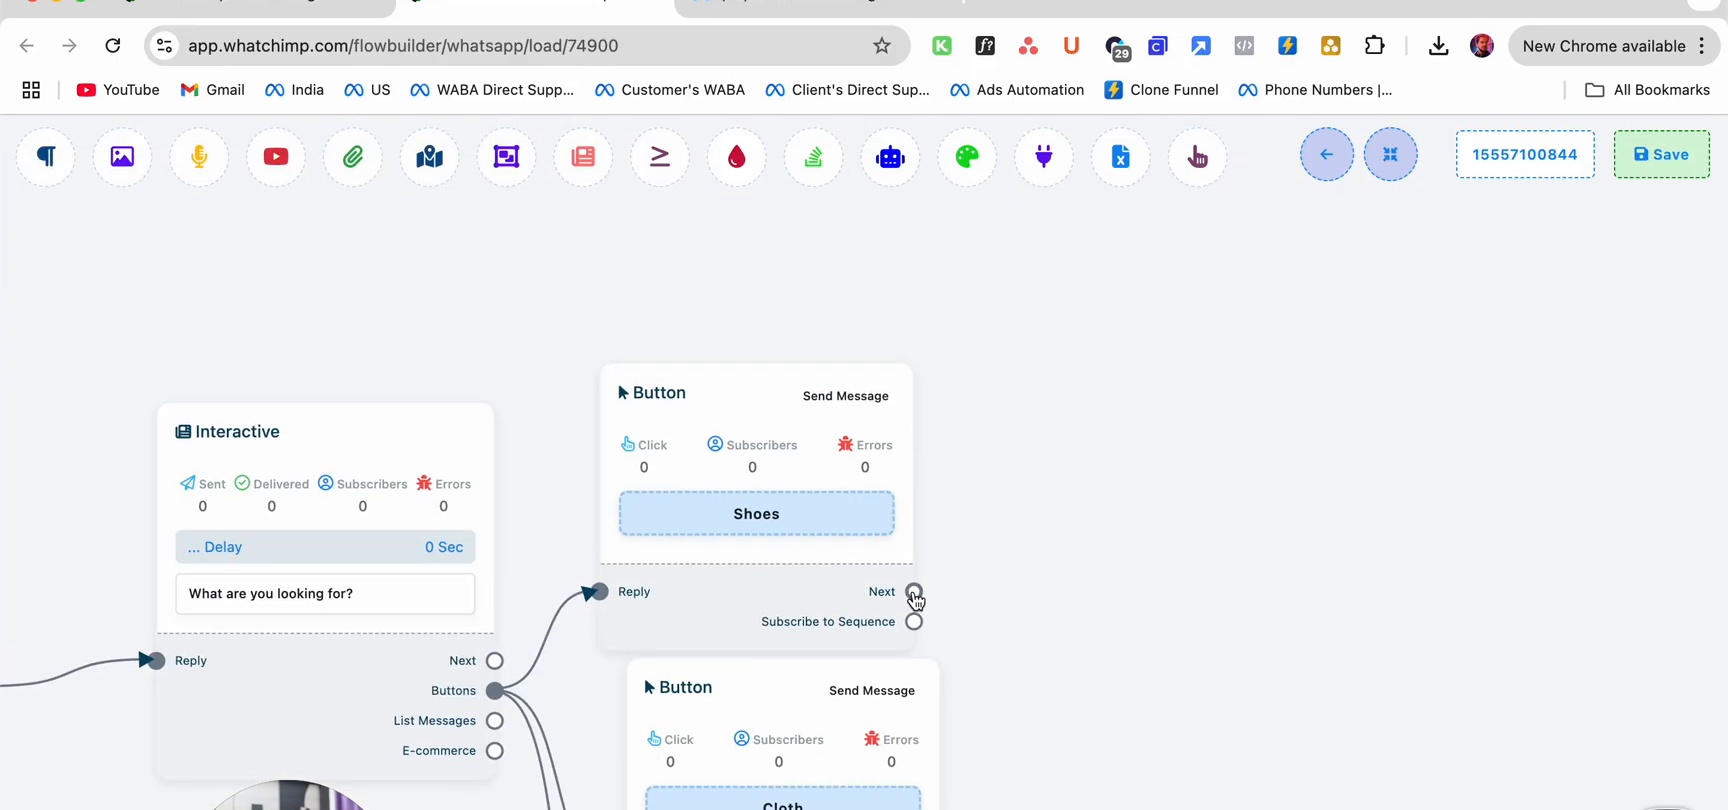
For example:
- Shoes button → Catalog node filtered to shoes
- Cloth button → Catalog node filtered to clothing
Tip: You can also add a Subscribe to Sequence node after each button to label customers by interest (e.g., "shoes_interest") for future targeting.
Step 5: Add the Catalog Node
Drag an E-commerce Catalog node into the flow. This is where you connect your actual product catalog.
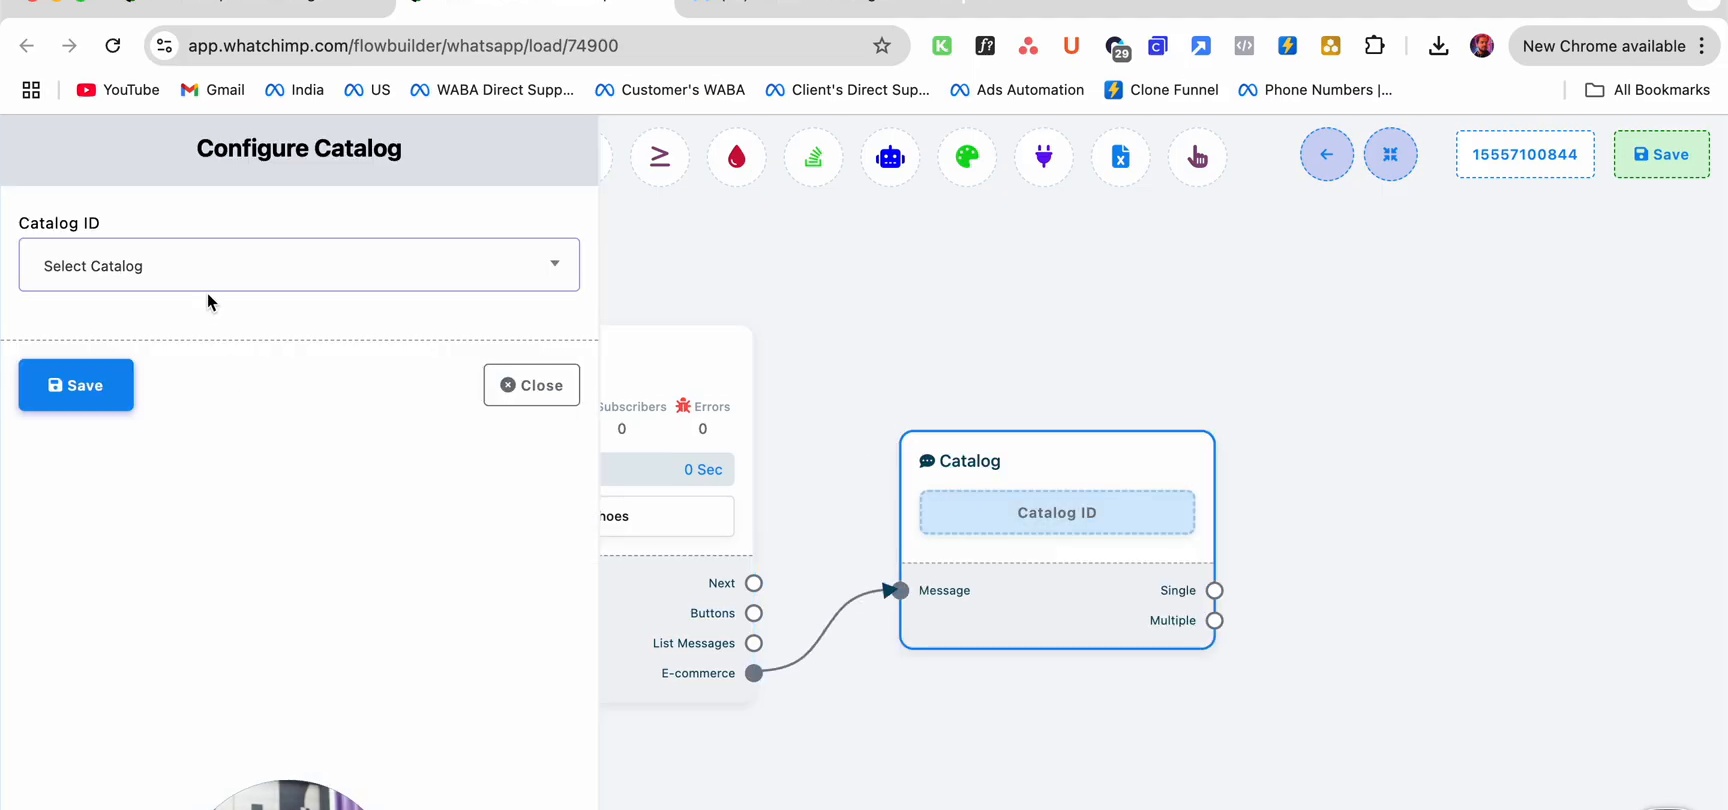
- Select your Catalog ID from the dropdown
- Choose between Single product or Multiple products
- The node will display a Product Section where you pick which products to show
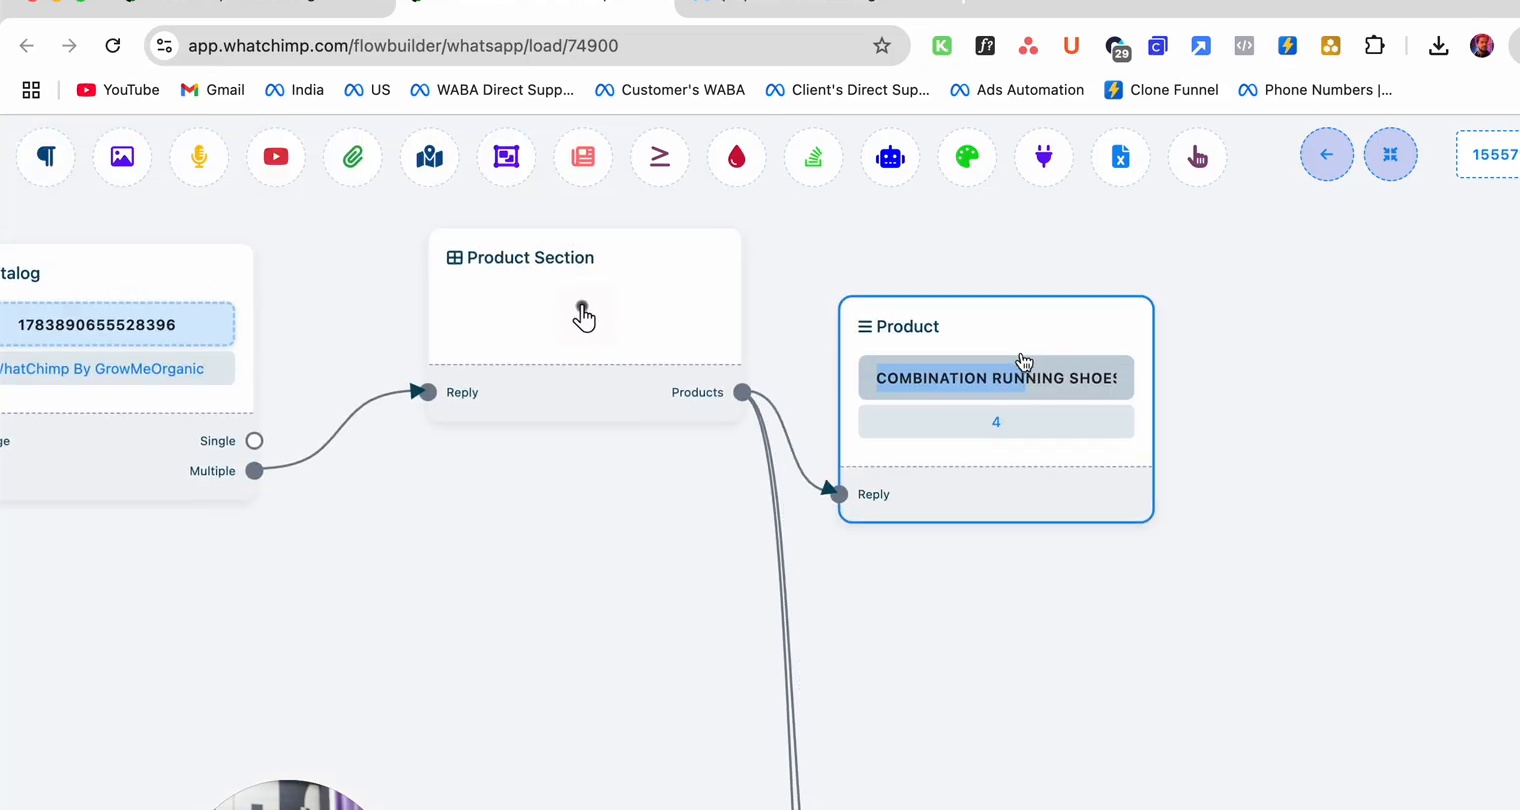
Select the specific products for each category branch. The products will be sent to the customer as interactive product cards in WhatsApp.
Step 6: Save and Test
Click Save to publish your bot flow. Then test it by sending a trigger keyword to your WhatsApp number.
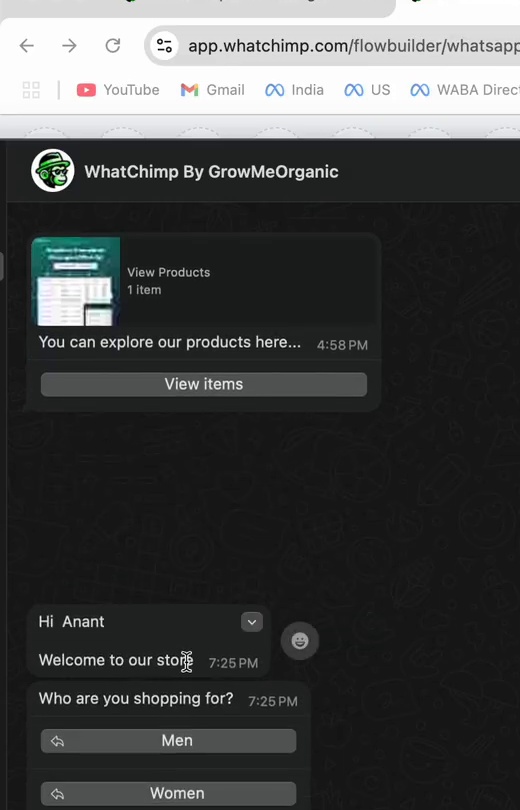
When a customer messages your number, the chatbot will:
- Send a personalized welcome message
- Show category buttons
- Display products from the selected category
- Let the customer browse, view details, and place an order
Tips
- Use a chat widget on your website with prefilled text (e.g., "send me catalog") so visitors are taken directly to your catalog chatbot
- Apply labels to categorize customers by interest for future broadcast campaigns
- Keep categories simple — 3-4 buttons maximum for the best customer experience
Next Steps
- Manage Orders & Payment Settings — Handle incoming orders and configure payment options
- Catalog Settings & Sync — Keep your catalog products up to date