Como Gerenciar Campos Personalizados e Etiquetas
Guia: Gerenciar Campos Personalizados e Etiquetas
Updated 10 February 2026
Custom fields and labels help you organize and segment your subscribers in WhatChimp.
Custom fields store additional information about subscribers (name, company, website, city) — enabling personalization in your messages and campaigns.
Labels categorize subscribers into groups (VIP Clients, Webinar Attendees, New Leads) — making it easy to filter and target them when broadcasting.
Set up both before importing contacts so your data maps correctly during import.
Video: https://www.youtube.com/watch?v=pYpWuoHSZlk
How to Add Custom Fields
Go to Subscriber Manager → Manage → Manage Custom Fields
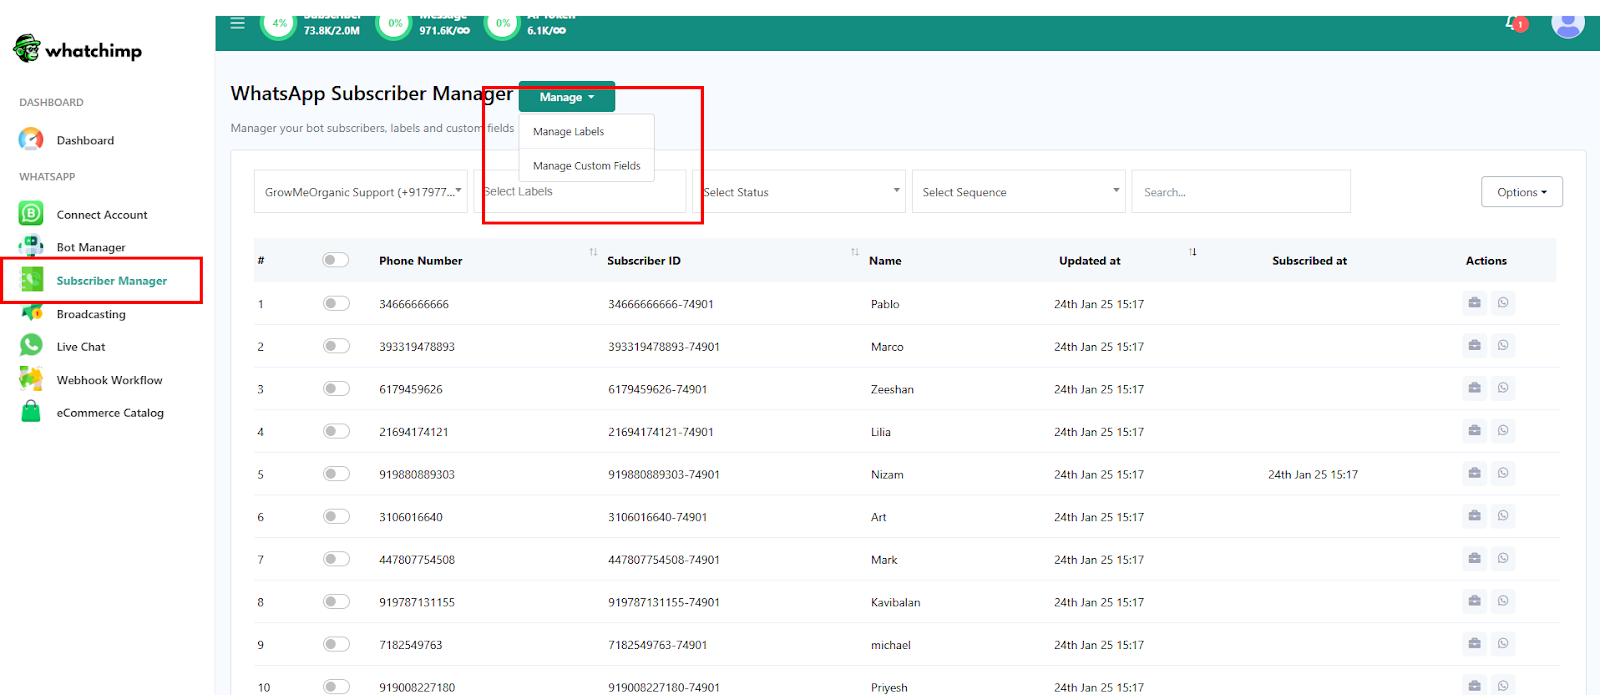
Click Create and enter a field name (e.g., website, company_name, city). Select the reply type that matches the data — Text for names, URL for websites, Number for quantities, etc.

Click Save and refresh the page to confirm the new field appears. Repeat for each custom field you need.
Note: "Phone Number" is included by default — you don't need to create it. Custom field names should match your CSV or Google Sheet column headers for smooth importing.
How to Add Labels
Go to Subscriber Manager → Manage → Manage Labels
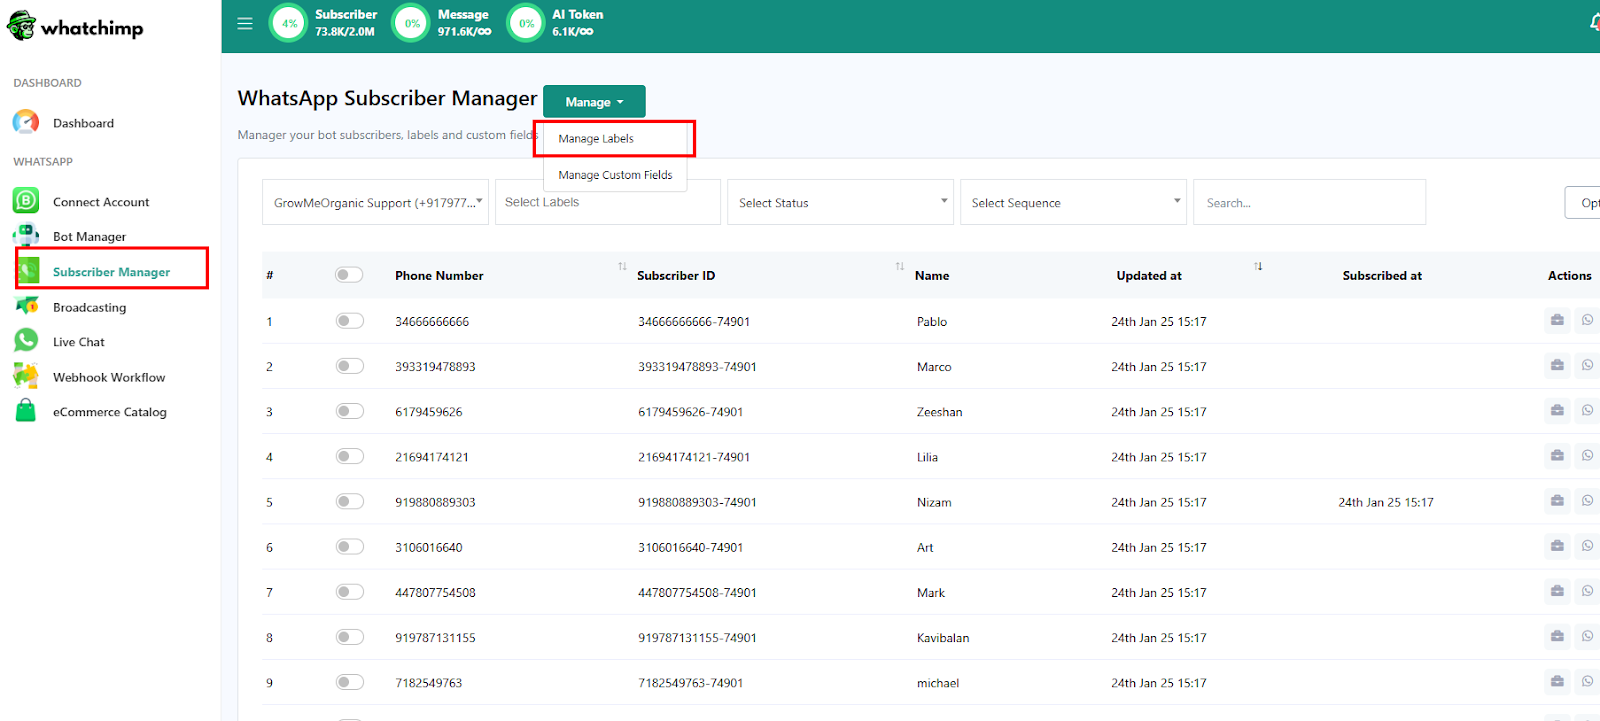
Click Create and enter a label name. Use descriptive names that reflect how you'll segment your audience — e.g., "VIP Clients", "February Campaign", "Webinar Attendees", "Free Trial Users".
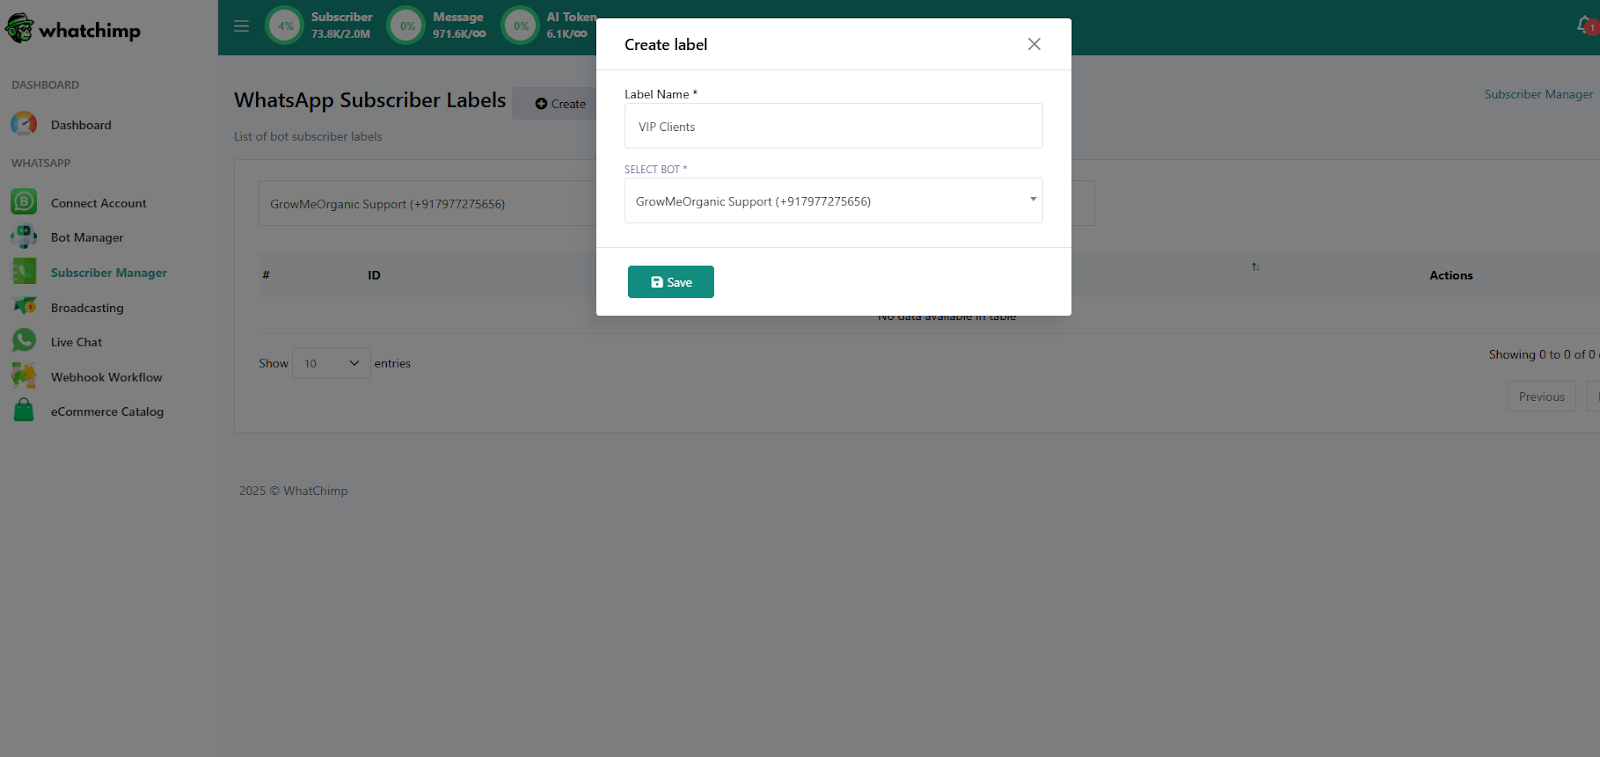
Labels are assigned to subscribers during import or manually from the subscriber profile. When creating a broadcast campaign, you use labels to include or exclude specific groups.
Related Articles
How to Import Subscribers Manually — Add individual contacts
How to Import Subscribers Using CSV — Bulk import from a spreadsheet
How to Import Contacts from Google Sheets — Direct Google Sheets integration
Template Variables vs Custom Variables — How custom fields work in message templates