كيفية إدارة الحقول المخصصة والتسميات
دليل: إدارة الحقول المخصصة والتسميات
Updated 10 February 2026
Custom fields and labels help you organize and segment your subscribers in WhatChimp.
Custom fields store additional information about subscribers (name, company, website, city) — enabling personalization in your messages and campaigns.
Labels categorize subscribers into groups (VIP Clients, Webinar Attendees, New Leads) — making it easy to filter and target them when broadcasting.
Set up both before importing contacts so your data maps correctly during import.
Video: https://www.youtube.com/watch?v=pYpWuoHSZlk
How to Add Custom Fields
Go to Subscriber Manager → Manage → Manage Custom Fields
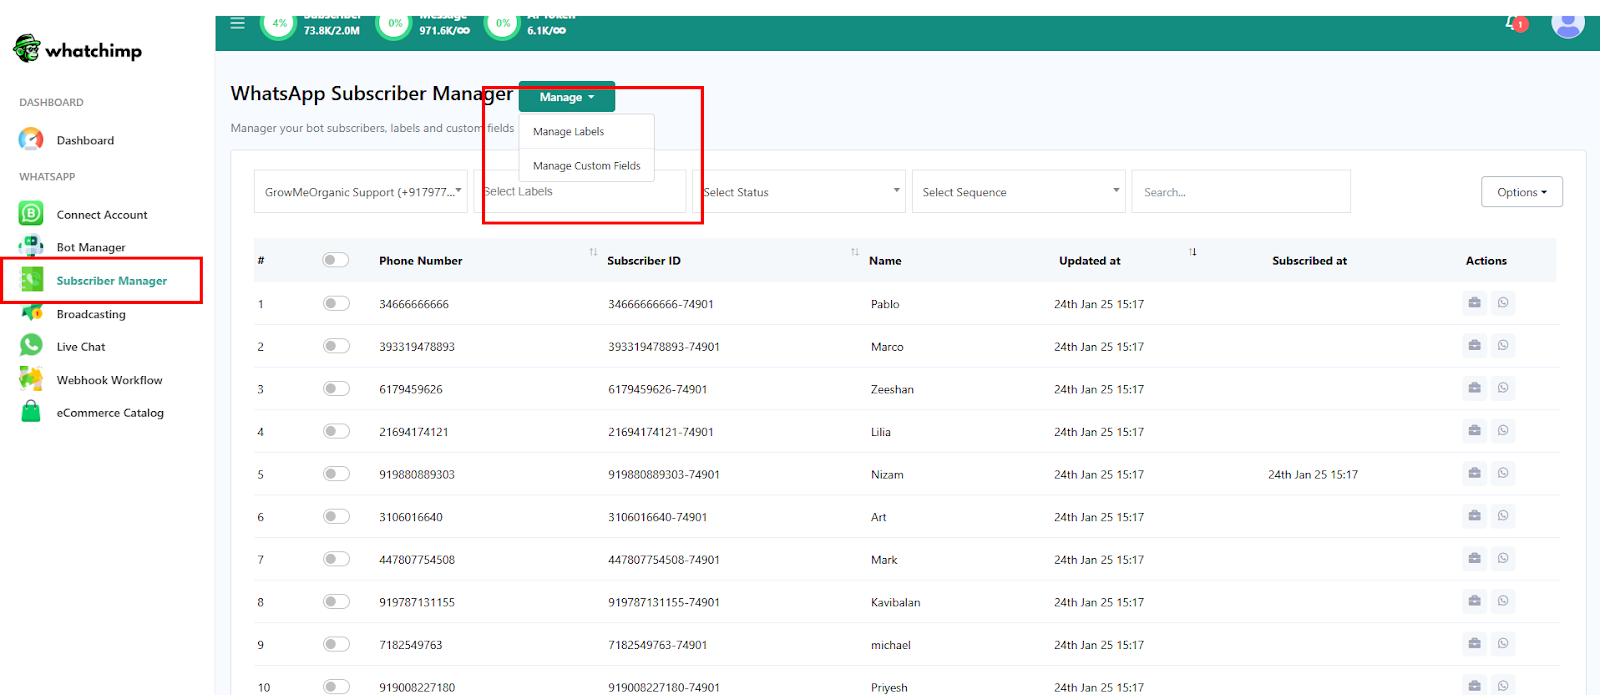
Click Create and enter a field name (e.g., website, company_name, city). Select the reply type that matches the data — Text for names, URL for websites, Number for quantities, etc.

Click Save and refresh the page to confirm the new field appears. Repeat for each custom field you need.
Note: "Phone Number" is included by default — you don't need to create it. Custom field names should match your CSV or Google Sheet column headers for smooth importing.
How to Add Labels
Go to Subscriber Manager → Manage → Manage Labels
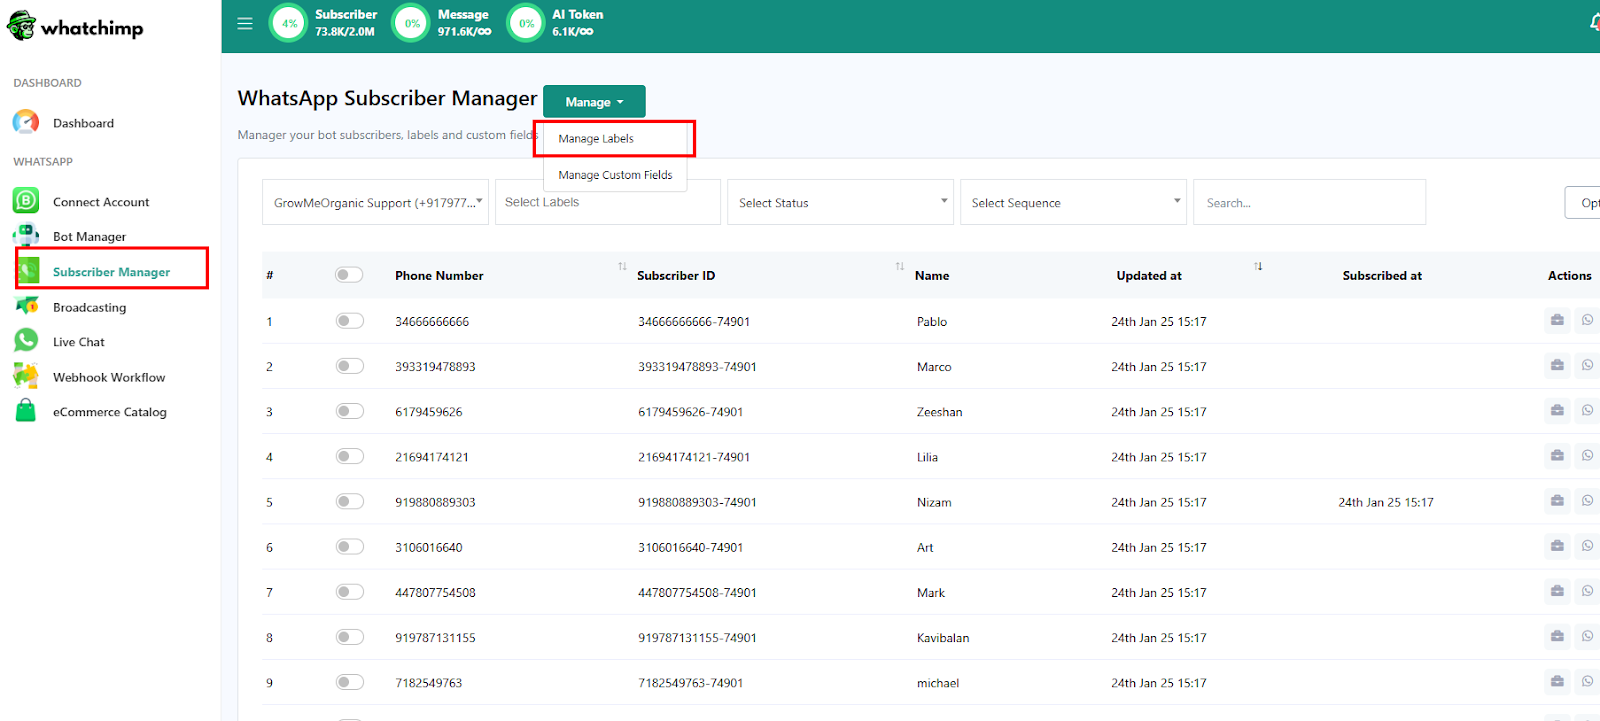
Click Create and enter a label name. Use descriptive names that reflect how you'll segment your audience — e.g., "VIP Clients", "February Campaign", "Webinar Attendees", "Free Trial Users".
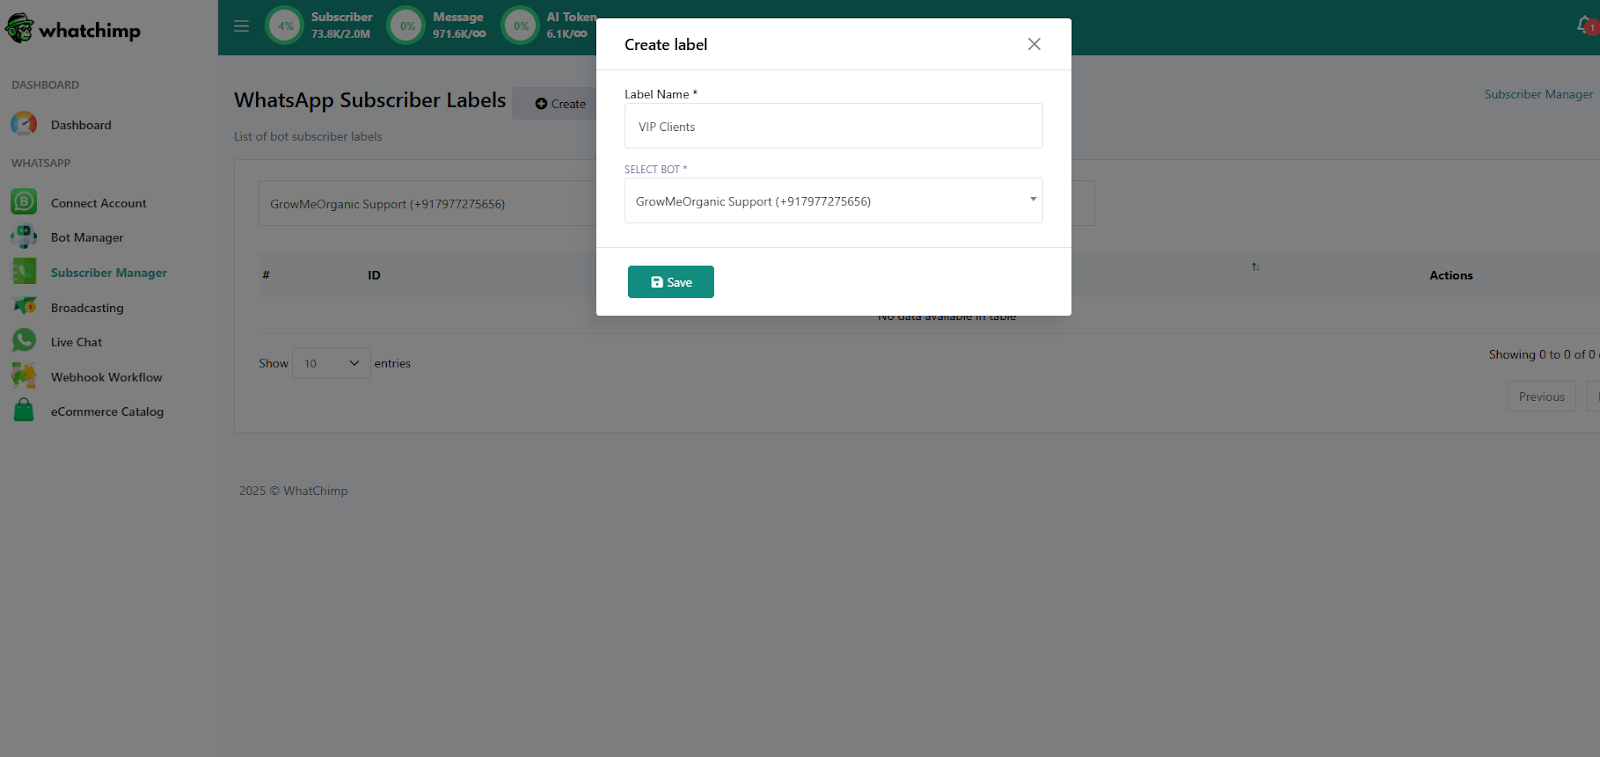
Labels are assigned to subscribers during import or manually from the subscriber profile. When creating a broadcast campaign, you use labels to include or exclude specific groups.
Related Articles
How to Import Subscribers Manually — Add individual contacts
How to Import Subscribers Using CSV — Bulk import from a spreadsheet
How to Import Contacts from Google Sheets — Direct Google Sheets integration
Template Variables vs Custom Variables — How custom fields work in message templates