Send WhatsApp Messages from Google Spreadsheet
Send automated WhatsApp messages like payment reminders or order confirmations whenever you add or update data in a Google Spreadsheet.
Updated 18 June 2026
Video: https://www.youtube.com/watch?v=8M7hRzcrk_g
Send automated WhatsApp messages to customers whenever you add or update data in a Google Spreadsheet. This is perfect for payment reminders, order confirmations, appointment notifications, or any scenario where spreadsheet data should trigger a WhatsApp message.
Prerequisites:
- Connect your Google account to WhatChimp
- An approved WhatsApp message template (you'll create one in this guide)
Prepare Your Google Sheet
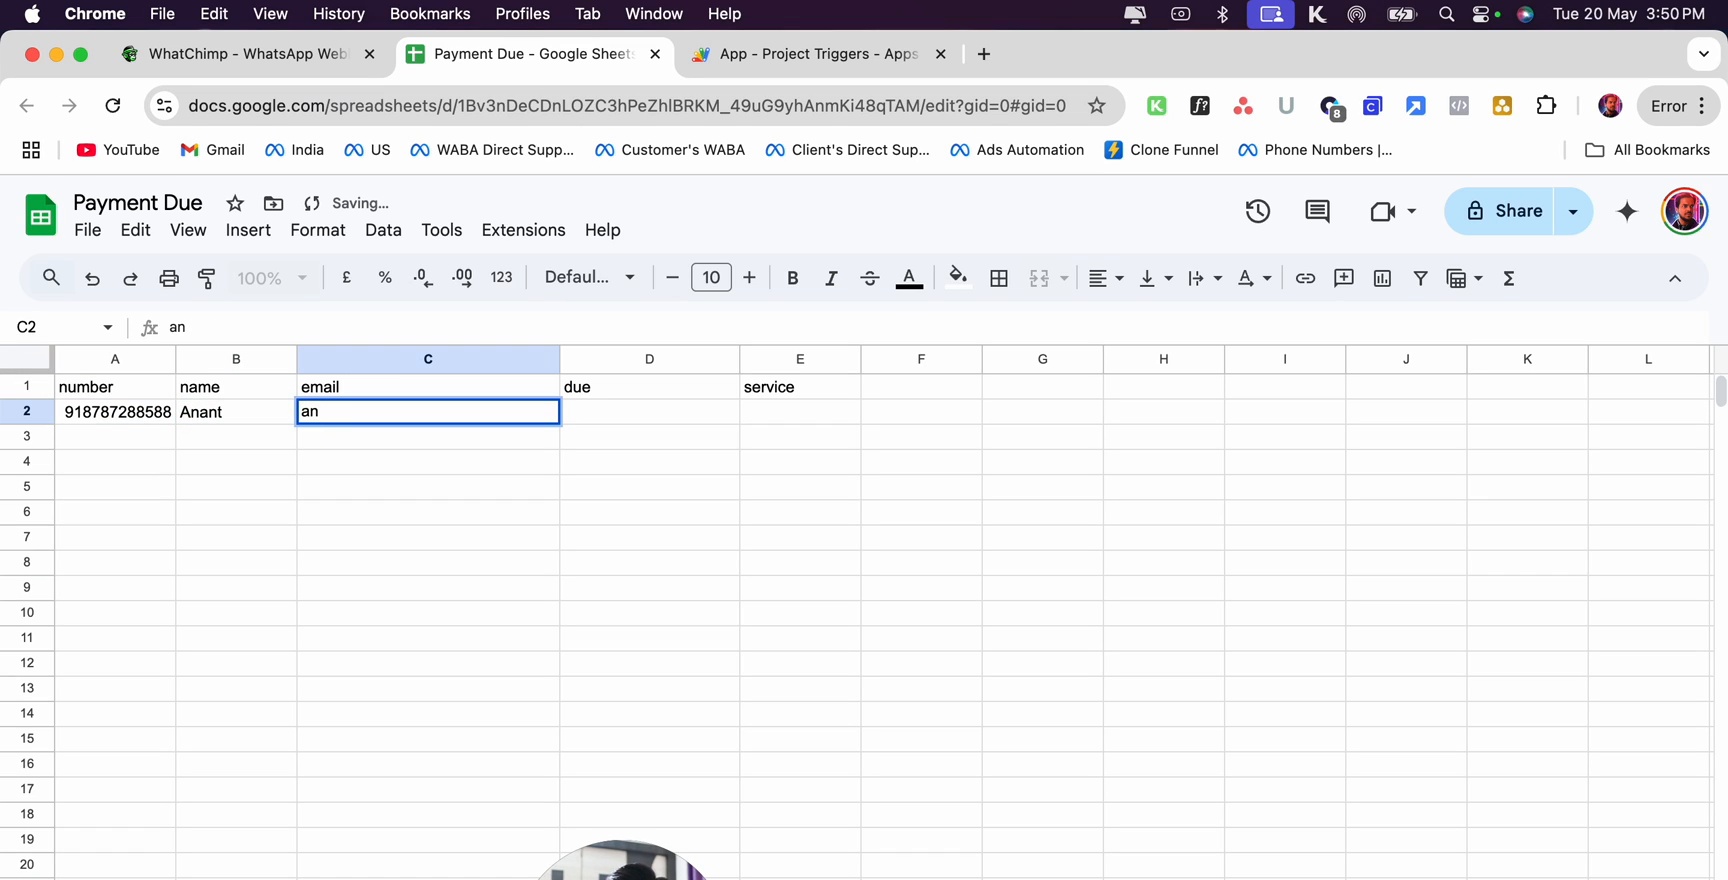
Create a Google Sheet with columns for the data you want to send. For example, a "Payment Due" sheet:
| Column | Description |
|---|---|
| number | Phone number with country code |
| name | Customer name |
| Customer email | |
| due | Amount due |
| service | Service name |
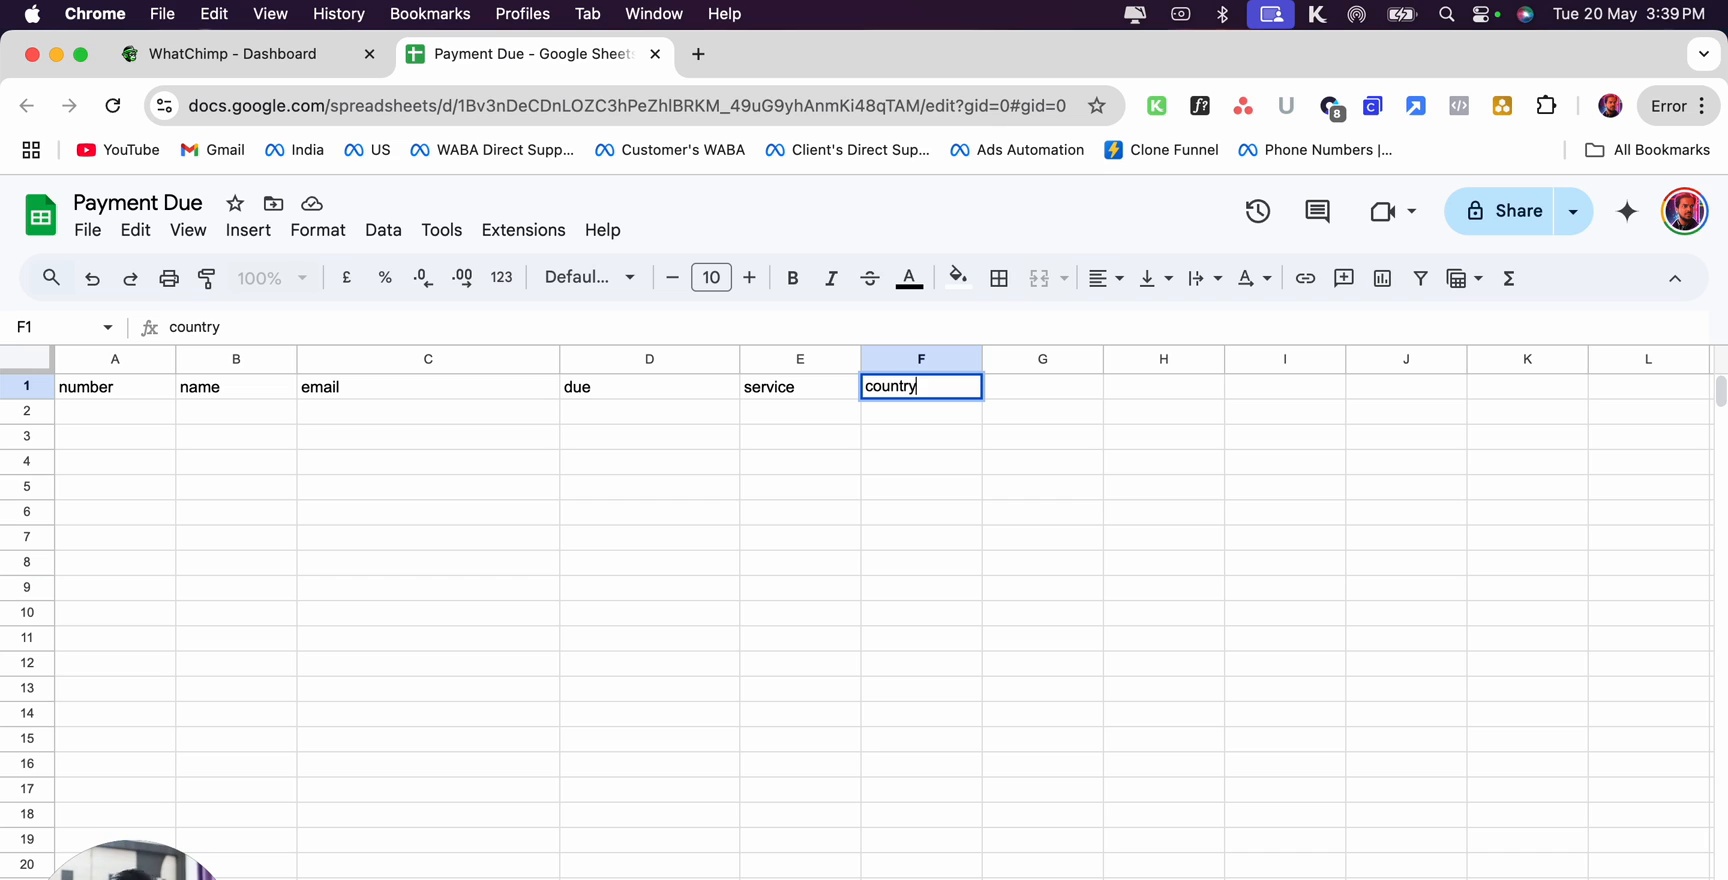 Google Sheet named Payment Due with columns for number, name, email, due, and service
Create a Message Template
You need an approved WhatsApp message template with variables that map to your spreadsheet columns.
- Go to Bot Manager in the left sidebar
- Click Message Template in the left panel
- Click Create Template
- Fill in the template details:
- Template Name: e.g.,
payment_due_reminder - Language: English (US)
- Template Category: Marketing or Utility
- Header Type: No Header (or choose as needed)
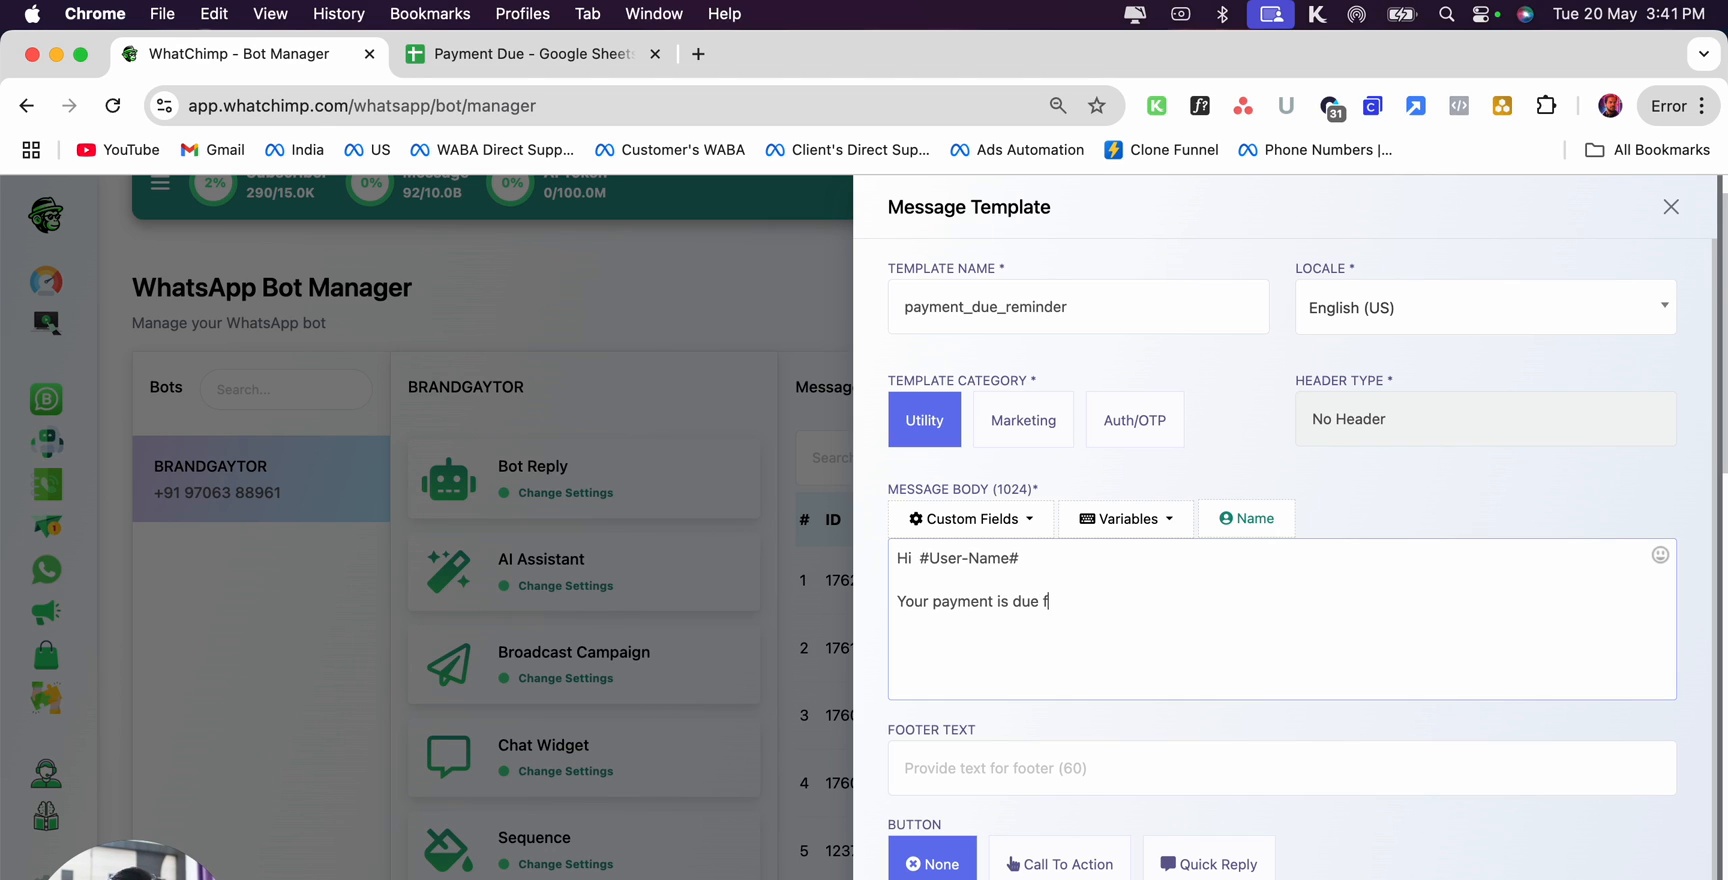 Message Template creation showing template name, language, category, and header type fields
- In the Message Body, use variables from your custom fields:
- Click Variables to insert field references
- Write your message using
#FieldName#syntax
Example message: ``` Hi #UserName#
Your payment is due for the service: #Eservice# Payment Amount: #Edue#
Thank you ```
- Add Buttons if needed:
- Click Call To Action
- Add a button like Pay Invoice with a URL
- Click Send to submit the template for approval
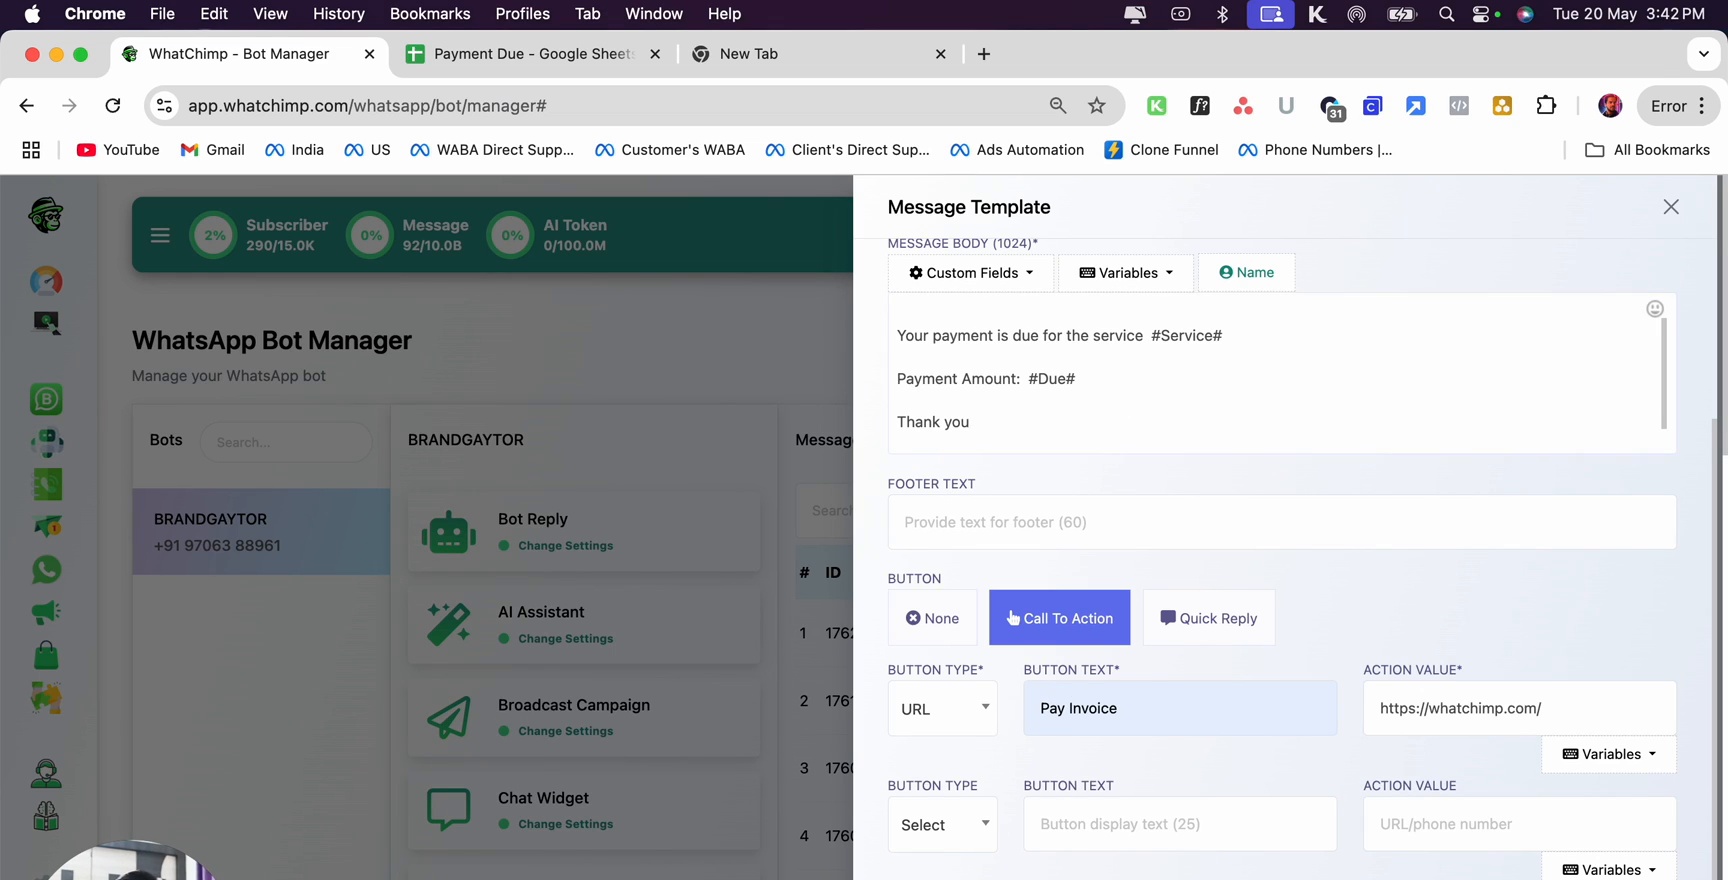 Message template body with variables for UserName, Eservice, and Edue, plus a Pay Invoice button with URL
- Wait for the template to be approved, then click Sync Template to sync the status
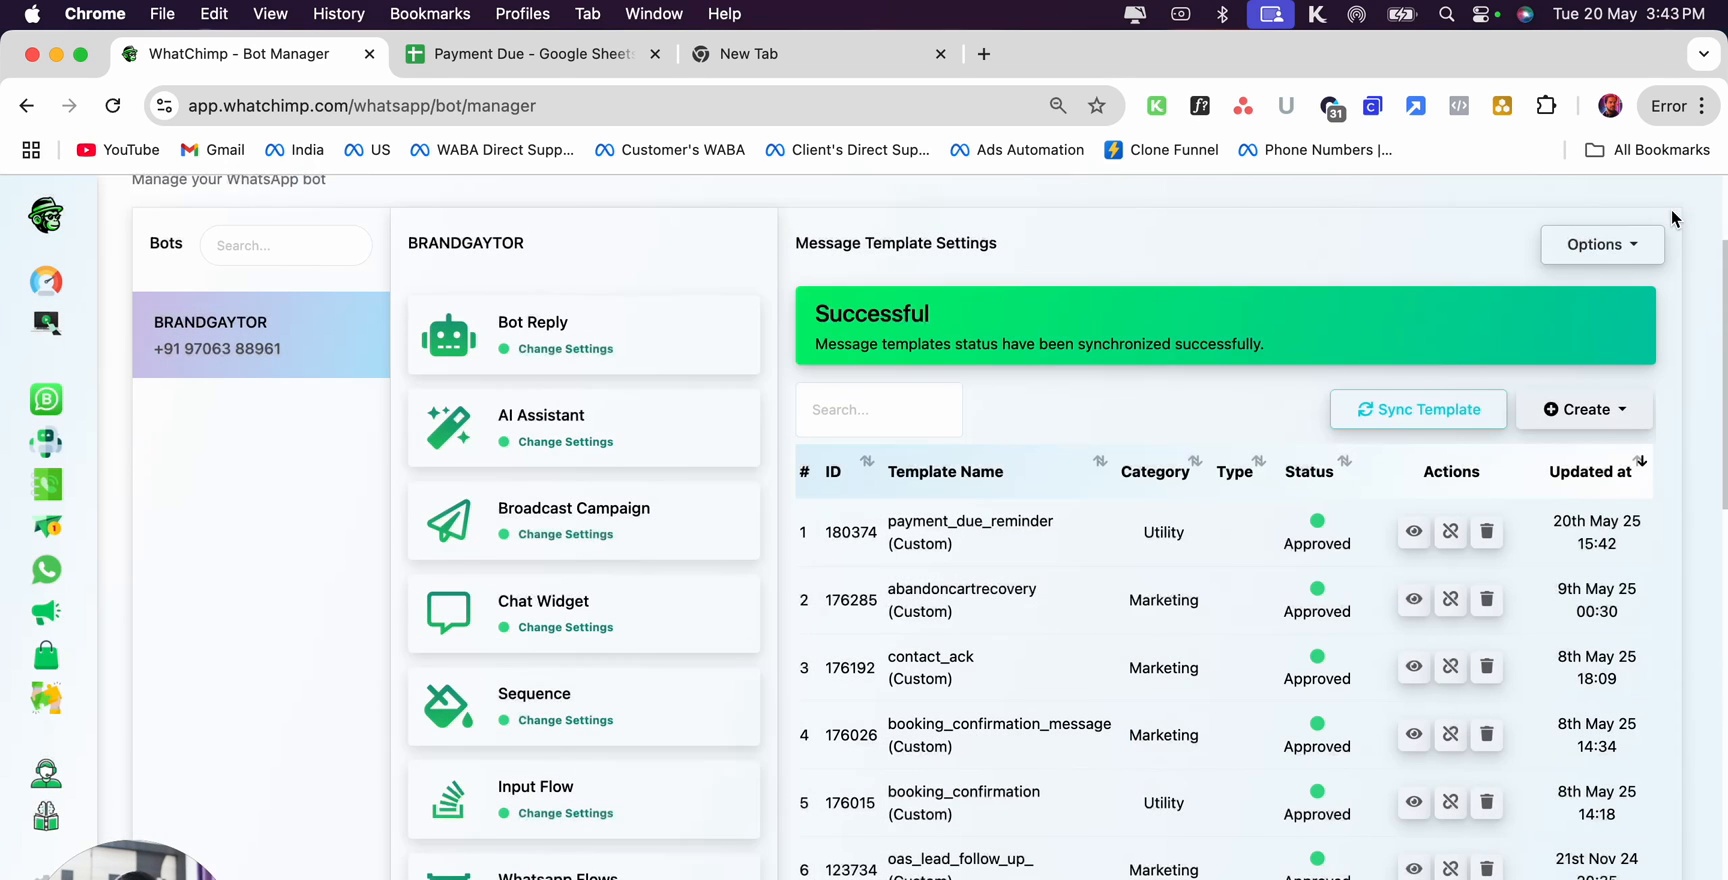 Bot Manager showing Successful message after template sync with template list
Create a WhatsApp Webhook Workflow
- Go to Bot Manager > Whatsapp Flow > Out-bound Webhook (or navigate to the WhatsApp Webhook Workflow page)
- Click Create
- Fill in the Workflow Details:
- Workflow Name: e.g., "Payment Due Reminder"
- WhatsApp Account: Select your connected account
- Message Template: Select the template you created (e.g.,
payment_due_reminder)
- Click Create Workflow
 Workflow Details page showing workflow name, WhatsApp account, and message template selection with Create Workflow button
After creating the workflow, you'll see the Google Sheet Trigger Instruction panel with:
- The Webhook Callback URL — you'll need this for the Google Apps Script
- Step-by-step instructions for setting up the Google Sheet trigger
- The Apps Script code to copy
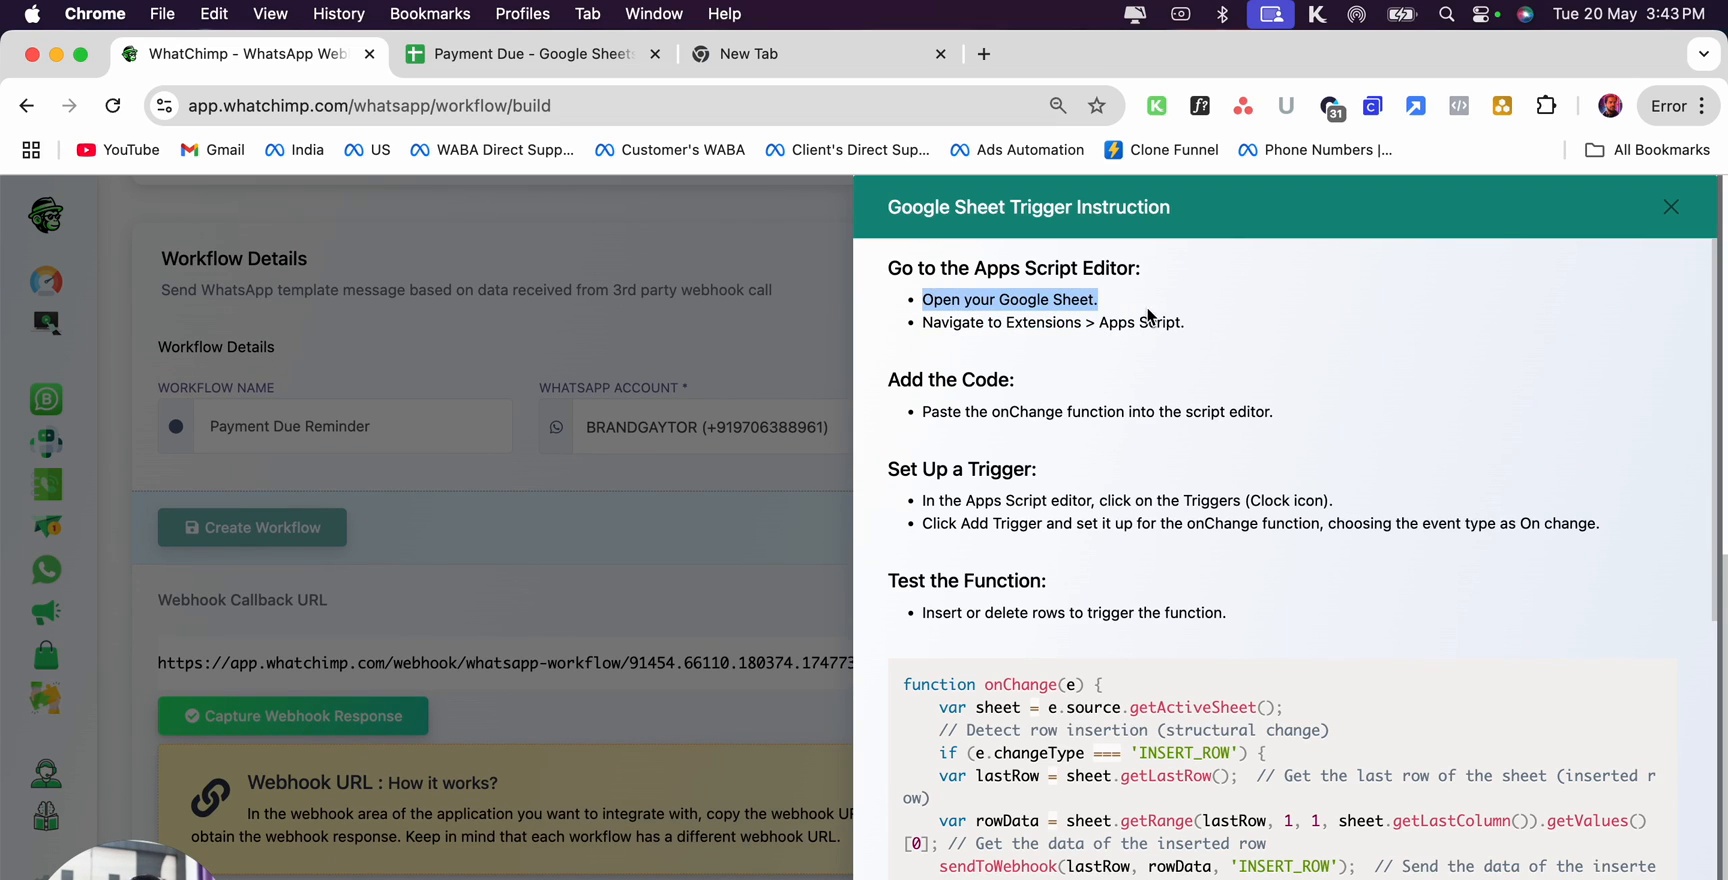 Workflow Details page showing Google Sheet Trigger Instructions with webhook URL and Apps Script code
Set Up the Google Apps Script
- Open your Google Sheet
- Click Extensions > Apps Script
- Delete any existing code and paste the onChange function provided in the Workflow Instructions:
function onChange(e) {
  var sheet = e.source.getActiveSheet();
  var lastRow = sheet.getLastRow();
  var rowData = sheet.getRange(lastRow, 1, 1, sheet.getLastColumn()).getValues()[0];
  sendToWebhook(lastRow, rowData, "INSERT_ROW");

  if (e.changeType === "EDIT") {
    var activeRow = e.source.getActiveSheet();
    var activeRange = activeRow.getActiveRange();
    var editedRow = activeRange.getRow();
    var rowData = sheet.getRange(editedRow, 1, 1, sheet.getLastColumn()).getValues()[0];
    sendToWebhook(editedRow, rowData, "EDIT");
  }
}- Click Save
Add a Trigger
- In the Apps Script editor, click the Triggers icon (clock icon) in the left sidebar
- Click Add Trigger
- Configure the trigger:
- Choose which deployment should run: Head
- Select event source: From spreadsheet
- Select event type: On change
- Click Save
- If prompted about permissions, click Advanced > Go to (your app) to grant access
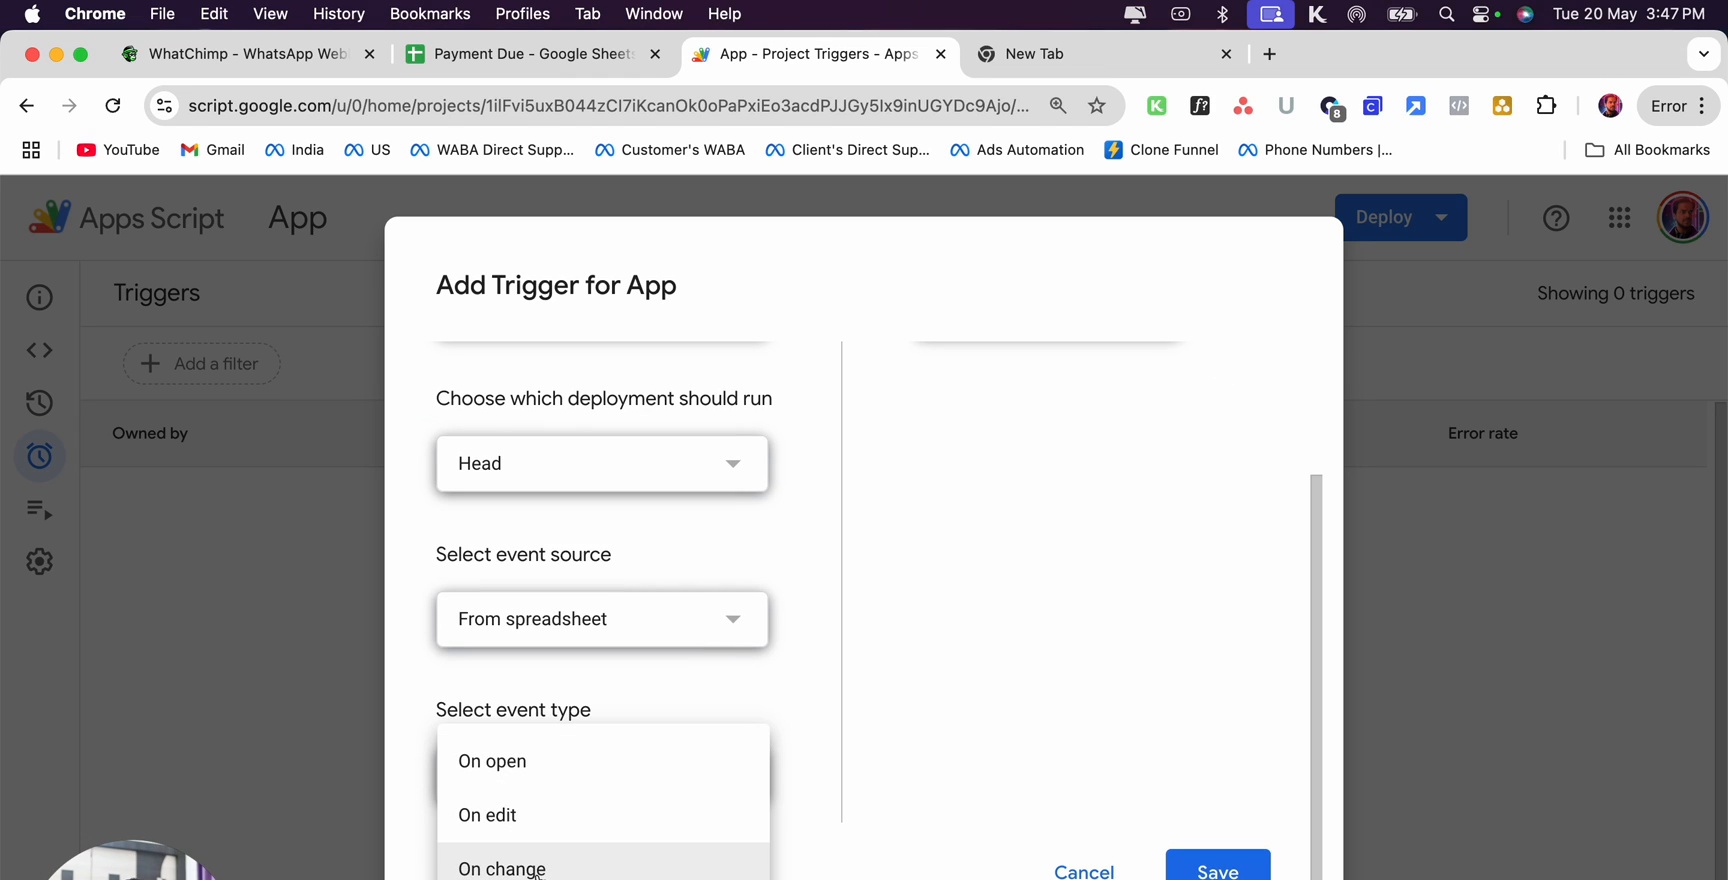 Add Trigger for App dialog showing deployment, event source, and event type configuration
Configure Workflow Settings (Optional)
Back in WhatChimp, you can configure additional settings for the workflow:
- Send message with a delay — add a delay in minutes before sending
- Send message based on conditions — add rules to filter which rows trigger messages
- Actions following successful webhook call — assign conversations to a team member or group
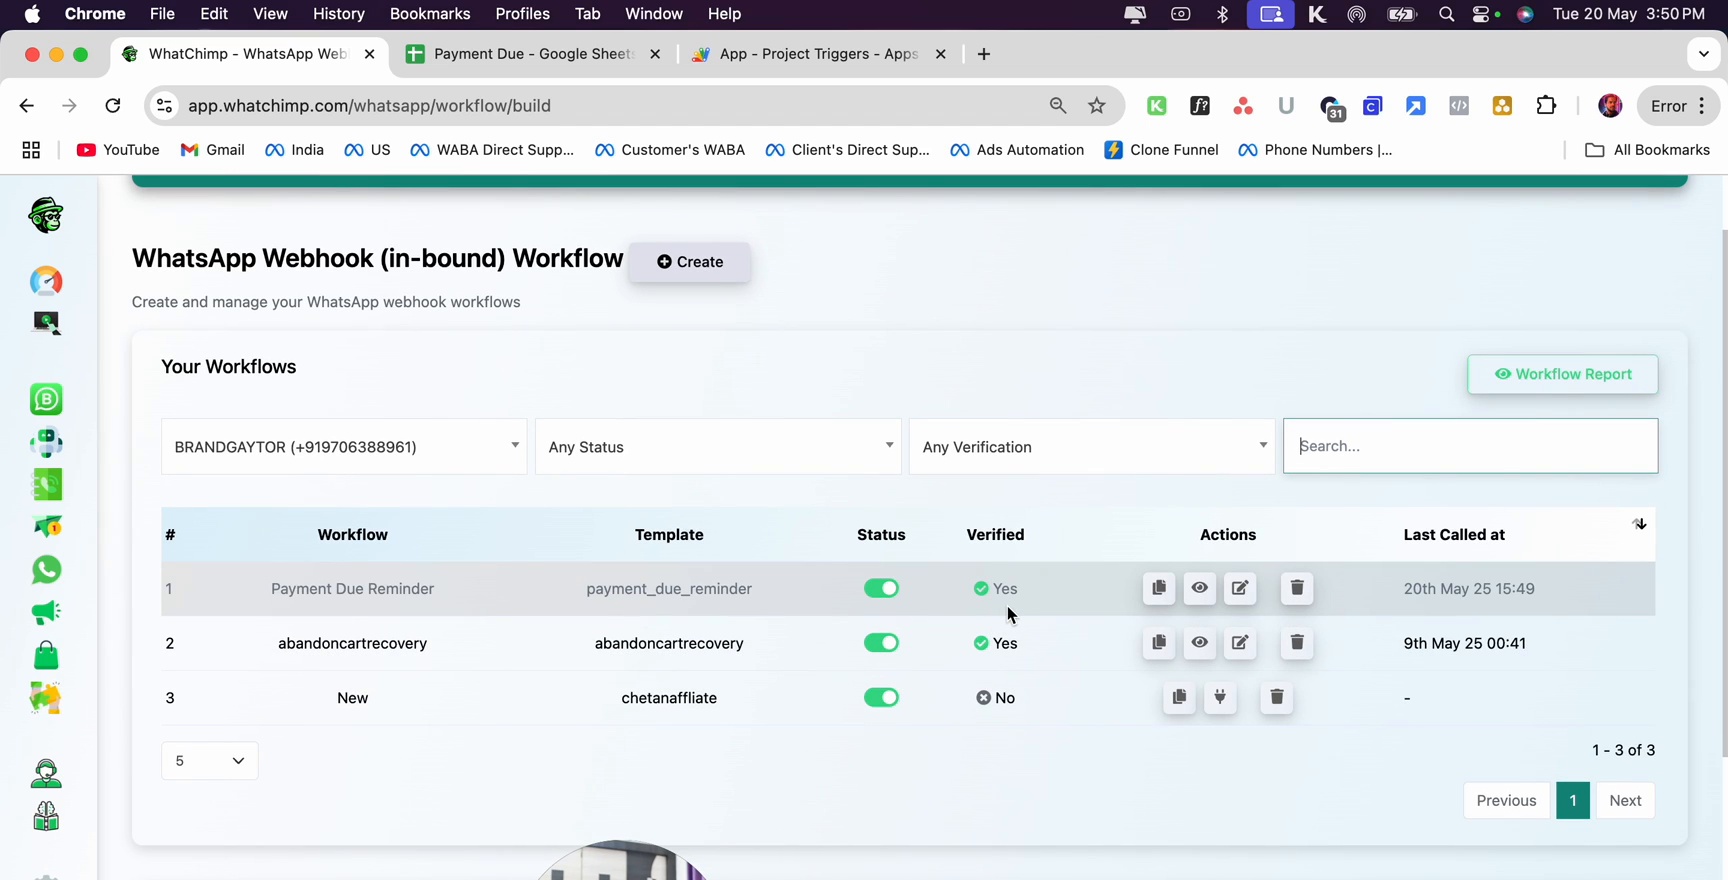 WhatsApp Webhook Workflow page showing list of workflows with status and verification details
Test the Integration
- Open your Google Sheet
- Add a new row with test data (number, name, email, due amount, service)
- The Apps Script fires automatically and sends the data to WhatChimp's webhook
- WhatChimp sends the WhatsApp message using your template
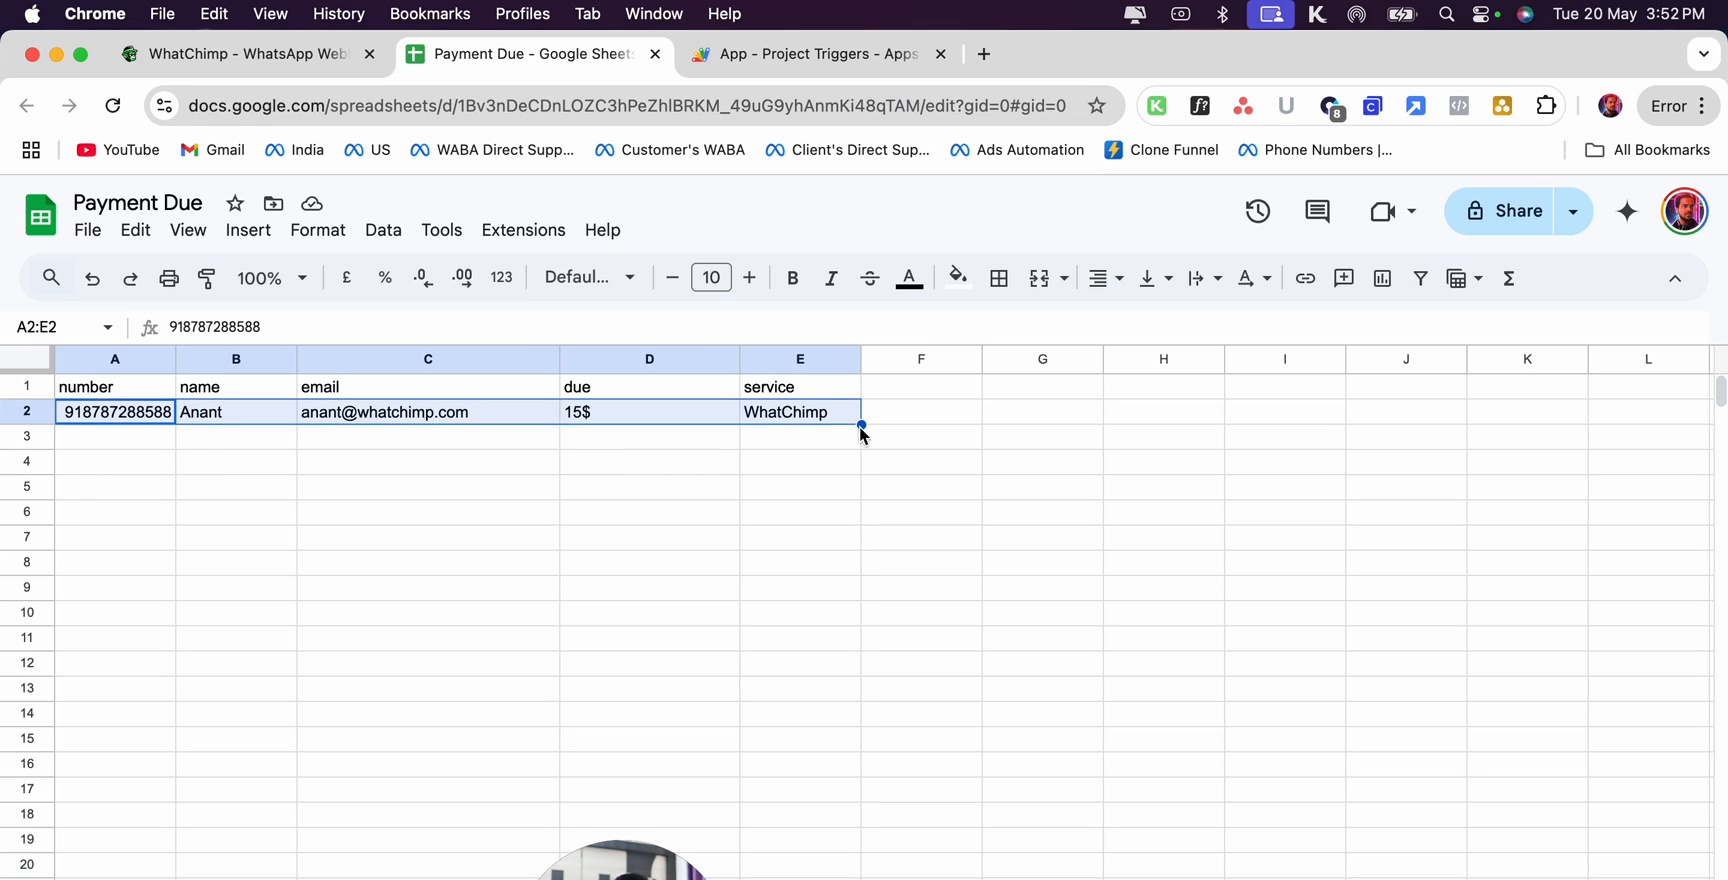 Payment Due Google Sheet with a test row containing phone number, name, email, due amount, and service
Check the Workflow Report to see the delivery status:
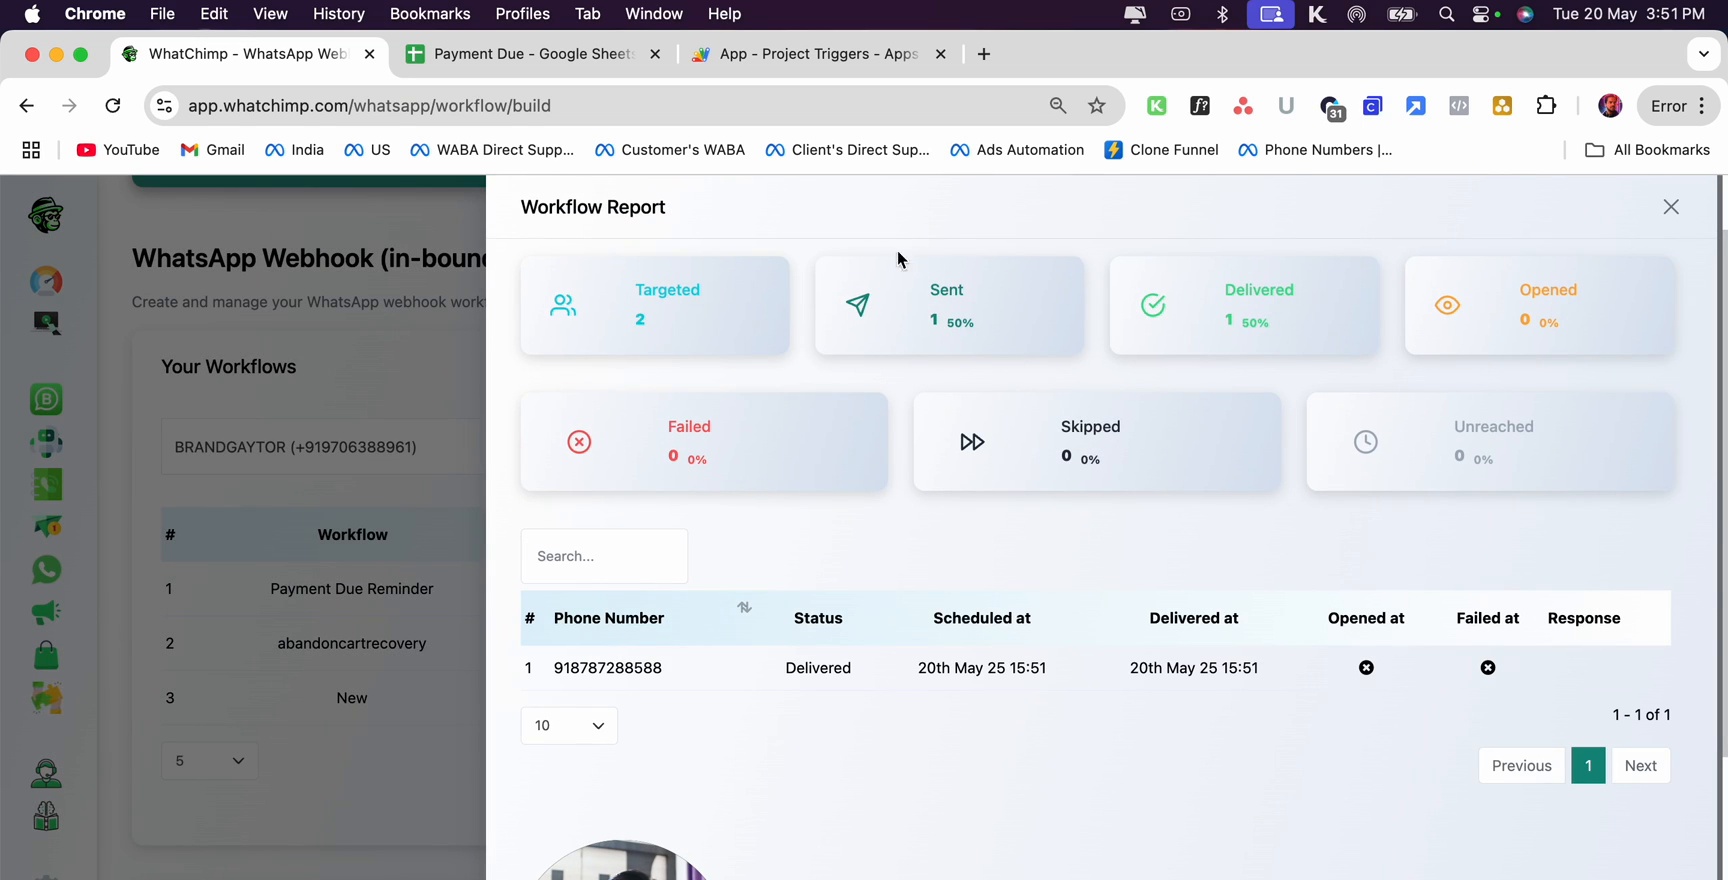 WhatsApp Webhook Report showing message targeted, sent, and delivered with phone number and timestamps
The customer receives the WhatsApp message with their personalized payment details and the Pay Invoice button:
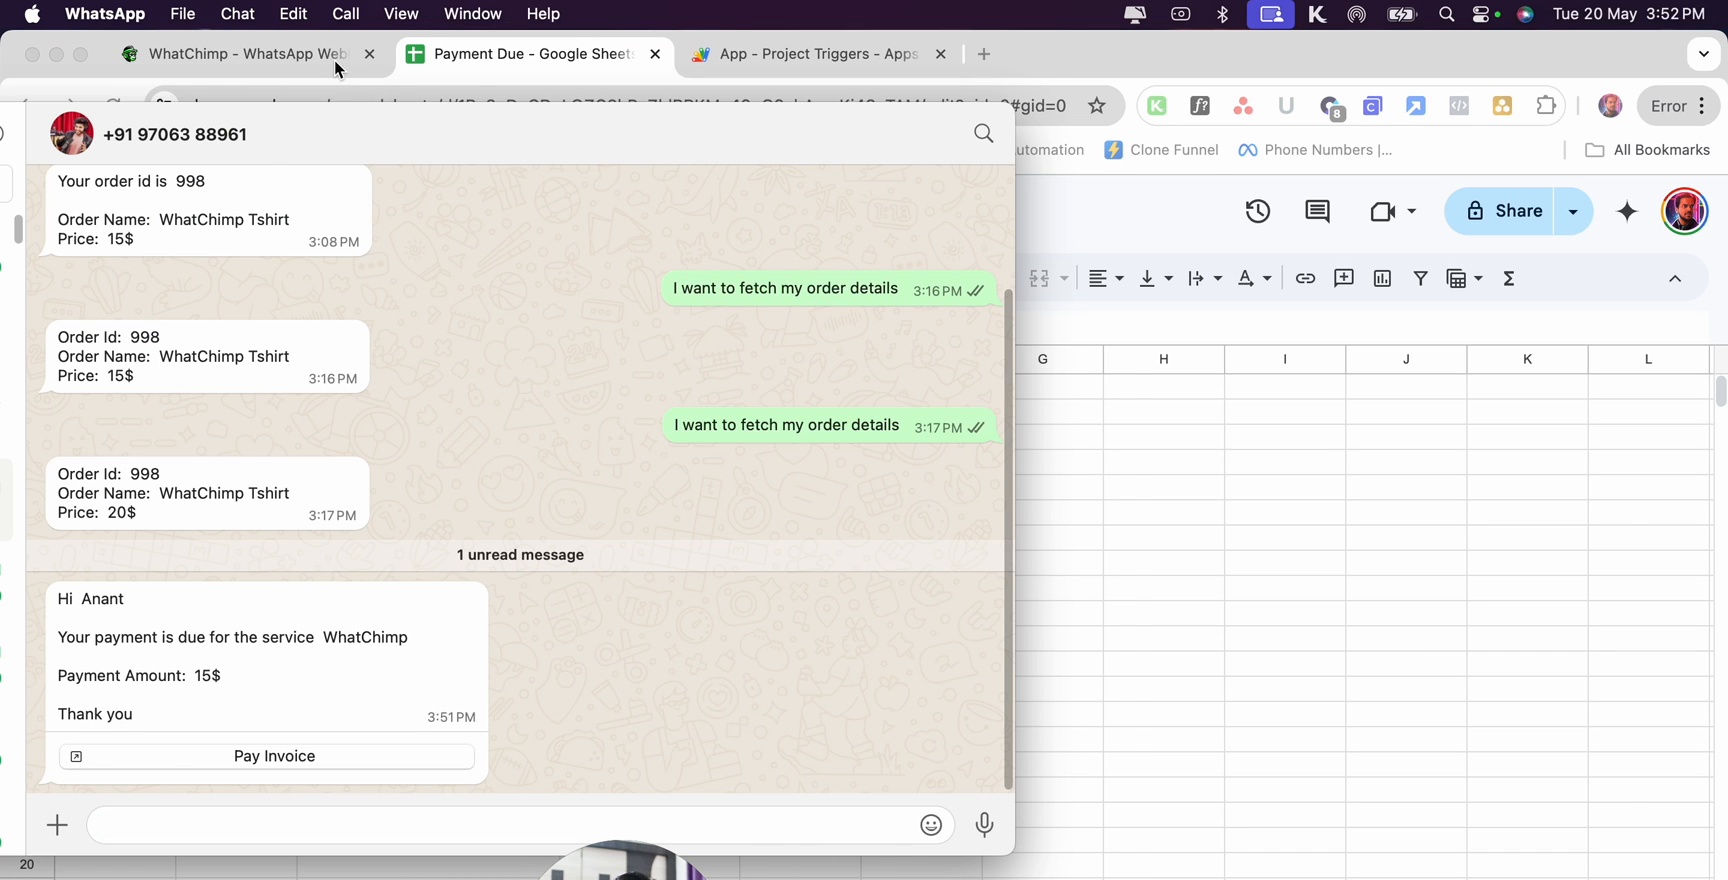 WhatsApp conversation showing the payment due reminder message with personalized name, service, amount, and Pay Invoice button
Tips
- Always include the country code in the number column (e.g.,
918767288568for India) - The Apps Script triggers on every change to the sheet — use WhatChimp's condition rules to filter which rows should send messages
- You can use this for any scenario: invoice reminders, shipping updates, appointment confirmations, or event notifications
- Check the Workflow Report regularly to monitor delivery rates and troubleshoot failed messages
Next Steps
- Fetch details from a Google Spreadsheet — let customers look up data from your sheet via WhatsApp
- Import contacts from a Google Spreadsheet — bulk-import contacts into WhatChimp