Fetch Details from Google Spreadsheet
Let customers fetch order details, booking info, or any data from a Google Spreadsheet by sending a WhatsApp message.
Updated 18 June 2026
Video: https://www.youtube.com/watch?v=gmORCEzt0fM
Let customers fetch their order details, booking information, or any other data from a Google Spreadsheet by sending a message on WhatsApp. WhatChimp's Data Fetch feature searches your sheet and replies with the matching data automatically.
Prerequisite: You need to connect your Google account first.
Prepare Your Google Sheet
Create a Google Sheet with the data you want customers to look up. For example, an "Order Details" sheet with these columns:
| Column | Example |
|---|---|
| Number | 918767288568 |
| Name | Anant |
| anant@whatchimp | |
| Order Id | 998 |
| Order Name | WhatChimp Tshirt |
| Price | 158 |
The Number column should contain phone numbers with the country code — this is how WhatChimp matches the subscriber to the correct row.
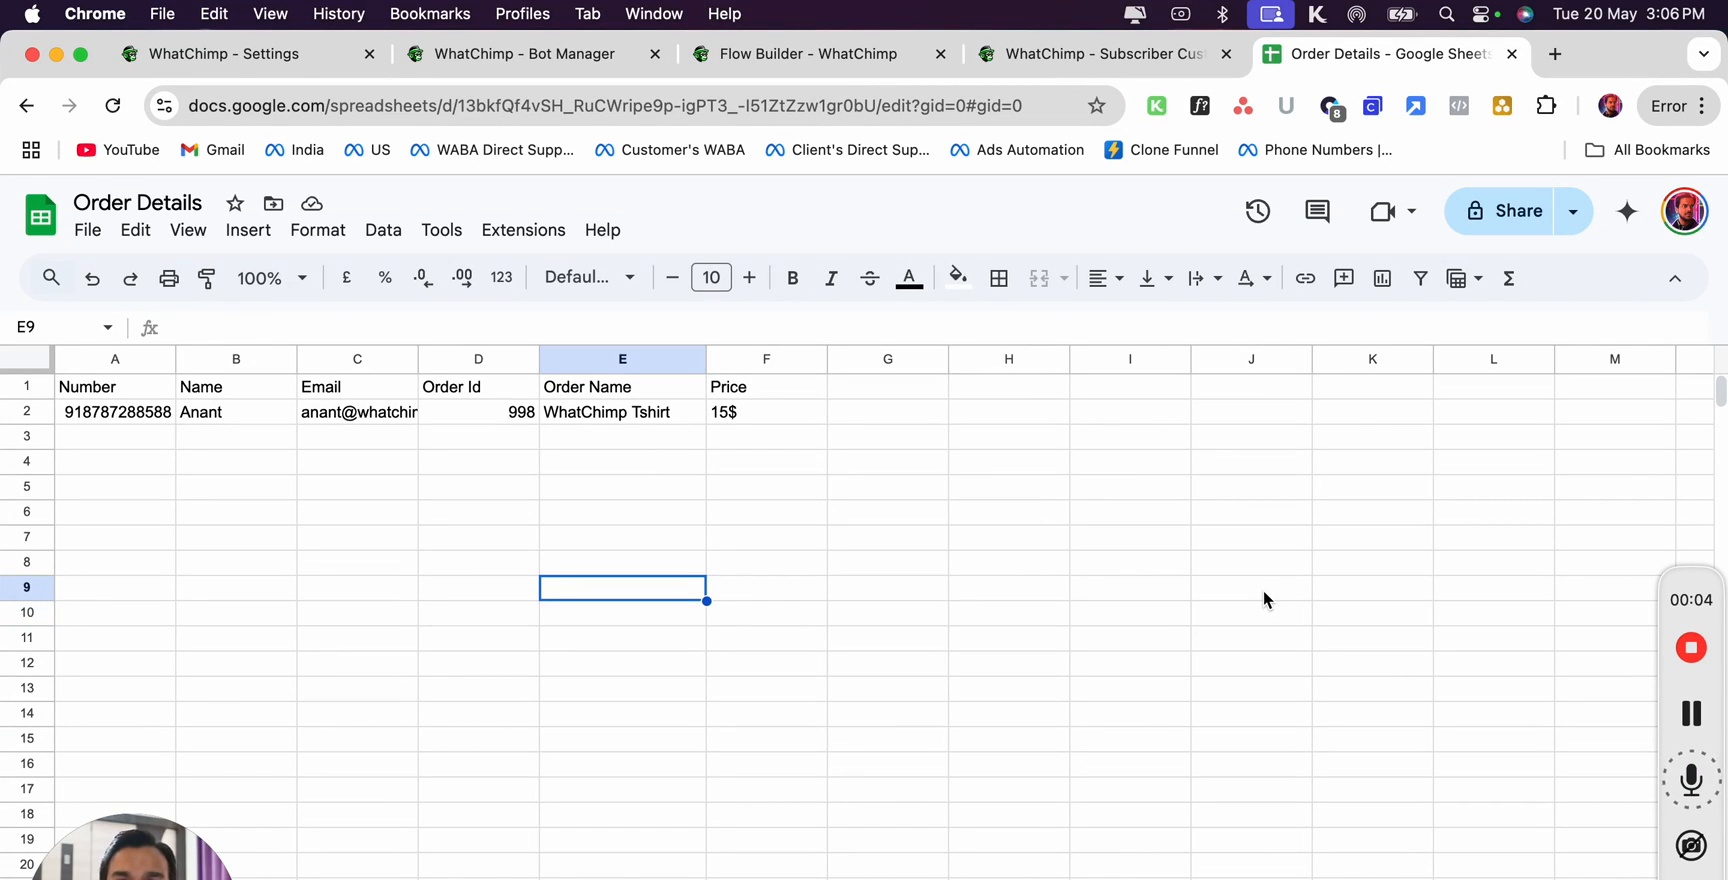 Google Sheet named Order Details with columns for Number, Name, Email, Order Id, Order Name, and Price
Navigate to Google Sheet Data Fetch
- In the left sidebar, click Settings
- Under the Google Sheet section, click Google Sheet Data Fetch
This opens the WhatsApp Data Fetch Campaign page where you can manage all your data fetch configurations.
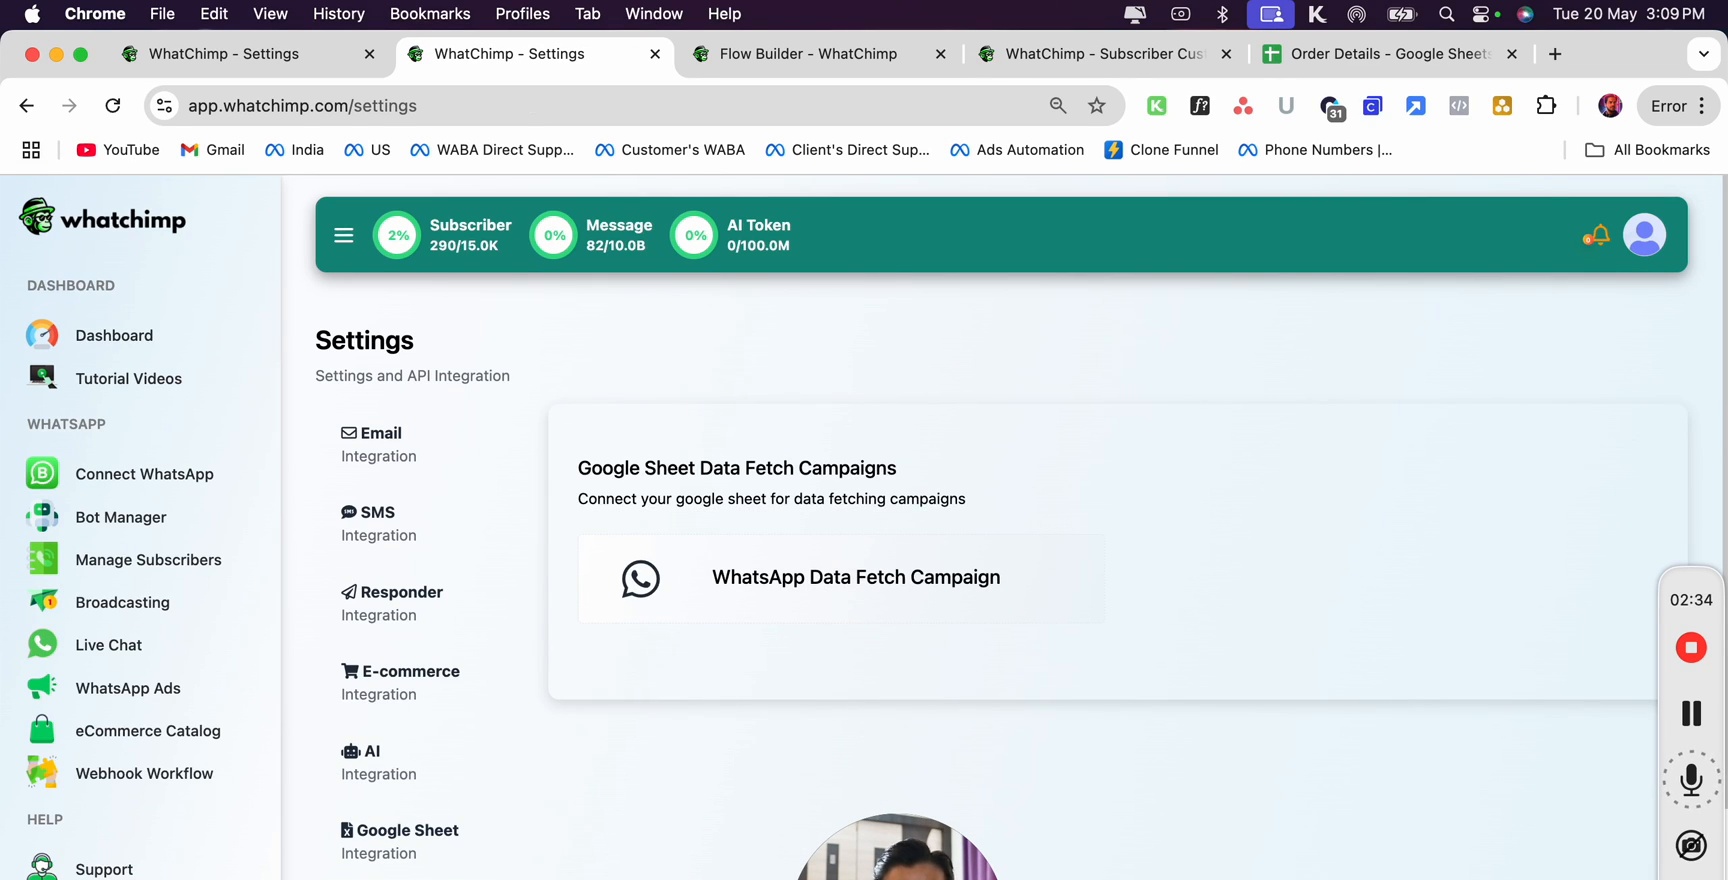 Settings page with Google Sheet Data Fetch Campaign option highlighted
Create a Data Fetch Campaign
- Click Create on the WhatsApp Data Fetch Campaigns page
- Under Connect Your Google Sheet, select your Google account
- Select the Google Sheet you want to fetch data from (e.g., "Order Details [Sheet1]")
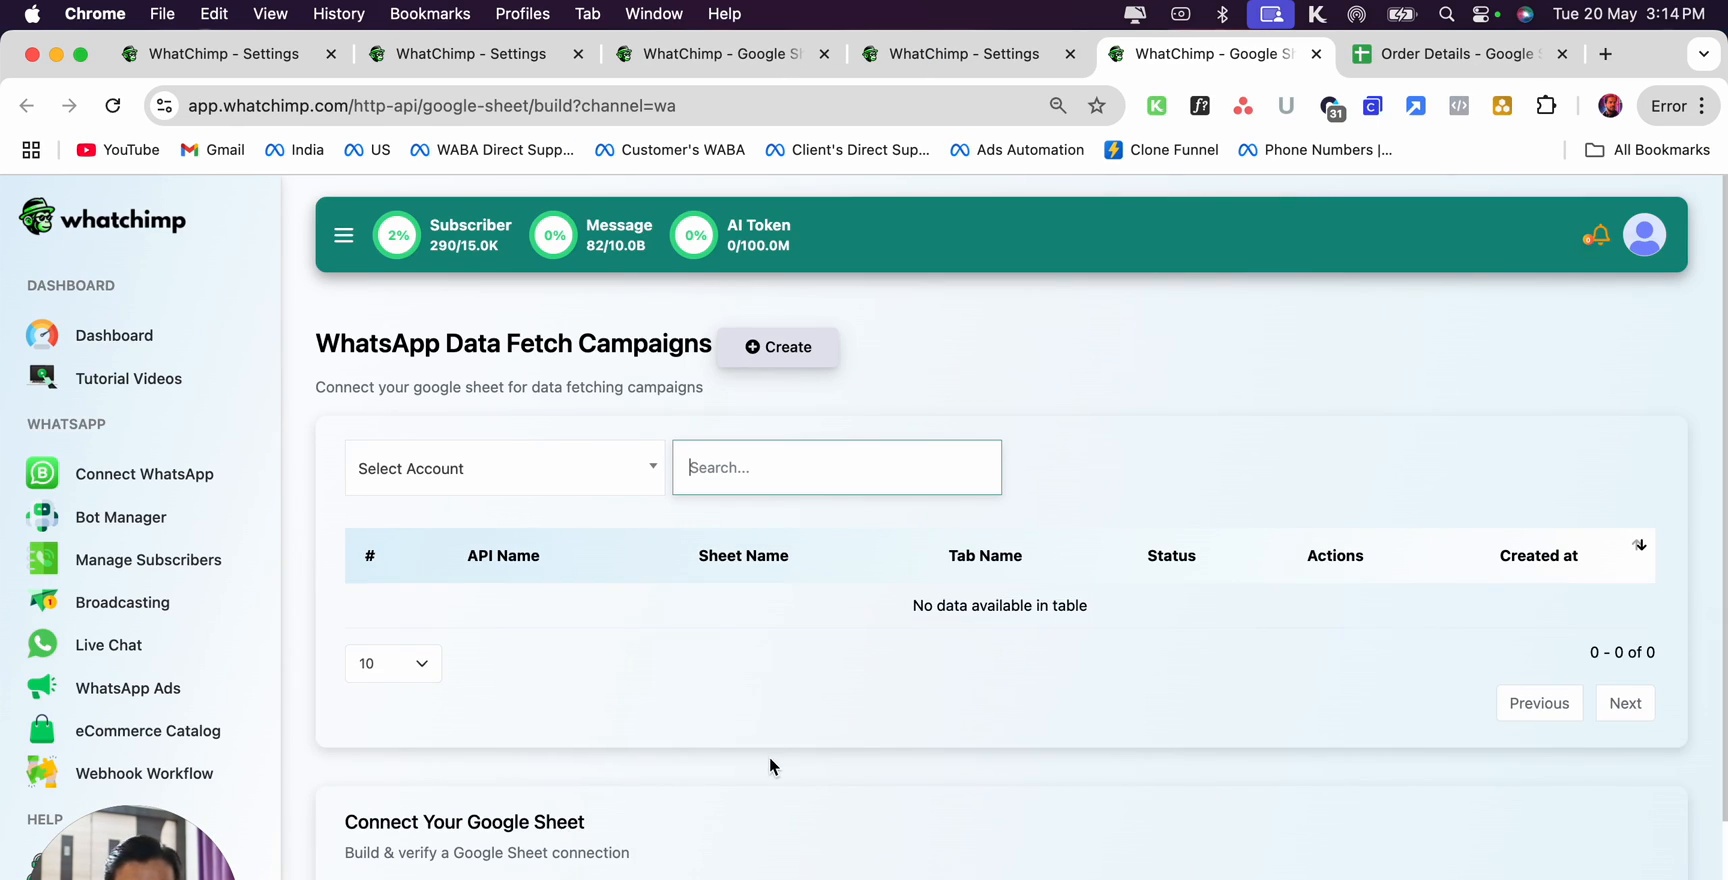 WhatsApp Data Fetch Campaigns page with Create button and Connect Your Google Sheet section
Create Custom Fields
Before configuring the fetch, create custom fields to store the fetched data. Go to Subscriber Manager > Custom Fields and create fields that match your spreadsheet columns:
- Click + Custom Field
- Enter the Custom Field Name (e.g., "Challenge", "OrderName", "Price")
- Set the Reply Type to Text
- Click Save
Repeat for each column you want to fetch.
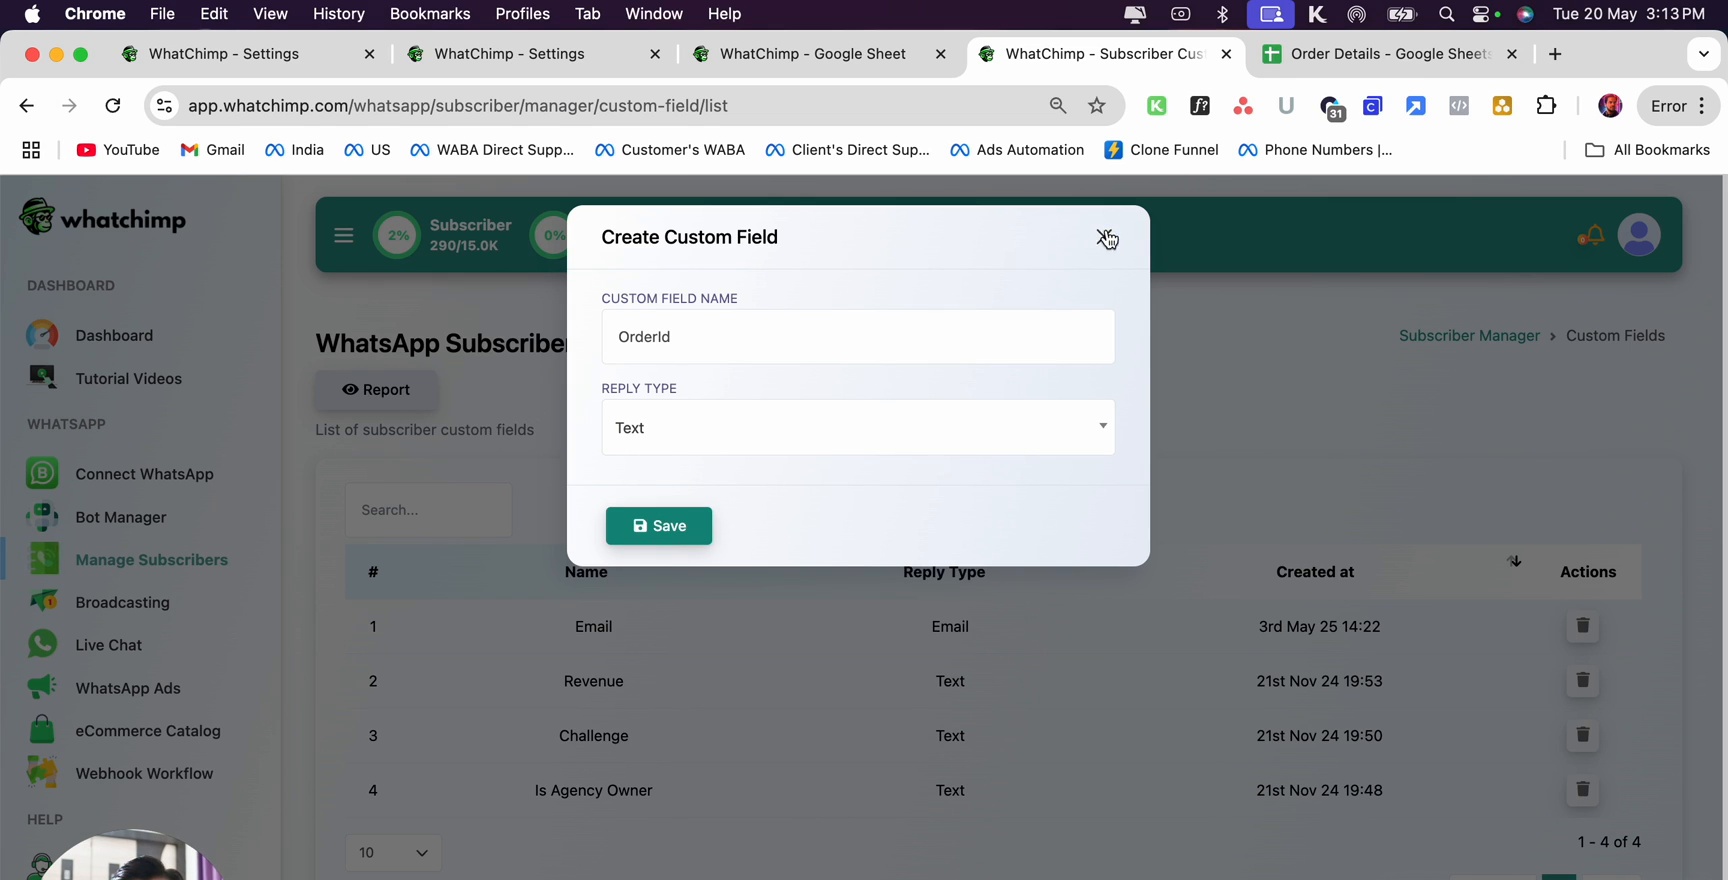 Create Custom Field dialog showing field name and reply type options
Configure Search Data and Assign Fields
Back on the Data Fetch Campaign page:
Search Data
This tells WhatChimp which column to search and what value to match:
- File Header: Select the spreadsheet column to search (e.g., "Number")
- Data Field: Select the subscriber field to match against (e.g., "SubscriberID/PhoneNumber(MN)")
Click Step Data to add the search configuration.
Assign Fields
Map each spreadsheet column to a custom field so WhatChimp knows where to store the fetched data:
| File Header | Data Field |
|---|---|
| Order Id | Orderid |
| Order Name | OrderName |
| Price | Price |
Click Step Data for each mapping, then click Verify Connection to test.
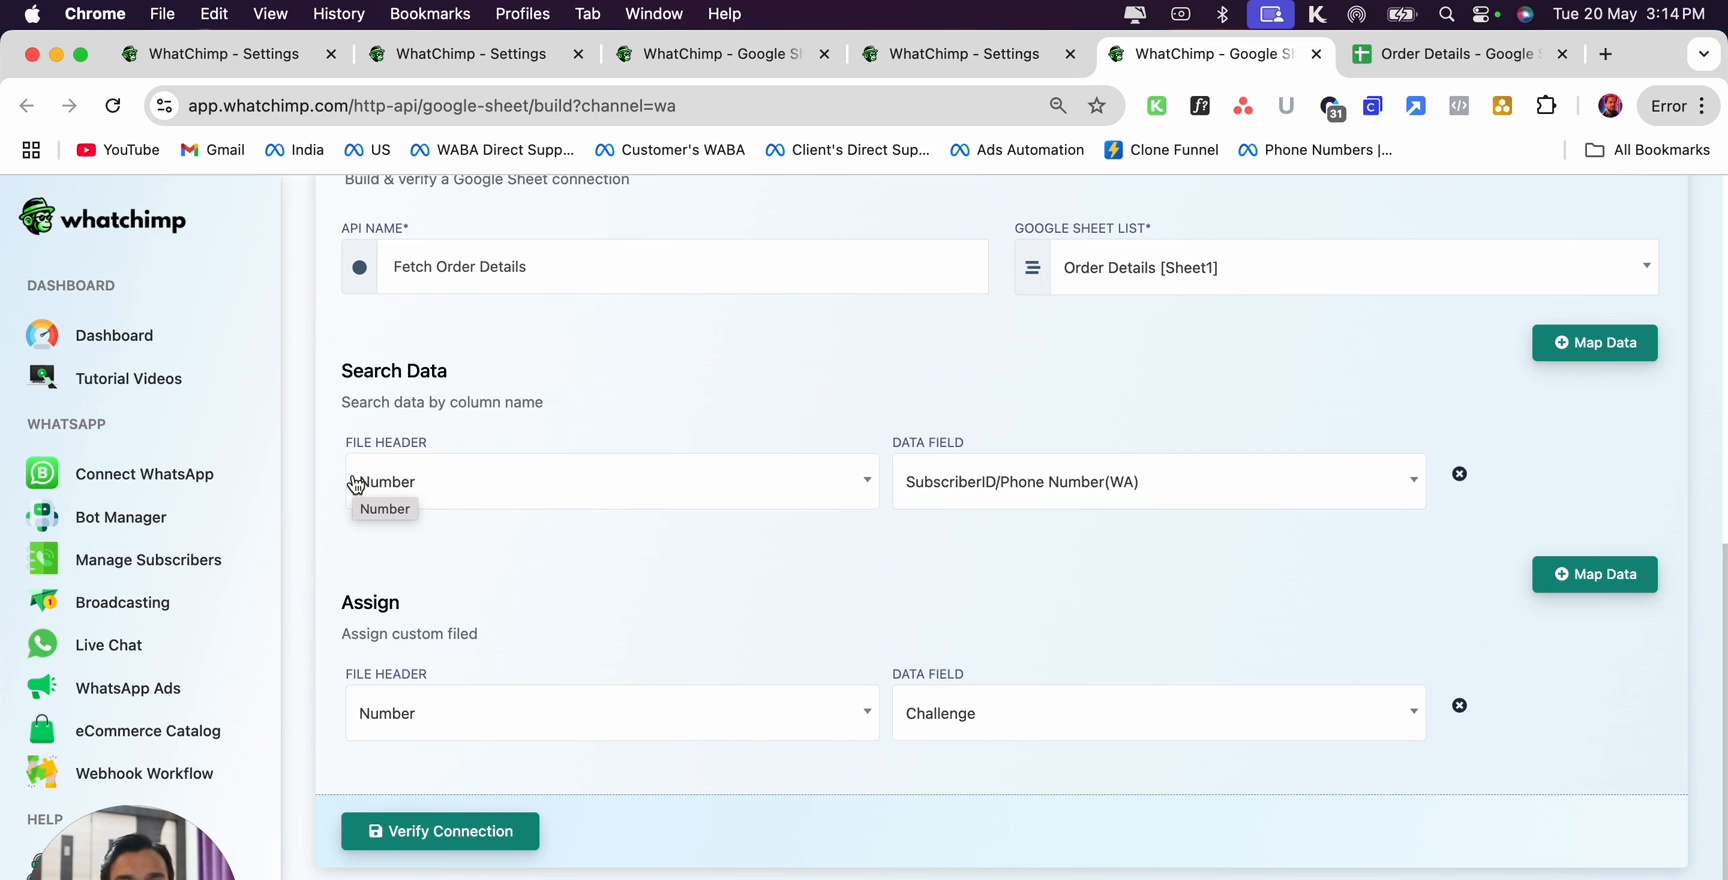 Data fetch configuration showing Search Data with Number field mapped to SubscriberID/PhoneNumber and Assign section mapping spreadsheet columns to custom fields
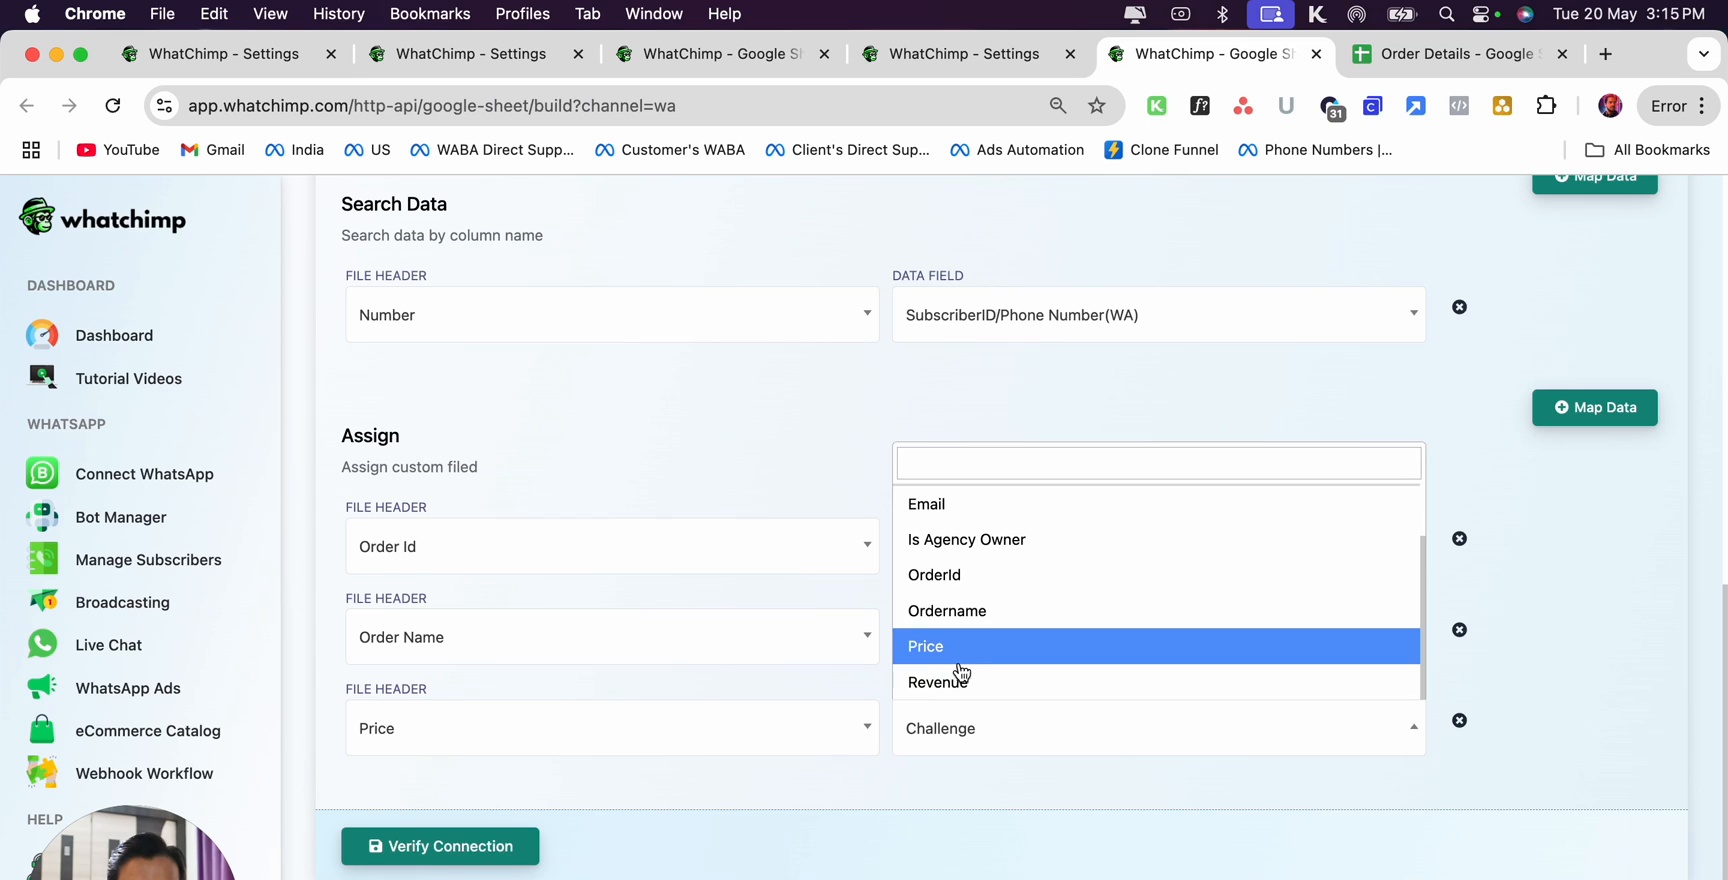 Assign section showing dropdown with available custom fields like Email, Is Agency Owner, Orderid, OrderName, Price, Revenue
Create a Bot Flow
- Go to Bot Manager in the left sidebar
- Click Create Bot Flow
- In the Configure Reference screen:
- Enter the trigger keyword (e.g., "Fetch Order Details")
- Choose String match as the matching type — this triggers the bot when the keyword appears anywhere in the message
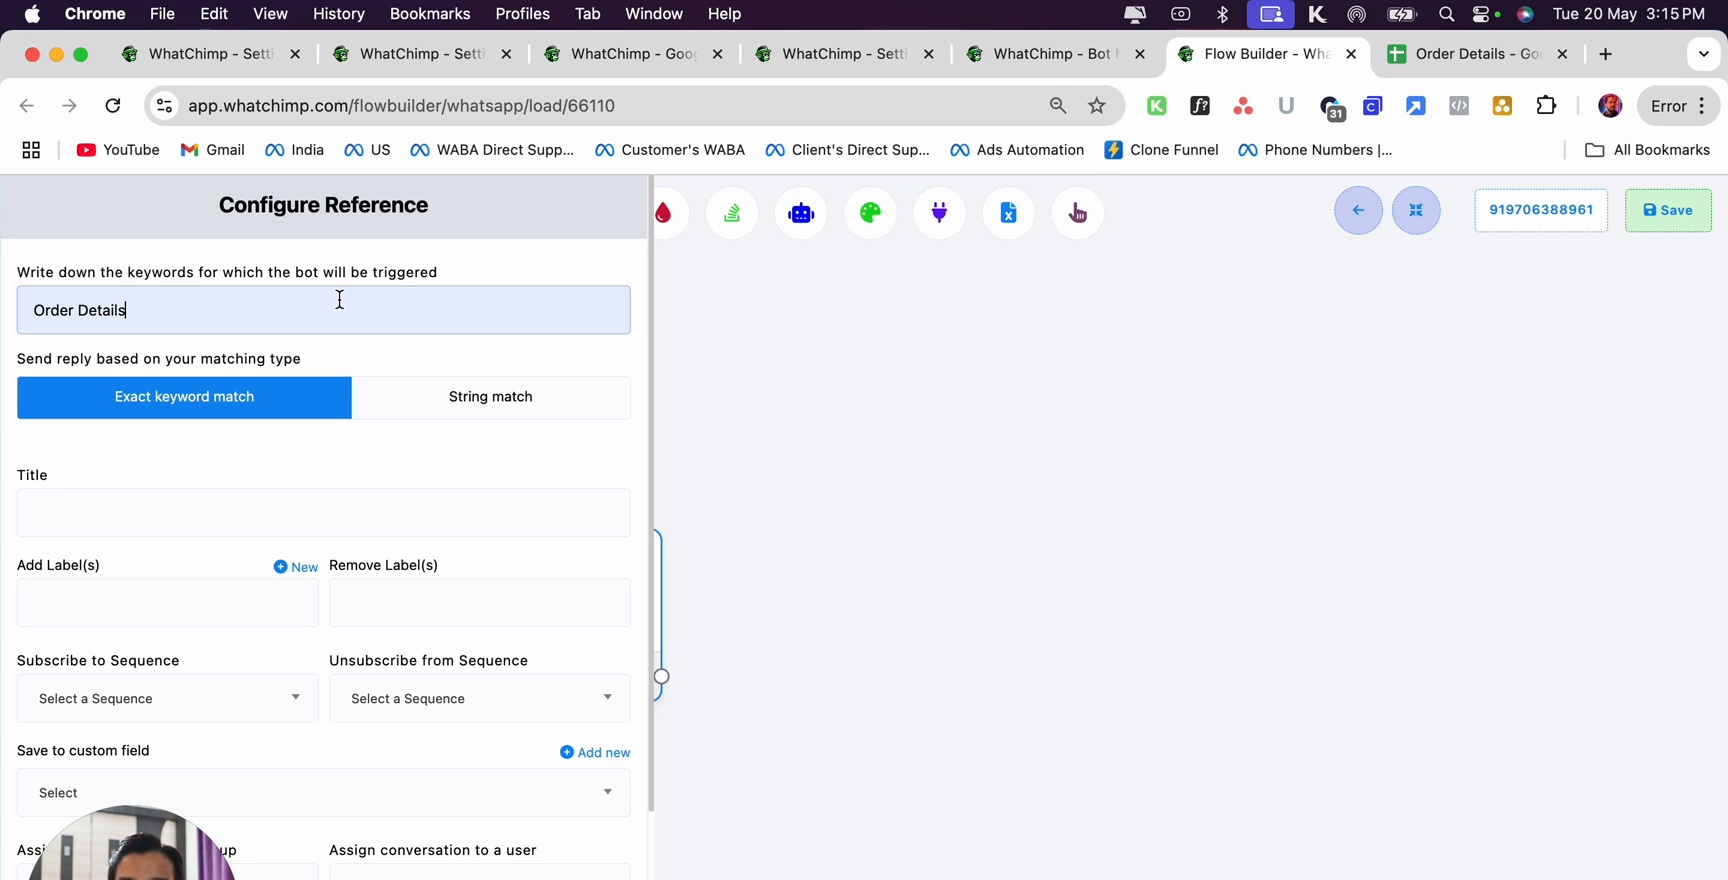 Configure Reference screen with keyword Fetch Order Details and String match selected
Add the Google Sheet Data Fetch Node
In the flow builder:
- Click Compose Next Message on the Start Bot Flow node
- Select Google Sheet Data Fetch as the node type
- This node fetches the data from your Google Sheet when the bot is triggered
 Flow builder showing Start Bot Flow connected to Google Sheet Data Fetch node
Configure the Reply Message
Add a Text node after the Google Sheet Data Fetch node to send the fetched data back to the user:
- Click Compose Next Message on the Data Fetch node
- Select Text as the node type
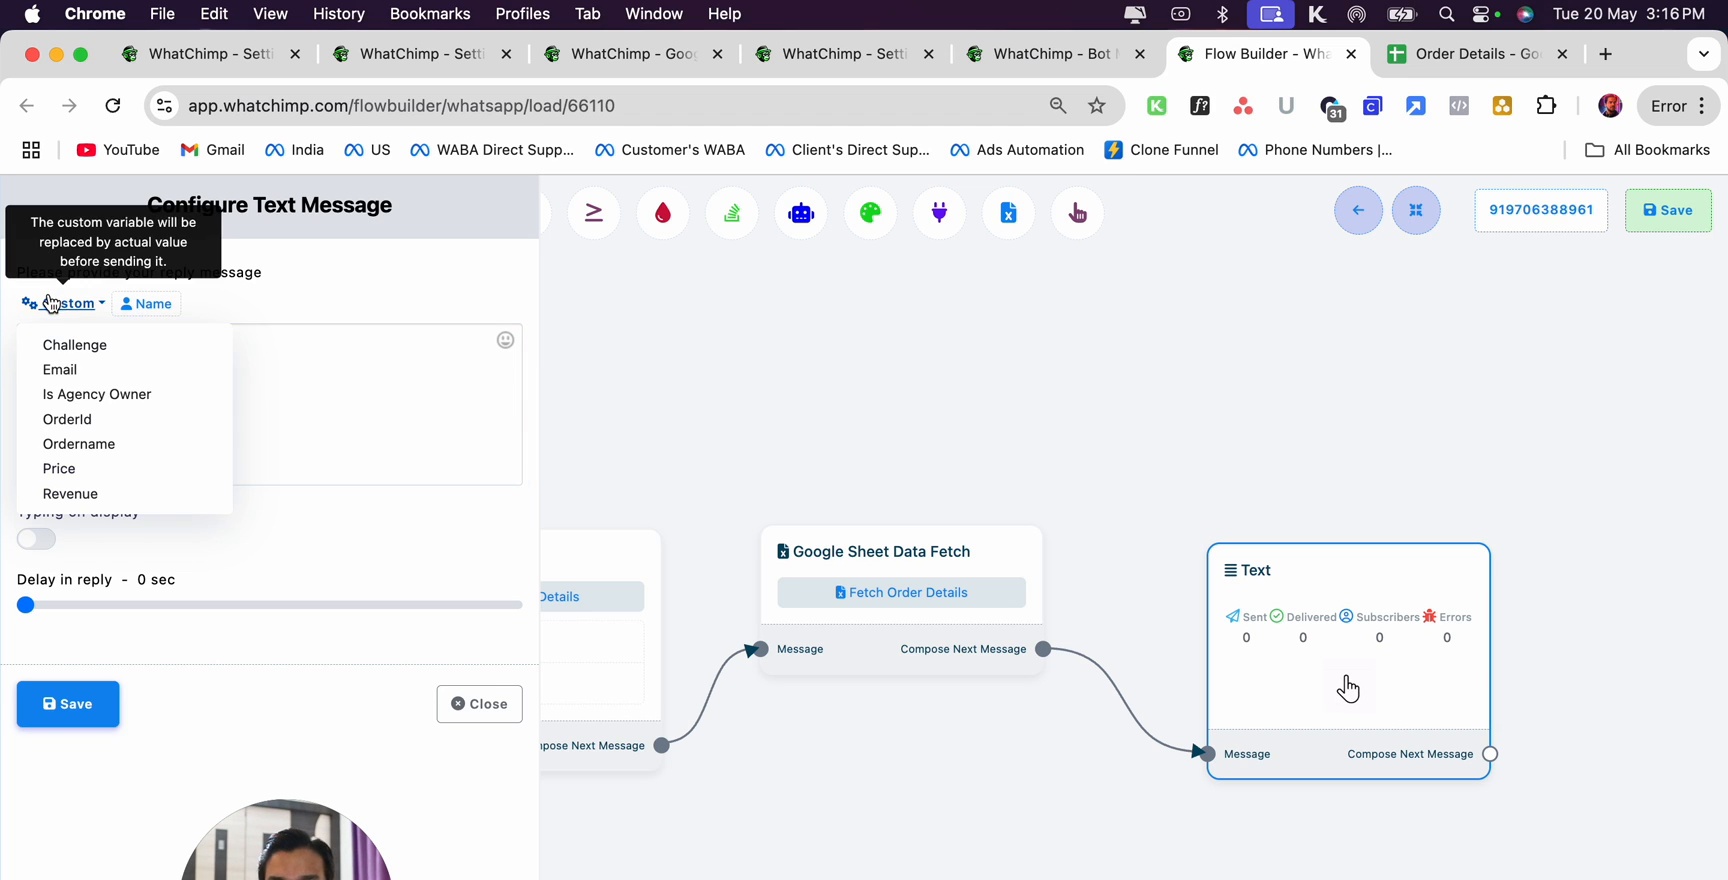
- Write your reply using the custom field variables:
Your order id is: #OrderId
Order Name: #OrderName
Price: #Price
The #FieldName variables are replaced with the actual values fetched from the Google Sheet.
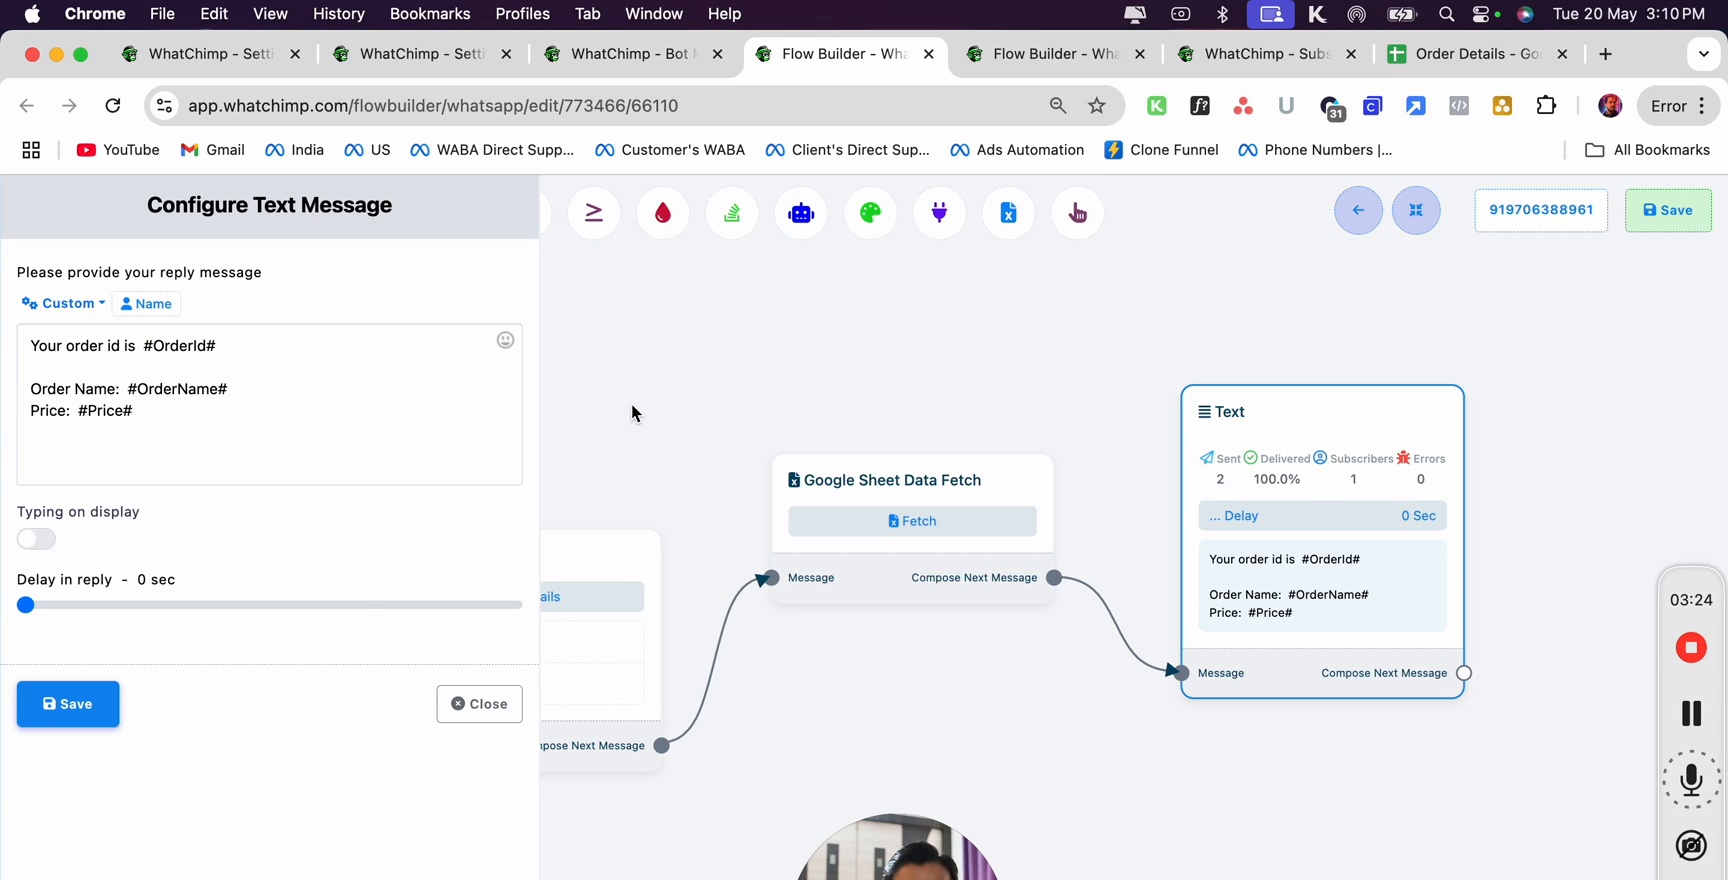 Configure Text Message showing reply with #OrderId, #OrderName, and #Price variables and complete flow in builder
Test on WhatsApp
- Save the bot flow
- Send a message containing the trigger keyword (e.g., "I want to fetch my order details") to your WhatsApp number
- The bot looks up the sender's phone number in the Google Sheet
- If a match is found, it replies with the order data
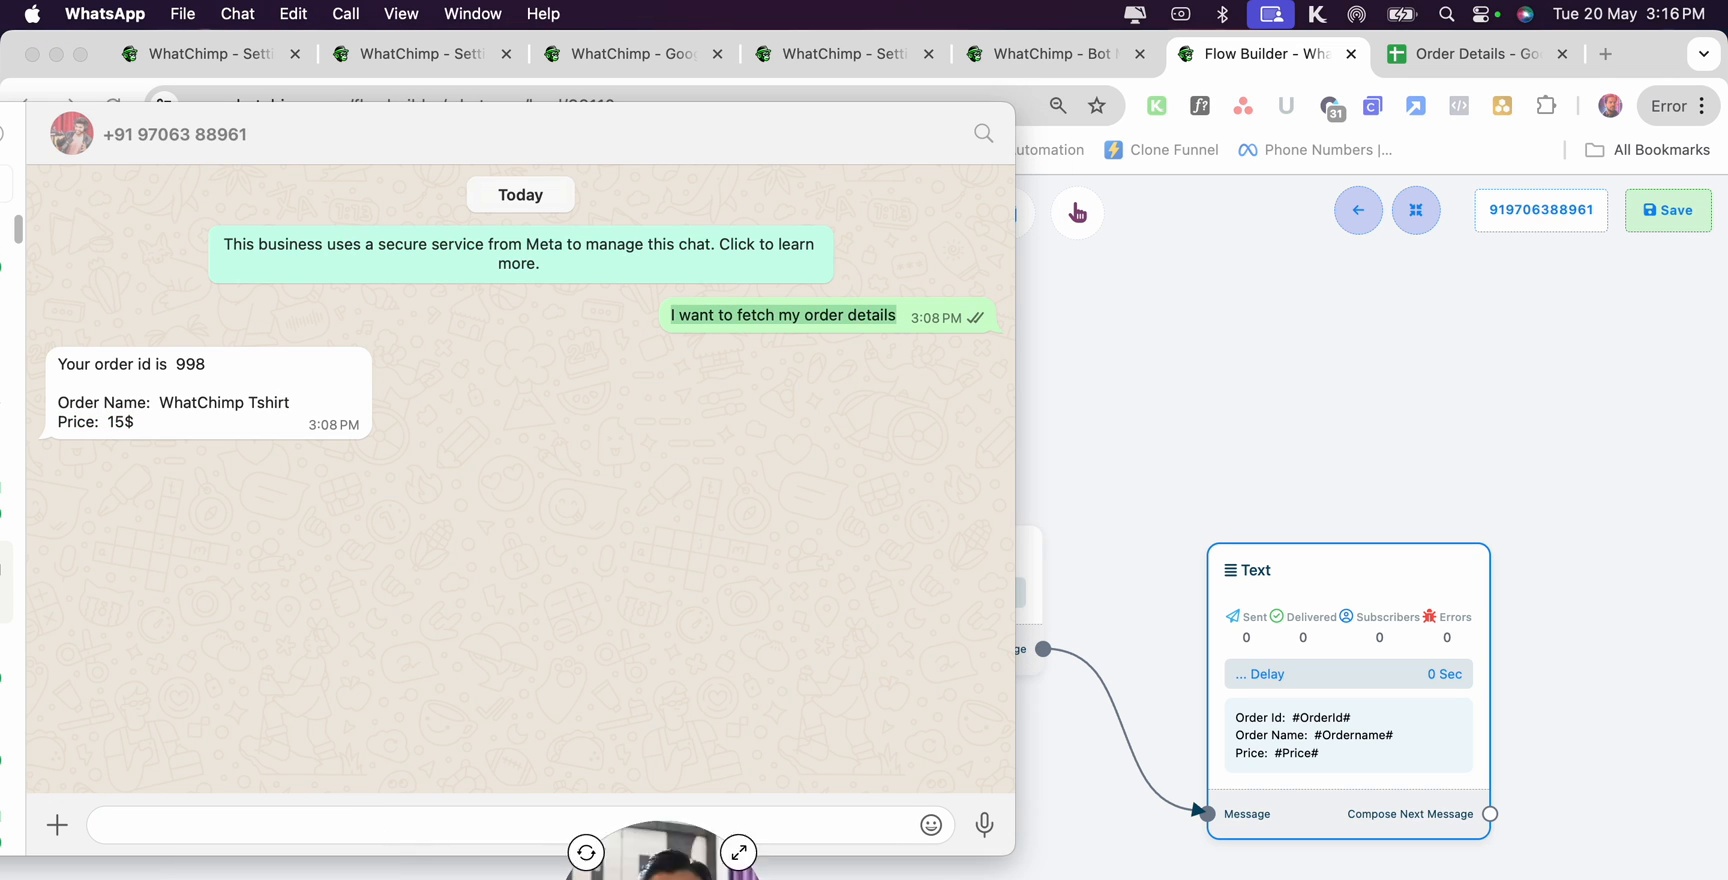 WhatsApp conversation showing user sending request and bot replying with Order Id, Order Name, and Price from the Google Sheet
Tips
- The Number column in your Google Sheet must match the subscriber's phone number format (with country code)
- You can fetch data from any column — not just order details. Use this for booking confirmations, account balances, membership status, or any lookup
- Update the Google Sheet data at any time — the bot always fetches the latest values
- Combine data fetch with other bot nodes like Interactive Buttons to create richer experiences
Next Steps
- Send WhatsApp messages from a Google Spreadsheet — trigger automated WhatsApp messages when you add data to a sheet
- Collect WhatsApp lead details via chatbot — build a bot that collects information and saves it to a Google Sheet