Collect WhatsApp Lead Details via Chatbot
Build an interactive WhatsApp chatbot that asks questions, validates answers, and saves lead data to a Google Spreadsheet automatically.
Updated 18 June 2026
Video: https://www.youtube.com/watch?v=a6ukQQM2gW8
Build an interactive WhatsApp chatbot that collects lead information — name, email, preferences — through a series of questions, and saves everything to a Google Spreadsheet automatically.
Prerequisite: You need to connect your Google account first.
Create the Bot Flow
- Go to Bot Manager in the left sidebar
- Click Create Bot Flow
- In the Configure Reference screen, set the trigger keywords: "Request Call Back", "Talk to sales", "Contact Sales"
- Choose Exact keyword match as the matching type
- Enter a Title for the flow (e.g., "Request Call Back")
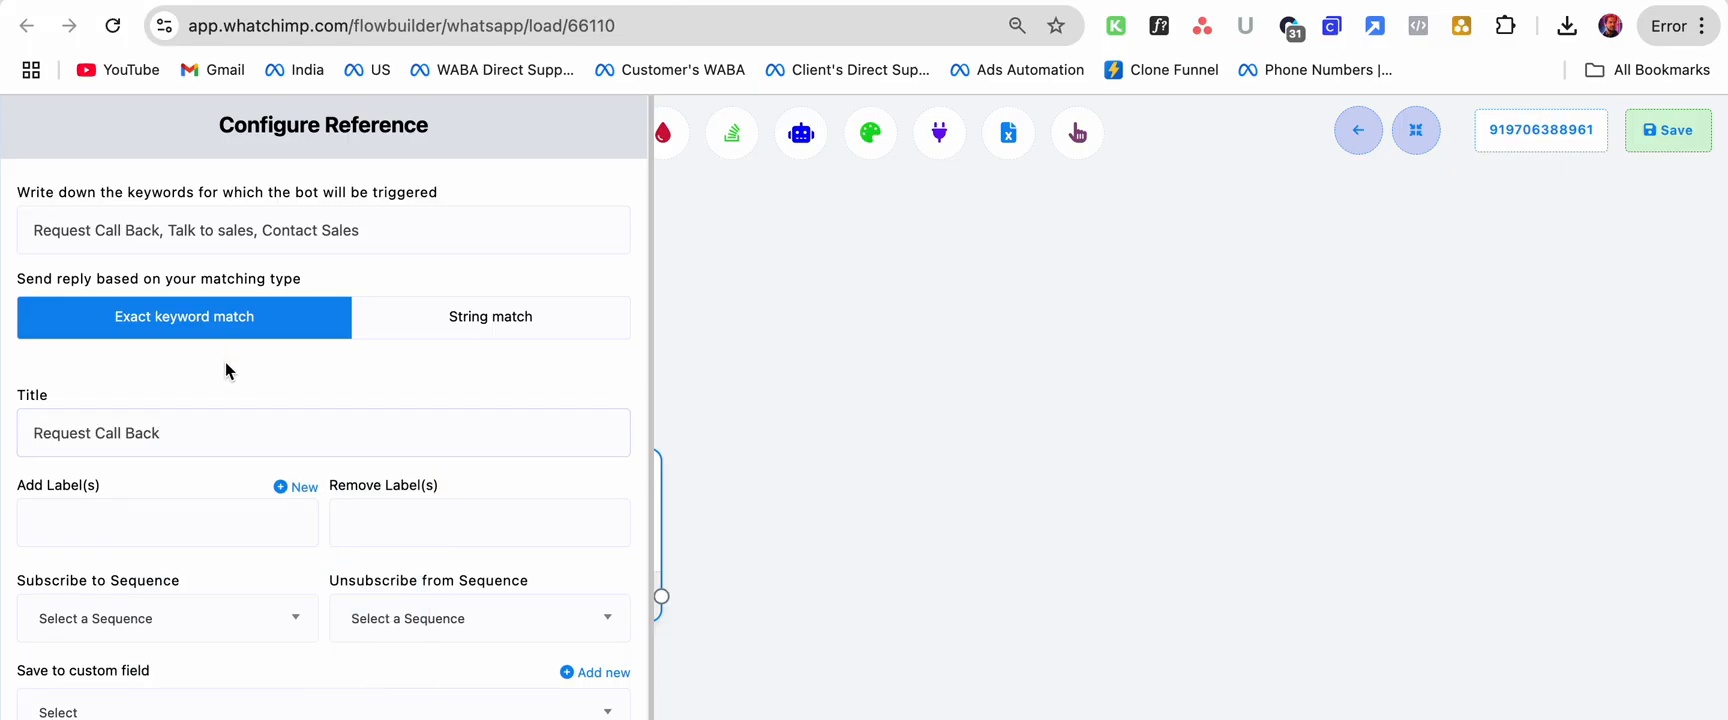 Configure Reference screen with trigger keywords and Exact keyword match selected
Set Up the User Input Flow
The User Input Flow node lets you create a series of questions. Configure it to:
- Select a User Input Flow campaign (or create a new one)
- Under Send data to Google Sheets, select your connected Google account and sheet (e.g., "Customer Details [Sheet1]")
This connects the chatbot to your Google Sheet so all collected answers are saved automatically.
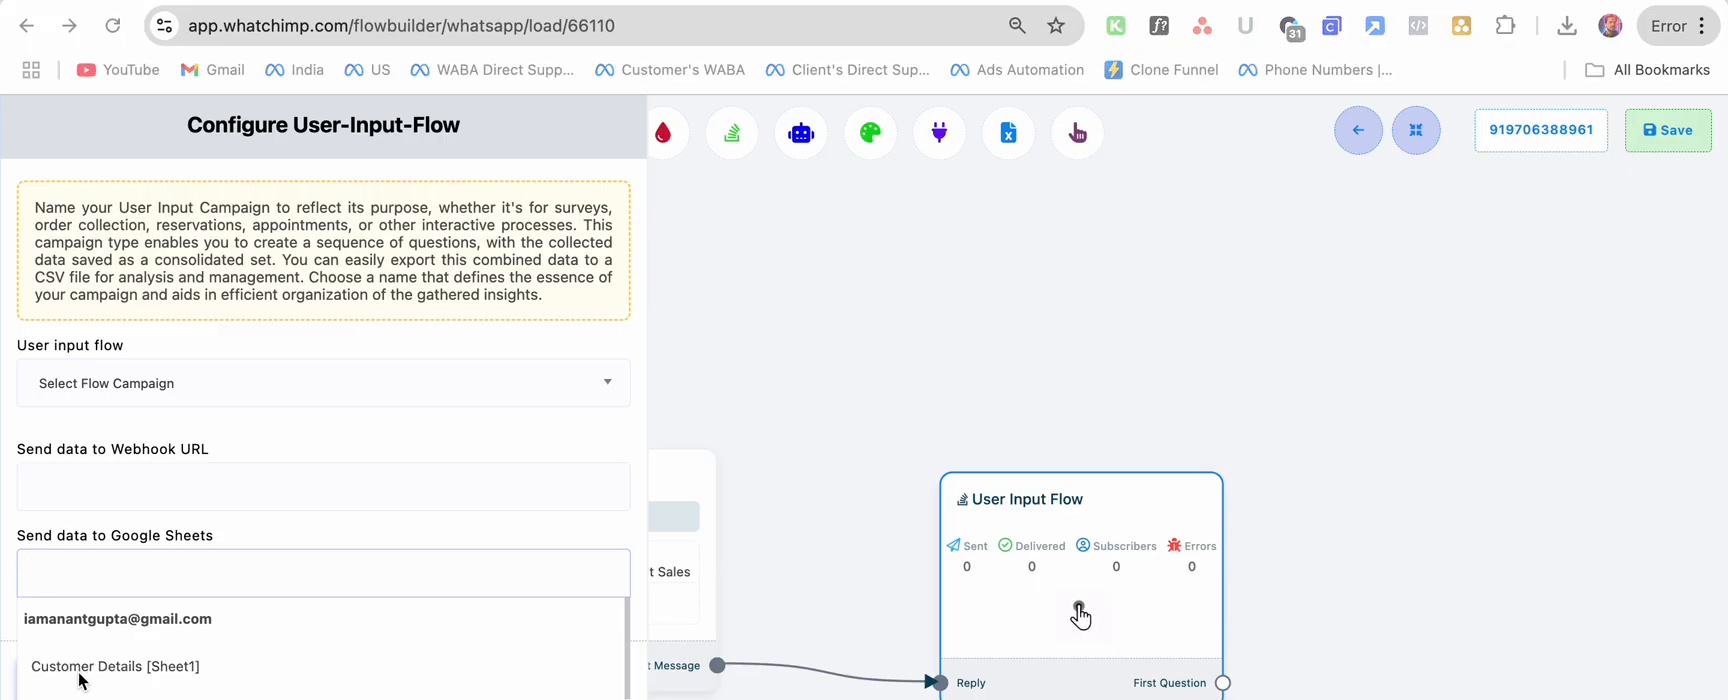 User Input Flow configuration showing Google Sheet selection with Customer Details sheet
Add Question Nodes
Question 1: Ask for Name
- Click First Question on the User Input Flow node
- Set the question type to Free keyboard input
- Enter the question: "What is your name?"
- Under Save to system field, select Name — this maps the answer to the subscriber's name field
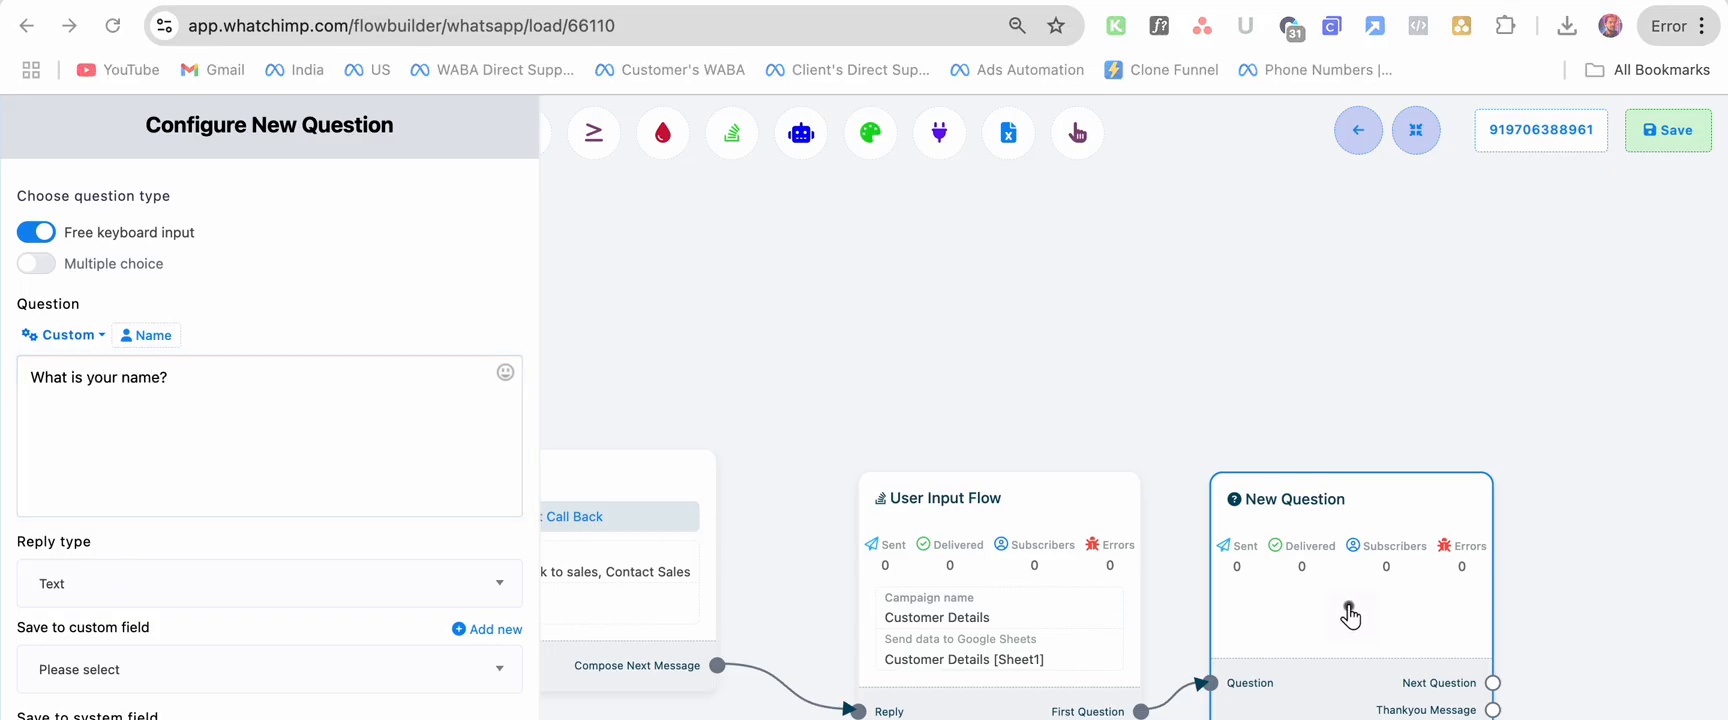 Configure New Question with free keyboard input asking for name
Question 2: Ask for Email
- Click Next Question to add another question node
- Set question type to Free keyboard input
- Enter the question: "What is your email?"
- Under Save to system field, select Email
- Set Reply type to validate the response as an email address — if the user enters an invalid email, the bot asks them to try again
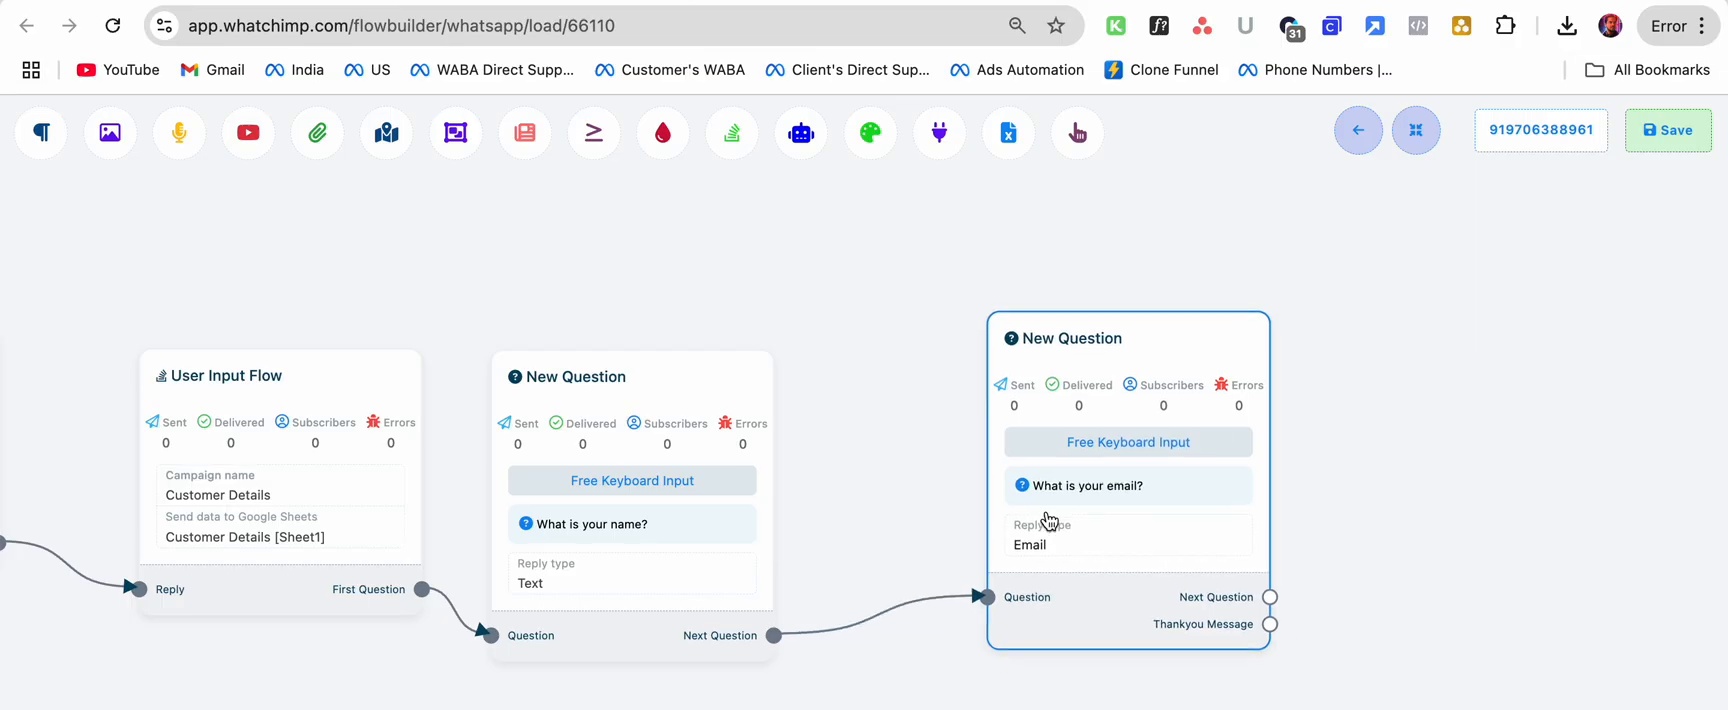 Flow builder showing User Input Flow connected to two New Question nodes for name and email
Question 3: Ask for Preferences (Multiple Choice)
- Add another question node
- Set the question type to Multiple choice
- Enter the question: "What are your preferences?"
- Add Multiple Choice option buttons — for example, different product or service options
- Set Reply type and Skip button text as needed
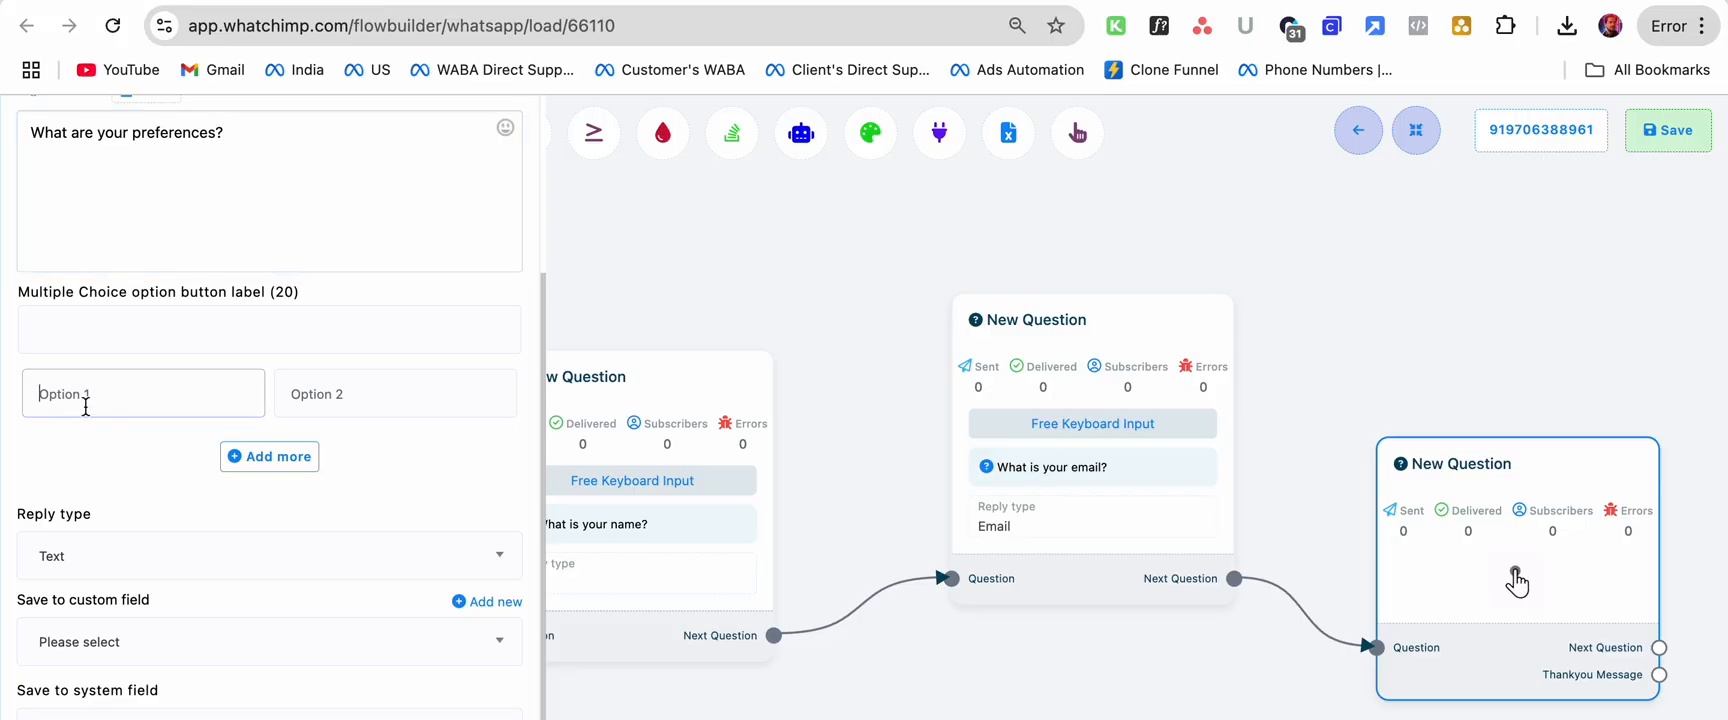 Configure New Question with Multiple Choice buttons for collecting preferences
Add a Thank You Message
After all questions are answered, send a confirmation message:
- Add a Text node at the end of the flow
- Enter your thank you message (e.g., "Thank you, our team will contact you shortly")
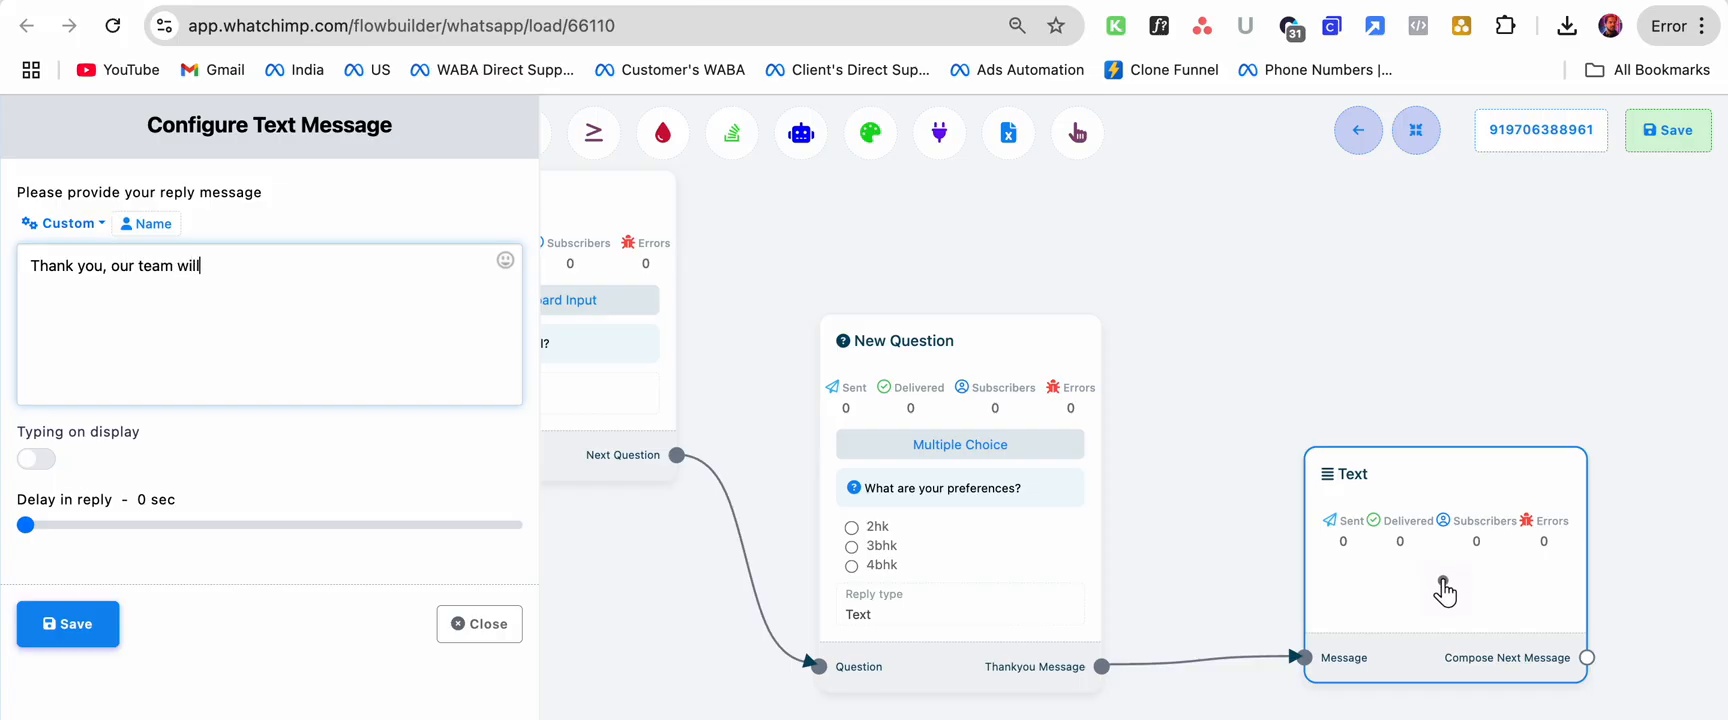 Configure Text Message with thank you reply and complete flow visible in builder
Review the Complete Flow
Your complete flow should look like this:
Start Bot Flow → User Input Flow → New Question (name) → New Question (email) → New Question (preferences) → Text (thank you)
The Start Bot Flow node shows your trigger keywords, and the User Input Flow shows the connected Google Sheet.
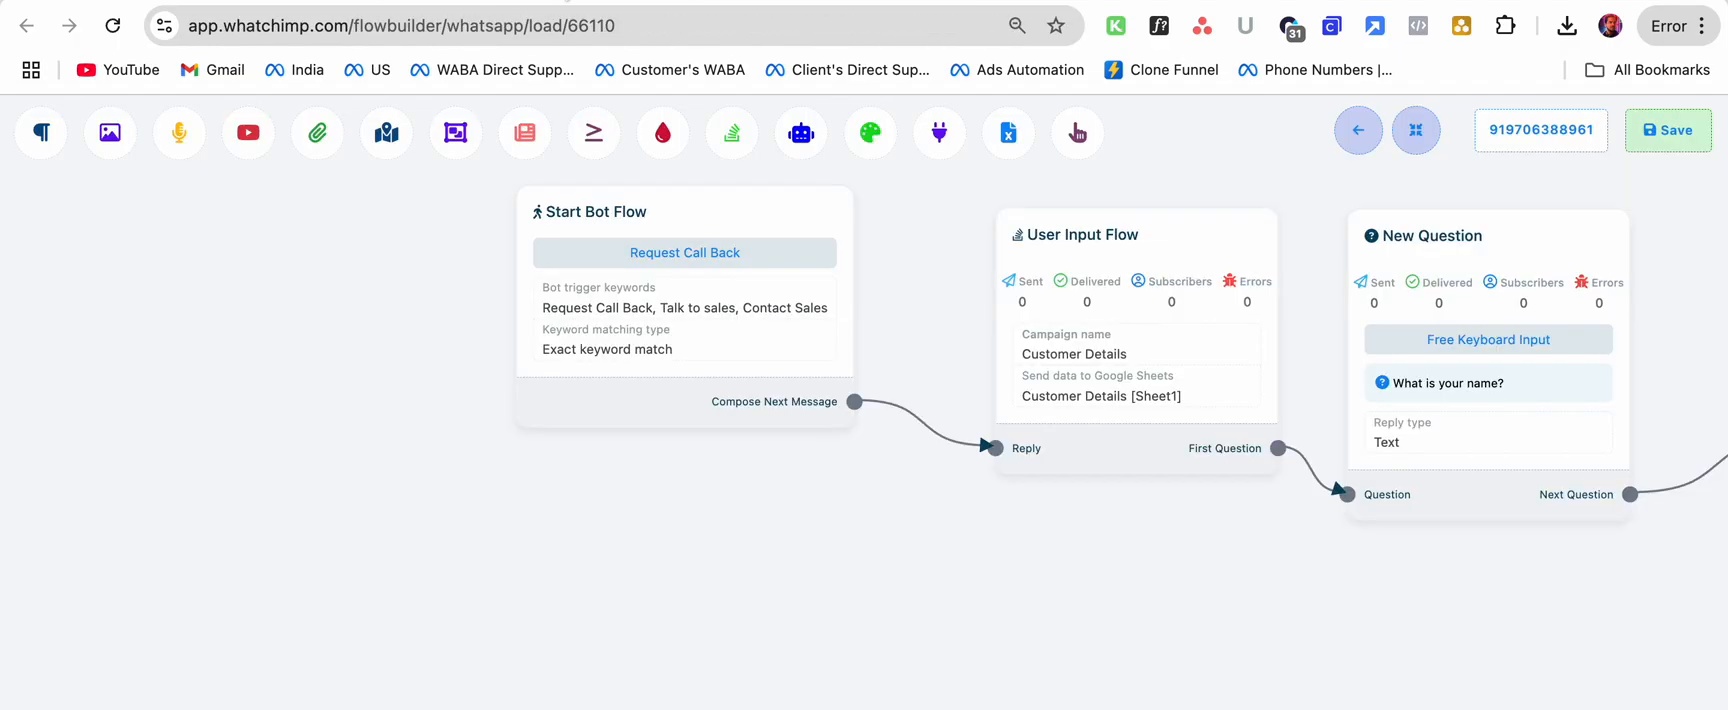 Complete flow showing Start Bot Flow, User Input Flow, and New Question nodes connected in sequence
Test the Chatbot
Send one of the trigger keywords (e.g., "Request Call Back") to your WhatsApp number. The bot will:
- Ask "What is your name?" — type your name
- Ask "What is your email?" — type your email
- If you enter an invalid email format, it replies: "Wrong format. Please send correct Email" and asks again
- Ask "What are your preferences?" — select from the multiple choice buttons
- Send the thank you message
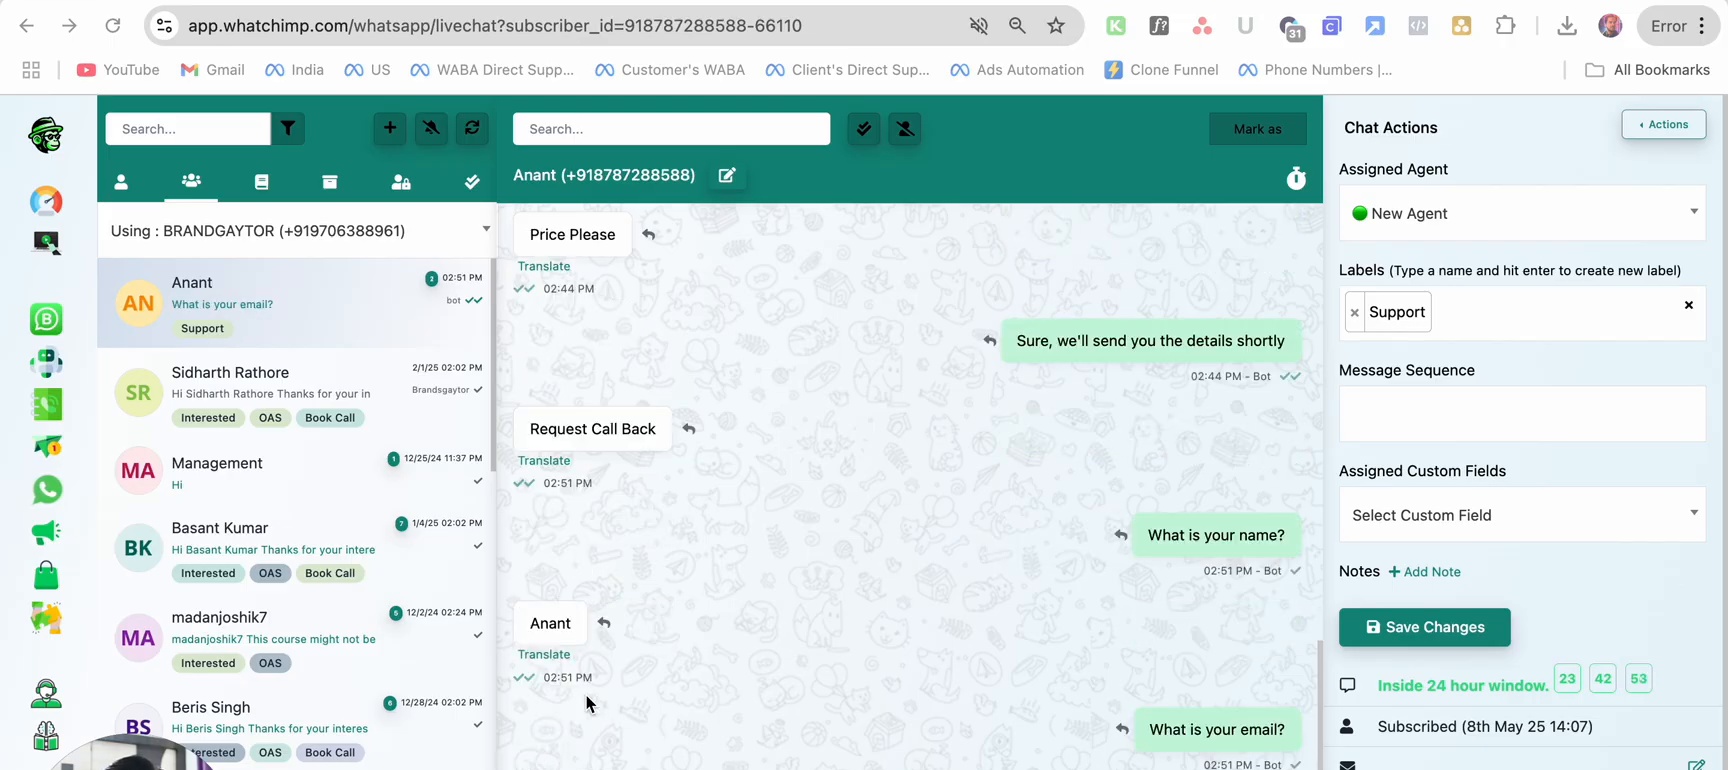 Live chat view showing the bot asking questions and collecting lead information
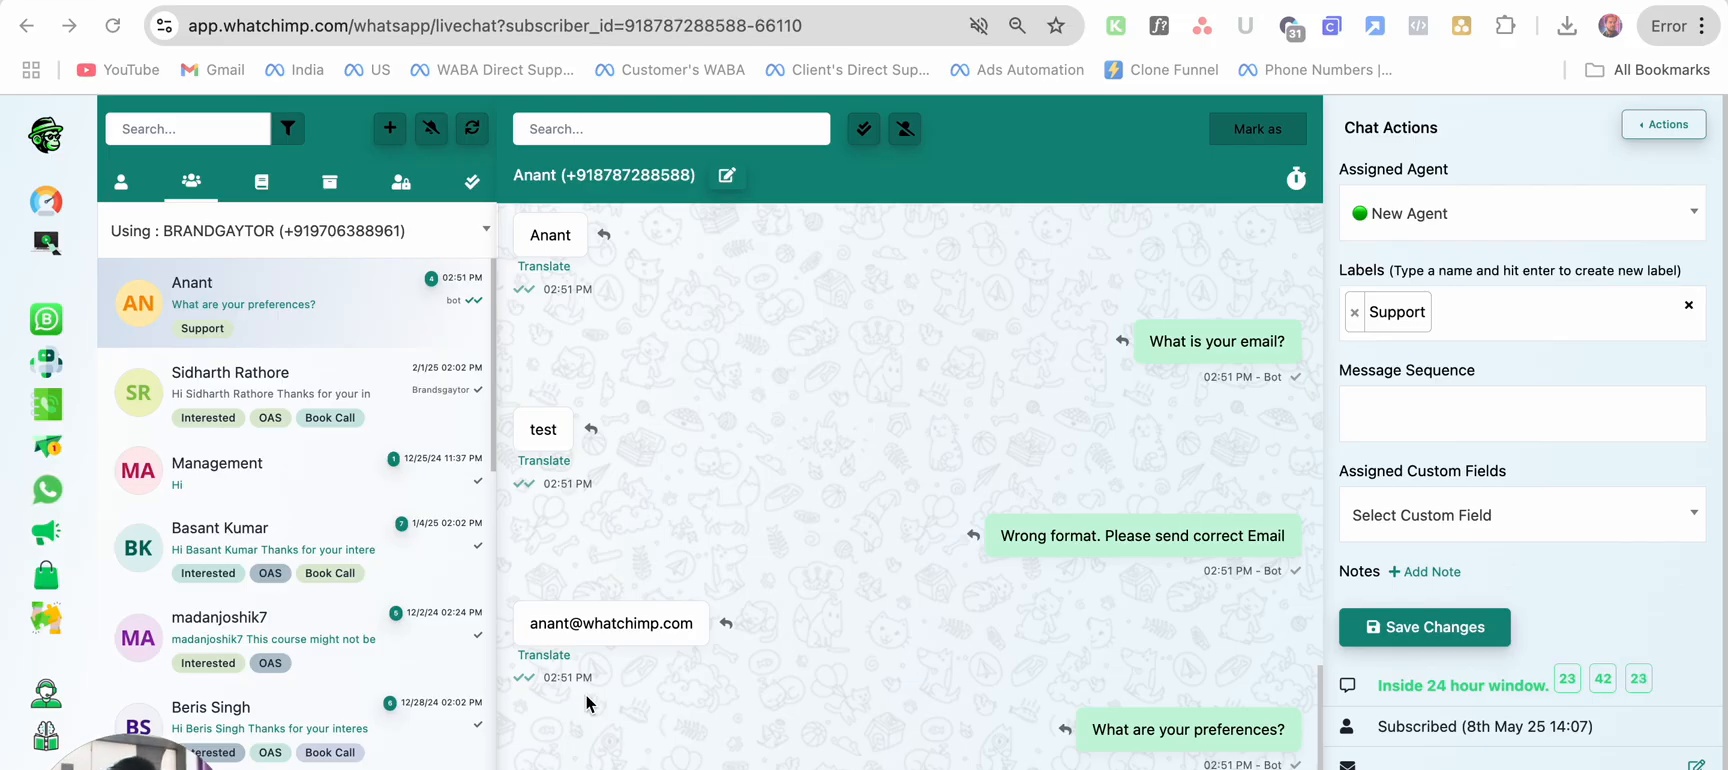 Bot validating email format and showing preference buttons in the WhatsApp conversation
Check the Google Sheet
After the conversation completes, open your Google Sheet to see the collected data. Each row contains the lead's phone number, name, email, and preference responses.
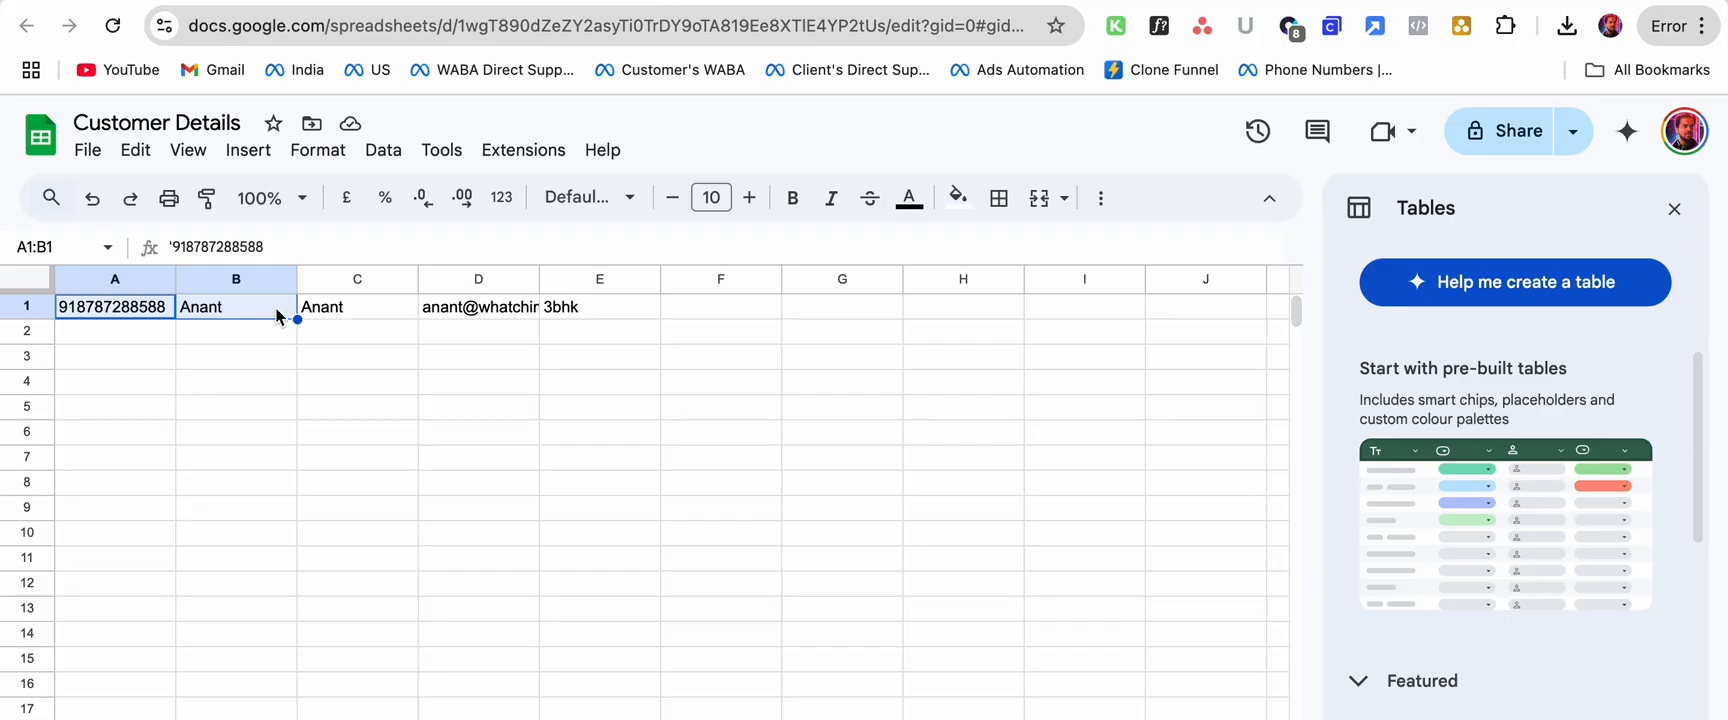 Customer Details Google Sheet showing collected phone number, name, email, and preferences
Tips
- Use email validation to ensure correct email format — the bot will automatically re-ask if the format is wrong
- Use Multiple Choice buttons for structured responses — this makes data cleaner and easier to analyze
- Apply labels to categorize leads by interest or source
- You can add as many question nodes as needed for your use case
Next Steps
- Fetch details from a Google Spreadsheet — let customers look up data from your sheet via WhatsApp
- Send WhatsApp messages from a Google Spreadsheet — trigger automated messages based on spreadsheet data