Webhook Automation Settings
Add delays, conditional rules, and post-webhook actions like assigning conversations and labels
Updated 10 February 2026
When creating a webhook workflow, you can configure automation settings to control when messages are sent, add conditional logic, and trigger post-webhook actions like assigning conversations or adding labels.
Send Message with a Delay
Add a delay between the webhook trigger and the message being sent. Set the number of minutes to wait after a webhook triggers before sending the message.

Use case: A customer books a meeting and you want to send a reminder 30 minutes before the scheduled time instead of immediately.
Send Message Based on Conditions
Add rules to control whether the message should be sent. Only send the message when specific conditions in the webhook data are met.
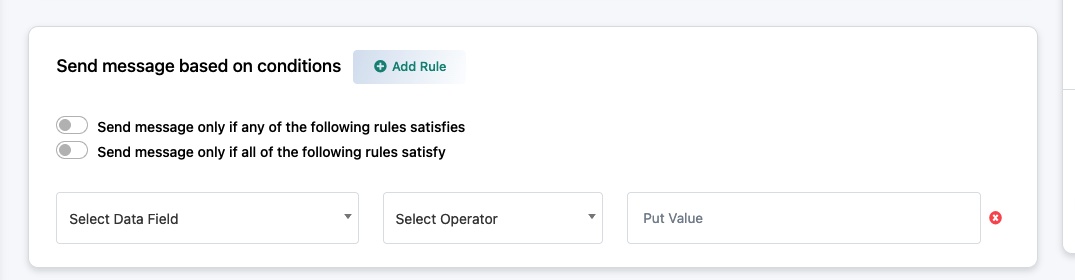
Add Rule — Click to create a new condition.
Logic options:
- Send message only if any of the following rules satisfies — OR logic. Message sends if at least one rule matches.
- Send message only if all of the following rules satisfy — AND logic. Message sends only if every rule matches.
Each rule has three parts:
- Select Data Field — Choose a field from the webhook response
- Select Operator — Choose a comparison (equals, contains, greater than, etc.)
- Put Value — The value to compare against
Use case: Only send a WhatsApp message if the booking type is "consultation" and not for internal meetings.
Actions Following Successful Webhook Call
After a message is successfully sent, you can trigger additional actions automatically.
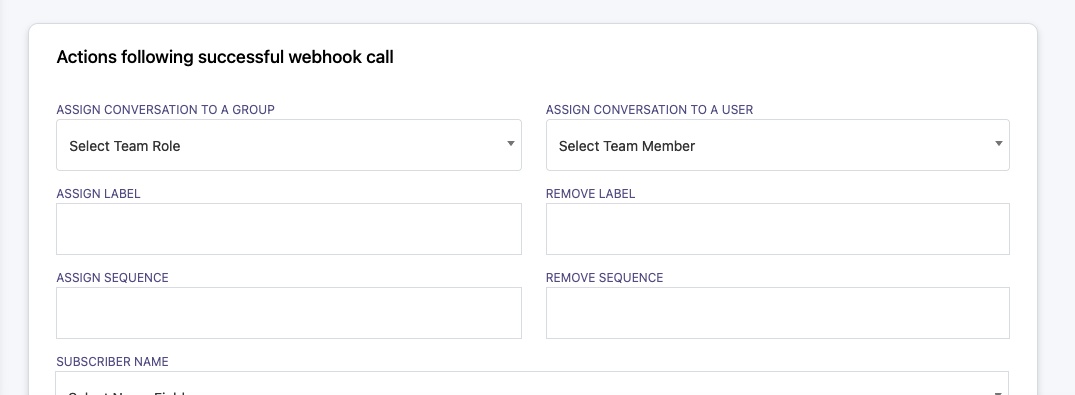
Available actions:
- Assign Conversation to a Group — Route the conversation to a specific team (e.g., Sales, Support)
- Assign Conversation to a User — Assign to a specific team member
- Assign Label / Remove Label — Tag the subscriber for segmentation and filtering
- Assign Sequence / Remove Sequence — Add or remove the subscriber from a message sequence
- Subscriber Name — Set the subscriber's name from the webhook data
Use case: A new lead fills out a form → webhook sends a WhatsApp welcome message → the conversation is automatically assigned to the Sales team with a "New Lead" label.
Related Articles
Create a Webhook Workflow — Full setup guide
Webhook Workflow Reporting — Monitor delivery stats