Create a Webhook Workflow
Step-by-step guide to creating a webhook workflow — set up callback URL, capture responses, and map JSON data to template variables
Updated 10 February 2026
This guide walks you through creating a webhook workflow — from setting up the workflow to mapping incoming JSON data to your message template variables.
Before You Start
You need a message template ready with variables (e.g., {{1}}, {{2}}). The webhook data will fill these variables automatically. Create your template in Message Template before starting.
Step 1: Create a New Workflow
Go to Settings & Integration → WhatsApp Webhook (in-bound) Workflow and click Create.
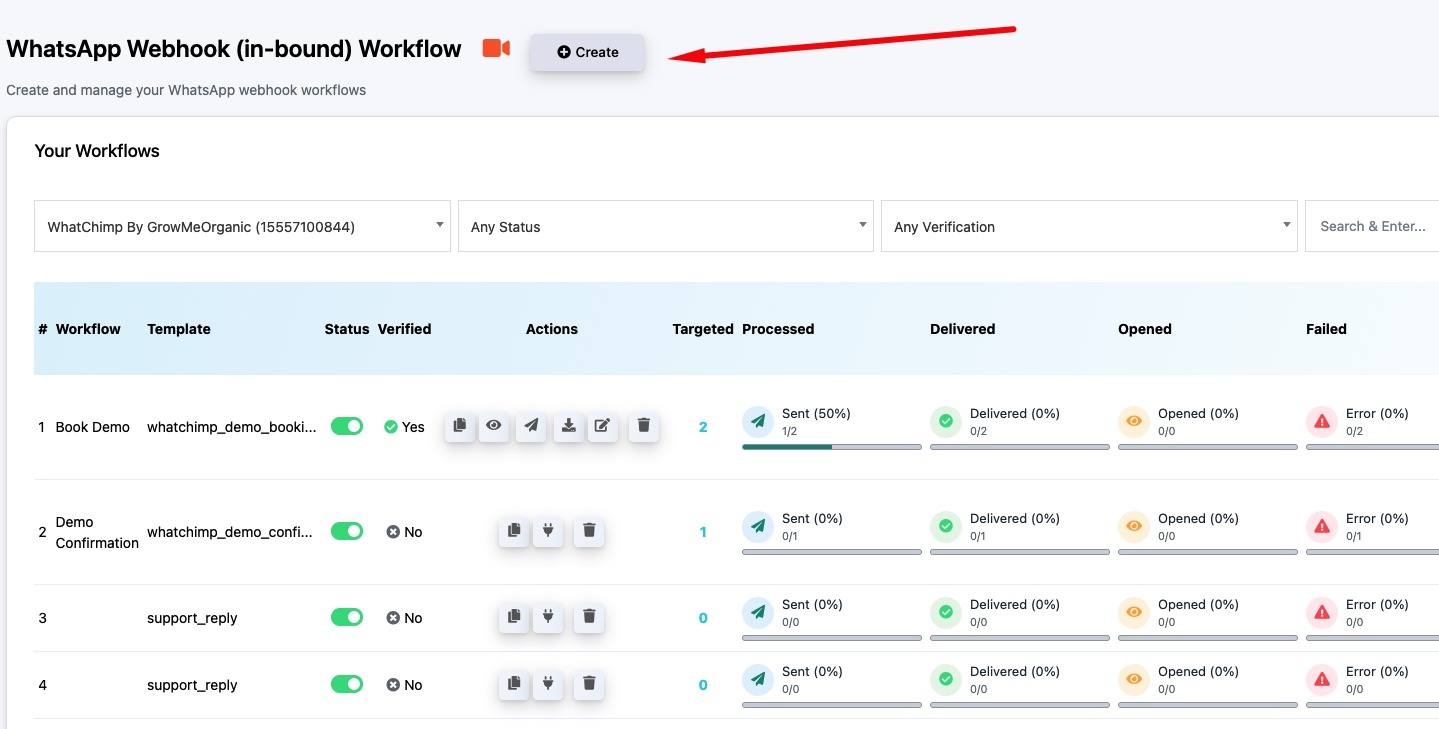
Fill in the workflow details:
- Workflow Name — A recognizable name (e.g., "Cal.com Booking Confirmation")
- Select Number — The WhatsApp number to send messages from
- Select Template — The message template to use
Step 2: Get the Callback URL
After saving, WhatChimp generates a Webhook Callback URL. This is the URL you'll paste into your third-party app's webhook settings.
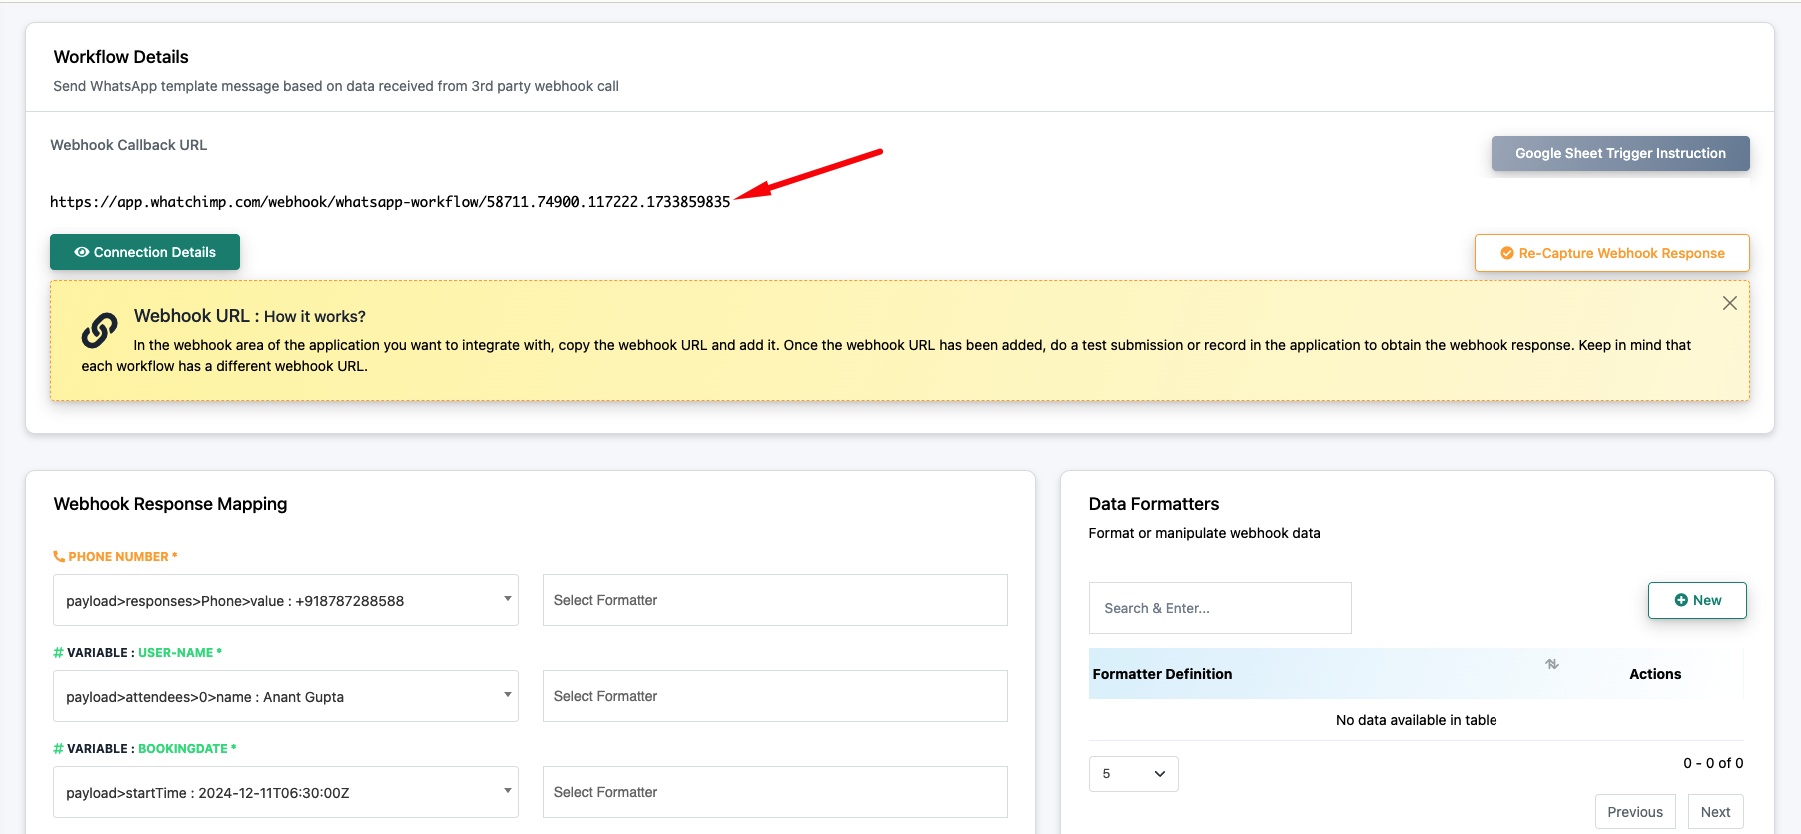
Copy the callback URL and add it to your third-party app's webhook or notification settings. For example, in Cal.com you'd paste it in Settings → Webhooks → Event Triggers.
Step 3: Capture the Webhook Response
Once the callback URL is set in your third-party app, trigger a test event (e.g., make a test booking). Then click Capture Webhook Response in WhatChimp. This captures the JSON payload so you can see all available data fields.
Tip: Click Connection Details to see how the webhook URL works and verify the connection.
Step 4: Map Data to Template Variables
After capturing the response, the Webhook Response Mapping section shows the available JSON fields.
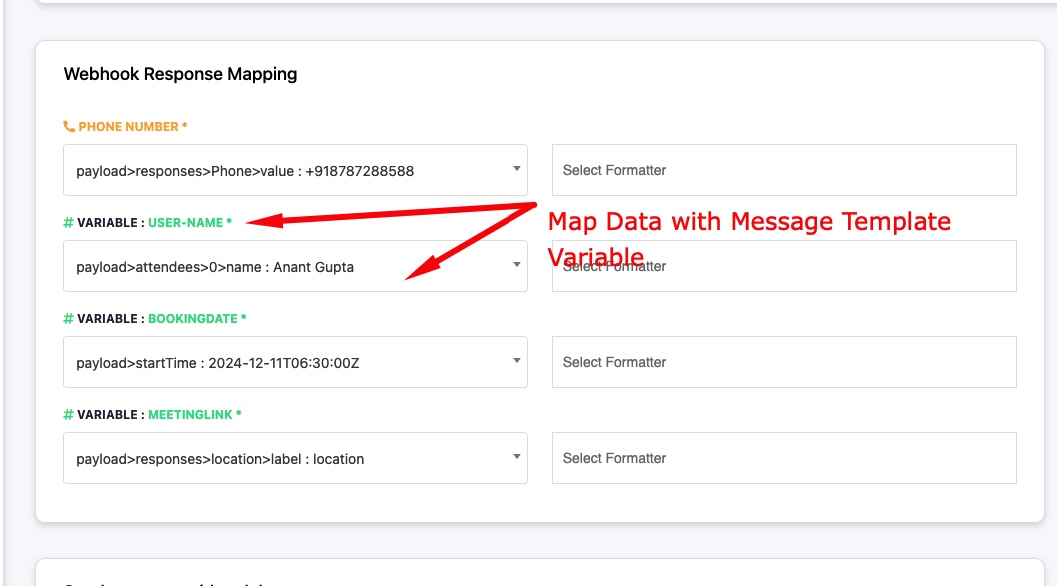
Phone Number — Select the JSON path that contains the recipient's phone number. This is required — it tells WhatChimp who to send the message to.
Variables — For each template variable (USER-NAME, BOOKINGDATE, MEETINGLINK, etc.), select the matching JSON path from the webhook response. For example:
payload>attendees>0>namemaps to the customer's namepayload>startTimemaps to the booking datepayload>responses>location>labelmaps to the meeting link
Data Formatters — Optionally apply formatters to transform data before sending (e.g., format dates, extract values).
Click Save when all variables are mapped.
Step 5: Verify and Activate
After saving, your workflow appears on the dashboard. The Verified column shows whether a successful test webhook has been received. Once verified, the workflow is active and will send messages automatically whenever the webhook fires.
Related Articles
What is Incoming Webhook Workflow — Overview and use cases
Webhook Automation Settings — Add delays, conditions, and post-webhook actions
How to Create a Message Template — Create templates with variables