Google Spreadsheet se Contacts Import Karein
Google Sheet se contacts ko bulk mein WhatChimp ke Subscriber Manager mein import karein — spreadsheet columns ko subscriber fields se map karein aur labels ke saath organize karein.
Updated 18 June 2026
Video: https://www.youtube.com/watch?v=I5yYMCsm2vE
If you have contacts in a Google Spreadsheet, you can import them into WhatChimp in bulk instead of adding them one by one. This is the fastest way to get your existing contacts into the Subscriber Manager.
Prepare Your Spreadsheet
Your Google Sheet needs at least a Phone column with phone numbers including the country code. You can also include columns for Name and Email.
| Column | Required | Example |
|---|---|---|
| Name | Optional | Anant |
| Optional | anant@whatchimp.com | |
| Phone | Required | 918080200500 |
Important: Phone numbers must include the country code without any spaces, dashes, or plus sign. For example, use918080200500(India) not+91 80802 00500.
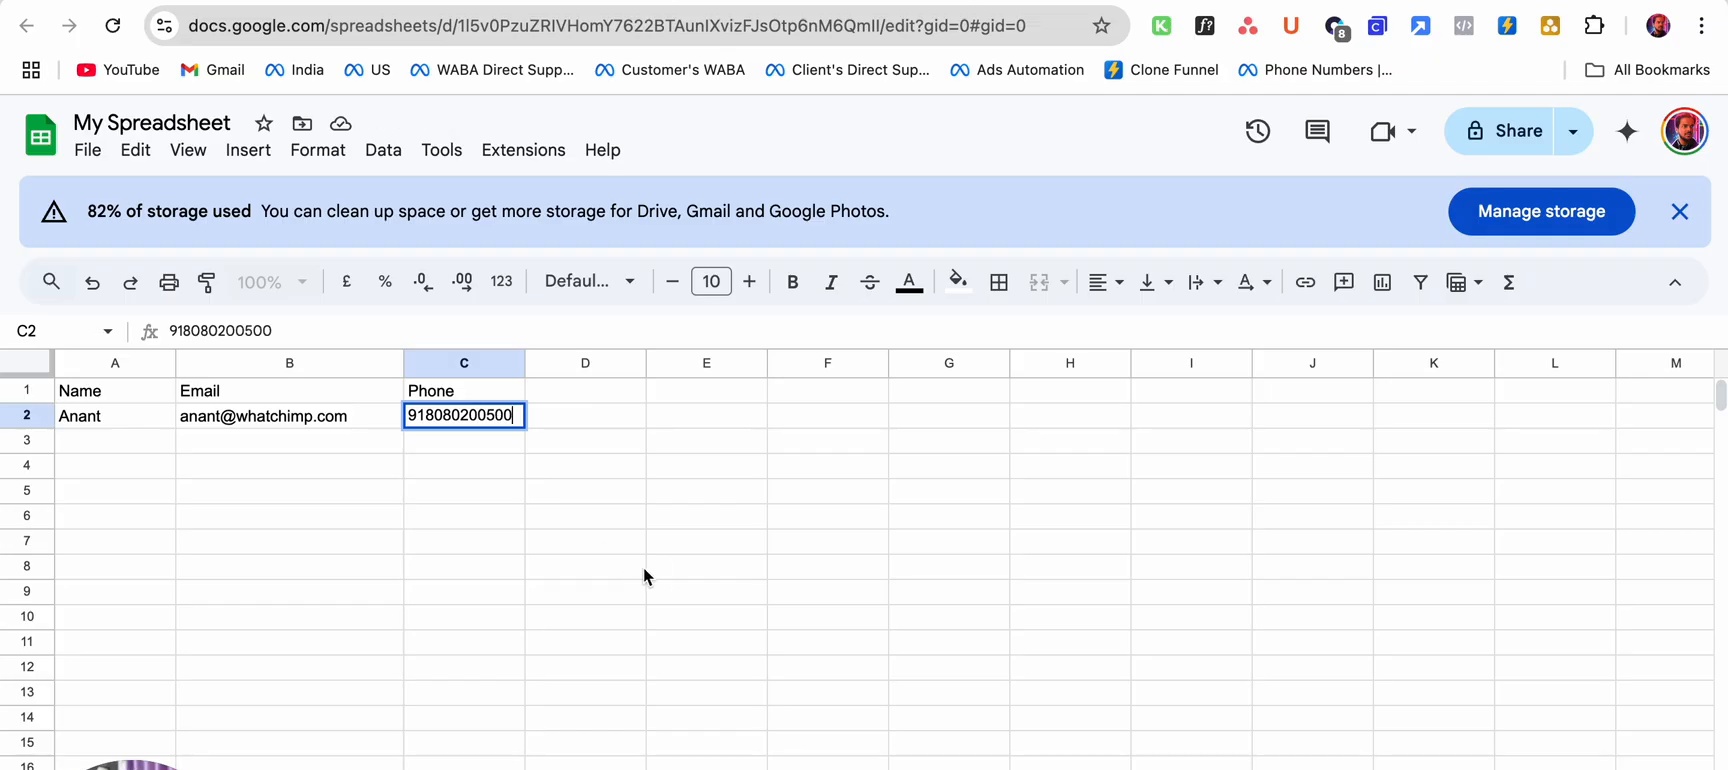 Sample Google Sheet with Name, Email, and Phone columns ready for import
Import Contacts
- Go to Subscriber Manager in the left sidebar
- Click Import at the top of the page
- In the Import Subscribers dialog, scroll down to the Import from Google Sheet section
- Select your Google Sheet from the dropdown
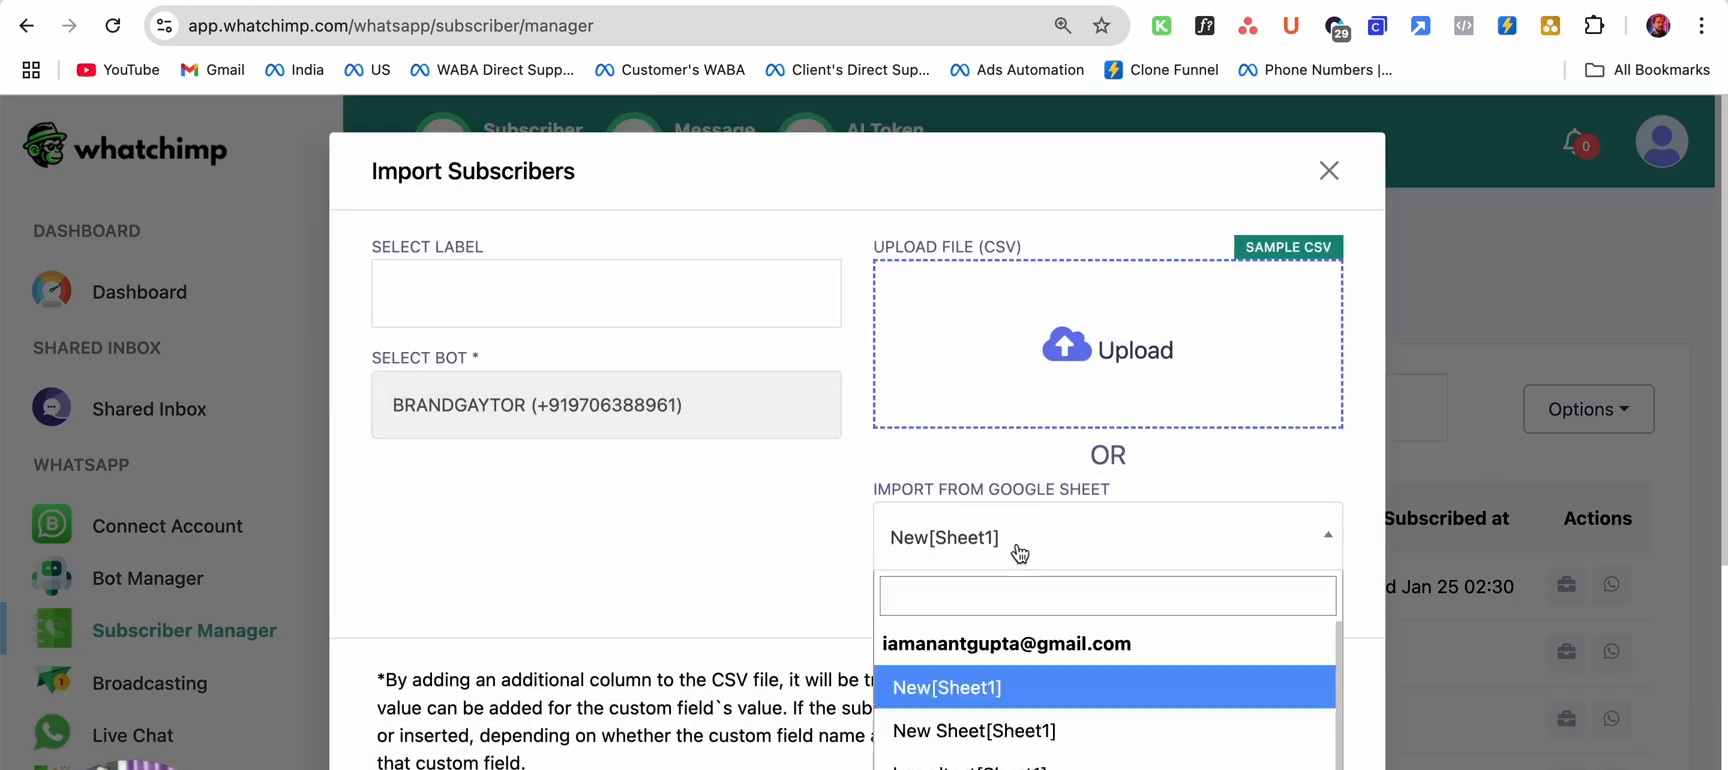 Import Subscribers dialog showing the Google Sheet dropdown with available sheets
Preview and Map Fields
After selecting your sheet, WhatChimp shows a preview of your spreadsheet data:
- Name, Email, and Phone columns from your sheet are displayed
- Click Map Data to map each spreadsheet column to the corresponding WhatChimp subscriber field
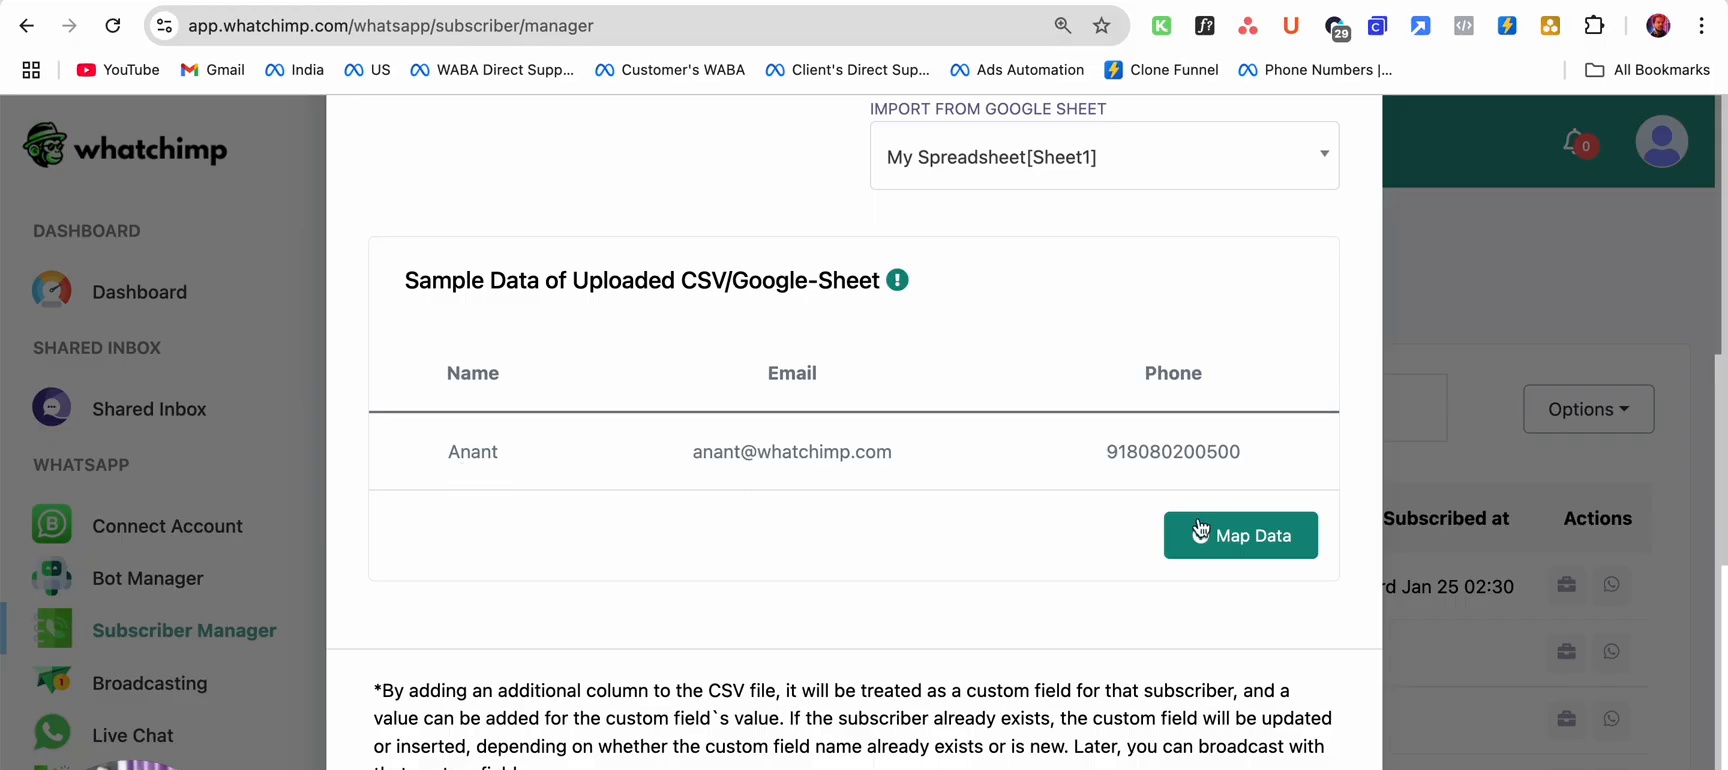 Sample data preview from the Google Sheet showing Name, Email, and Phone
For each column, select the matching Subscriber Field from the dropdown:
- Phone Number — maps to the phone column (required)
- Subscriber Name — maps to the name column
- Email — maps to the email column
- Any additional columns can be mapped to Custom Fields
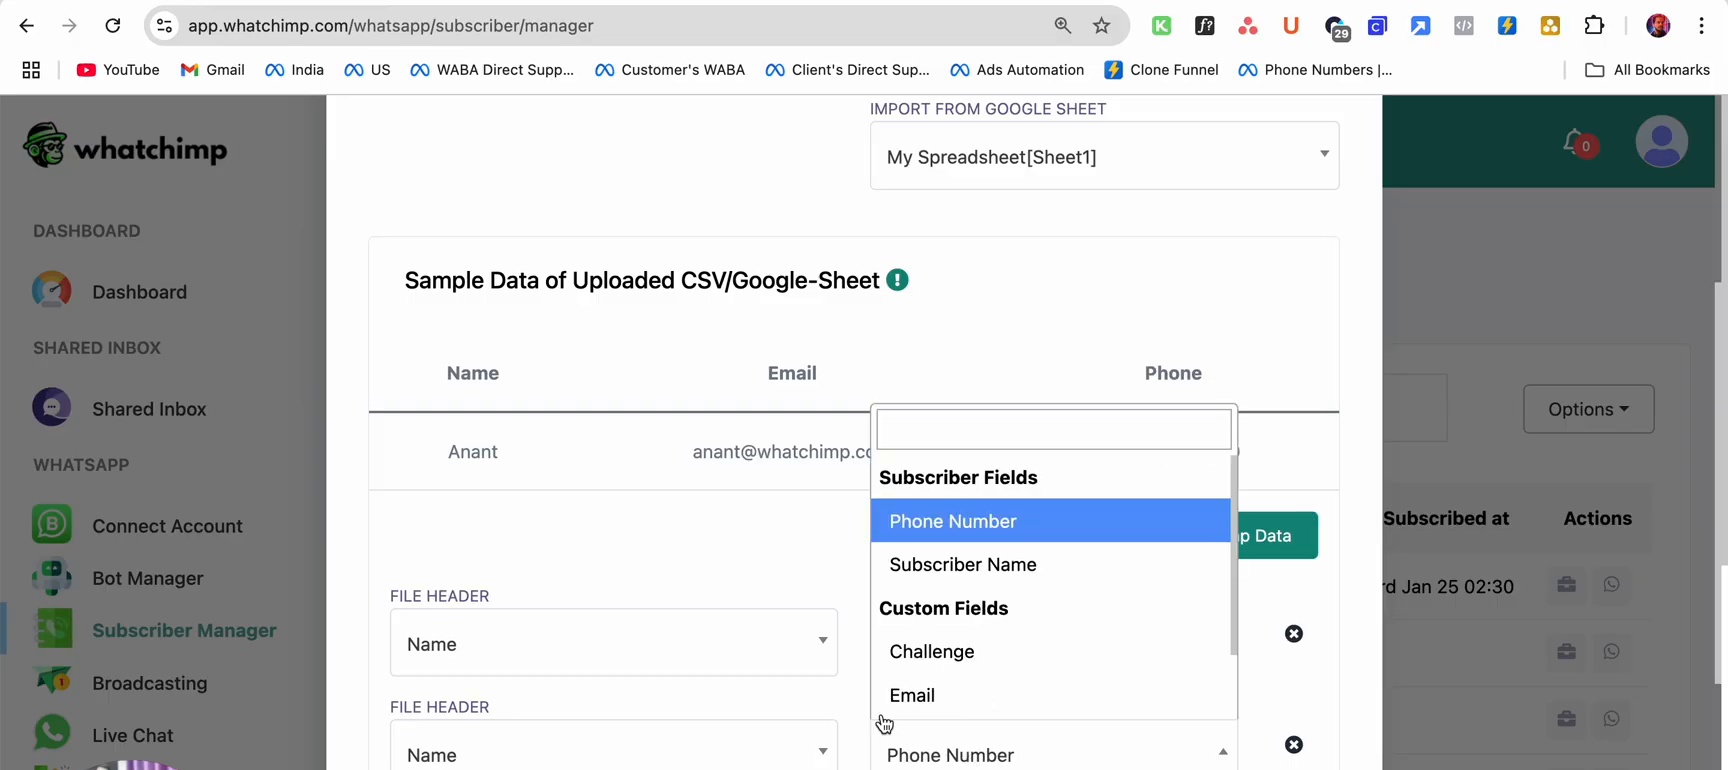 Field mapping showing Subscriber Fields dropdown with Phone Number, Subscriber Name, and Custom Fields options
Assign Labels
Before importing, you can assign a label to organize your imported contacts:
- In the Select Label dropdown, choose an existing label or create a new one (e.g., "Book Call", "Interested", "OAS")
- Click Map Data to start the import
Labels make it easy to filter and manage your contacts later — for example, you can broadcast messages to everyone with a specific label.
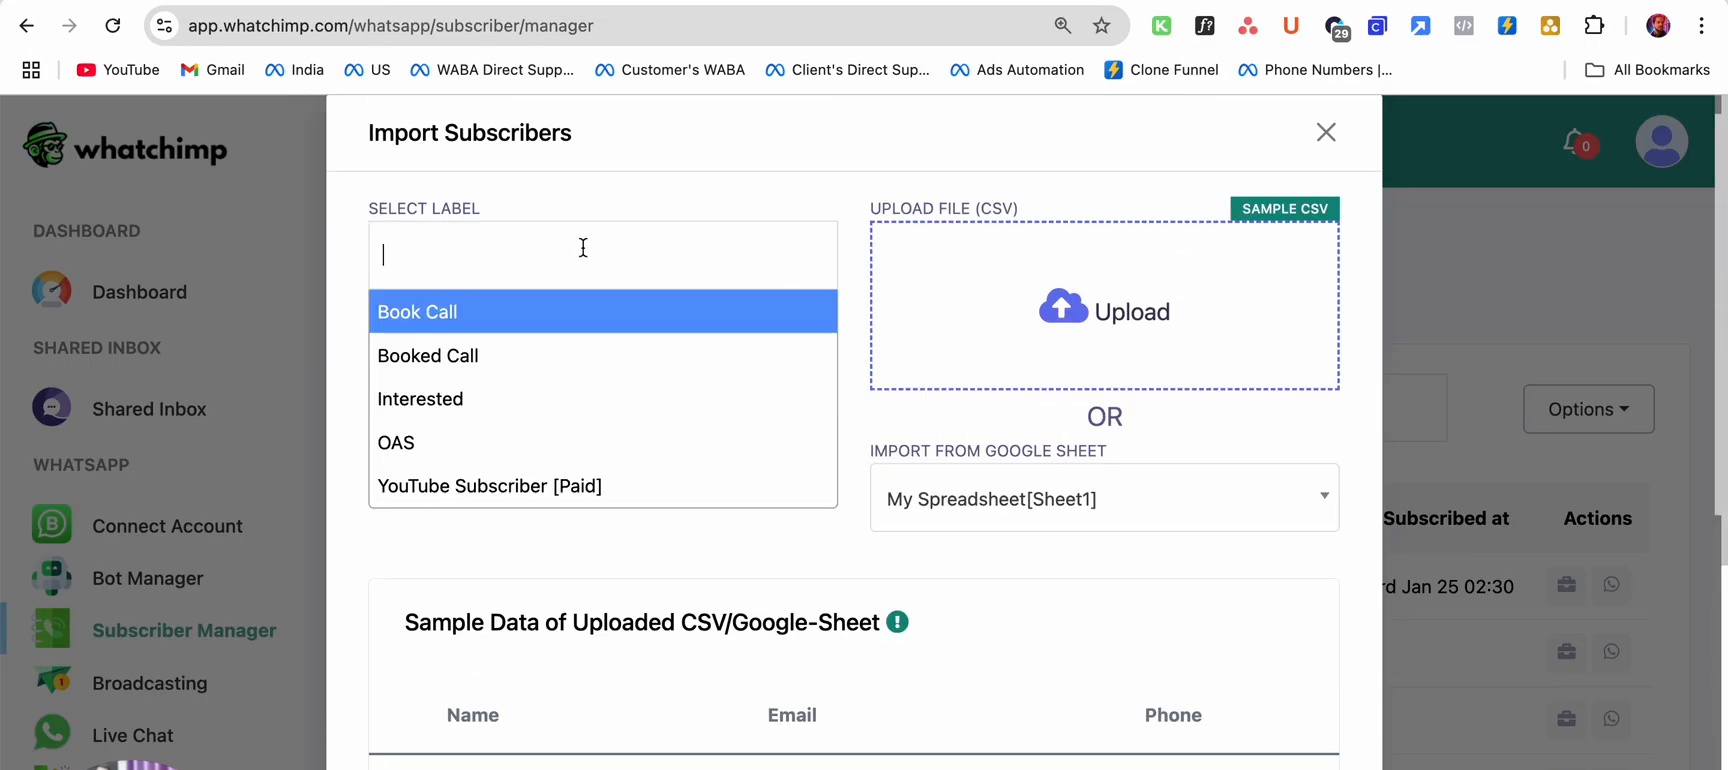 Import Subscribers dialog with label selection and Google Sheet import options
Verify Imported Contacts
After the import completes, go to Subscriber Manager to see your imported contacts. You'll see:
- Phone Number — the imported phone numbers
- Subscriber ID — unique IDs assigned by WhatChimp
- Name — names from your spreadsheet
- Updated at and Subscribed at — timestamps
- Actions — options to view, edit, or manage each contact
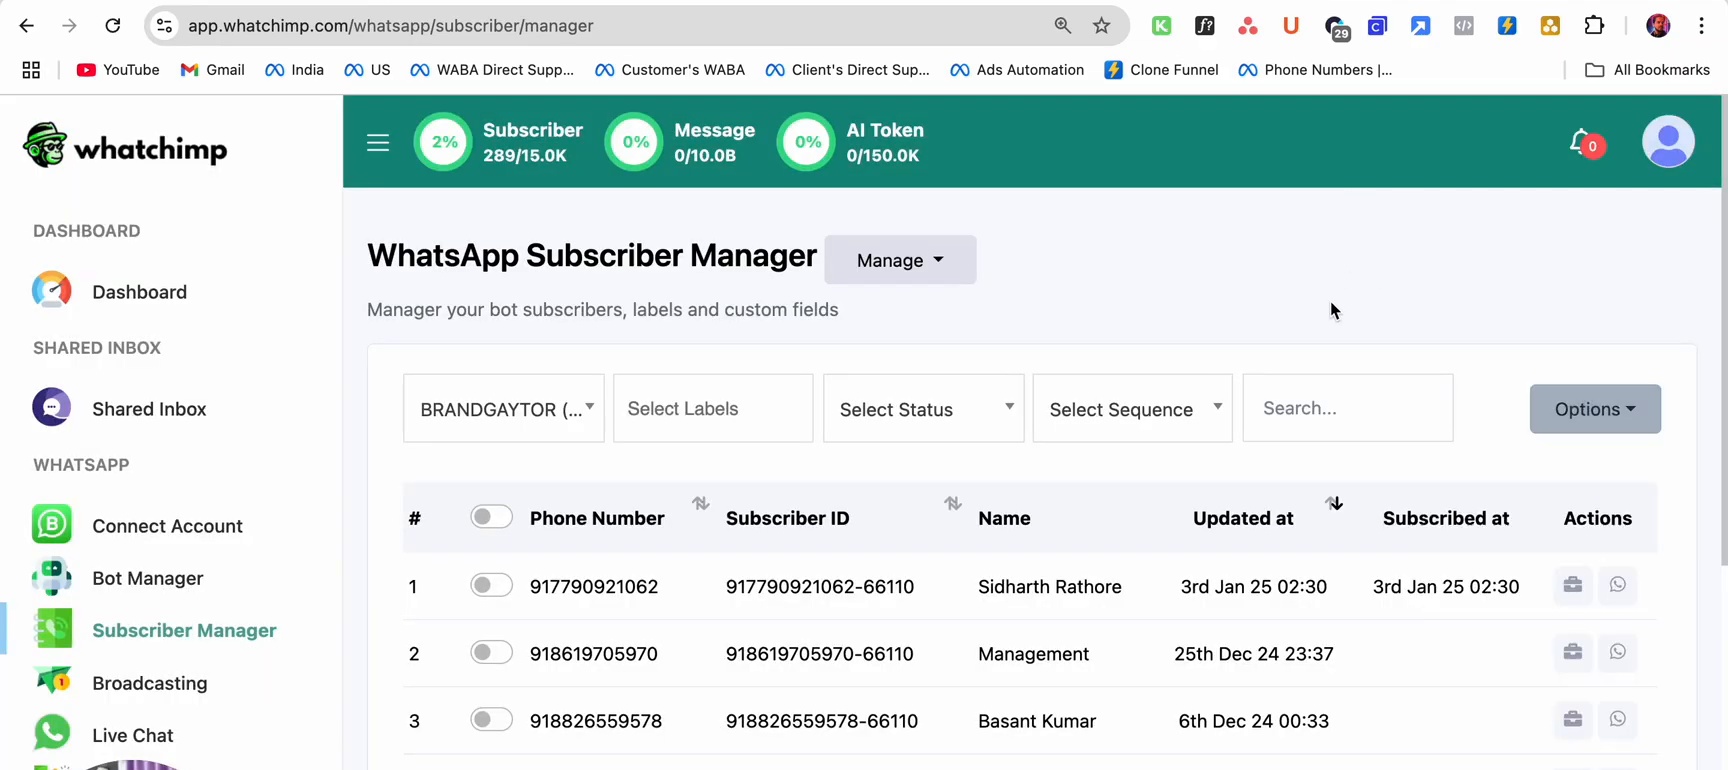 Subscriber Manager showing imported contacts with phone numbers, names, and subscriber IDs
Tips
- Always include the country code with phone numbers (e.g.,
91for India,1for US) - Remove duplicate phone numbers from your sheet before importing to avoid errors
- Use labels to organize imported contacts — this helps when sending targeted broadcasts later
- You can import from multiple sheets by repeating the process
Aage Ki Steps
- Send new subscriber data to a Google Spreadsheet — automatically save new contacts to a sheet
- Collect WhatsApp lead details via chatbot — build a bot that collects information and saves it to a Google Sheet