How to Restrict Login to Specific IP Addresses (IP Whitelisting)
Lock your WhatChimp account so it can only be accessed from trusted IP addresses. Use IP Manager to whitelist IPs for login, direct login, and API.
Updated 6 August 2026
If more than one person can log into your WhatChimp account, or you just want tighter control over who reaches your dashboard, you can lock access to specific IP addresses. With IP Manager, login works only from the IPs you trust, and attempts from anywhere else are blocked.
This guide shows you how to whitelist an IP address so only trusted locations can log in, with the same control available for direct login and API access.
What IP restriction does
IP Manager lets you build a list of IP addresses and decide how each one is treated:
- Whitelist: only the listed IP addresses are allowed. Everyone else is blocked.
- Blacklist: the listed IP addresses are blocked, everyone else is allowed.
You apply each rule to one or more features:
- LOGIN: signing in to the dashboard with email and password.
- DIRECT LOGIN: one-click login links generated for your account.
- API: requests made with your API key.
So you can, for example, allow dashboard login only from your office IP while leaving API access open, or the other way around.
WhatChimp automatically protects your current IP address when you set this up, so you do not accidentally lock yourself out.
How to restrict login to a trusted IP
Step 1: Open IP Manager
- In the left sidebar, open Settings & Integration.
- Select the Security tab.
- Click IP Manager.
- Click Add IP.
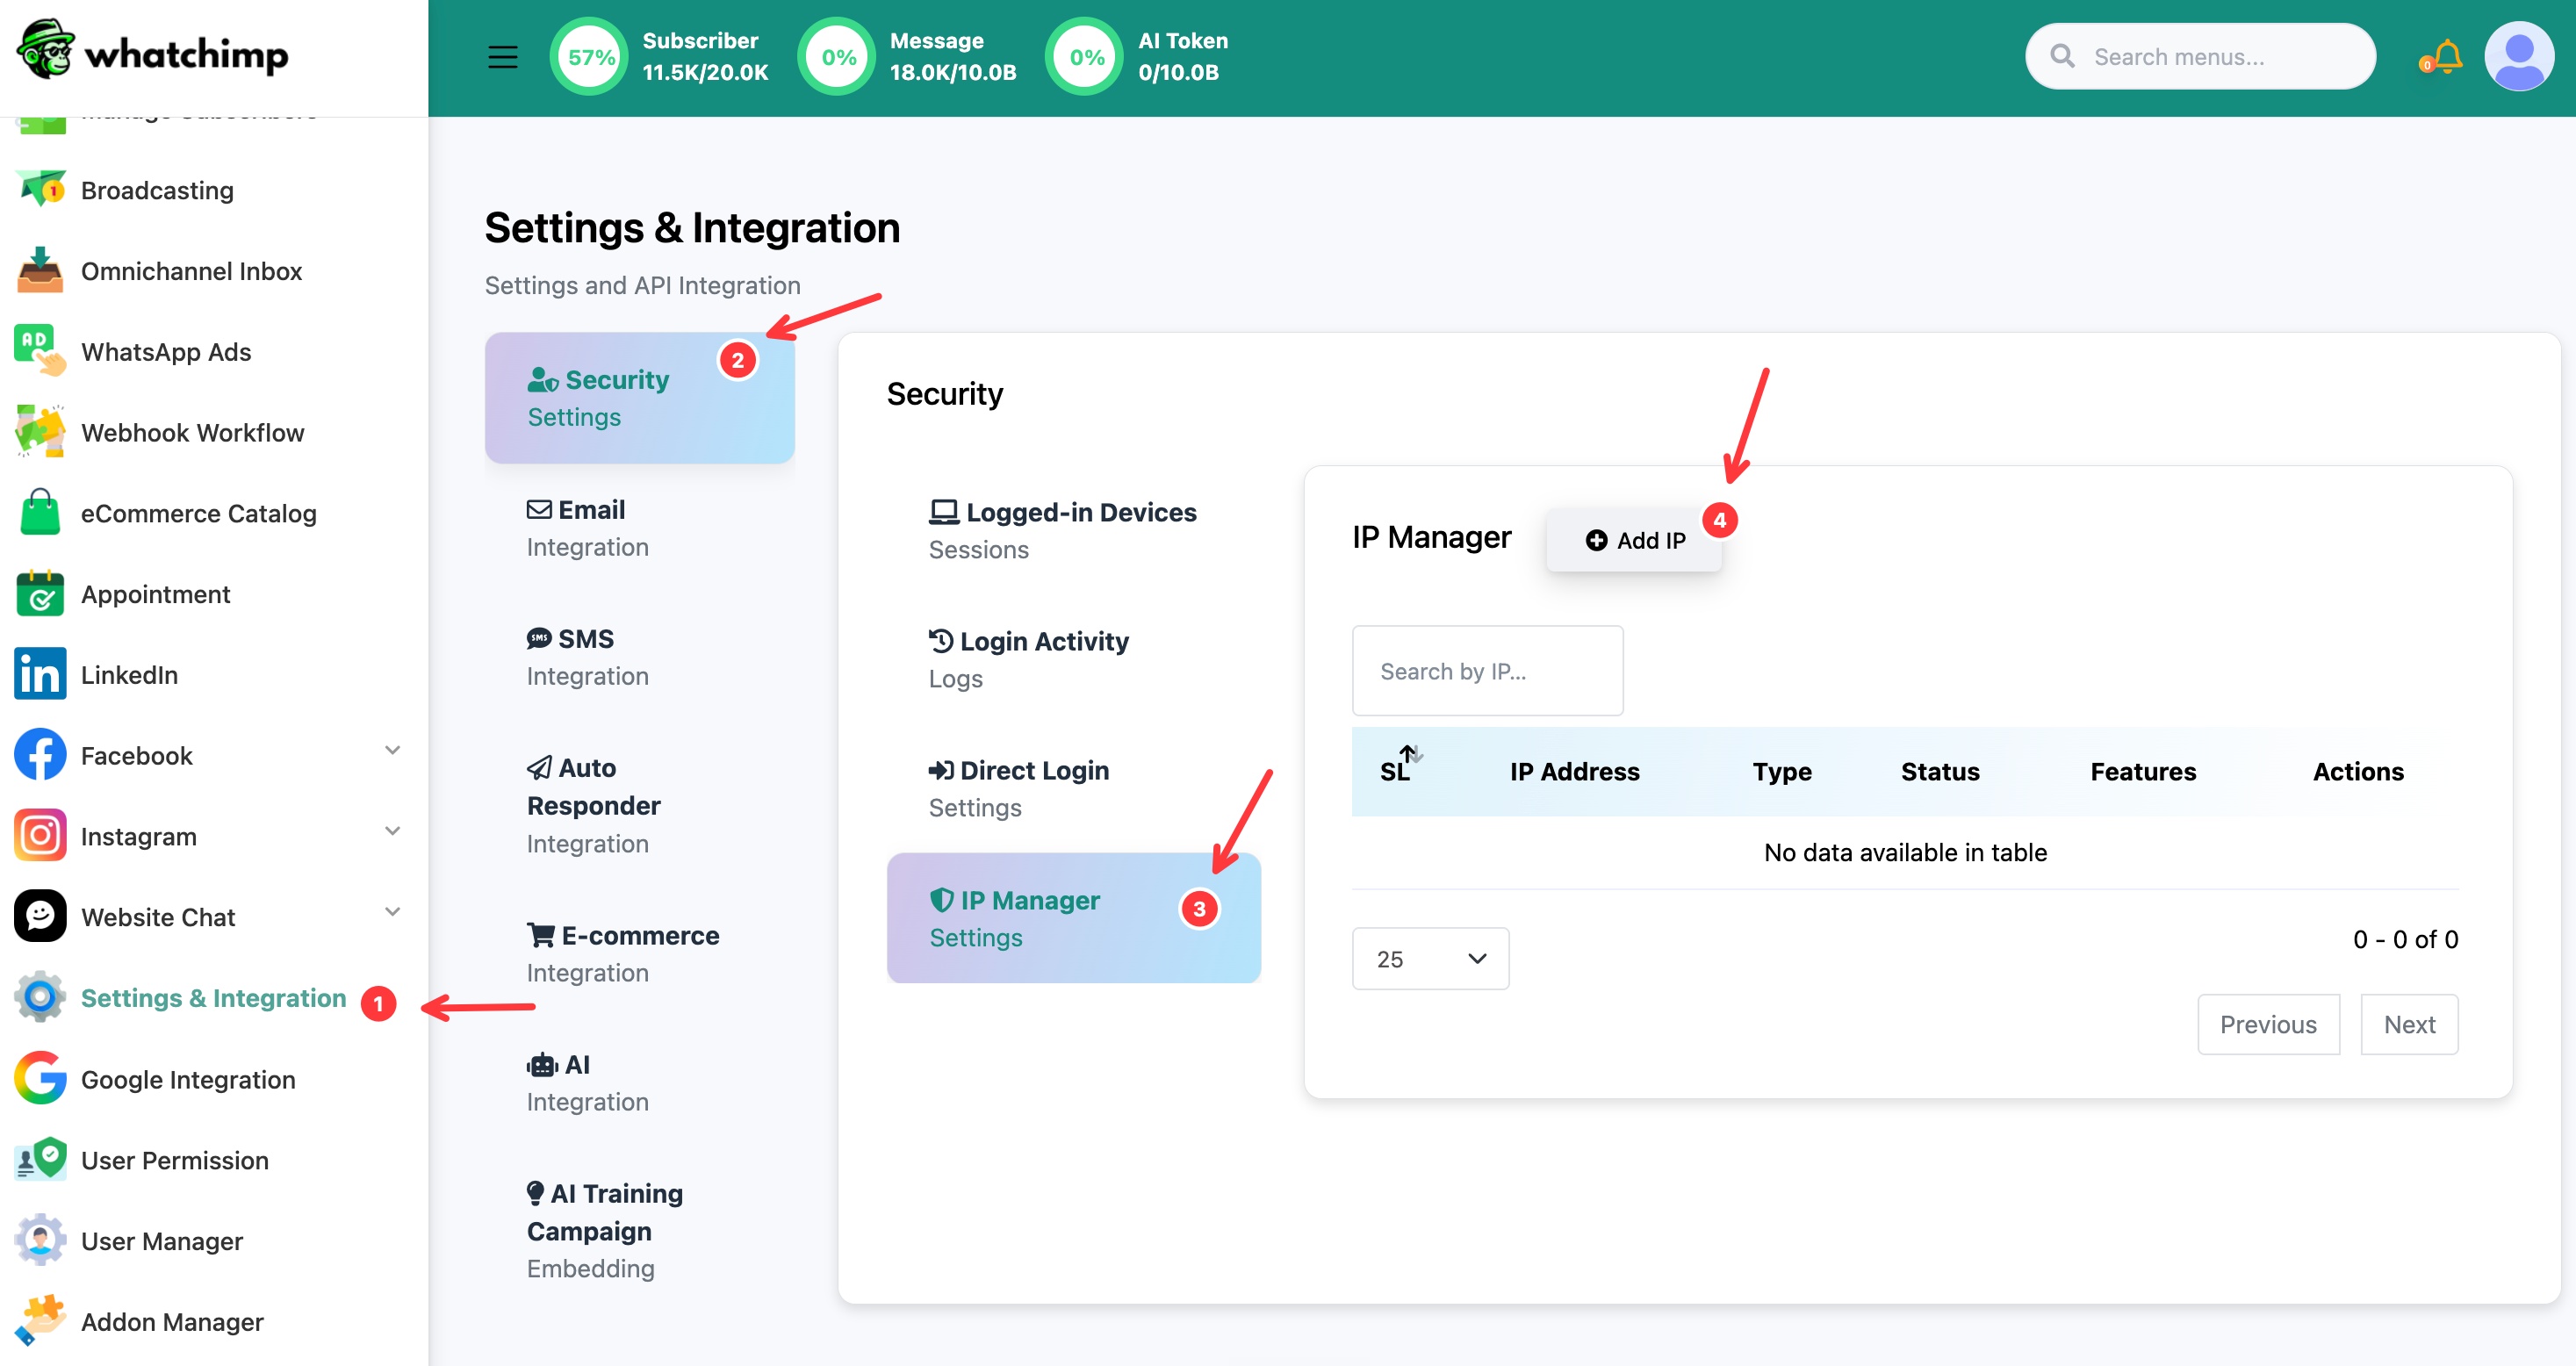 Open Security, then IP Manager, then Add IP
Step 2: Add and configure the IP
In the Add IP window:
- IP Address: enter the IP you want to trust, for example your office or home IP.
- List Type: choose Whitelist to allow only this IP, or Blacklist to block it.
- Status: set to Active so the rule takes effect.
- Features: tick the access this rule covers: LOGIN, DIRECT LOGIN, or API. To restrict who can sign in, tick LOGIN.
- Save the rule.
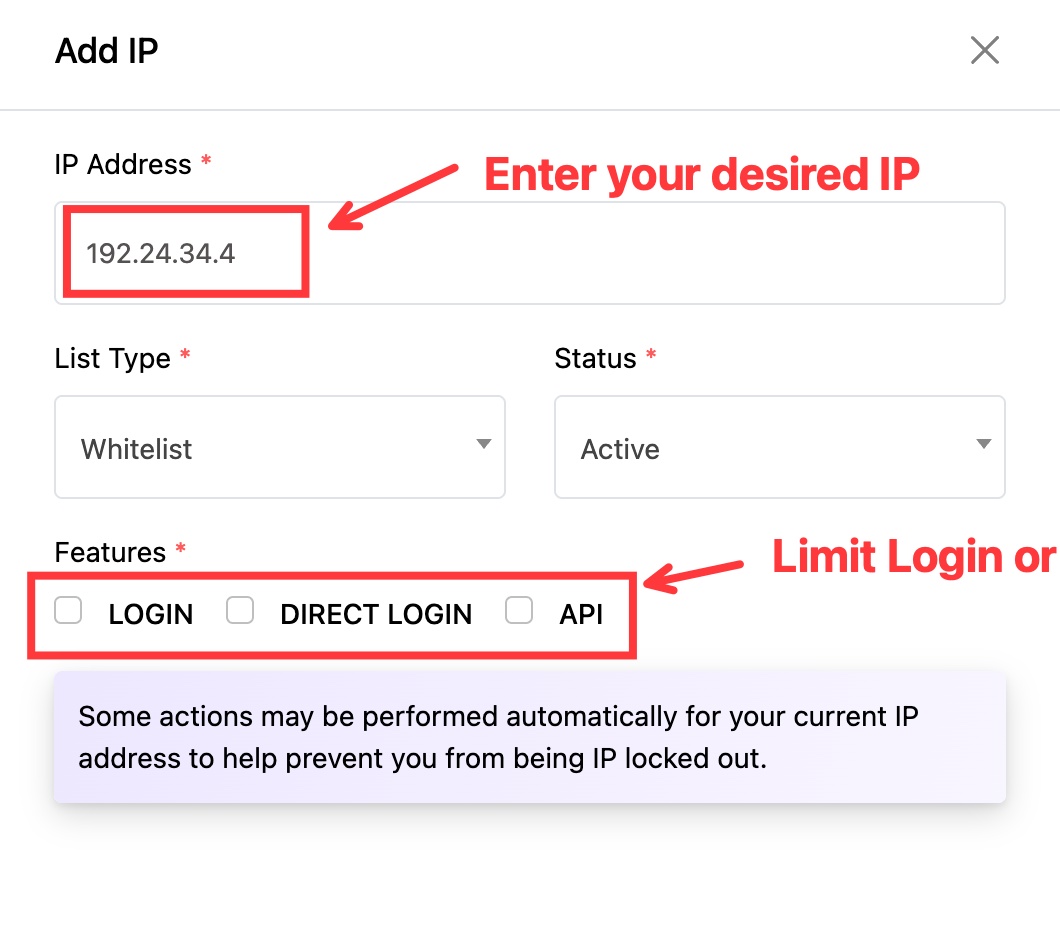 Enter the IP, set Whitelist and Active, then choose which features to restrict
Once saved, the rule is live. With a LOGIN whitelist, only the IPs on your list can sign in to the dashboard.
Whitelist or Blacklist: which to use
- Use a Whitelist when you know exactly which IPs should have access, like a fixed office or a VPN. This is the stricter, safer option.
- Use a Blacklist when you only need to block a few specific IPs and leave everything else open.
Before you rely on a whitelist
A whitelist blocks every IP that is not on the list, so set it up carefully:
- Add your own IP first. If you whitelist LOGIN without including your current IP, you could lock yourself out. WhatChimp auto-protects your current IP to help prevent this, but confirm your IP is on the list before you depend on it.
- Add every IP your team uses, including remote workers, before switching login to whitelist-only.
- Remember that home IPs can change. Many internet connections use dynamic IPs that change over time. If yours does, a whitelist may block you later, so a static IP or VPN is more reliable for this.
Tips
- Set Status to inactive (instead of deleting a rule) when you want to pause a restriction temporarily.
- Use a Blacklist for a quick block of a suspicious IP without changing your overall access.
- Restricting API by IP is a strong way to protect your API key even if it leaks.